


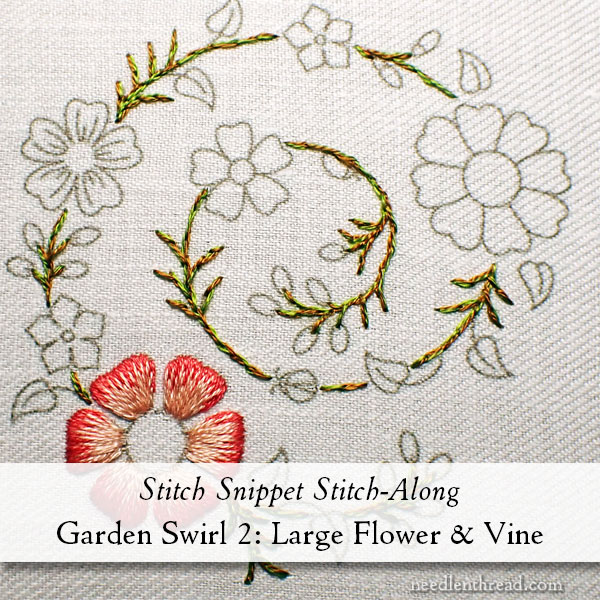
Welcome to part 2 of the stitch-along for Garden Swirl.
If you’re just joining in, you’ll find part 1 – which covers materials, tools, and the design – here.
Next Monday, I’ll be creating a Project Index for Garden Swirl, which will be available under “Tips & Techniques” in the main menu here on Needle ‘n Thread.
Members on Patreon will find today’s information (which also includes embroidering the leaves) already published over on Patreon, with a downloadable PDF.
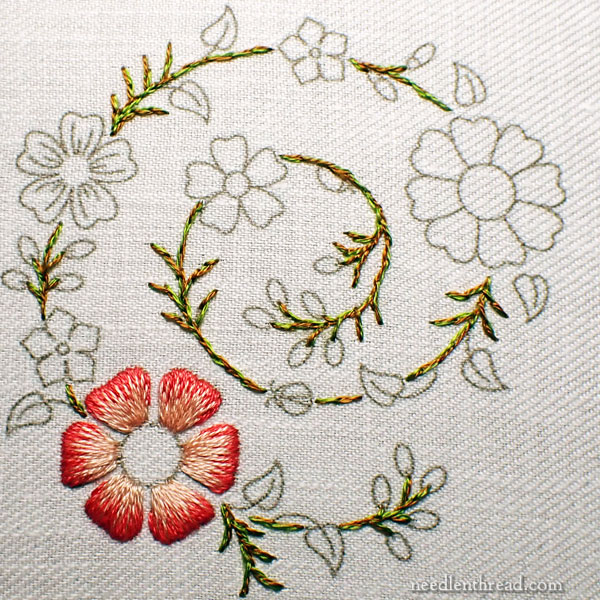
Today, we’re going to embroider one of the large flowers on the design and we’ll also stitch the vine and all its little offshoots.
Beginning Your Thread
Habitually, I begin my threads for embroidery with a top-down approach, using a waste knot that I cut away, and small tacking stitches that get covered up.
You can see in the photo above the waste knot and the small tacking stitches I’ve made inside the area that I’m going to stitch. The knot gets snipped off and the tiny holding stitches get covered.
Starting a thread in this manner has advantages: 1. it doesn’t leave a bump of a knot on the back of your work; 2. it doesn’t require you to turn your work over for any reason. Everything is done from the top of the fabric.
Nevertheless, as much as I like this start and I habitually use it, it’s not the only way to start an embroidery thread!
You can use a knot on this project, knotting the end of your thread and coming up at your starting point, leaving the knot on the back of the work. The finished piece will have a low-loft batting / interfacing behind it, so the knot won’t cause any bump to show on the front of the fabric. It’ll just get sunk into the batting.
Just make sure, if you use a knot, that you snip off the tails so that there aren’t long tails of thread on the back of your work. You don’t want those showing through on the front or tangling in other stitching.
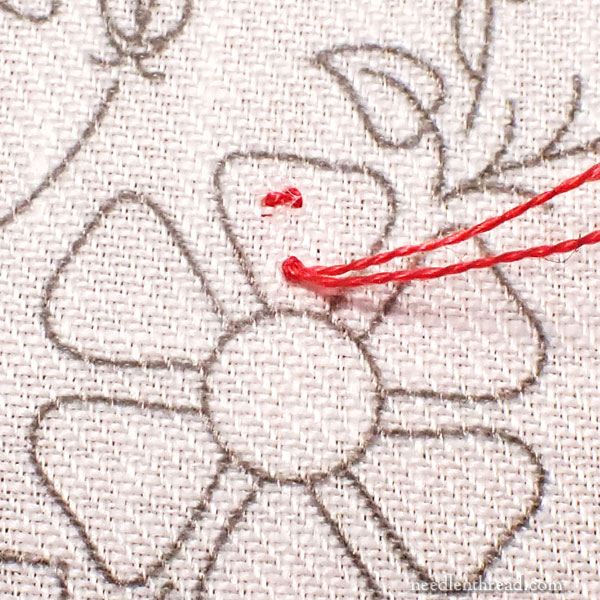
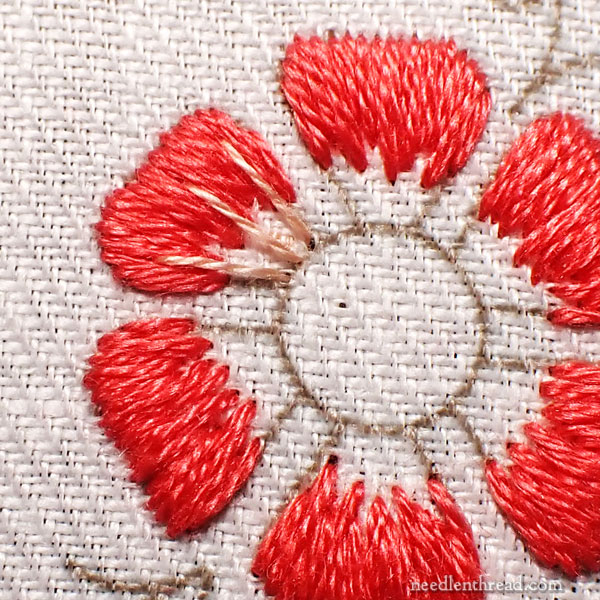
The Flower
The large flower with the separate petals is embroidered with 3705 (two strands) and 353 (one strand).
Try to keep the strands of thread in each stitch parallel, either by using a laying tool or by “railroading” your stitches. (You’ll find an explanation of “railroading” stitches in this article – just scroll down.) Occasionally, you might hold your work up and drop your needle so it hangs towards the floor, to help untwist your thread.
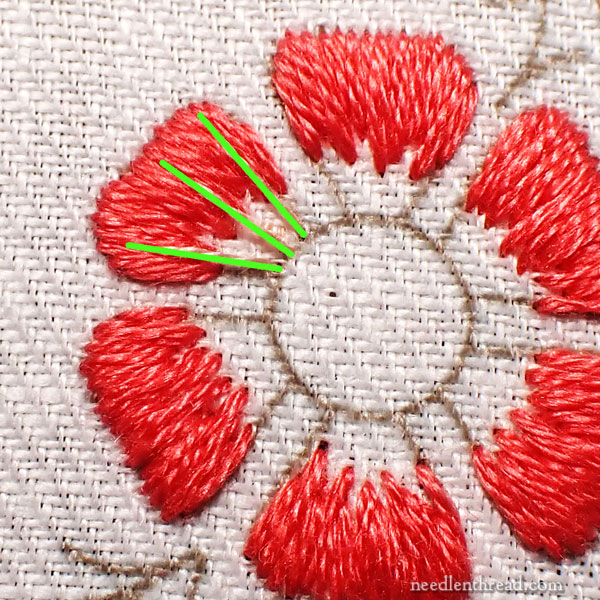
When working a petal shape like this, I start with the middle stitch, since it extends from the middle of the outer edge straight towards the center of the flower. Then, I stitch the two outside “angle setters.” The idea is to stitch towards the “growth point” on the flower. You can see that here:
The green lines indicate the angle of the stitches across the petal.
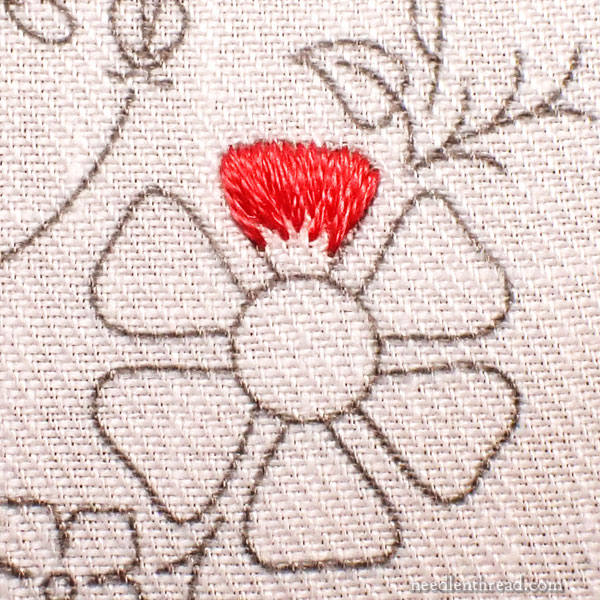
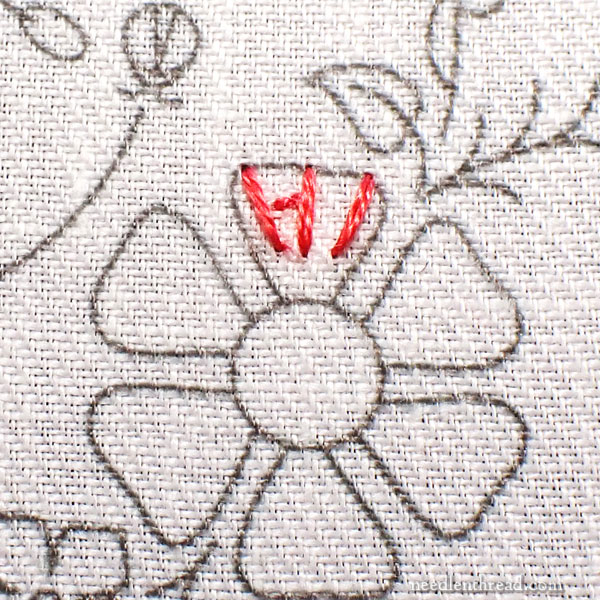
After you’ve worked the first three stitches to set your angle, fill between those stitches, staggering the length of your stitches, as shown above.
Try not to crowd the stitches – you want them to lie smoothly.
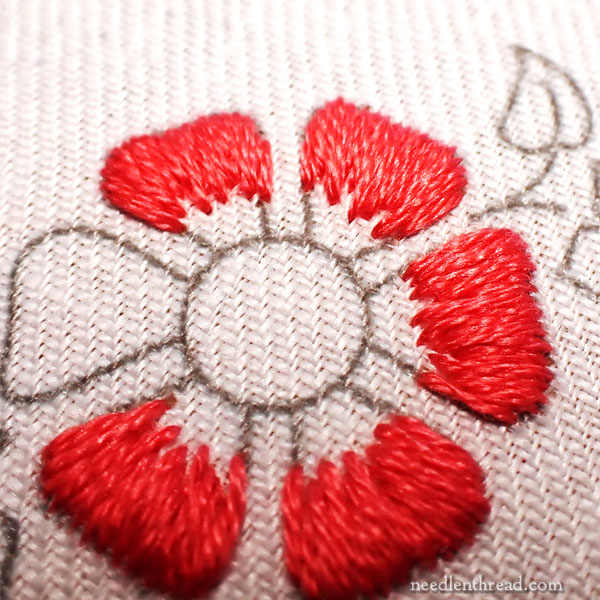
Work all the way around the flower, filling each petal in this manner.
The darker coral first layer should occupy about 2/3rds of the top of each petal.
If you need to, you can use a pencil to mark about 2/3rds of each petal, so that your filling is more or less even all around the flower.
If your staggered stitches are exactly alternating in length, don’t worry about it. You’ll be covering up the staggered base of all the stitches, anyway.
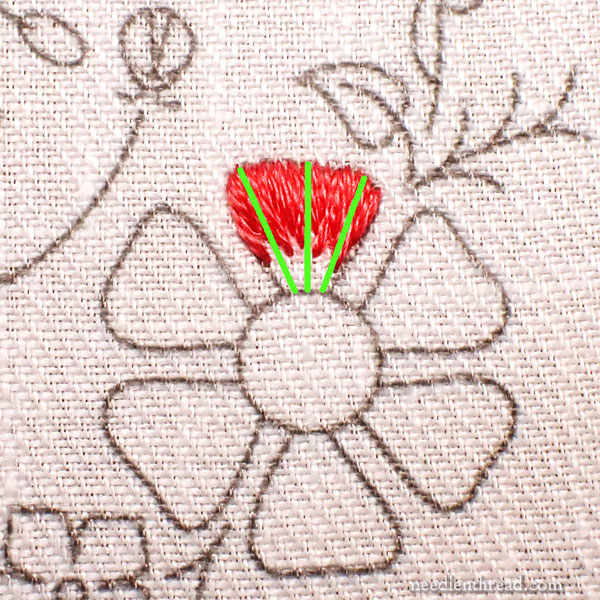
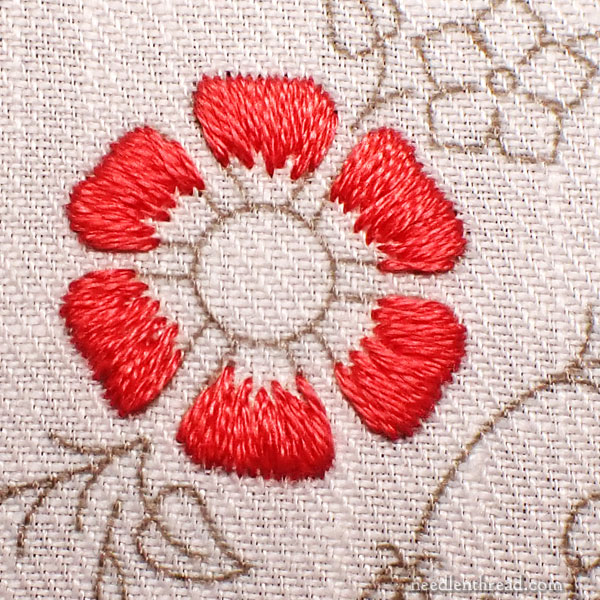
Switch to one strand of 353 and the smaller (#9) crewel needle (if you want to – you can use the larger #7, but I find it’s easier to use a finer needle when working with one strand of floss).
When you begin the next row of shaded color here, you’ll always be starting the stitches by coming UP into the previous stitches and splitting them
When you come UP into the previous color, come up DEEP into those stitches – almost to the top of the petal for the longest stitches.
Again, you’ll want to set in three directional stitches, as shown above. You’ll start these stitches coming up DEEP into the first layer of color, and you’ll end them at the base of the petal.
Again, the direction towards the growth point is illustrated above.

See the green dots? They indicate just how deep you’ll want to go up into that first layer of color.
Even though the stitches themselves look shorter, they began much farther up. As you finish the stitch and pull through, it pulls the thread down into the previous stitches, so that’s why they look a bit shorter.
If you don’t go into the first layer of stitches deep enough, you’ll end up with a very short, small, truncated, and “blocky” bit of shading on the petals.
Go deep, my friend! Go deep!
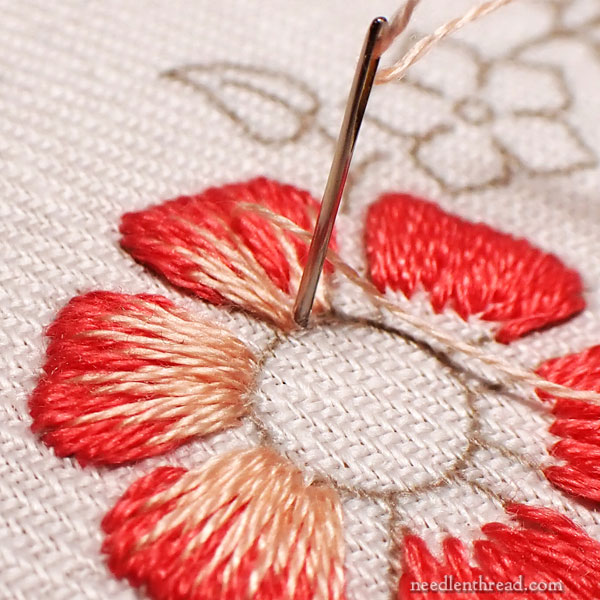
Now, just fill in between those first three stitches, always staggering long and short, so that you don’t have the same length of stitches right next to each other.
You want the lighter stitches to kind of “fan out” over the darker color.
As you go down into the fabric at the base of the petal, you might have to slide the ends of some stitches under other previous stitches, because the ends might not all fit comfortably. Just work the lighter coral in, in a “sketchy” way, keeping the beginning of the stitches (where you come UP into the previous layer) staggered and fanned out.
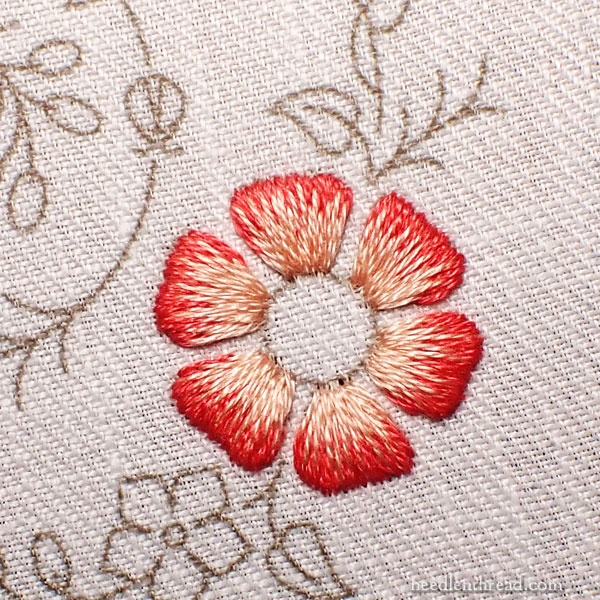
Most of the other flowers in this design are based on the same stitching principles, more or less: work towards the growth point; try not to crowd your stitches; go deep into the previous layer of stitches when shading.
The Vine
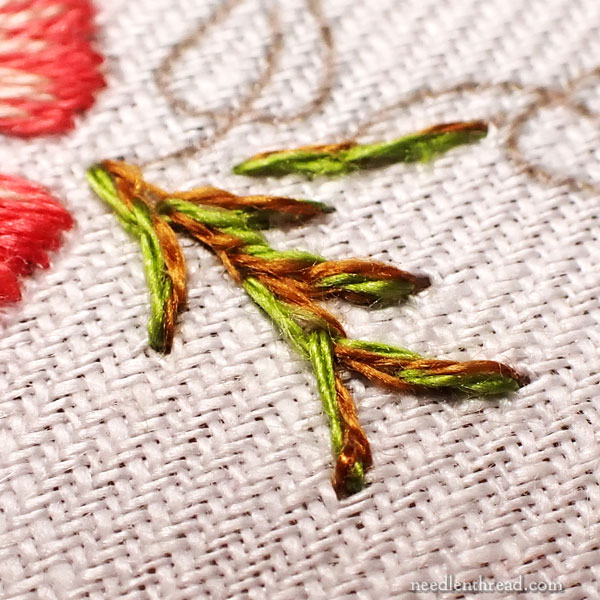
The vine and its offshoots (note: the offshoots are everything that’s twiggy, that are not stems on leaves) are worked with one strand of 470 and one strand of 780 in the needle, in split stitch.
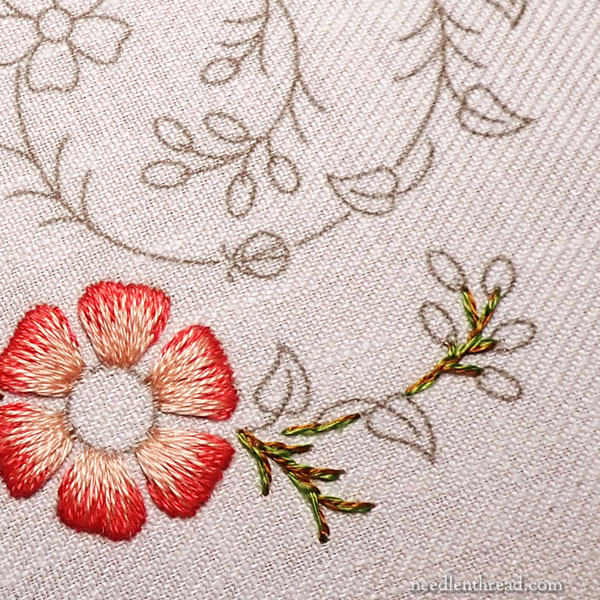
I worked from the outer start of the swirl to the inside of the swirl.
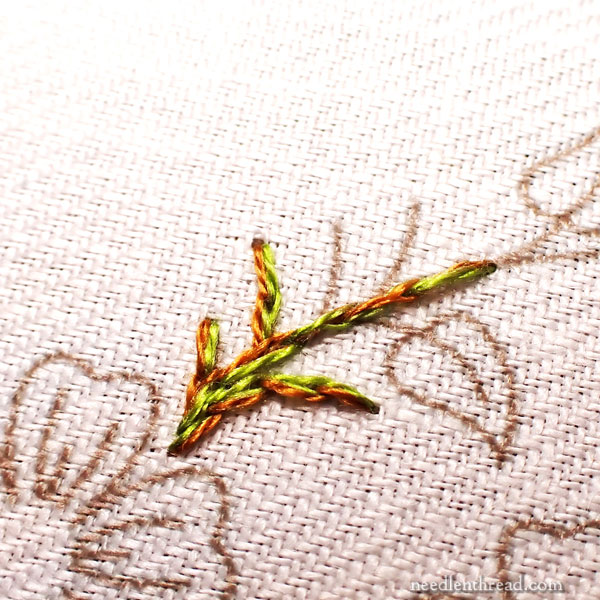
The idea here is that you want the vine to look sketchy. So, to achieve this, you can allow your thread to twist up a bit – you don’t want the individual strands to lie parallel to each other – and occasionally, you might employ straight stitch instead of split stitch for little twiggy offshoots that are relatively short.
As you work along the fine, you’ll need to stop and re-start your thread when you come to large elements blocking the vine.
But on all the small offshoots, stitch those as you come to them. You’ll just digress from the vine to stitch the offshoots, and then come back to the vine and keep going forward.
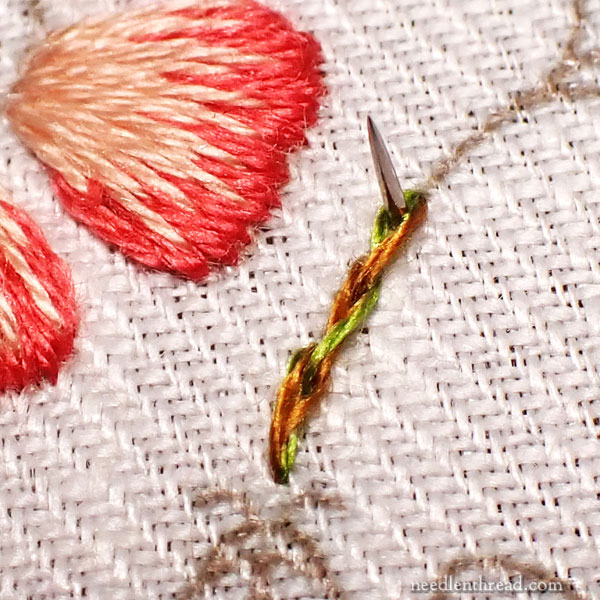
When you’re working the split stitch, split the very end of the previous stitch. This keeps the split stitches long and thin and sketchy looking.
When it comes to stitching the vine, you want to precisely cover the design line, but you don’t need to be super precise and fastidious in your stitching. You really want to achieve something that looks a bit sketchy (as if sketched, not “suspicious”!) and a wee bit twiggy.
When you need to, it’s ok just to work straight stitches in small spaces.
Don’t stress out too much about getting a super-precise, perfect split stitch line. Go for relaxed and sketchy!
Looking for More? Kits and Boxes! And Coming Up!
If you’re just joining in on this project, you can find the first installment of Garden Swirl here, with the design and materials list.
We will have more kits and decorative boxes available for this project within the next 1.5 – 2 weeks. I’ll tell you more about that next week, and show you pictures of the substituted color for the box we’re going to have in stock. Yes, we cleaned out the distributor’s whole stock of lighter brown, so we’ll be working with a darker box, too. I’ll show you some photos of one of the stitched samples mounted in the darker box. It’s pretty!
Next week, we’ll add leaves and more flowers!
Have a wonderful weekend!
Hi Mary and Anna, Just a quick question, are you ending your threads after each petal and starting fresh or carrying across between petals? Similarly, are you ending your threads at the gap between twigs or carrying across the back of the work? Great information on starting threads, I just sometimes wished I knew the etiquette for ending them since the fabric is nice and heavy….. do you try to get away with more on a heavy fabric than on a light one?
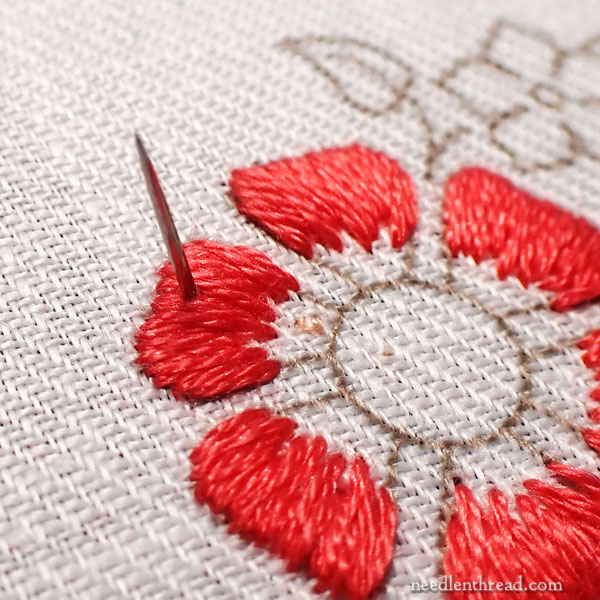
End the thread with each petal – no point in carrying that darker color across the space. It likely wouldn’t muddy the front, but why risk it?
I always end threads when individual elements are spaced apart, if I’m using a darker color on a lighter fabric. If I were using a dark fabric, on petals this close together, I might carry the thread. If I were using a light thread on petals this close together, as long as the fabric has some body to it and isn’t sheer, I’d likely carry it. It really just depends on the fabric and the thread!
Is it possible for you to show the back of the garden swirl project after it is finished? I am just curious if mine is similar to yours.
Thanks!