May 24, 2011
Another Needlework Finish in the (Near?) Future
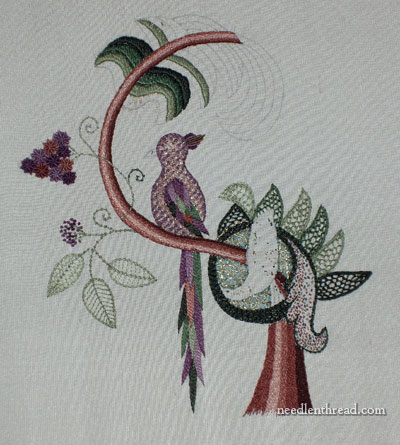
After finishing the Cluny piece up last week, I sifted through a few other pieces of needlework I want to finish up and … ahem. Well, not to sound insulting… but I want to get them over with and out of the way! Makes it sound like I’m trying to plow through an Unpleasant Task, doesn’t it?
It’s not the case at all… not really! If they were Unpleasant Tasks, I’m pretty sure I could justify not doing them at all. (I’m really good at that!)
But they are Loose Ends, and I want to tie them up while I’m organizing my Knuckle-Into-Summer List. That’s the list of Big Things I want to do this summer. And I’m more likely to knuckle into those big things, if I have some little things finished and out of the way.