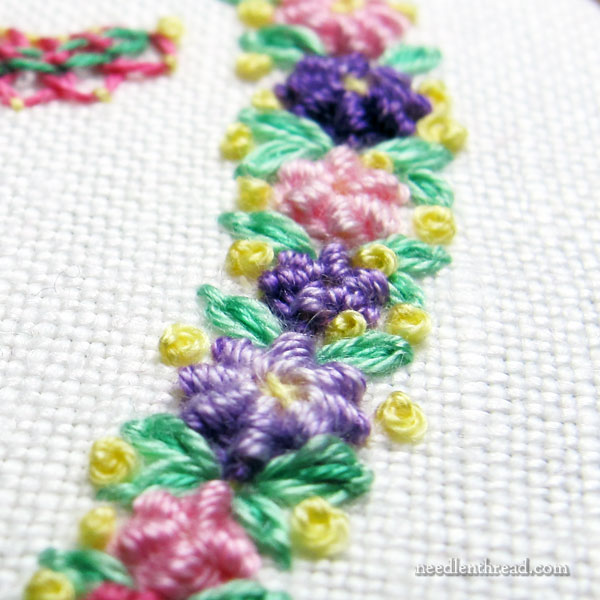
About

Mary Corbet

writer and founder


I learned to embroider when I was a kid, when everyone was really into cross stitch (remember the '80s?). Eventually, I migrated to surface embroidery, teaching myself with whatever I could get my hands on...read more

Contact Mary

Connect with Mary


Archives

2025 (75) 2024 (135) 2023 (125) 2022 (136) 2021 (130) 2020 (132) 2019 (147) 2018 (146) 2017 (169) 2016 (147) 2015 (246) 2014 (294) 2013 (294) 2012 (305) 2011 (306) 2010 (316) 2009 (367) 2008 (352) 2007 (225) 2006 (139)
 

Ecclesiastical Embroidery: Annunciation Cope and More


Amazon Books

When spring starts to tickle the landscape, my thoughts turn to travel. There’s nothing I like better, when the weather gets warmer and the landscape comes back to life, than to indulge in exploratory day trips (or two-day trips) that have some kind of needlework potential to them.

Whether it’s visiting a distant needlework shop (we don’t really have any close-by fine needlework shops) or a distant museum with some great textiles, either makes a great excuse for day tripping.

If you live in the Midwest, if you’re hankering for a road trip, and if you’re into ecclesiastical embroidery – or fabulous examples of beautiful embroidery – today, I thought I’d highlight two pieces of ecclesiastical embroidery appropriate for the day, that are within road-trip reach of Midwesterners this spring (and beyond).

(For those who don’t know, I live in Kansas. I tend to think “Midwest” frequently, but this isn’t to say that people outside the Midwest can’t visit these destinations as well!)

One exhibition is time sensitive. Even though I’ve mentioned it before, I think it’s worth mentioning again because it’s a grand opportunity to see two magnificent pieces of embroidery here in the States that you’d have to travel overseas to see, otherwise.

The other is a permanent exhibit that you can visit if you’re ever wandering through the wilds of northern Missouri.

Annunciation Cope, Clyde Missouri
Continue reading “Ecclesiastical Embroidery: Annunciation Cope and More”

Bee-Jeweled Pincushion, Finishing 2.5: The Top & the Stuffing


OK! It’s time to rectify yesterday’s blunder, wherein I published the final article on the pincushion (the Palestrina stitch edge) when I should have been publishing this article on the second-to-the-last step.

On the Bee-Jeweled Project Index page, the articles will be listed in the correct order of work for proceeding normally through the project, so if you have to come back to this later in the year (maybe you aren’t stitching your pincushion just yet), you’ll find all the articles listed in the project index, in the correct order.

So let’s look at how to add the top to the pincushion and stuff it and close it. Please remember to read through all the steps thoroughly. Don’t rely solely on the pictures, since some steps are not pictured but are explained in the text.

Finishing the top and stuffing the pincushion
Continue reading “Bee-Jeweled Pincushion, Finishing 2.5: The Top & the Stuffing”

Bee-Jeweled Pincushion, Finishing 3: The Palestrina Stitch Edge


It’s time to bring the Bee-Jeweled Pincushion project to a close!

If you have not had a chance to stitch the pincushion yet but you still want to, you can find all the articles, with design, materials lists, and step-by-step instructions, here in the Bee-Jeweled Pincushion Project Index.

I’ll continue to stock the pincushion kits in my shop, so if you decide you want one, I can help you with that! They are out of stock right now, but I’m taking a waiting list via email, so if you drop me a line, I’ll add you to it. It’s an affordable way to gather all the materials you need from one source.

Today, we’re adding the Palestrina stitch edges to the pincushion. We’re going to embroider the bottom edge first and then the top.

Please read through the instructions before you begin!

Palestrina Stitch edge for Pincushion
Continue reading “Bee-Jeweled Pincushion, Finishing 3: The Palestrina Stitch Edge”

Bee-Jeweled Pincushion, Finishing 2: Side to Base Construction


Today, we’re going to continue with the finishing instructions for the Bee-Jeweled Pincushion project, and we’ll just jump right into it!

If you want the backstory, or the previous step in finishing and constructing the pincushion, check out this article, where we started the finishing process by preparing the embroidered fabric, cutting it, and preparing the base of the pincushion.

Today, we’re going to prepare the side strip and sew it to the base.

It is important to read all the way through the instructions, making sure you understand the sequence of steps, before you start. Please read and don’t rely solely on the photos. Some steps are not shown in the photos because they are easily explained (and there’s simply not space for every move), so you have to read the instructions to follow all the steps.

Bee-Jeweled Pincushion Project: Finishing part 2 - construction of sides and base
Continue reading “Bee-Jeweled Pincushion, Finishing 2: Side to Base Construction”

Bee-Jeweled Pincushion Finishing, Part 1


This morning, we’re going to head into the final stretch on creating your own Bee-Jeweled Pincushion – the finish work! This is where we construct the pincushion into something beautiful and serviceable.

Now, this is The Thing about finishing: it is a multi-step process. To make it as clear as I can, I’m including a lot of photos in the process. In order to accommodate the whole process here on the blog, it will be broken into multiple parts, which I’ll publish over the next several articles.

If this is the first time you’ve built a pincushion or something similar and you are hesitant or a little worried about the finishing process, I recommend waiting until all the articles on finishing the pincushion are published before you start finishing your project into a pincushion. There are some steps below that you can do ahead of time, though, to prepare your work.

If you’ve finished embroidery projects into things like pincushions before and you’re confident about what you’re doing, then you can probably guess where I’m going with each step of the process and you can most likely move ahead and finish your pincushion with techniques that you’re already familiar with.

Bee-Jeweled Pincushion: Finishing part 1
Continue reading “Bee-Jeweled Pincushion Finishing, Part 1”

Monday Musings, News, and Interrupted Programming


Yeeeeegads. I’m a morning person. And I don’t mind getting up at what is naturally 4:30AM for me.

But 3:30AM is pushing it! The spring time change is not my favorite, no siree bob!

But I promise I’ll try not to be a grump!

Speaking of being a grump, I have some not-so-great news (well, in the scheme of Major Things in Life, is it bad news? not really!) and some great news for you.

Come along. Let’s have a calm, quiet, sensible chat to ease us into the day as we await the sunrise (which is a riffemrackemfrickemfrackem hour later than it should be. Uhhh…that’s my grumpy side coming out.)

Cotton stitch samples
Continue reading “Monday Musings, News, and Interrupted Programming”