The gold in this goldwork project will be gold passing thread. If you’re not familiar with what gold passing thread is, feel free to look at a few previous articles: gold passing thread up close, the Agnus Dei project, the golden pomegranate, or my goldwork Christmas ornament from this past Christmas – all of them make liberal use of gold passing thread.
In this technique, which is called Or Nué, the gold passing thread will be couched with colored silk to form a picture. I’ve recently run a couple articles on Or Nué techniques (Margaret’s goldwork flower and Christiana’s goldwork peacock feather) if you want to get more of a sense of what the technique is all about.
Here, I’ll be going step-by-step through the process of Or Nué embroidery, and I’ll tell you up-front, I’ve only worked the technique a few times, on simple projects. This little iris is more complicated than any Or Nué I’ve done before, and I will undoubtedly be troubleshooting along the way!
I’m off to a bad start, anyway. Let me show you what I mean…
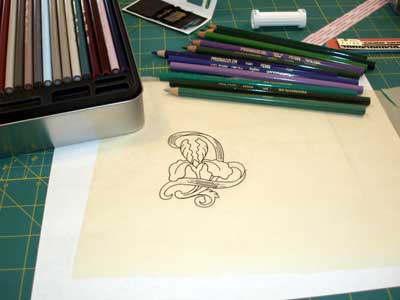
Here’s the design, traced onto tissue paper. It’s from
4000 Flower & Plant Motifs: A Sourcebook
by McCallum – an excellent book for little motifs perfect for embroidery. I modified the design slightly.
After laying in some (really sloppy!) color using prismacolors and centering up the design, I added in that swashy looking line, because I’m thinking I’ll work the gold thread in some other pattern besides just a straight line. I don’t think this particular swash is going to be my gold thread guide, though….
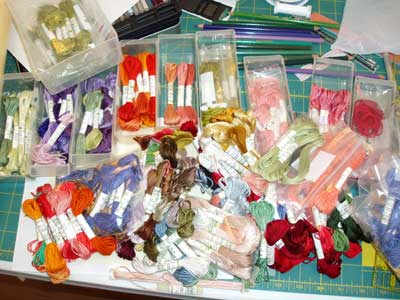
The next thing to do was to consider colors of silk. Actually, the next thing was to consider TYPES of silk. I wanted a fine thread, to ensure that I didn’t end up with too much bulk over the gold threads, which could distort and push them out if I didn’t space them correctly. It was at this point that I noticed that none of my finer threads were available in the same colors – or in any extent of color – compared to my rather haphazard collection of Soie d’Alger. Now, Soie d’Alger is my favorite thread for needle painting (long and short stitch – like this
needlepainted iris, which is actually worked in DMC cotton). I found as I was planning out this goldwork project that I was thinking too much in terms of needlepainting. This may pose a problem later – we’ll see!
Anyway, I had a good collection of purples and greens in the Soie d’Alger, so that’s what I decided to go with.
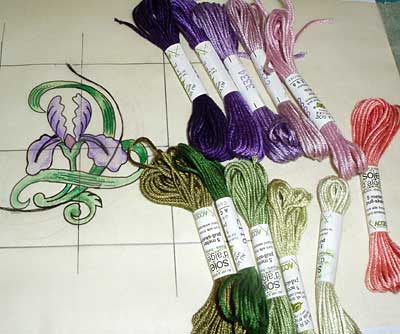
I selected a palette. I think these are way too many shades of color!! (And I know you’re probably wondering about that coral. So am I!)
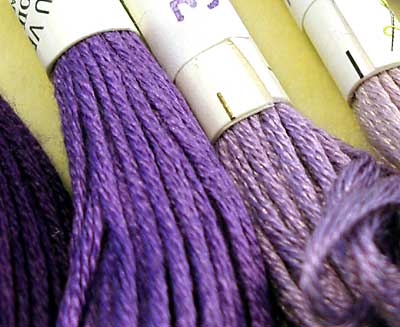
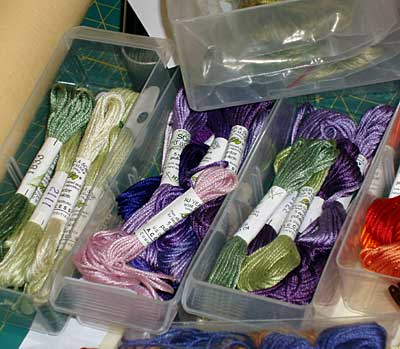
I’ll probably end up using these two purples…
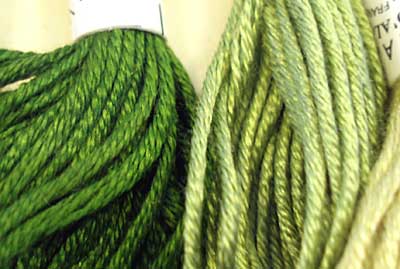
… and these two greens predominantly.
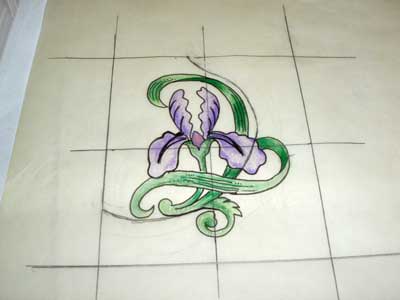
So, colors selected and pattern more or less messily prepared, I headed to my light box to transfer the pattern onto the fabric.
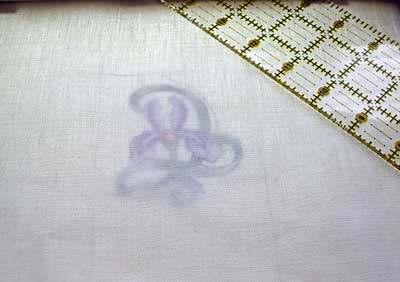
And here comes Mistake #1:
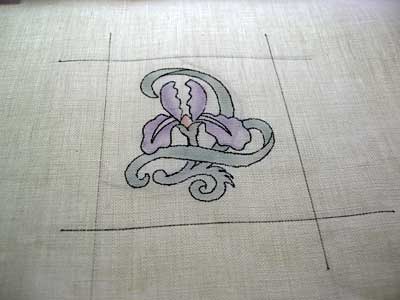
I outlined in black, using a micron art pen. Oh dear. It didn’t occur to me until later that I really don’t want those harsh black lines on the surface of the fabric. I know that there will be some space between the gold threads – not a lot of space, but some, nonetheless. I don’t want any vague black outline peeking through…
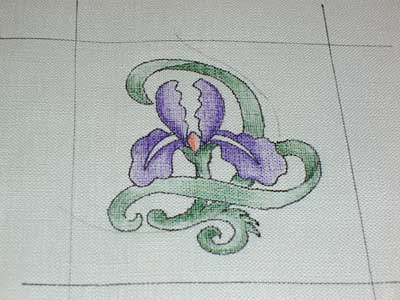
And this could be Mistake #2, but I don’t know yet. I used prismacolors (soft lead colored pencils) to lay the color in on my fabric. Normally, this would be done with watercolor paints, but …. mine are packed away, and I was over-eager. I tend to think it’ll be ok.
Regarding the black line, I’m planning on couching stitches long that black line, so I’m hoping they will be sufficient cover up. We will see!
After I finished transferring the design, I
mounted the linen on an Evertite Frame, which have fast become my favorite frames. (I don’t have a slate frame that’s small enough for this project). Now, my next step is to prepare all my supplies and put everything together in one basket for easy access. Then, I’ll set up my
Needlework System 4 stand with the frame in it, and have that ready for those
15 minute moments when I can take a few stitches during the week!
So that’s my current colored project! I’m still working on the
whitework sampler, though not regularly. I’ll be dividing up a few days a week for whitework, a few days a week for goldwork now. I did finish my
miniature embroidery piece, and will show you some photos of that tomorrow.
What are you up to? Do you have any projects going? Are you blogging progress on any projects? Feel free to share a link to your blog, flickr account, etc., below, so that we can see what you’re up to, too!
]
]>


I’m stitching a set of six household pet guardian angels for the ANG Auction fund raiser this fall. You can watch me at my blog (address below) and also see random things I find on the Internet that pertain to needlepoint.
Jane/Chilly Hollow
http://blog.360.yahoo.com/chillyhollow
with mirror blog at http://chillyhollownp.blogspot.com
Have you read All That Glitters by Alison Cole? Among the other goldwork projects in her first book is an or nue one that has circles in the background, not a horizontal line of or nue. Very neat!
Jane/CH
Hi, Jane! Wow – you are busy!! Thanks for sending the blog links!
YES!! Alison’s my inspiration! I love the way she does that with the gold backgrounds on these projects!
Thanks for your comment!
Hi, Jane! Wow – you are busy!! Thanks for sending the blog links!
YES!! Alison’s my inspiration! I love the way she does that with the gold backgrounds on these projects!
Thanks for your comment!
I am busy trying out your Drawn Thread tutorials…beginner series! I’ve blogged about it including my oops’ as counting/reading/following directions issues remain.
I bought a light since my last go at Hardanger. I’m thinking textured surface embroidery must be what I’m striving for. I clicked on a comment left for you by Maggie’s Textile. I’m stalking — I mean — linking you both now with my latest blog entry 🙂
I’m following your white work slowly… now an other project to follow…
After a (more or less) long absence, today I’ve post my work in progress – and I have to say that I’ve tried satin stitch for the first time (always with your blog opened…)i hope in a few days to show the complete project.
ooooo- I’m looking forward to watching this one progress!
I’ve just finished a cross stitch section in my band sampler. Excited to use your tutorials to learn new stitches!
Hi, All! Yep, I'm looking forward to watching this one progress, too, Elmsley R! Sheesh, Megan – it's harder than I thought. I had to take out the first bit of stitching I did on it. Ah well – it's a challenge, and I think it'll be fun!
Mal & Laurie – sounds like you're both having fun learning! Glad you like the tutorials!
I’m working on some autumn leaves on some pillow cases and some little samplers for friends. Working small has been quite a challenge, not quite the challenge of miniature but small nonetheless. This site is invaluable to me as I branch out the try new stitches and techniques. Thanks so much Mary.
I am working on finishing up my Boink, working some BASIC surface embroidery for a table cloth–it is a wrath of all the seasons done in flowers. I have a couple needlepoint projects going on as well as an afghan i am doing in cross stitch blocks.
But all that being said—I want to be you Mary when I grow up–you just flat out amaze me!
Ruth M
Mary — I know that your iris will be beautiful and inspirations. A couple of questions — what is your base fabric?
And why use the black pen instead of say pencil?
Thanks,
Cissie
Hi, Cissie-
The ground fabric is linen, alba maxima by legacy, I think – could be alabaster angel. It was a “scrap” in my legacy pile…
Yes, I didn’t need to use the black pen. Normally, I use these pens when I know I’ll be covering theh lines, because they don’t smudge or disappear or anything like that – they give a nice, permanent line, which is great, if you’re sure to be covering it up. If I had thought ahead, I would have merely used the colors of the design as the design markings….
Still, it seems to be covering up fine…
Thanks!
MC
Love your Iris Mary!(I think coral makes it “pop”)
I am currently working on a Maginel Wright Enrigh Bo-peep image and posted progress this AM. http://www.flickr.com/photos/10248177@N08/
-Shariub
P.S. I’ve a couple vintage patterns listed too if anyone is interested 🙂
Mary,
I’ve been following your blog for a while now and I’m really impressed with your work! Used to do quite a bit of embroidery, counted cross, etc. (I prefer embroidery), but when I went back to school all my time was taken up with other things.
Now I am starting up again and I’m fascinated by goldwork, which I’ve never done. I have a design I would LOVE to do, but I figure I’d better start small first. What would you recommend for someone who has never done goldwork before?
Thanks
Carol
PS. I would love to send you the design I have and get your recommendations on how to go about working it. It’s super ambitious, but I think it would be a knockout.
PPS My daughter wants the pomegranate, and the pansy.
Hi, Meri – I have two different lights: an ott light (which is probably the easiest to find) and an ‘ultralux’ light, which I got for a mere $2 at a thrift store, and it just needed a new bulb (which was $30!)…
Hi, Carol –
you can send me the design, if you wish! mary (at) needlenthread (dot) com
Oh Noooo! Just what I need!! Another project! But – who knows! If it grabs me, I may abandon all else!!
Thanks!
Mary
🙂 Thanks, Mary!