Today, I’d like to show you how to make zig-zag bundles in your drawn thread work. It helps to understand basic hemstitch before moving on to zig-zags, so you might want to check out that tutorial if you’re just getting started with drawn thread embroidery.
When you work zig-zags in drawn thread, you’re hemstitching the top and bottom of a row of stitches that have had several horizontal (or vertical – depending on the direction you’re stitching) removed.
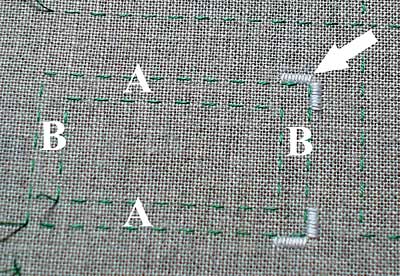
In this little tutorial, I’m working around a box, so I’ve removed threads horizontally on the top and bottom rows that comprise the outside of the box (indicated by “A” in the photo above), and vertically on the sides of the box (indicated by “B” in the photo above).
I’m using satin stitch bars to secure the edges (see the arrow in the photo above). Note that they are secured around the corner, for both the vertical and horizontal removal of thread.
I’m working in groups of four threads. This technique requires an even amount of threads, so that the bundles can be divided correctly. So, if you’re working with four threads, you want to count off a multiple of four for the width and height of your box.
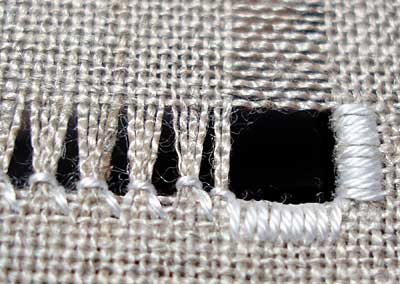
When you work your initial hemstitching on the outside of the box edge, on the first group next to the satin stitch bars, you want to pick up only two vertical threads. Then, for the subsequent groupings, pick up four vertical threads….
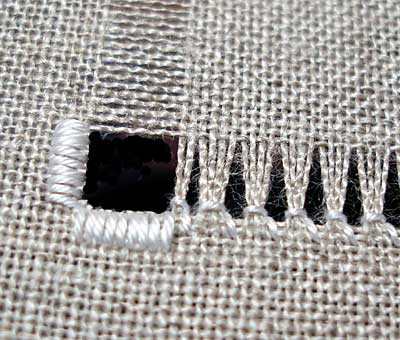
… until you come to the end of the row, where you’ll only have two threads leftover.
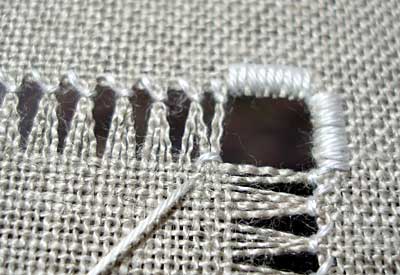
To begin the hemstitching around the inside of the box, use a waste knot to start your thread. Now, you’ll be working in groups of four threads, hemstitching around the first bunch of two, and picking up two from the next bunch of four.
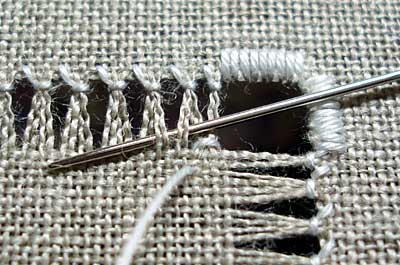
For the next bunch, pick up the two left in the bunch, plus the first two of the next bunch.
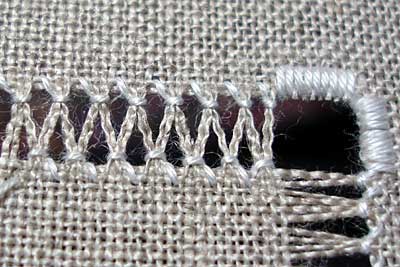
Work this way all the way to the corner – you can see the zig-zag pattern developing.
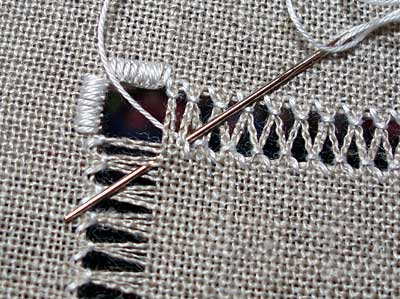
When you come to the corner, you’ll work the wrapping stitch of the hemstitch around the last four threads (two from the bundle you’re in, and the last two bundled threads). When you take your needle down after the wrap, you’ll bring it up in the second bundle around the corner, so that you can now wrap the first four threads around the corner.
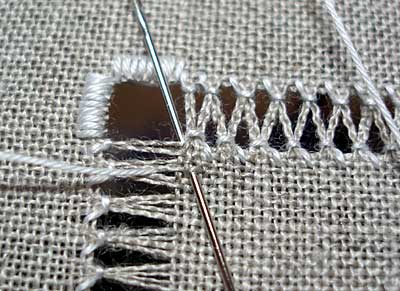
To complete this corner hemstitch, take your needle down into the corner to form the wrap and bring it up in the fabric to form the wrap and put your needle in position for the next hemstitch.
Work the next inside row over four threads, splitting the bundles as you did in the first row, and then proceed around the rest of the corners of the box in the same manner.
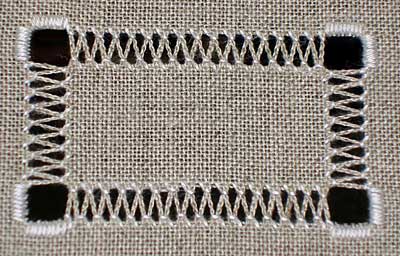
When you come to the end of your last inside row, to anchor the thread, slide it underneath the hemstitching on the inside row. Don’t cross over to the outside of the box, or your thread will show behind the drawn thread areas.
And there you have zig-zags in drawn thread, around the outside of a box!
More Drawn Thread and Whitework Embroidery
Drawn Thread – Securing Edges with Re-Weaving
Drawn Thread – Securing Edges with Satin Stitch
Drawn Thread – Hemstitch Tutorial
Drawn Thread – Chain Loop Bunches
Sampler Update with Schwalm Embroidery
Online Book on Drawn Thread Techniques
Diamond Stitch in Drawn Thread Work
Coral Knot Bunches in Drawn Thread Embroidery
You can find more tips and tricks for hand embroidery – including all the above tutorials – indexed on my Tips and Tricks for Hand Embroidery page.


Hola me parece fabuloso todo el contenido de su pagina,gracias
Very biuotifull