


Last time we visited the spot sampler, we added some herringbone stitch to the sampler. Today, we’ll look at some filling techniques that work well on even-weave ground fabric. Specifically, we’ll look at darned fillings (uh… darned as in the darning stitch, which is really just running stitch), some lattice work, cloud filling, and others.
Most of the filling techniques I worked on my sampler are in 1″ squares, but some of my students worked some 2″ x 1″ rectangles – and other various sizes. You can work any size filled area you’d like, and you can get creative with your fillings, too, and incorporate them with other stitches on your sampler.
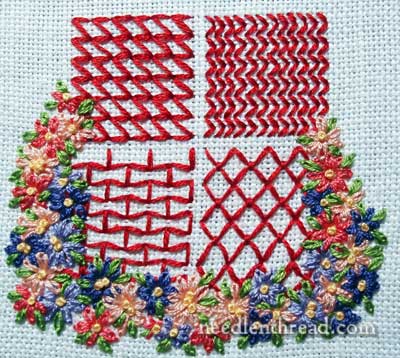
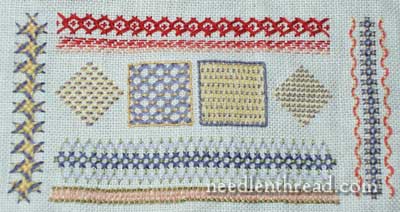
On my sampler, I worked these four squares of fillings, and then further decorated them by clustering flowers around the base of them. Not realizing quite how much they would end up looking like a window, I regret now that I stitched the fillings in red. Blue wouldn’t been even more window-like!
The fillings from top left are: Bosnian Filling, arrowhead filling, then lower left, Japanese darning, and finally, in the lower right, fly stitch used as a filling technique.
My students worked a variety of fillings on their samplers. They were required to do one darned filling area, one cloud filling area, and one lattice filling.
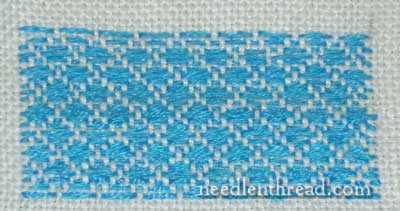
Their darned filling patterns came out particularly well, I thought. I love the blue in the one above, and the diamond pattern ended up being a real favorite.
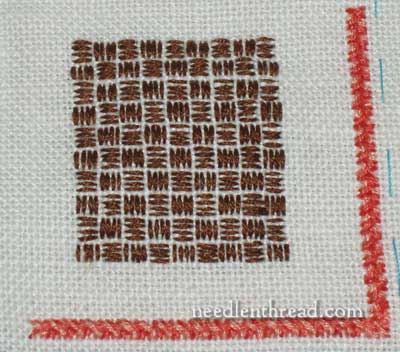
Among the darned filling patterns they explored was this basket-weave darning, which one of the students worked in the corner of her sampler, set off by herringbone stitch.

Could filling as also pretty popular among the students, as it is an easy stitching technique and makes a nice pattern.
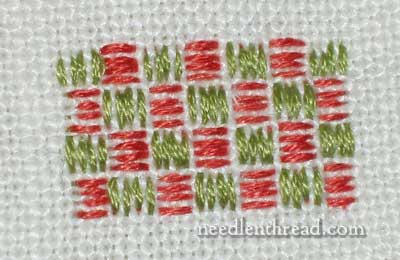
Some of the students got fancy with their darning, and worked it in two colors.
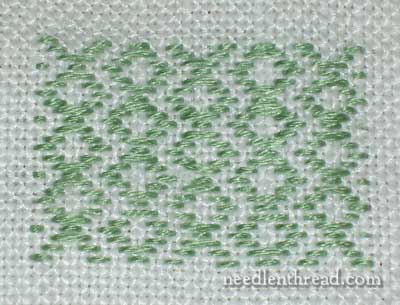
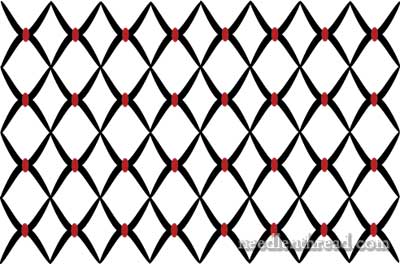
And the open diamond darning pattern, though a little more challenging, was also a favorite.
I worked four of the 1″ squares on my sampler in a row, beginning and ending squares-turned-diamond. They’re all a form of lattice filling, except the third one, which is cloud filling, worked very small. The fillings are surrounded by my herringbone stitch work, and, on the top, there’s a row of darning in there, too.
So you can pretty much play around with the filling patterns, to see what you like best for your spot sampler. Here are some ideas to help you out:
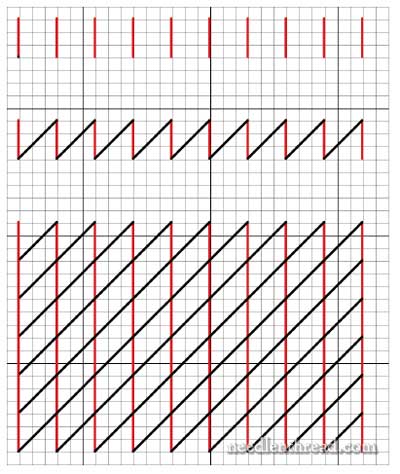
Bosnian filling can be worked over any number of fabric threads. We worked it over three, so on the chart above, that’s how it’s graphed. First, you stitch the red vertical lines in each row, then go back along the row with the diagonal lines.
For Japanese darning, work the red horizontal lines in the pattern above first, then go back and fill in the black slanted lines, row by row.
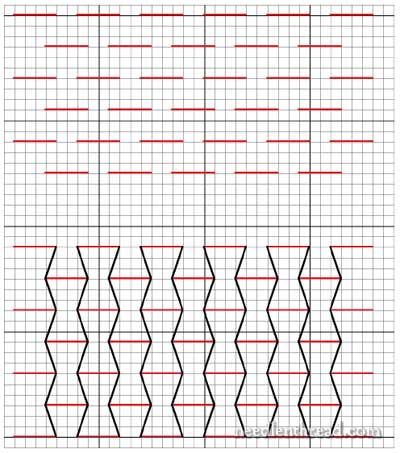
Fly stitch filling is pretty simple, once you know how the horizontal fly stitch is worked. You’ll want to work horizontal rows of fly stitch, which mirror each other. The red anchor stitch in the chart above indicate where the fly stitch is held in place. Over each “tip” created by the fly stitch, you’ll have two anchor stitches. Work the first row of fly stitch as you regularly would work a horizontal row of fly stitch. For the second row, work the fly stitch upwards, and anchor the stitch over the same anchor stitch from the previous row. Then the third row is the same as the first, and so on.
Finally, here’s a PDF of sample darning patterns:
Sample Darning Patterns (PDF) – you can space these over the threads however you wish, depending on the count of your fabric. You may want to play around with them a bit to see how they work best on your fabric count.
You can find a very nice tutorial for cloud filling on Pintangle.
For lattice work, you can use my video on lattice work. You don’t have to work the satin stitch base below the lattice work, if you don’t wish to. There are all kinds of variations on lattice work, and many of these you can discover on your own, if you play around with the concept! Basically, you’re just crossing long lines, and then couching the intersections to hold the lines down.
You’re welcome to follow along in this series on developing a spot sampler, if you’d like. You can find a handy index for the series under Tips & Techniques.
Enjoy!
Hi, Mary
Your students are lucky to have you for their tutor and under your guidance their inherent talent is blooming. They seem to be having a great time.
sublime j adore ce tu fais bises jojo
I’d love to see a larger picture of the 4 squares and straight lines in blues and yellows.
The red sampler squares looked perfect to me. We have a small courtyard with tall brick walls. With flowers at the base and climbing up the sides, it looked to me like a garden wall with some very fancy brickwork!