There were lots of questions and helpful comments on yesterday’s post about using silk satin as a ground fabric for hand embroidery. I’ll answer those questions (I hope) within today’s article, where I’ll also show you the second silk option I tried out.
A couple months back, I showed you some gorgeous silk dupioni from Japan, bought by a good friend who went shopping in Osaka just to find it for me. (What a guy!) My second Ground Fabric Test made use of the “white” (more like egg-shell) dupioni. Again, it’s silk, so it’s not a glaring white – just a soft pearl-ish white. A very pretty fabric!

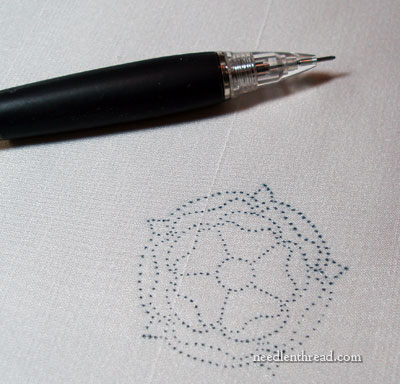
Down the middle of the fabric in the photo above (running through the left half of the flower), you can see one of the characteristic lines found in silk of this type. This is a definitely difference between the silk satin of yesterday and this dupioni – the silk satin has a very smooth finish, no slubs, no little lines; the dupioni is characterized by these marks. Another difference is in the weight of the silk. This is a very nice dupioni – the finest I’ve ever seen, but weight-wise, it is much lighter than the silk satin. No worries, though. If this were my final choice for a ground fabric, it would also be backed with linen.
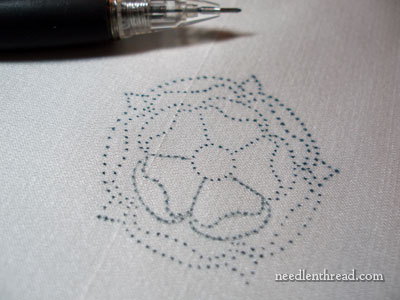
So, going through the same process as yesterday, I pounced the same design onto the silk dupioni, and started playing around with transfer methods. You’ll see a big difference here between the dupioni and the satin.

I started with the pencil, and the line it provided was ok. The dupioni is not “spongy” like the satin weave. The pencil does not get caught on the weave, like it does when drawing on the silk satin. The dupioni is “hard” (if you can say that about a fabric!) compared to the satin. It’s a much easier surface to write on.

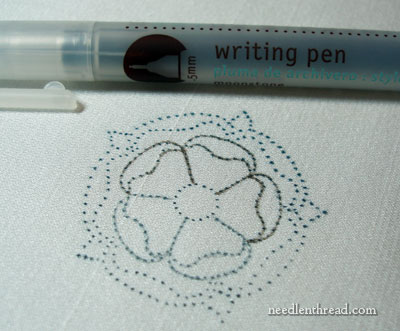
Using this Martha Stewart brand archival pigment ink pen in sepia, I drew in some of the petals, and you can see that the bleed is nowhere close to what it is on the silk satin. It makes a pretty good line. Dark, but a good line!

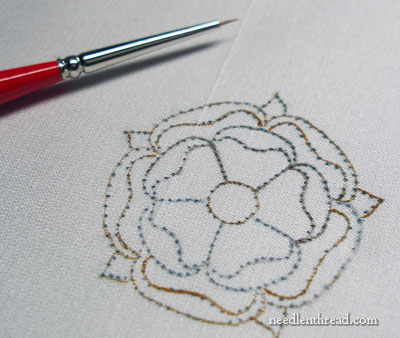
Last, but not least, the paintbrush, which works fine as well.
The paints are indeed watercolor. This is a silk and goldwork project, and will not be washed or damp-stretched. At the most, it might be lightly steamed from afar, from the back, while still on the frame, if I need to, but I don’t even like doing that with metal thread work, and I don’t plan on needing to do so. But even then, the steam wouldn’t affect the watercolors. I’ve used this method before with the best success for long-term projects like this, without ever having a problem with the paints. However, for kicks, in the future, I may try a piece on linen, with cotton threads (or wool) and dampen it to see what happens with the paint. I suspect that it wouldn’t be anything too significant, given the small amount of paint – but I’m curious to find out!
Concerning the water quantity in the watercolor paint, there isn’t much. The cake is barely misted with water – it gets maybe a drop or two of the mist on it, and then I work the drop into the cake, further and further in to make a pool of thick paint, not runny paint. It has to be thick enough that it isn’t all watery, but runny enough that it goes on smoothly, without blotching. Some might find it easier to use tube watercolors (or gouache, as another comment suggested). I don’t like using acrylic, because acrylic tends to form more of a skin on the paint, in my experience. You can also use paints that are made for fabric (I’m not talking puff paints here, though!). But I’ve found watercolors very easy and always dependable for this type of embroidery.
Ok – all that being said – what fabric do you think I’ll be using?! The choice may surprise you! (Does “tertium datur” mean anything to you?) In any case, tomorrow, I’ll show you, and I’ll tell you why. I’ll also show you a beautiful piece of embroidery that has inspired my choice.
Questions? Comments? Suggestions? Feel free to leave a comment below!
Earlier this week, the Ask & Share section made its debut, and there are lots of topics up for discussion, and heaps of good needlework-related questions developing in there. You’re welcome to drop in and take a look around – or you can register and join in on the discussion! I’m still working out a few kinks on my end, but otherwise, things seem to be running smoothly enough. If anyone has any functionality issues with the Ask & Share, though, please feel free to drop me an e-mail!


Dear Mary,
Thank you for the explanation on the use of the paint. It clarified the method excellently.
Can’t wait to see your “third” choice 🙂
May your days be cooler than mine,
DorisHH
Hi, Doris – The paint option has always worked well for me. We’ll see if it continues to do so! I realize, though, that it doesn’t leave room for changing the design too much! The third choice is actually pretty basic – I hope you’re not disappointed! It’s been pretty nice here in Kansas in the mornings (this morning, only 62 degrees!) but by afternoon, we’ve been in the mid-90’s. It wouldn’t have minded it much yesterday when it hit 96 (with a hot dusty breeze!), if my car hadn’t blown a hose and stranded me on the side of a state road, next to a dusty cornfield…. !! 🙂
Hi, Irene! Ahhh – I figure that, when I’m preparing a project that’s going to probably run me close to a hundred dollars or more in supplies, I want to be sure that I’ve worked out all the details ahead of time! I never see it a waste to test fabric first on this type of project, with smaller pieces of fabric. It forestalls making mistakes on the real fabric and ending up wasting even more. I even test out my threads and my design ideas in small bits before launching into the “real” thing. Another reason it’s imperative to do so on this project is that I’m teaching it to someone else, so I want to make sure that I’ve worked out all the methods I want to use, before meeting with the student. So, no, I never have any regrets using small pieces of good fabric to test things out on, especially if those fabrics are possibilities for the final design.
I was actually thinking about keeping a running tab on how much the project cost, all the way down to the paper for the design and so forth. I normally keep track only of the cost of the threads and the ground fabric, but there are a lot of other little incidentals that go into this type of thing: test fabrics, beeswax, felt for padding, cotton for padding, the photocopies of the design (I had to have the design printed on larger paper, but more on that later!) I generally “guesstimate” the extra costs, but on this one, I may work it out down to the penny! We’ll see….
I’m wondering what type of linen you would back this silk with. Also, what do you think of other transfer methods — specifically, copying the design on lightweight tracing or tissue paper, then using thread to stitch the outline onto the fabric? Would you use a different transfer method if using linen?
Hi, Patricia – I don’t mind using tacking threads and tissue for some transfers, especially when working on a dark fabric, or working on a piece where I know I can’t cover the transfer lines all the way. Other than those two instances, where tacking and tissue are usually my first resort, in all other circumstances, it’s usually my last resort, mostly because I don’t like stitching twice and having to pick out the stitches. (Lazy, I know!)
Also, to answer a question previously asked about prick and pounce (I can’t seem to find where it was asked right now) about just leaving the dots and not connecting them, since they are so close together…. The dots are made from a charcoal powder, and will eventually smudge away or blow away, or get brushed off. Their purpose is just to give an accurate outline for the drawing of the design. Sorry I haven’t been able to track down where that question was asked or who asked it – I know it’s here somewhere! :-/
MC
In Japanese emb. we do steam the finished piece on the frame from underneath. Using a dry iron with a wet washcloth on top of it for the steam we hold the iron quite close to the fabric without actually touching it. The Japanese say that it brightens the silk. Maybe, maybe not, I can’t tell, but it doesn’t harm the metal in any way.
Just sayin’
Thank you, Cecelia!! I appreciate the tip. That’s how I do it, too. I think I read it in a Japanese embroidery book. I’ve also tried using the steam stream from a whistling kettle (read that one in a Chinese embroidery book), but I prefer the cloth approach. ~MC
Hi Mary,
well, I was very curious about ‘tertium datura’ and I have interpreted it right…there is no third choice, and since you said surprise, maybe it will be the first silk. Looking forward to finding out…take care.
P.S. my comment should’ve included the word ‘if’ (and ‘if’ I have….) 🙂
Hi Mary,
I have to tell you that these posts have been very informative! I definitely will have to try the prick and pounce method, although I am leaning toward the stitching outline mentioned in one of the comments. Have you thought about damp stretching before adding the metal? I don’t even know if it would work, but it might!
Could you give a source for the vellum graph paper? That looks pretty useful.
Hi, Cynthia – the vellum graph paper is available at most places that sell a good selection of good drafting supplies. I’ve found it before at Office Max, too, but I don’t know if they still carry it. There’s another kind that says it’s vellum graph paper, but in fact, it isn’t translucent at all, so check the paper before buying it. The translucent stuff is very nice to use for this type of work!
MC
What about whitework–how to transfer when it’s white-on-white? I have a few small pieces on hold, trying to figure out the best way to copy a design onto them.