


The bullion knot is a terrific little slug-like stitch. Oh, that sounds ugly. It’s a terrifically beautiful stitch, and you can make terrifically beautiful things with it!
It’s a terrifically versatile stitch, too.
And at first, it can be terrifically intimidating.
To help you with the latter point, I have a how-to video for the bullion knot. In the video, I’ve worked the bullions with the fabric in a hoop that’s stretched somewhat tight, but not tight enough to prevent me from making the bullion knot easily.
Today, we’re going to look at the bullion knot, worked on fabric that’s framed up very taut in an embroidery frame. When the fabric is very taut, and when you’re working in a frame with two hands available for the stitching (you don’t have to hold the hoop with one hand), there’s a slightly different method you can use for making a bullion knot. You might find it much easier to approach bullions this way.
So normally, this is the beginning set-up for working the bullion knot. The needle comes up at A, and then you take it down at B and immediately back up at A, without pulling the needle through at B. That’s the normal starting position for the bullion knot.
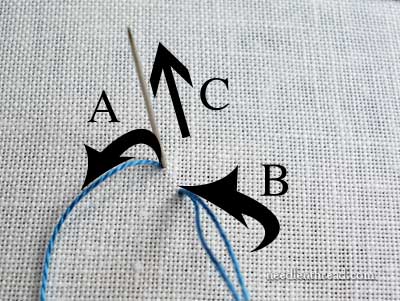
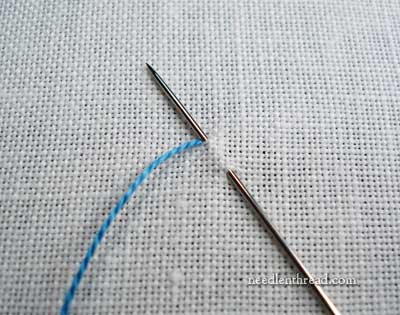
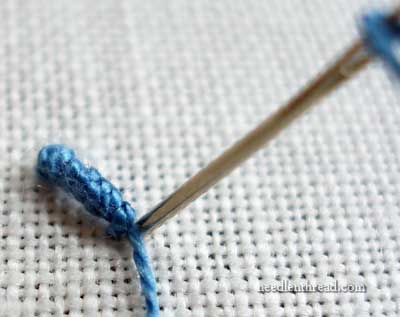
If you’re working with your fabric taut in a frame, though, you can do it this way. Bring your needle up at A, and pull your thread through. Then take it down at B, and pull the needle through, but don’t pull the thread all the way through. Leave a large loop of thread above the fabric. Then, indicated by C in the photo above, bring most of your needle up right next to your thread at A. Leave the needle in the fabric, poking up, so that the majority of the needle is sticking out of the front of your fabric, but the eye is still behind the fabric.
Using one hand behind the frame, hold onto the eye. With the hand on top of the frame, hold onto the loop of thread that’s still on top of the fabric. Using the eye, make the tip of the needle turn in a clockwise motion, picking up the working thread on the front of the fabric in such a way that it makes the wraps on your needle. You can just wrap the working thread around the tip of the needle without moving the needle, just as you do to make a bullion knot in the normal manner. But you’ll get less twist in your working thread if you let the needle do the moving.
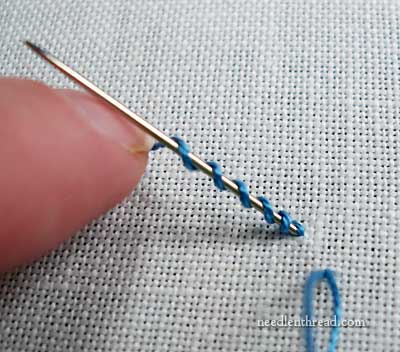
Use your finger to hold the wraps onto the needle.
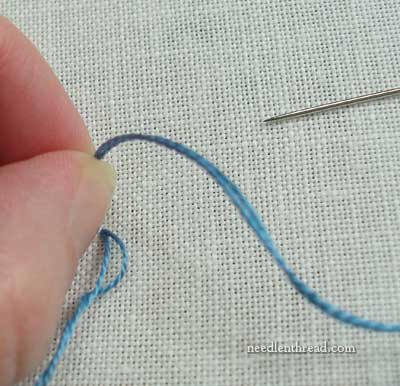
Once you’ve got as many wraps on your needle as will cover the distance between point A and point B (indicated in the photo above), hold onto the wraps with your finger and thumb, and pull your needle and the rest of the working thread the rest of the way through the fabric and through the wraps. Pull the thread straight up and out of the wraps. Don’t let go of them with your other hand, but … you might have to loosen your grip on them a little to let the needle and thread pass through easily.
Once the needle and working thread have been pulled all the way through the wraps, pull the working thread down towards B. You can use the tip of your needle to hold the wraps in place while pulling the working thread a little to make sure the stitch is as tight as it should be (but not too tight to pucker the fabric!). Then you finish the bullion just as you would normally, by taking the needle down at B. Use your needle to stroke the underside and top of the knot, to neaten the wraps if you need to.
Over on the page for the how-to video for bullion knots, there are a few useful tips to working bullions that still apply when working them in this fashion – especially the fact that a milliner (or straw) needle makes it much easier to make a bullion knot.
So, for those situations where you’re working bullion knots on a project set up in a very taut frame, you might try this method of making bullion knots. You might find this is an easier way to make bullions, whether your fabric is in a taut frame or not!
Dear Mary,
Great technique! Thank you for such a useful tip. You ARE a great teacher, making things doable even when they are hard.
Have a blessed day,
Doris HH
Hi Mary, I used this for our stitch play project to make a buillion knot flower.