


When working vertical satin stitches to fill an irregularly shaped area, it’s extremely tempting to crowd the stitch on one side of the design or the other. I think the reason for this is that satin stitch is generally demonstrated in diagrams as worked straight up and down, right next to each other. For example, this is what a typical satin stitch diagram might look like:
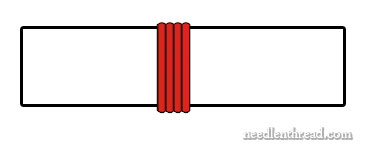
That’s your basic satin stitch, right? The stitches lie parallel to each other, right next to each other, without overlapping. And to achieve that stitch, we know that we come up in the fabric right next to the previous stitch, and we go down in the fabric right next to the previous stitch, too. Isn’t that the way it works?
But what happens when you want to work a vertical satin stitch (straight up and down like the ones in the diagram above), keeping your stitches perfectly vertical and parallel, but you’re filling an area that is irregularly shaped?
Take a look at what I mean:
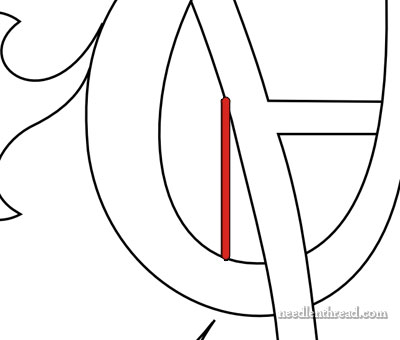
This is part of the Medallion design (only upside down, because, in the photos below, I’m working with the project upside down). If I want to fill the space in the diagram above, where the red line represents my first vertical satin stitch, if I follow the “start-and-end-right-next-to-your-previous-stitch” scenario, what’s going to happen?
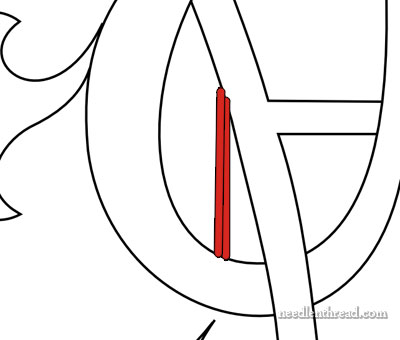
When I add my second stitch, if I crowd the top of the stitches – that is, keep them snuggly next to each other – you can see that the perfect vertical is quickly going to be lost.
In fact, the more I try to keep the tops of my stitches right next to each other, the more the stitches are going to fan out and start turning.
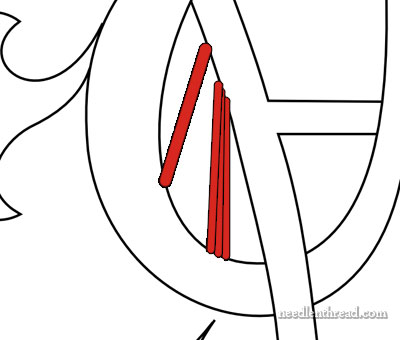
Eventually, the direction of my stitches will end up similar to direction indicated by the larger red line in the diagram above.
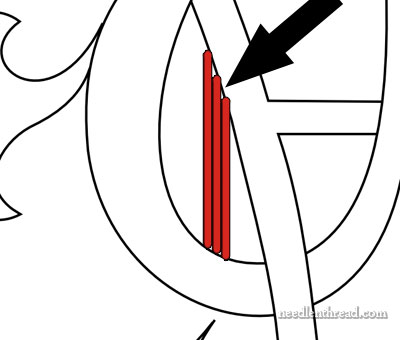
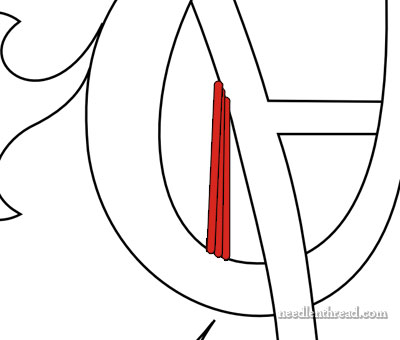
To solve this problem, “step” your stitches. That’s what I call it. I doubt it’s a technically correct term, but the idea is pretty clear: space the top of each satin stitch quite a distance up the slant from your last stitch, stepping up the diagonal line at the top of each stitch. See the resulting “space” between the tops of the stitches? This isn’t noticeable in the stitched product, I promise.
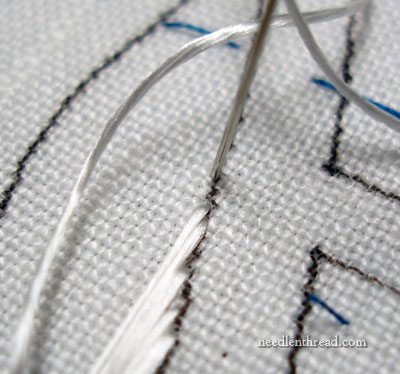
In the photo above, I’m working the exact design area illustrated in the diagrams above. My needle is heading down into the fabric. See how far away I seem to be from the top of my previous stitch?
As I begin the next stitch, check out that gap! I left a good space between the top of the previous stitch and my new stitch, moving up the slant of the line.
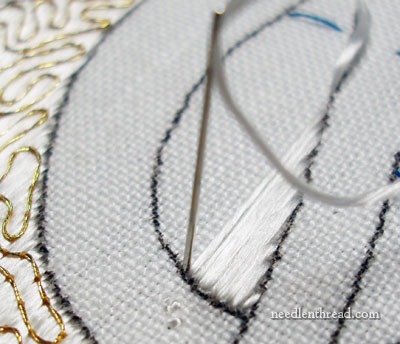
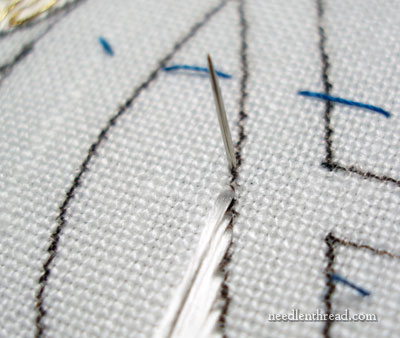
At the base of those stitches, though, the threads are right next to each other.
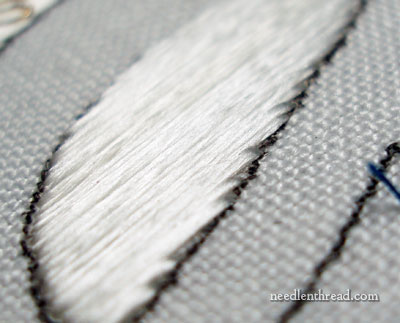
You can see the “steps” in the satin stitch up the slanted design line.
And voilá! Vertical, uncrowded satin stitches.
This applies when you’re trying to achieve perfectly vertical (or horizontal) satin stitches. If you want your stitches to be slanted, then this wouldn’t apply. But if you’re doing “laid work,” which is what I’m doing here – where the silk is stitched down in vertical lines covering the whole area – then you would want to keep those lines as vertical as possible, because your finished product will look better.
So, stepping your stitches when one part of your design is made up of a diagonal line will keep your satin stitching vertical and smooth. Give it a try and you’ll see what I mean!
If you’d like access to all the tips and techniques discussed in the Medallion Project, including complete step-by-step coverage of the Tudor-Style Rose, conveniently collected in one document, interlinked, referenced, and indexed, why not add the Marian Medallion Project e-book to your library? It’s packed full of all kinds of embroidery tips for undertaking a project like this, all in a convenient electronic format for easy searching.
Mary, This is a technique explanation that is extremely helpful. I ran into this situation last night, and encountered the problem, so it’s good to have the solution for future projects.
In fact, it would be very instructive (not to mention saving lots of “bad embroidery technique decisions”), if you could do a series of posts on this same theme, using different stitches and shapes.
I’ve run into this problem using chain stitch in leaf or petal shapes, stem stitch, etc. Heck, this would be a good subject for an “Embroiderer’s Technical Manual”. I’ll be your first customer if you decide to write one!
-Sharon in France
Very clear diagrams Mary, thank you.
thanks so much for showing us that technique.
I notice you didn’t pad the satin stitch or do an outline stitch. Is this because you’re couching it?
That’s right, Alessandra. This isn’t quite satin stitch, either – these are “laid” stitches, so I begin each stitch on the same side that I ended the previous stitch. I’ll have more on that later. But you’re right – no padding. Since this is serving as a background, I want it to be as flat as possible. Good question!
Sharon – as a matter of fact, I’m working on a whole “fillings” series, so in the future, I hope it’ll be quite helpful!
MC
Thank you once again Mary: that’s so helpful.
So helpful! This is a wonderful lesson! Thank you.
Thank you so much, Mary. Just last night I unpicked several inches of jumbled satin stitch. Now I know exactly how to do it! Very timely post for me.
Good lesson! I love the satin stitch but I could not figure out how to fill in uneven/asymmetrical shapes with it so I avoided it there. Thank you for the lesson, now I want to go try it!
nice lesson, thanks a lot Mary.
What a great lesson! I had kind of, sort of, figured that out but your explanation really made it clear for me. And I love the look of that flat silk. In the closeups it looks almost like a ribbon.
Oh wow, that makes so much sense! But I hadn’t figured it out yet, maybe in another year ^_^
Thank you very much!
Good question Alessandra. I was wondering the same thing. Mary, I really look forward to learning more about that and also look forward to learn from your “filling” series!
Questa informazione è corretta
very useful information 🙂 am a new learner n have several times spoiled my embriodery.but i got the solution now.thanks again 🙂 u r the ultimate solution of all my embriodery quieries 🙂