


Maybe you’re wishing you had time to add just a touch of hand embroidery to some Christmas gifts or some table linens or kitchen towels?
The idea behind this episode of Stitch Fun is to demonstrate how to use two simple stitches and no pattern to work up some festive embroidered embellishment. And you don’t have to limit this to Christmas embroidery, either – you can take the concepts here and apply them to all kinds of embroidered greenery, leaves, berries, other fruits, and the like.
First, we’ll start with how to embroider holly, free-style, on anything that needs a touch of Christmas greenery. After we work up the holly, I’ll show you how to add some embroidered evergreen sprigs, and finally, how to easily embroider little round red berries.
The sample I made for this demonstration took about 15 minutes to work up – so really, we’re talking about quick and simple! And this time of year, quick and simple is good.
For this demonstration, I’m embroidering on a piece of natural colored linen (Legacy wren wing linen), using #5 perle cotton in green and a size 2 crewel needle. I’m using a hoop, and you’ll notice that there’s no pattern drawn on the fabric.
To stitch the holly, I’m going to “eyeball it.” This is free-style embroidery with no pattern – I just have the basic notion of your typical stylized holly leaf in my head, and I’m going to reproduce that on the fabric with needle and thread.
Now, don’t panic! This isn’t hard to do – it doesn’t really take any “artistic” sense or skill, either. I’m just using one stitch (fly stitch, worked horizontally) and working up a sketchy notion of a leaf.
If you need a pattern, though, don’t hesitate to sketch one up. It doesn’t have to be complicated. If you google “holly clip art,” you’ll get plenty of ideas of what stylized holly looks like!
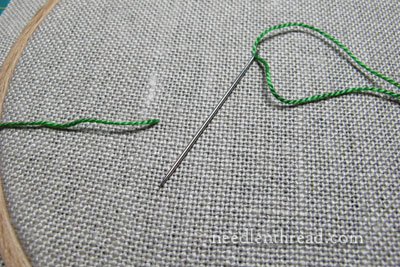
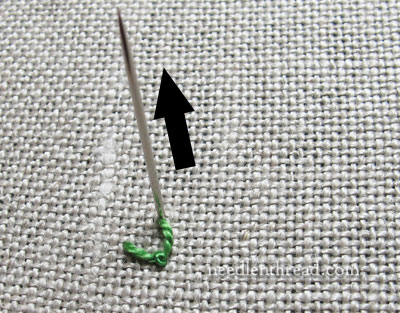
Think of the first stitch as coming up off the stem.
Here, I’m taking the anchor stitch in the middle of the fly stitch. The anchor stitches will form the little “valleys” on the holly leaf edge.
Most of the “valleys” in the fly stitches will not need to be this deep – you’ll vary the depth of the valleys. Because this is free-style and you’re not following a pattern, you can be sure that each of your leaves will be somewhat different!
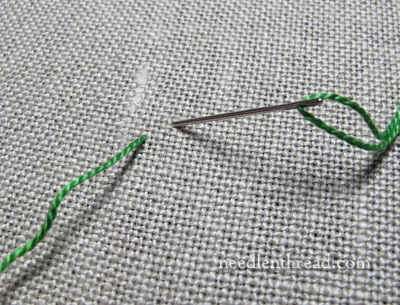
The next stitch comes up in the same hole at the end of the previous stitch. Where the stitches touch like this, you’ll have the sharp peaks of your holly leaves.
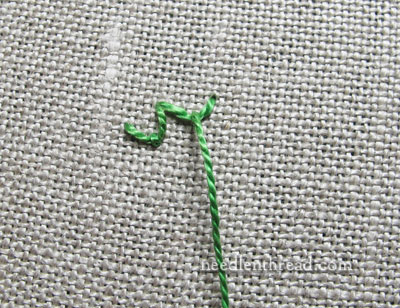
You’re working your way around an imaginary holly leaf here, so keep that in mind when you place your stitch. Notice that the valley on this stitch is not nearly as deep as the one on the first stitch – it’s just a gentle scoop in the middle of the fly stitch.
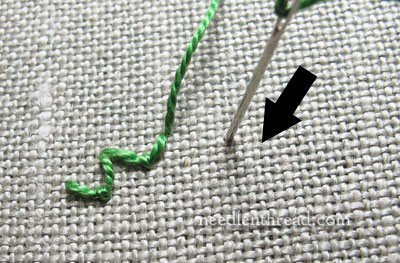
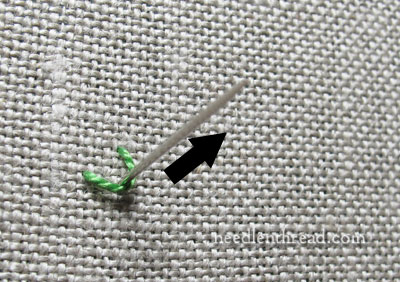
Come up in the same hole at the end of the previous stitch, and work another fly stitch, following your imaginary leaf shape.
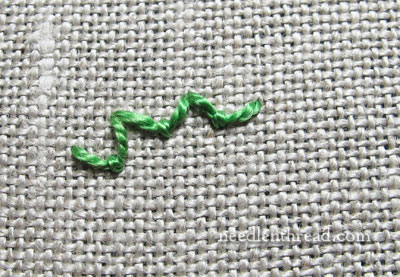
Three fly stitches…

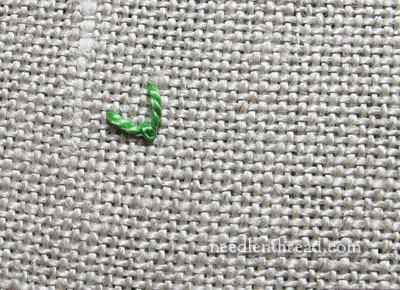
… and the fourth fly stitch completes the first side of the leaf. Now, I’ll start heading back in the other direction, to work the opposite side of the leaf.
And here I’m coming back to my starting point.
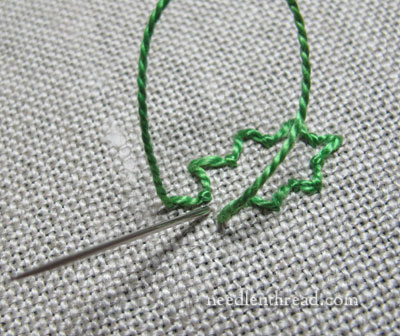
I’m going to bring this last stitch in nice and close to the first on this particular leaf. Remember: each leaf will be different, so just work out what you think looks best as a holly leaf shape.
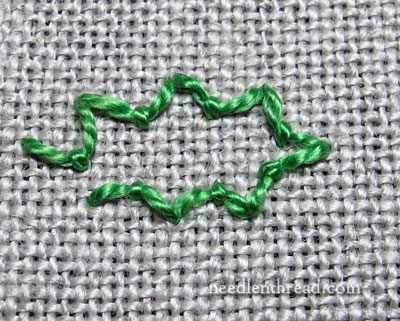
There’s my first leaf, with somewhat of a stem to it! Kind of odd, but it works.
Now, working around that first leaf, I’m going to add other fly stitch holly leaves.

I’m bunching them around in a kind of corner arrangement – kind of like the typical holly corner pattern we used to draw with crayons when we were kids. It’s exactly the same idea!
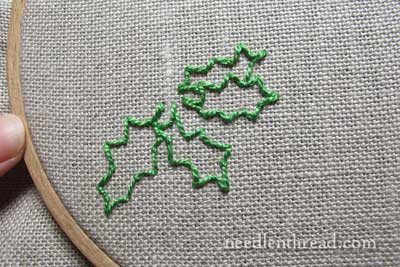
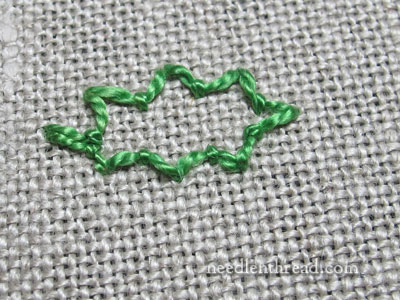
And there are my four leaves. Notice the second one in from the left – it’s a bit wonky, but that’s ok, because it’s holly. And holly is not always perfectly symmetrical!
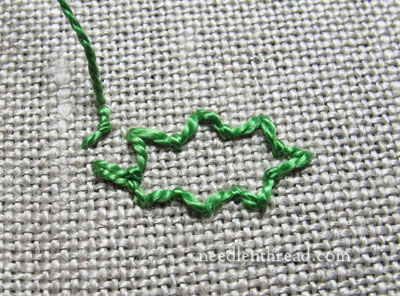
To touch it up a bit further, add a fly stitch in the center of each leaf as a vein.
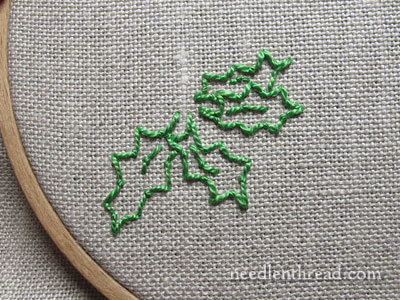
So that’s the beginning of my fly stitch greenery. Very simple and very quick! Really, you’re looking at less than five minutes here!
It’s not fancy embroidery, but it’s fun embroidery! Next, we’ll add some sprigs of evergreen and then some berries – and I’ll show you how I use this idea to add just a tiny personalized touch to Christmas gifts.
Stitch Fun is a series of embroidery tutorials here on Needle ‘n Thread that demonstrate some different and fun things you can do with individual embroidery stitches and their variations. Feel free to check out the other tutorials in the Stitch Fun series!
Awwww Mary, that’s sweet. Thank you. Cheers, Kath.
Thank ‘ s mary ..it’ s very nice …I like it
NICE! I like it! I’ve also done free-style “bling” embroidery on a few baby quilts. Including using glow-in-the-dark thread on the net on the “Winkin, Blinkin, and Nod” quilt.
How incredibly cute and easy!! What a genius you are, Mary!!
Hi Mary,
This is incredible – to see the holly created before my very eyes with such a simple stitch. I am so fascinated with what you are able to do – Again, I am such a simple one, BUT I can handle this!!
Thanks for such encouragement and generosity.
I have been looking for something like this. This is wonderful!! many thanks.
Brilliant! I am making a crazy quilt Christmas stocking and this will definitely be a prominent stitch! Thanks so much
Thank you for this. It was just what I needed. I’m pretty new to embroidery and definitely subscribe to your newsletters. Even newer to hardanger and am making Christmas decorations basically from a picture. One piece required a poinsettia and holly leaves. The poinsettia I figured out but the holly leaves were beyond me, so I googled and up came your tutorial. It was terrific. Thank you. I’d never have thought of fly stitch.