


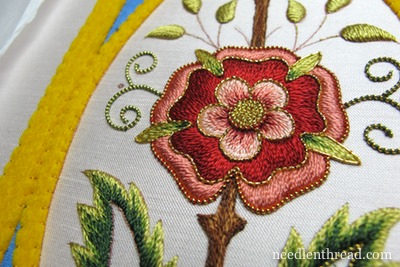
With the goldwork on the main rose on the Mission Rose project finished, I moved on to the curlicues on the side of the rose, and then onto the large leaves.
Before I delve into a deep explanation (there actually isn’t one) of why I did the leaves the way I did them, I should probably remind everyone again that this is a stylized design. That is, it’s not supposed to look real.
And. Uh. It doesn’t.
Here are the two curlicues finished. Again, these are worked in stretched pearl purl, with two strands of green Soie de Paris twisted around it, and then couched down with one strand. They look like they are different colors in the photo only because of the shoddy lighting. They’re definitely the same color green.
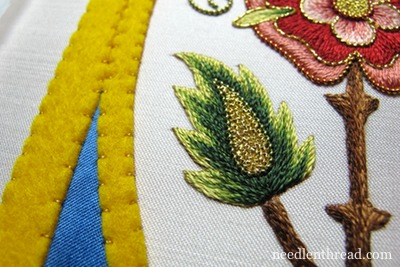
And then, on to the center of the large leaves. The center is outlined again in the stretched pearl purl, this time twisted with two strands of dark green Soie de Paris.
The inside is filled with goldwork chipping or chip work – little bits of bright check purl, cut into small lengths (about 1/8″ long), and sewn down like beads in random directions until the space is filled.
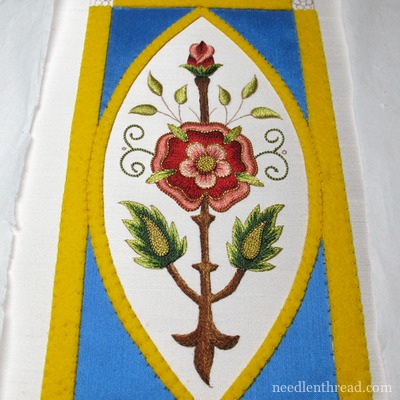
Here we are, stepping back a little way to see the whole thing so far.
Now, before you get too alarmed over the gold filling in the middle of the leaves (which echoes the gold filling in the middle of the rose), I should probably warn you that it’s going to get worse! But, in getting worse, it will look better. The leaves (in fact, every element in the design) will be outlined in gold. And that outline will tie the whole thing together.
As soon as I have my computer situation sorted out (yes, the blasted thing Died the Death, so I’m replacing it) and I have all my regular photo editing software and all my familiar tools, I’ll supply you with some better close-ups, I promise!
If you’d like to follow the Mission Rose Project from its beginning, feel free to visit the Mission Rose Project Index. There, you’ll find information on the design source, you’ll find the pattern (which you can print out for free and use to create your own Mission Rose), and articles that cover materials and techniques.
whoa beautiful….
Gosh, are you going to outline all the brown stems in gold too? That will be a lot of gold!
Oh, yes, Monica! Everything….! 🙂
Love it, love it, love it!!!
Dear Mary
It looks great I love the goldwork on the curlicues and the chip gold work in the centre of the large leaves and when all the goldwork is sewn on it will look lovely, I find embroidery always looks awkward halfway through the project but as you say comes together eventually, great work.
Regards Anita Simmance
Mary,
The goldwork looks great. I like the way the rose, stem and leaves are coming but I just cant’t wait for that yellow to be covered.
Dear Mary, your Mission Rose is beauteous. Like all roses it grows from a brown, sturdy stem to become a blooming delight.
Mary,
Great work! The blue gets prettier the more you work on it. I’m curious, will it hang on a bedroom wall or is it a gift?
Also, what motivates you when you’re about half way done with a project and suddenly want to chuck the thing out the nearest window? I’m losing steam, sigh.
Best,
Maureen
It’s coming along~ I’m looking forward to the yellow felt being covered. Will there be color there, or just the gold?