


Yesterday, we looked at the Spanish Knotted Feather Stitch worked closed, so that it produces a nice, complicated-looking (but not complicated at all!) braid-like line.
We looked at those stitches very close up, and I received some questions about how I get clear close-ups like that, and some questions about the camera I use.
Since I was working on some stitch samples for another project yesterday, I have a few photos on hand that I can use to explain what I do when I take photos of stitch samples.
You should probably understand right off the bat that I am no professional photographer. If you want professional photographic advice to produce professional, gorgeous photos, you’ll want to ask someone else!
First off, there’s the photo equipment that I use when embroidering. My camera criteria is pretty simple: it must take high resolution photos easily and quickly, without having to spend a lot of time fiddling with the camera.
Equipment I Use for Photographing Stitches
Camera: Right now, I’m using a Canon PowerShot G12 to take photos for the blog. It’s not the most up-to-date model of the PowerShot, as I’ve had it for a while.
The PowerShot has some features that make it easy to use – it’s essentially a point and shoot, but you can manually adjust some things to improve your photos, depending on what you’re photographing. Or you can just put everything on auto…
Most importantly for what I do is the fact that it has a macro setting. Most digital cameras do – you just have to know how to turn it on. So read your manual and look for the macro setting! It’s usually pretty easy to find.
Another important point for me: it’s not a complicated camera. I don’t have to spend a lot of time manipulating anything in order to take pictures for the blog – I can just grab it and shoot the photos I need as I go. They aren’t professional photos, but they do the job.
Another important point: it’s a good camera, but it didn’t break the bank.
Lights: I use BlueMax lights in my workroom, and they work really well for taking photos. The color spectrum is right, the lights are good and bright, and I can bend them and move them if I need to manipulate where the light’s coming from.
OTT lights won’t do it, if you want sharp pictures. For one thing, though you might not normally notice it, OTT lights pulsate. The camera does notice it! Another thing: they just aren’t bright enough.
Sunlight: Nothing like good sunlight for good macro photos – just be aware of shadows.
Taking the Picture
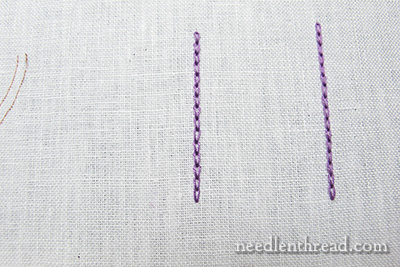
The picture above was taken with my camera on a macro setting (that’s the setting for close-ups), and the lens was practically on top of the fabric, which is evident by the shadow at the bottom of the photo.
The shadow is there because I didn’t have the right light set up when I took the photo. Why not? Because I was being lazy, and because my work area was such a mess, it couldn’t accommodate another light!
For the photo I was taking, I wasn’t concerned so much about that whole shot. I really just wanted part of the chain stitch line in the photo, and, by cropping the photo, I’ll lose the shadow.
Those lines are just less than two inches long. Each chain stitch is 1/8″ long. The thread is coton a broder #25, which is a somewhat fine thread.
So there they are, two chain stitch lines, with 1/8″ long stitches, taken fairly close up with the camera.
If I took the picture as far away as my eye when I’m doing the embroidery, you would see even more of the fabric, and even less detail on the individual stitches.
And, as it is now, it’s not the best photo for instructing on anything, because you can’t really see much detail.
After I take pictures, I load them on my computer. I use a Mac and I use Photoshop to edit my photos. There are plenty of other more economic software options out there for photo editing, though. I use Photoshop pretty much because I’ve always used it and I’m familiar with it.
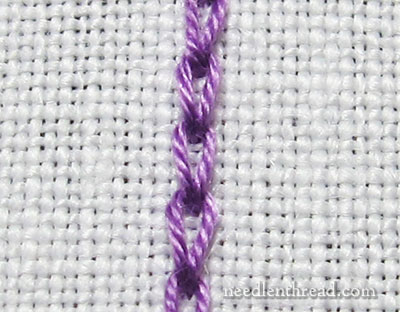
I crop the photo to the area I want to focus on (see the photo above) and make any adjustments in brightness, contrast, etc. Then I re-size it so that it fits on my website (400 px in width).
The resulting photo shows the stitches a bit out of normal proportion, when it comes to the real size of the line of stitches and of the individual stitches!
But this way, you can see every detail of each stitch, and in fact, every detail of the thread. I figure, if my purpose is to instruct on the movement of a stitch, you need to see everything in detail.
A. Above, the original shot, relatively close up using the macro setting.
B. Above, the cropped version.
So that’s how I get my close-up photos. No big secret! But if you’re trying to figure it out, I hope that helps!
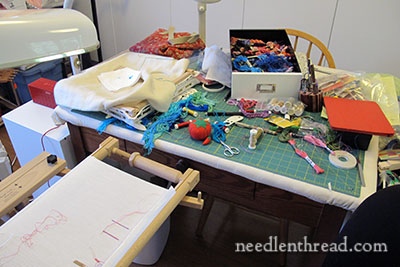
And I meant it when I said I had no more room for another light. I suppose my workroom is a mess (again!) because it’s Wednesday. I’m not sure why my Wednesdays start this way, but it will end on a much tidier note, I promise!
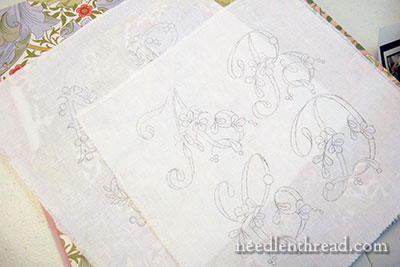
Another little thing I got done: I transferred some monograms onto small pieces of left over linen, to play with different approaches to these particular lettering designs. If I manage to actually get around to working on them, I’ll share them with you down the road!
Now, off to straighten and organize, so I can think again! Hope you have a jolly day!
Dear Mary
I always admire the way you are able to get such detailed close ups of photos, I must look for my macro on my GE camera, I’m thinking of investing in a new camera because I don’t particularly like the GE it was a present, my Niece had a panasonic camera and that looked really good so we will see it depends on cost. Anyway photoshop looks a good app to have especially for your purposes I like the fact that you can edit and crop your photos. Your workroom looks good and the monograms look nice can’t wait to see what surprise stitches you have instore for us. Have a good clean up and thanks for informing us of the technologies you use for your photos.
Regards Anita Simmance
I think your photos are great, as are your instructions. Thanks again for your tutorials!
Thank you for a great lesson. Always a joy to visit and learn from you.
Thanks for this post. Your photos are far better than anything I’ve ever taken, and its good to have some quick and easy information on how you do it.
Dear Mary,
Thanks for sharing once again in a simple and straight forward manner your skills and insights. You always seem to know the details one needs to understand the subject at hand.
Thanks!
Jayne
Oh good! It’s such a relief to know that it’s okay for our work area to be a mess on Wednesdays (because Mary says so!). I have a Canon PowerShotSD1200 IS and it’s a wonderful little camera, and better yet, it’s cheap.
Thank you for this tutorial. Taking photographs of one’s work is tricky. My husband paid a professional photographer quite a lot of money for his portfolio, but the pro’s shots were no better and in many cases worse than the ones we took ourselves. So it often doesn’t pay to pay for your pics (sorry about the pun).
We use Canon digital point and shoot cameras – I can’t recall the models/types but they are very easy to use. The one I have is lighter but even so I am finding it impossible to hold still with the result that all my photos are blurry. Out with the tripod! My husband also uses a Nikon digital SLR but it is too heavy for me. I like natural daylight best and do most of my photography indoors (in a south-facing room – read north-facing for those of you on the other side of the equator)on a bright day which gives good colour definition and no shadows. We have experimented with photographic lights and umbrellas and all that but for my purposes, daylight is fine. I agree with macro that essential as is the facility to turn off the flash.
As far as post-camera manipulation is concerned, I do as little as possible. I don’t have Photoshop (mainly because of the $) but I do have Paint Shop Pro and a couple of other lesser programs and they work well for my purposes. I am not using my work to teach as Mary is so that homing in on the detail to that degree is not something I do often.
You are absolutely right about the whole process though – it should be fun, it should be easy and it shouldn’t cost arms and legs.