


Last week, we chatted a bit about silk chenille hand embroidery embroidery thread, looking at it up close, discussing what it is, and how it’s been used in embroidery for centuries.
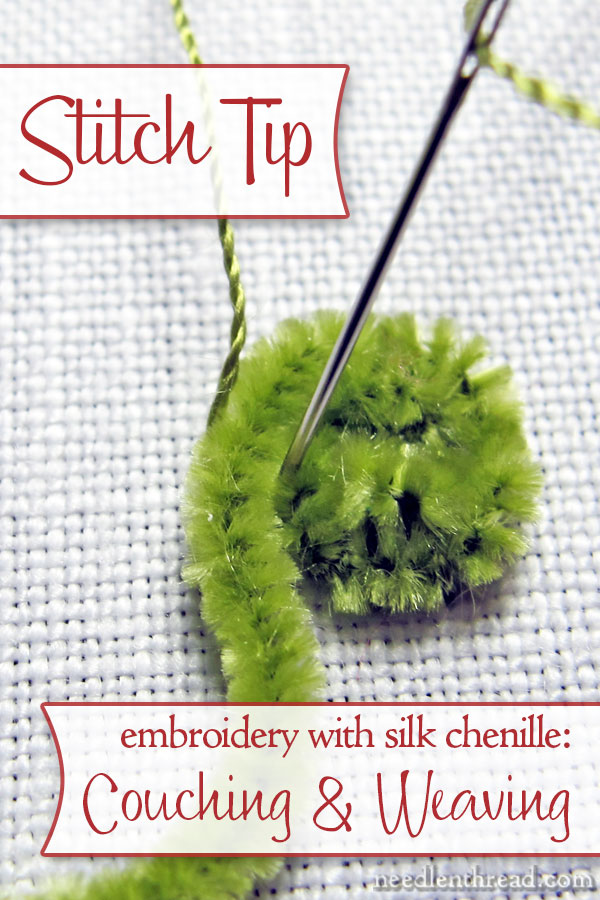
Welcome to part 2 of a 3-part series on silk chenille, where today, we’ll look at two basic approaches to embroidery with silk chenille.
Right off the bat, I’ll tell you that silk chenille is certainly not the easiest thread to work with in hand embroidery. Because of its fuzzy nature and its structure, silk chenille can be a real challenge.
If you’re using it for the first time, take it slowly and start with some techniques that will yield you the most successful results with silk chenille.
That’s why I’m splitting this into a three-part approach to the thread: an introduction to silk chenille, which we covered last week; basic approaches to stitching with silk chenille, which we’ll look at today; and finally, in the third article, we’ll look at some other stitching techniques that can be managed with silk chenille, but that are a little more challenging.
Today, two basic approaches to embroidering with silk chenille: couching, and woven stitches.
Because couching and woven stitches don’t pass through the ground fabric too often, silk chenille gets along with them very well!
Couching with Silk Chenille Embroidery Thread
When couching, you don’t have to worry about cutting your thread to a specific length. You can cut the chenille thread at the end of your couching adventure. Normally, when working with chenille that’s passing through the fabric, you work with very short lengths (we’ll cover this more in part 3). But with couching, since the thread isn’t passing through the fabric, you don’t have to cut it until you’ve finished covering the area you want to couch over.
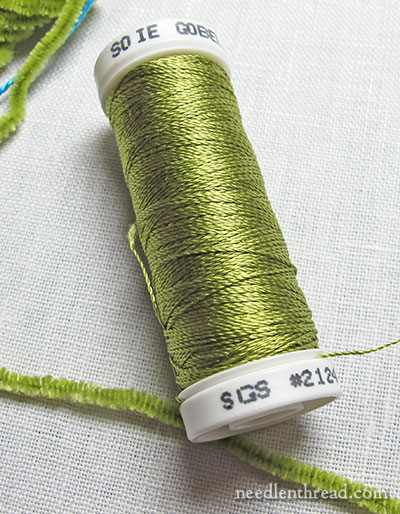
When couching silk chenille, you want to choose a couching thread that’s the same color as your chenille thread, and that’s relatively fine.
In this case, I’m working with Soie Gobelin, because that’s the closest green I had that would work well as a couching thread.
Now, you can use other colors to couch – sometimes couching looks great when worked with contrasting colors – but you won’t get the same effect with chenille that you do with other threads. The couching thread (the finer thread that stitches the chenille down) sinks into the chenille, so you don’t really see it. If you use a contrasting color in there, you’ll see speckles of color amidst the fluff, but nothing uniform.
You might want that – it’s definitely something you can play with – but for the most part, this type of couching is usually done in a matching thread.

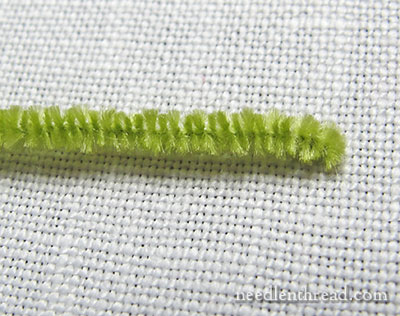
Before I start couching the chenille, I like to secure the starting point onto the fabric. To do this, I strip the the fuzzies off the end of the chenille thread, plunge the end into the fabric, and secure it on the back with the working thread (the Soie Gobelin in this case).
Stripping the end makes it easier to plunge the chenille thread through the fabric and it lessens the bulk of the thread on the back of the fabric.
Just strip about an inch or a little more off the end of the thread, thread the naked end into the needle, and plunge the end of the thread into the fabric.
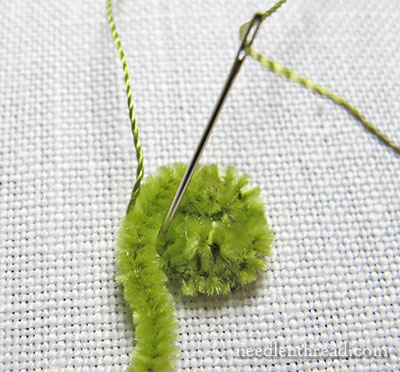
There’s the initial plunge, securing the chenille thread right where I want to start couching.
If you’re not sure how couching works, take a look at this how-to video on couching embroidery threads.
Use this basic couching stitch to secure the fuzzy chenille to the fabric, following your design line, or filling the area you want to fill.
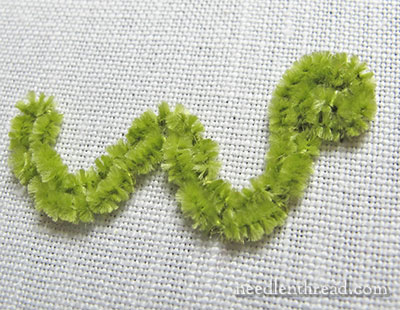
I really didn’t intend to couch a worm. It just sort of happened…
Each place that you take a couching stitch, the chenille fuzzies will separate a little bit, so, while couching, try to work each stitch carefully into the fuzz to minimize the separation, and when you’ve finished couching, lightly brush the area over to refluff the thread.
When you get to the end of your design line, cut the thread an inch or so longer, strip the extra, and plunge the end to the back of the fabric. Then secure the naked chenille thread to the back with your couching thread.
If you already know how to couch thread, you pretty much know how to couch chenille thread – it’s easy! And it is easy on the chenille thread, too.
Woven Stitches with Silk Chenille Embroidery Thread
Woven stitches work great with chenille thread, because the chenille passes under the anchoring stitches rather than into the fabric.
With woven stitches, just like with couching, you only plunge the chenille through the fabric and the beginning and end.
When weaving stitches with chenille thread, use a large tapestry needle (size 20) for the chenille.
For this demo, I’m stitching a kind of “attached” woven picot.
Although the result will look nothing like a woven picot, the weaving movement here is just like the weaving movement used to work a woven picot.
You can see photos of the woven picot here, as well as a how-to video, if you’re not familiar with the stitch.
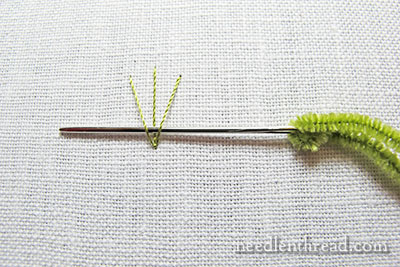
I cut the chenille thread about 8″ long, to make sure I didn’t waste any. You’ll want to cut the chenille long enough to complete the woven filling, though, but not so long that the thread wears out from passing over and under the anchoring stitches.
For this demo, I simply wove the chenille over three straight stitches fanned out from one point.
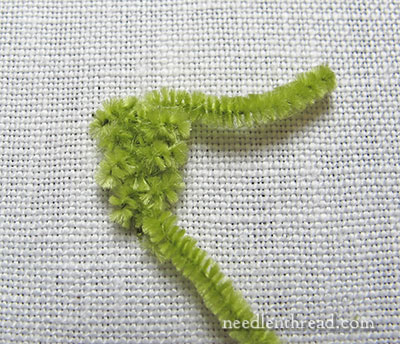
With this woven element, I did not plunge the thread at the beginning of the stitch. I wanted to make sure I could tuck the end under the woven area, so it was better to leave tails on each end.
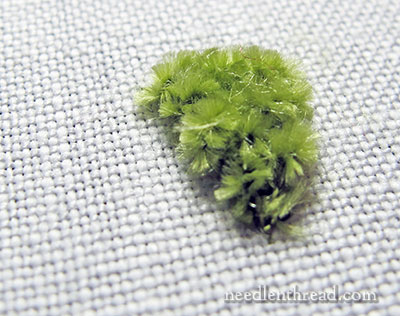
Here’s the resulting lump of glorious silky fluff!
Once the weaving was completed, I cut the thread, and using a large chenille needle (size 18), I plunged the ends (without stripping them) to the back. Then I stripped the fuzz off the ends and secured the thread on the back with the same thread used to create the anchoring stitches.
Other Woven Stitches that Work with Silk Chenille
Other woven stitches work well with chenille, especially this woven wheel stitch (you can make fluffy chenille flowers with it) and this woven filling.
Where to find Silk Chenille
I’m using Au Ver a Soie’s silk chenille for these demos, and you can it through locally owned needlework shops that carry goods from Access Commodities. Many of these shops are online, too. You might try Thistle Threads as well, since they carry some of the Au Ver a Soie specialty threads. It’s a very smooth silk chenille – there are no lumpy blobs and blips in it. There are other silk chenilles out there, but I can’t vouch for individual brands that I haven’t tried.
In Part 3 on Silk Chenille, coming up a bit later, we’ll explore using silk chenille with other types of embroidery stitches.
Questions, comments, suggestions? Tips, insights, or foresights? Feel free to chime in below!
I have used silk chenille on a beautiful white sampler. While a little frustrating to work with, the results are well worth all the care and effort
Good Morning Mrs. Corbet! Thanks for the cute little worm for me to think about at the hospital later today. You know, I think if someone embroidered the illustrations of “The Hungry Caterpillar” with this stuff it’d be a match made in heaven for a nursery!
Still, the more I see of this thread the more I think, “Girl, you can dream but this stuff’s like real metal threads. Your hands can’t handle it!”
I want a blanket, footie-pajamas, and slippers made out of this tread. I don’t necessarily want to stitch with it myself! Still I am learning so much! Thank you, thank you, thank you!
Dear Mary
I’ve not heard of Chenille silk thread and it looks a great thread for outlining or on a fun embroidery project, or grass, a tree lots of uses come to mind, I love the worm and the fuzzy leaf. I’m looking to purchase this in the UK so I’m in process of searching different sites as these specialists threads are hard to come by in the UK. Thanks so much for showing us how to use Chenille silk thread and for the tips and techniques, I can’t wait for the next instalment using Chenille silk on other embroidery stitches.
Regards Anita Simmance
Years ago I bought a stash of it and hated it so I threw it out! But it looks like you’ve done something nice with it, which I could not do.
The green! It reminded me of the “hungry caterpillar”, too, and I was smiling about every picture, because it really looked like a fuzzy green caterpillar crawling and /worming/ its way across your fabric! 😀
I like couching thicker threads or cords, although I can´t really see myself working with the chenille like that… But I´m looking forward for the next part in this series, and thank you so much for sharing all these amazing things!
All the best wishes, Marion
Hello Mary, I have not used chenille before so I look forward to getting some. Can’t wait to see part 3. Thanks
Victoria
For some reason, I’m now feeling an urge to embroider a cat . . .
I’ve never thought of weaving with the silk chenille and pretty much have limited myself to couching so thanks for the great tip. I will certainly be using this idea. <3