


With Christmas a mere two weeks away, you might be thinking it’s a little late to start embroidering an ornament.
And normally, I’d be the first one to agree with you, especially if Said Ornament was a fancy-schmancy one, embroidered with hard-to-find threads and supplies.
But would I do that to you, right before Christmas? No, no, no! This is a fun and quick project, something to relax and enjoy, while making something special.
In this 2014 Christmas Sampler Ornament series, we’ll discover how to embroider a Christmas ornament with whatever we have in our stash, and how to put the ornament together and have it hanging on the tree (or wrapped in a box for gift-giving) well before Christmas arrives!
Today, in Part 1, we’ll talk about materials, setting up the project, and working the first stitches. Then, in subsequent articles, we’ll concentrate on more embroidery ideas and finishing.
The whole idea of this series is to show you how to work up a quick Christmas ornament with fun stitch choices and various thread types.
Working from your stash as much as possible, feel free to make adjustments in the types of stitches and embellishments you want to use on your own ornament. Think of the ornament as a kind of little stitch sampler.
In other words, don’t feel obliged to do the same thing I do. You’re free to improvise!
To begin, let’s talk about embroidery supplies.
Supplies for an Embroidered Ornament
- Fabric: a piece of high-count, firmly woven linen, in whatever color you want as the main color of your ornament. I’m using white, Alba Maxima linen. To embroider both sides of the ornament, you’ll need a piece about 5″ x 8″ (with room for hooping or framing up). If you only want to embroider one side and back the ornament with decorative fabric, you’ll just need about a 5″ square of fabric, with room for hooping or framing up.
- Threads: any colors you want in any threads you want to use. I’m using a combination of cotton threads (perle cotton in various weights and cotton floss) and some wool threads. I’ve chosen a color scheme of Christmas red, pinks, white, and bright green. I might throw in some accent colors along the way.
- Embellishments: any beads, specialty beads, buttons, charms, silk ribbon, metal or metallic threads, specialty threads and the like that you might want to add to your ornament. I’ll be using beads, some specialty threads, and perhaps a touch of ribbon here and there.
- Tools: hoop or frame, scissors, needles of various sizes and types
To prepare for working the ornament, I grabbed an empty photo box and went through my stash, pulling threads, ribbons, beads, and anything else I thought might come in handy, that fit the color scheme and theme I have in mind for the ornament, and I threw it all in the box.
I probably won’t use everything I pulled, but it’s all there in one box, so I don’t have to go digging for it elsewhere. The box also gives me a place to tuck everything away at the end of a work session, so I don’t end up with another disorganized mess on my table!
Fabric Set Up
Once you have your supplies gathered, it’s time to set up your fabric and start stitching!
To set up the fabric, you just need to hoop it up or frame it up, so that it’s drum tight and ready for stitching. Use whichever you prefer – a hoop or a frame will work. Because the ornament I’m making will involve many different types of embroidery techniques and stitches, I used a frame because it’s easier for me to have both hands free using a small frame on my floor stand.
Then, transfer your design – which, in this case, is just a series of concentric circles, but you can use any type of shape you want with the same techniques. Don’t feel like you’re limited to a circle! I’ve included a printable PDF below with two circle sizes on it, a star shape, and a heart shape, in case you want to use any of those.
I transferred my design using this embroidery design transfer method we talked about yesterday.
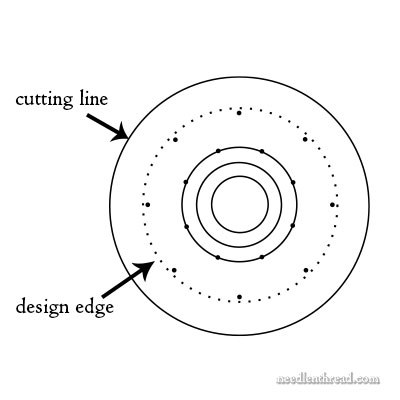
The outside line of the circle, as shown above, is the cutting line. The second line in is the design edge and the first stitching line. The dark dots are there so I can work a wavy line in that area using DMC Memory Thread. The large dots mark the crest and trough of the waves. You don’t have to transfer them, but it’ll help keep things spaced evenly if you want to couch a wavy line on your ornament, too.
Once the design is transferred, you’re ready to start stitching!
For the simple finishing technique I’m going to use on this ornament, a backstitch line along the design edge is essential.
So, I started out by working the backstitch along the design line (the second line in on the circle). It just so happens that the dots in the design are spaced just right for backstitch in a #3 cotton perle. When I transferred the design using the prick-and-pen transfer method I talked about yesterday, I pierced each dot on the dotted design line, so that I could space my backstitches accurately.
To work the backstitch in a #3 perle cotton on this type of closely woven linen, a chenille needle works well. I used a size 18 chenille needle.
When working the backstitch, make sure to pull the stitches snug to the surface of the fabric. You don’t want the stitches bulging up loosely from the fabric, because this will affect the finish of the ornament.
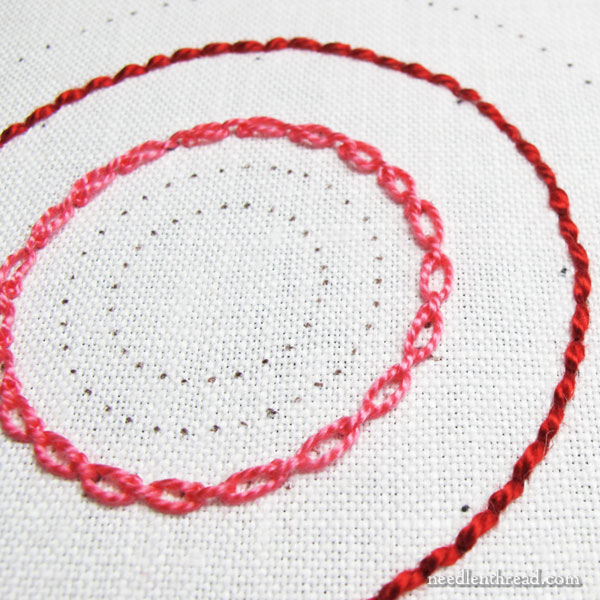
For the next circle in on the design, I worked a cable chain stitch around the circle in a bright, light pink perle cotton #5.
Can you guess where I’m going with this?
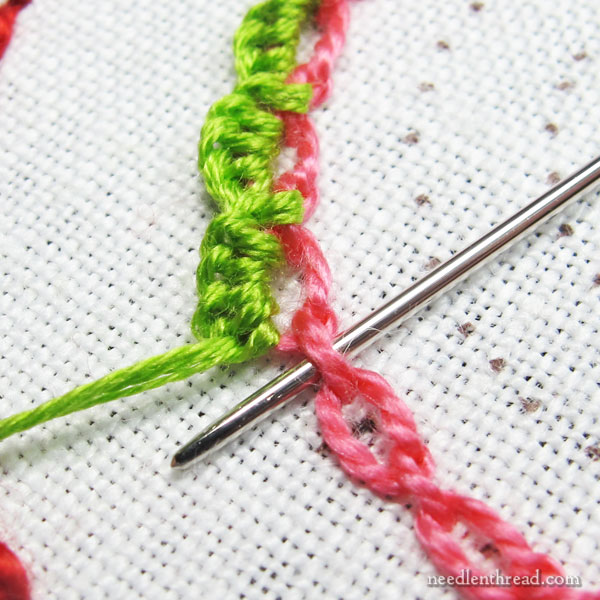
Over the outside loop of the cable chain stitch, I worked a buttonhole scallop using four strands of regular cotton embroidery floss in bright green.
This is the same technique I used for this tutorial on the buttonholed cable chain stitch, with two differences:
1. I worked one buttonhole stitch over the straight link between each chain, as shown in the photo above.
2. I only buttonholed the outside loop around the circle, instead of both sides of the chain stitch.
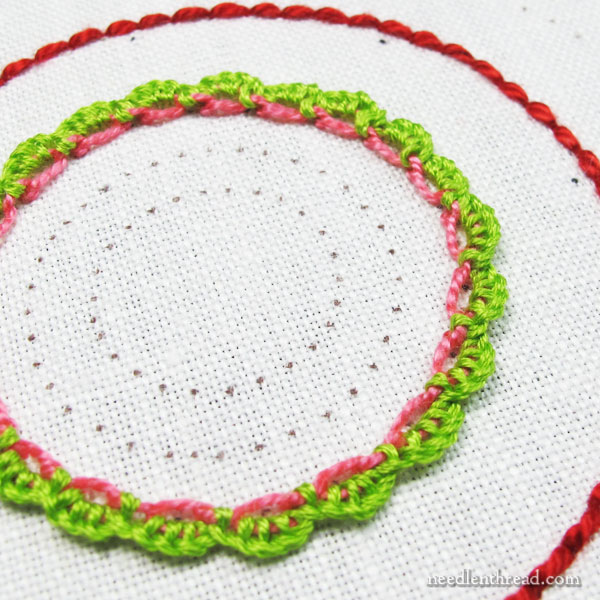
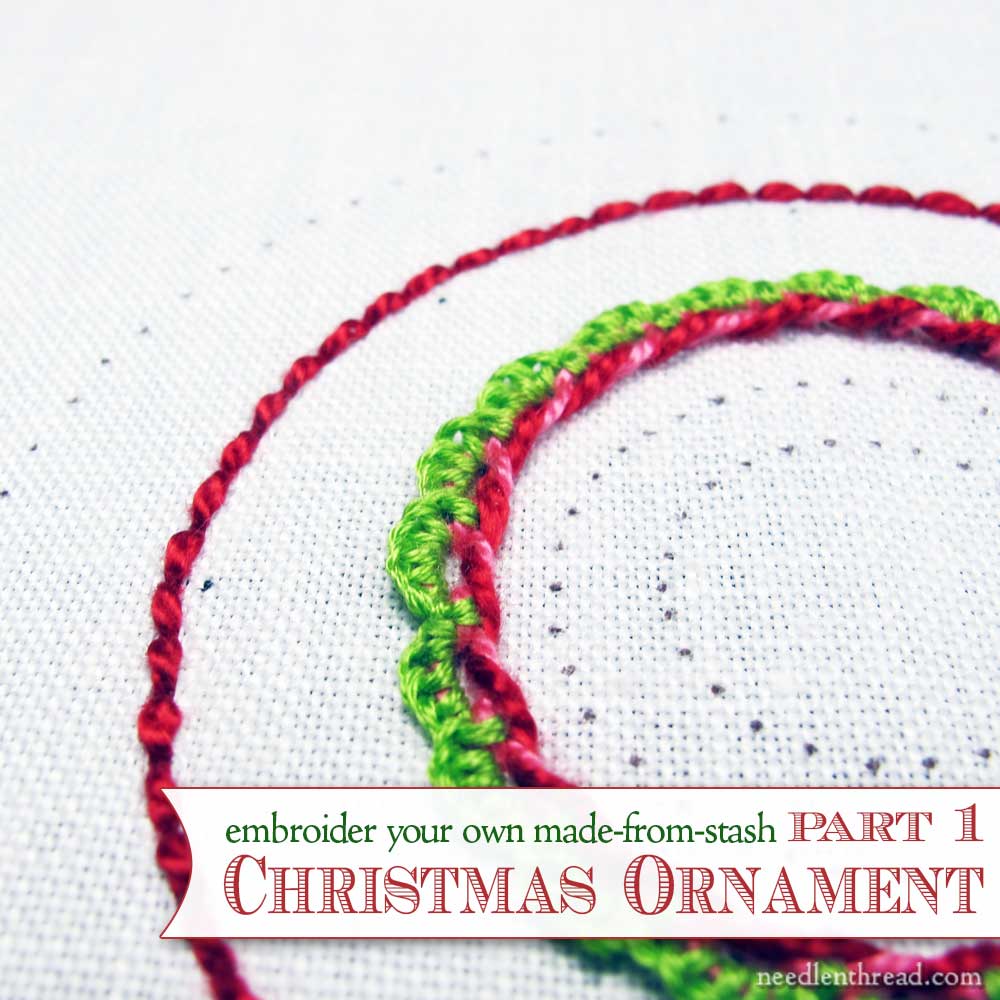
Here’s the completed circle, with the buttonhole scallops worked over the outside loops of the cable chain stitch.

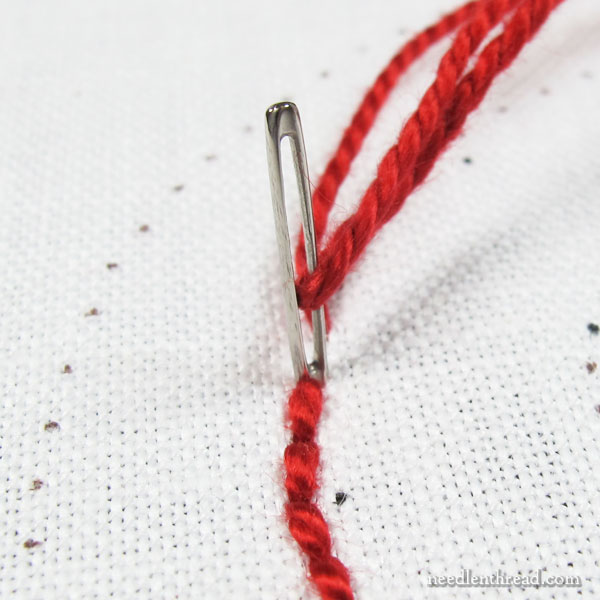
To finish this decorative circle on the ornament, I threaded the #3 red perle cotton into a #18 tapestry needle, and I whipped the inside loops of the chain stitch, all around the circle.
You can see how to whip embroidery stitches in the first half of this video on whipped backstitch. You can also learn more about lacing and whipping embroidery stitches here, to get a good idea of how to go about doing this.
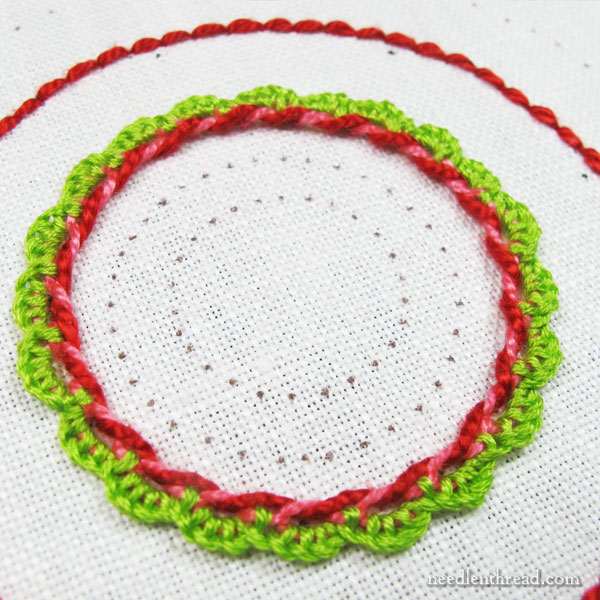
So here’s the first part of the embroidery on the ornament, finished. It includes the design line stitched in backstitch, and the first inner circle stitched in a composite of buttonholed cable stitch, whipped on one side. Total stitching time: about 40 minutes.
Christmas Sampler Ornament Pattern Printable
The following PDF includes a star shape, a heart shape, and two circles, all of which are suitable for making Christmas Sampler Ornaments. If you print at 100% (or choose “no scaling” in your printer options), they’ll print the same size as the ornament I’m making. The large circle will finish at 3″ round.
2014 Christmas Sampler Ornament Patterns – PDF
Over to You…
In the next article on this project, we’ll continue with the embroidery on the inside of the ornament.
In the meantime, any questions? Comments? Suggestions? Feel free to have your say below!
Needle ‘n Thread, Daily!
Did you know there are seven terrific reasons to sign up for the Needle ‘n Thread daily newsletter? Check them out and sign up today!
Good morning Mary! Love the stitches on ornament. What a way to start my day! So love handwork!! Will follow daily ! Love your morning e-mails. Very inspiring!!
Good morning, Mary Beth! Glad you enjoy it! The ornament so far has been fun, fun, fun – can’t wait to get back to it this morning!
Hello Mary, thank you for the nice project!
My question – is 32-count linen (Belfast from Zweigard) is enough high-count for this project or it’s better to take 40-count fabric? Meanwhile I’ll collect my threads 🙂
Hi, Maria – it depends on how closely woven the 32 count is. Do the threads fill the weave, or are the threads pretty fine, so you can see space between them? You can always back it with a piece of muslin, to help support the stitches, though. That’ll work just as well – you’d just have to do a little extra trimming at the end.
Thank you! The shapes are starting to call me. Maybe some bead embroidery in my near future?
Next year can we have a year of Drawn
thread, pulled thread, schwalm and all those lovely monocolour embroideries. These last years have all been so flashy, something stylish might be nice for a change. Show us how the italians set up there work there are so many of us that are just deleting now.
Good point, Jean. How do we Italians set up our work? In the following order:
Attention to detail, which means perfect mastery of the basics, choosing a pattern and stitches that complement it to a T, provided that the right material has been selected, once we have learnt to feel the fabric by touch and technique, playing with contrasting and shading and decided what type of threads we are prepared to use or try. Then we transfer the pattern and check again that all of the above satisfies the requisites, including the purpose and pleasure one derives from embroidery.
All of this requires precision, which is what all of Mrs Corbet’s flashy blogs and step-by-steo videos and indexes show tirelessly. It must work, since the best Italian embroidery sites I visit have a link to Mrs Corbet’s website.
Happy Xmas to you all. Buon Natale a tutti voi.
I couldn’t disagree more, Jean. Mary can’t hit 100% of peoples needs and likes 100% of the time. There are thousands of us who are in awe of her talent and energy, not to mention her knowledge! I say keep up the GREAT work, because most of us need her.
Thanks for that, Roberta! Yes, it’s something I wrestle with, the whole “pleasing everyone” problem. I guess in the end, it comes down to what I can manage, and what we can all draw out of any project, to apply to our own endeavors, no matter what techniques we prefer.
Oh, Mary,
Your newsletter yesterday was so helpful I have been trying without much success to put a pattern on linen. It seems to slip and slide all over. I never thought of hooping the fabric first….thank you thank you.
I’m so excited – i’ve been waiting for this – i’ll just leave the window open on pc. i cannot read now because in middle of christmas cards and online shopping but really happy it is here, maybe i can get supplies ready later color me happy
What great little projects–I have been away from surface embroidery for so long and ornaments like this are perfect for getting back into non-counted stitching—they would make wonderful scissor fobs also–and a chance to try out a lot of stitches and embellishments with just a little time and materials invested. Thanks so much–looking forward to what follows in the next day or so.
What a lovely project, Mary! You are so generous with all the free patterns, and all the time you put into the website. I have plans for so many of the stitches you have taught us, but on articles of clothing, too! I had embroidered some when I was a young woman, but had set it aside for other fiber arts. Ever since I found your website though, (about four years ago!) I have really been getting more into embroidery. You have made for me something that had become dull and boring to something vibrant and exciting. Myself, I enjoy most of the different things you teach. If it is something I don’t find appealing, I know there are thousands of people out here that *do* find it appealing. But there is always something to learn from your posts which keeps it all fresh for me, and I remember that not everyone has the same taste, everyone is different. Anyway, thank you for all you do for the art of embroidery, I am glad you followed your heart and made this such a large part of your life.
Thanks Mary! I’ve just emailed the link to my girlfriend who took me to a surface embroidery class earlier this year. This looks perfect to play & experiment with – thank you so much!
Love your blog…always broadens my horizons. Gathering up my material and maybe make it into a needle book& pincushion, love little tidy project s this time of year, something to relax with without taking a ton of space and materials as this household tends to be messy at best! By the way, some of the plastic canvas circles can work as a template the way the holes are placed. Maybe they are no longer available? I have 40 years of stash!
Hi Mary,
This is such a great project for a beginner like me. I love it!
Thanks,
Barbara
Mary, I am so excited to start this ornament. As I am a new stitcher, I don’t have much of a stash yet but I am expecting a nice little package from Hedgehog Handworks on Saturday. In it will be a piece of your favorite Alba Maxima and some floche in Christmas Red and Green. Your blog articles have been such an inspiration to me, awakening a desire to make something meaningful with my hands. Thank you so much. Pam
How exciting, Pam! You’ll love the floche! I’m glad you’re excited about the ornament. I haven’t used any floche on mine yet, but I think I will, now that you mention it!
G’day Mary,
Verrrrry nice! Thank you.
Cheers, Kath
Hi Mary,
I’m going to have a go at this lovely project and hopefully build my confidence in embroidery. I’m still a learner.
I read the email to my hubby and he nearly laughed himself to tears with your fancy-schmancy comment.
I better go find my stash and get started so I don’t get left behind.
Thank you 🙂
Your article today (Dec 12) was so informational and encouraging. Tips and Techniques. Especially the Crazy quilt squares made from a wedding dress. So inspirational, I save so much lace, beads and etc just saved for a purpose like this. I hope I live long enough to do a Crazy Quilt. Thank you for taking time and providing us with so many ideas and you do such a good job of it. Lea Rae
Hi Mary,
i am doing the Christmas ornament with you so am keen to get to the next stage! My efforts look a bit more organic than yours though . I traced the pattern and so maybe it wasn’t accurate enough. Anyway.am loving the project. Something to do on these long dark evenings.
Hi, Diana! So glad to hear you’re working along on it!
This is the time that I normally start Christmas projects. I know I don’t have a chance of finishing it this year, but I still like to work on Christmas stuff when I’m in a Christmassy mood.
It could be the reason that most of my decorations are store bought.
Cindy
I do the same thing, Cindy – I can never bring myself to do specifically Christmas-related stitching in the summer, or specifically autumn-related designs in the spring. I guess the key would be to embroider a small enough project during one particular season that it can be finished before the turnover into the next season!
First off, I love the blog. It is just the inspiration I need to get myself back in gear to get back to work on my own stitchery! But my family has a work-around when it comes to Christmas you might find handy. I am one of 3 sisters, all of whom are into the fiber arts. When we are making Christmas presents for each other, we never specify exactly which Christmas they are for. It is considered very bad manners for the recipient to bring it up, and it is a given that the giver is making an honest effort and eventually the present will be delivered. It makes life so much easier for everybody!
I love this idea, This way we get a special gift sometime unexpected. I think that makes it even more special. I think I will give it a try in my family. Thanks for the Idea.
How can I get the comments to a “printer friendly” version? I would like to do this project and hat to read on the computer continuelly.
Hi, Shel – The comments are not going to print in a printer-friendly version, I’m afraid. Your best bet is to highlight, copy, and paste them into a document (Word, Pages, Open Office, or whatever desktop publishing program you use). Hope that helps a bit! ~MC