


Oh, let’s have some Stitch Fun today, shall we?!
Several years ago, I wrote an article about why it’s important to play with your embroidery stitches now and then. My views on that haven’t changed, not a jot or a tittle.
Playing is necessary with any craft, hobby, or art. When you play around – when you loosen up a bit and try new things – that’s when the juices flow and the Muses sing. Playing is a creative catalyst.
Plus, it makes you better at what you do. The more you play with embroidery stitches, the better you get at stitching in general. Think of it as practice – not the drudging practice of the kid who never wanted to take piano lessons in the first place. Think of it as practice for the adult, who desires, enjoys, and embraces the lessons!
So, there’s your excuse to play with your embroidery stitches! It’s good for you.
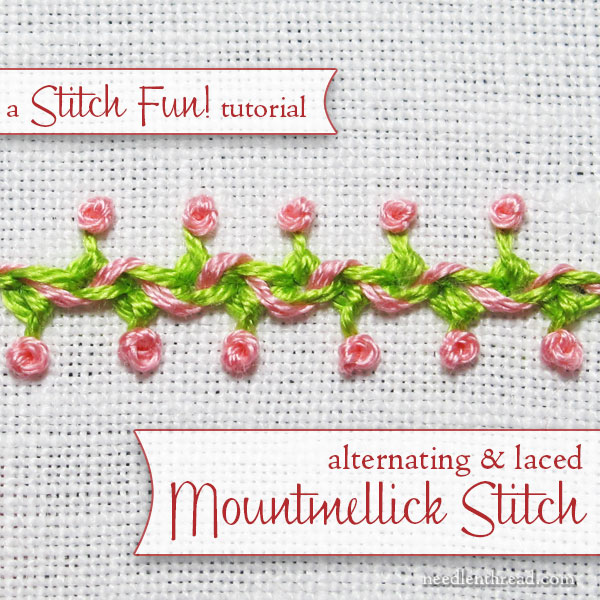
Today’s Stitch Fun starts with Mountmellick stitch as the foundation, worked on alternating sides of the design line. If you’re not familiar with Mountmellick stitch, this how-to video will help you out!
This alternated and laced Mountmellick stitch would make a great addition to crazy quilt seams – and really, anywhere you want a slightly spiked, festooned stitch.
For this Stitch Fun tutorial, I’m using Alba Maxima linen and regular DMC floss (three strands from the six) in a #7 crewel needle.
I’ll be working from the top of the line down, vertically. The stitch can also be worked horizontally, but I find it easier to work it vertically.
And don’t forget – you can click on any of the photos to see larger images.
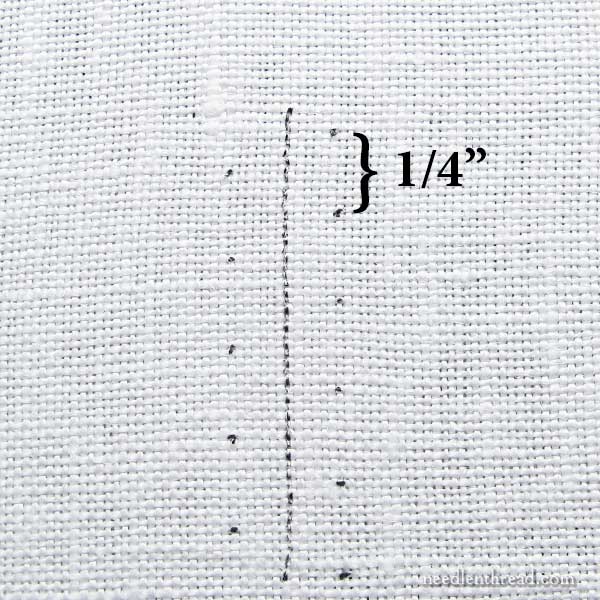
I’ve marked out the path here on the fabric, so you can get an idea of how the stitch moves down the line. Each dot on each side of the center line is 1/4″ apart, and the whole line itself (from the dots on the left to the dots on the right) is about 1/4″ wide.
Feel free to mark out dots when you practice the stitch – it does make it easier to get the spacing right – but once you get used to the stitch, you’ll find you can eyeball the spacing without the dots for guides.
You can experiment with different thread weights and adjust the width of the line, the length of the spikes formed, the depth of the stitches. With finer threads, you might want smaller, more compact stitches; with heavier threads, you’ll want a little more room for the whole decorative band.
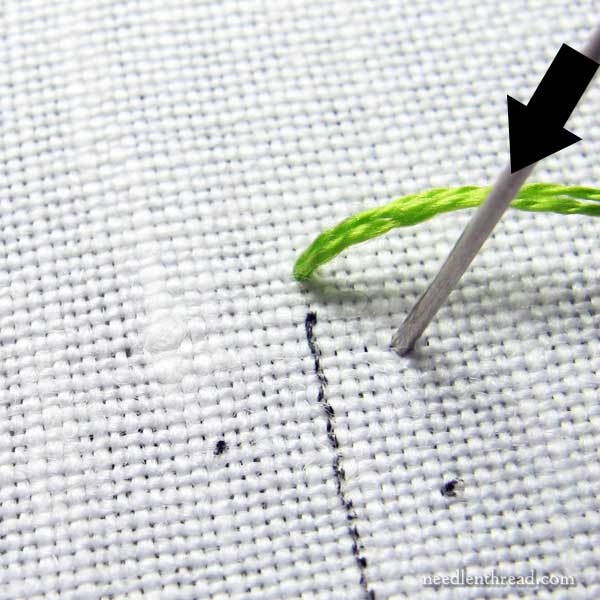
We’ll just start with a regular Mountmellick stitch. Bring your needle and thread to the front of the fabric at the top of the line.
Make a diagonal stitch by taking the needle and thread to the back of the fabric a little way off the design line, which spot, in this case, is marked with a dot.
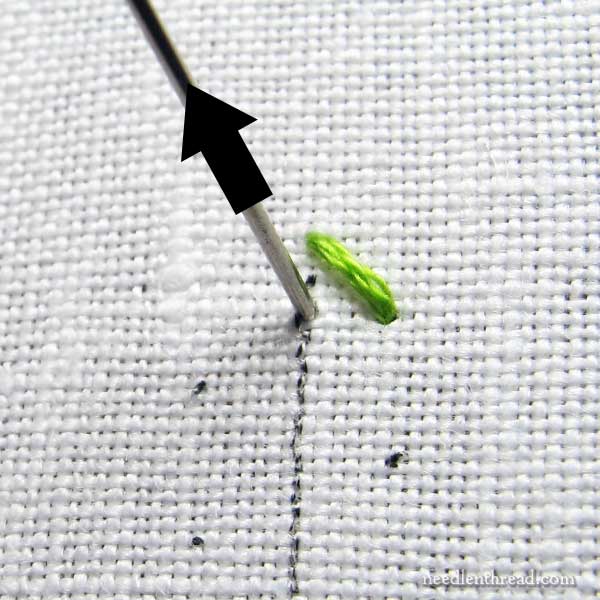
Bring the needle and thread back to the front of the fabric on the design line, directly across from the end of the diagonal stitch.
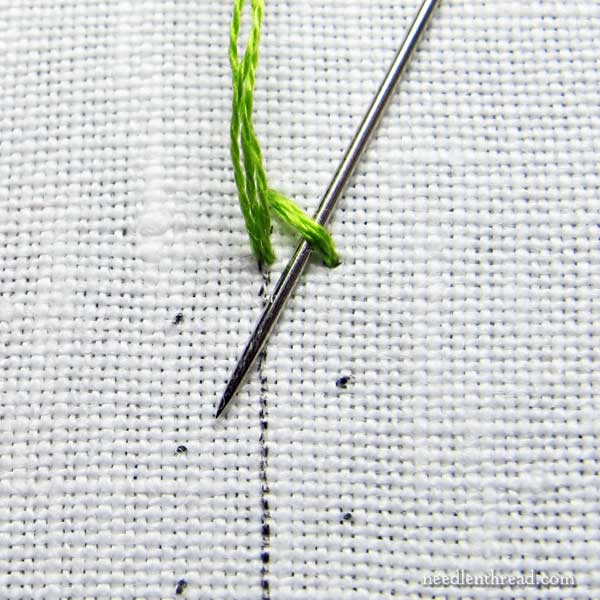
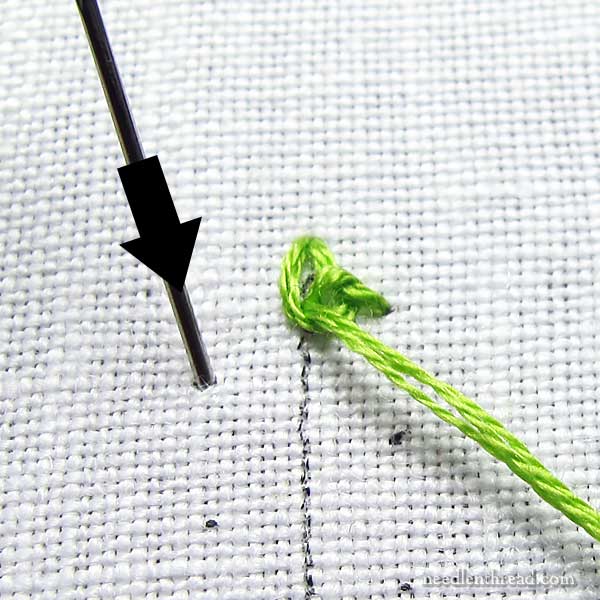
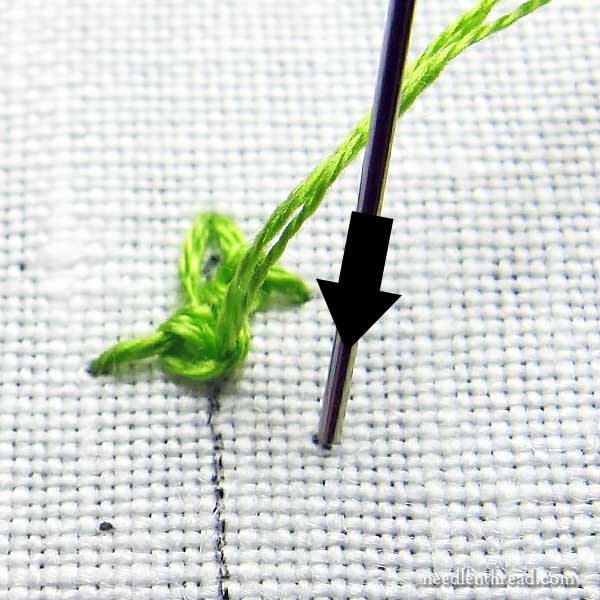
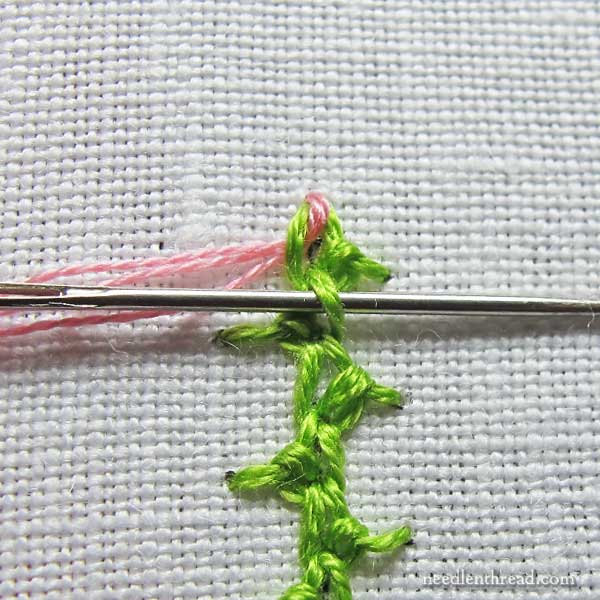
Now, pass the needle underneath the diagonal stitch, from the top down, without picking up any fabric.
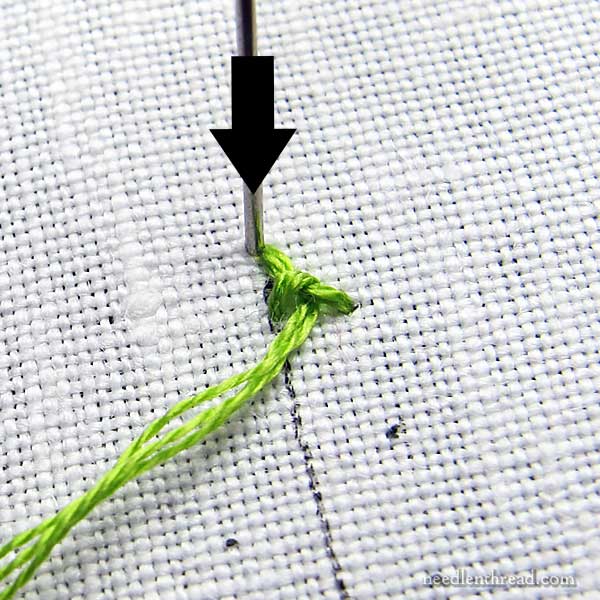
Pull the thread through, underneath the diagonal stitch, and then take the needle down into the fabric at the top of the diagonal stitch, right where you came up in the first place.
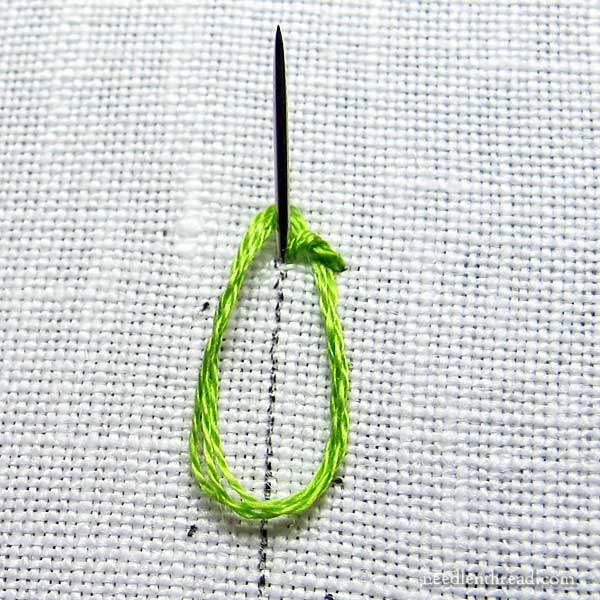
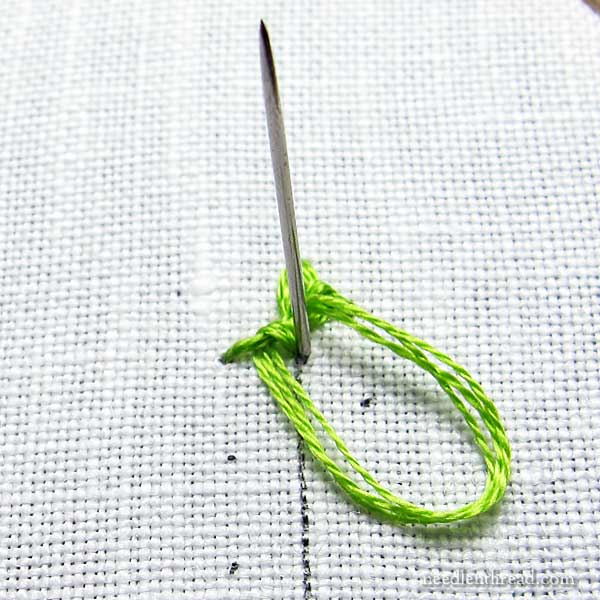
Pull the needle through to the back of the fabric, but leave a small loop on the front, and then bring the needle up into the fabric, inside that small loop, on the design line where you came up immediately after making the first diagonal stitch.
You’re going to make a chain stitch at this point – that’s why you’re coming up inside the loop.
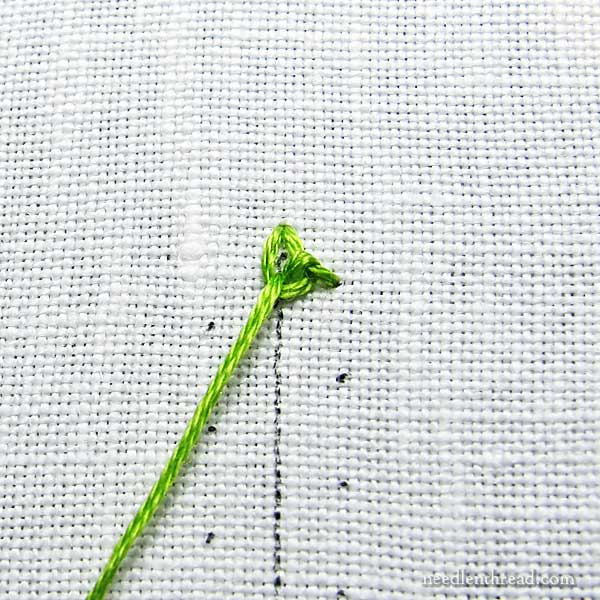
Pull your thread through to tighten the loop around the working thread, to make the chain stitch.
Now, normally, with Mountmellick stitch, you’d just continue this process down the same side of the line, so your little spikes would all end up on the same side.
But with this version, we’re alternating the placement of the spikes from side to side. So, the next step is to make your diagonal stitch again, this time going down into the fabric to the left of the design line.
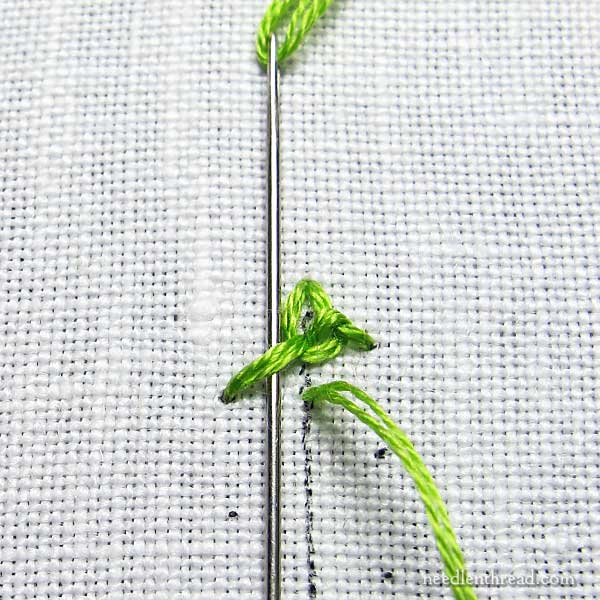
Bring the needle and thread up to the front of the fabric again, right on the design line, directly across from the end of the diagonal stitch, and then pass the needle from the top down, under the diagonal stitch.
Don’t pass over the working thread, and don’t pick up any fabric.
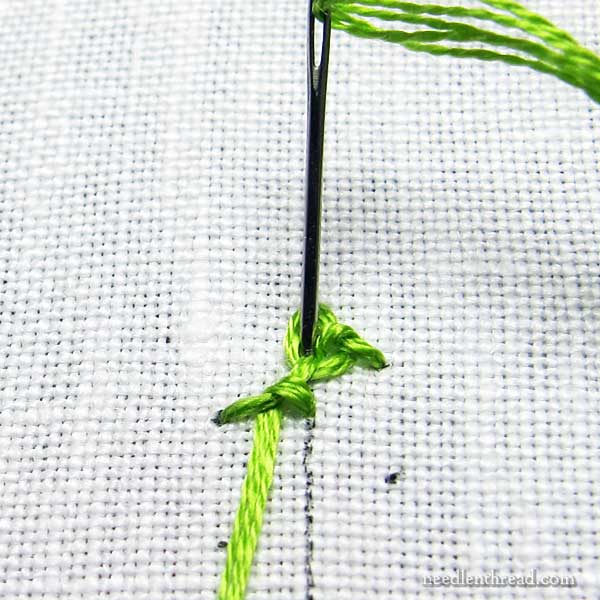
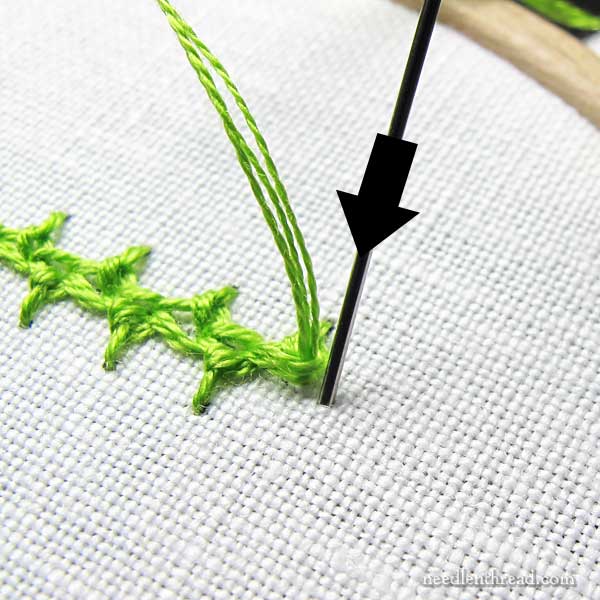
And now you head to the back of the fabric again, this time inside the previous chain stitch, at the top of this last diagonal stitch you just made.
Don’t pull all the way through – leave a small loop of the working thread on the front, so you can come up inside it for the chain stitch.
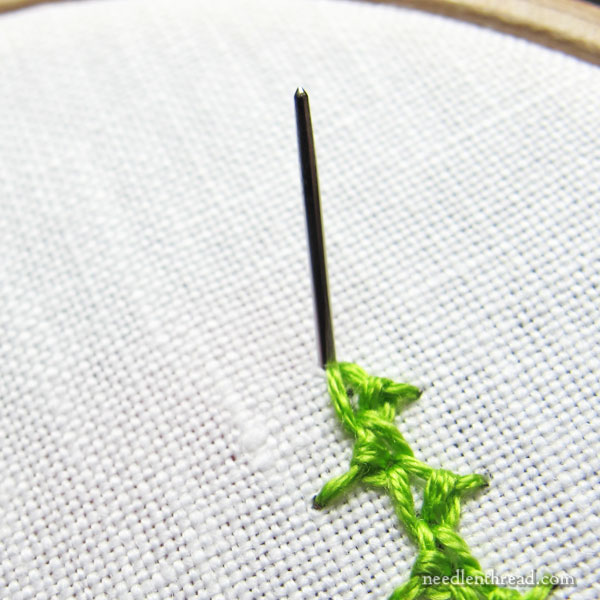
Come up inside the chain stitch loop, on the design line at the base of the stitch as before.
And now, step to the right of the design line out onto the dot, and take your needle and thread down into the fabric for the next diagonal stitch.
Lather, rinse, repeat.
Just continue this order of work all the way down the design line.
When you get to the end of your line, finish your final stitch with the chain stitch part of it, and then take the needle and thread to the back of the fabric just over the chain stitch, to anchor it.
Time for the fun, fun part!
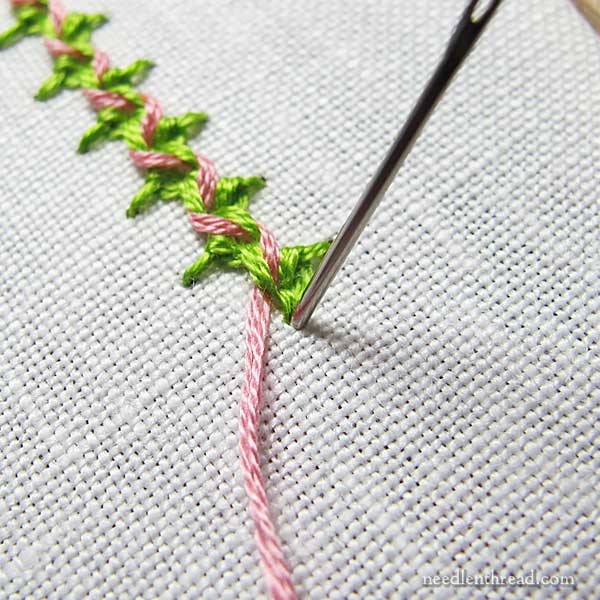
Switch to a tapestry needle and a contrasting color of thread, and bring the needle up at the top of the line you just stitched.
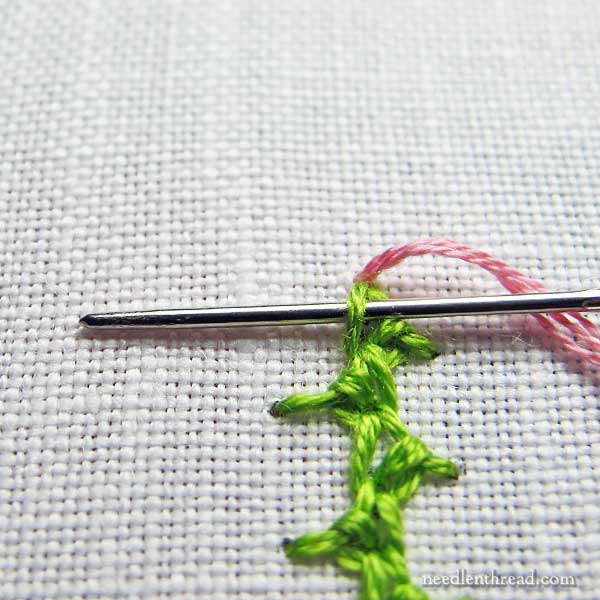
Pass the needle from right to left, under the left side of the first chain stitch on the stitch line. This will be directly across from the first “spike” on the right.
Remember to pass under only the left half of the chain stitch. Take the needle into the center of the chain stitch and pass out under the left side. Don’t pick up any fabric.
Then, pass the needle under the right side of the next chain stitch down. Again, pass into the center of the chain stitch and out under the right side, without picking up any fabric.
Continue down the line, lacing the chain stitches this way, alternating from side to side.
When you reach the end of the line, take the needle and thread to the back of the fabric at the end of the last Mountmellick stitch.
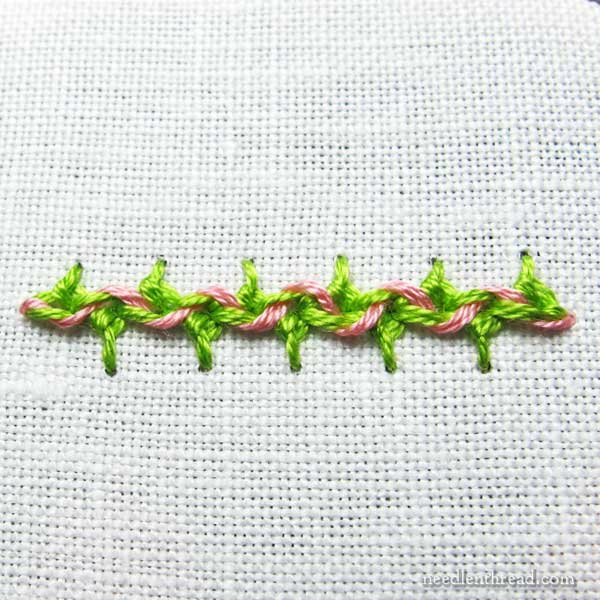
Here’s the completed line of alternating Mountmellick stitch, laced.
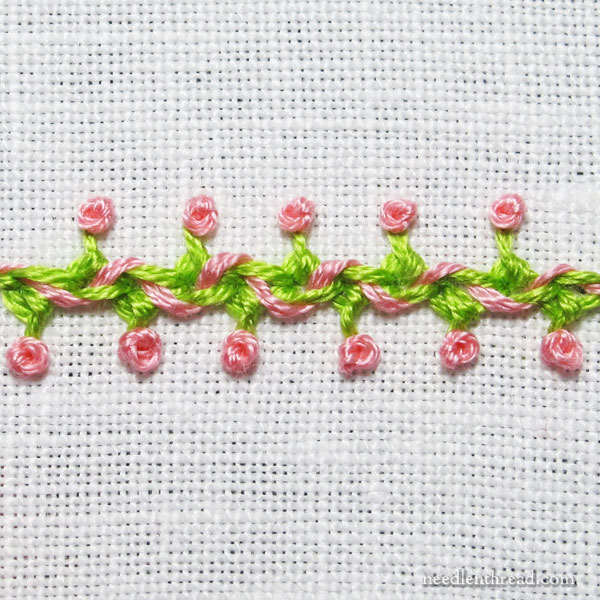
And of course, those little spikes just beg for French knots!
So that’s it – alternating, laced Mountmellick stitch, with a few French knots thrown in for good luck!
Enjoy playing with it – it’s a fun stitch!
If you want to play around with some embroidery stitches and you’re looking for instructions, you can find many more Stitch Fun Tutorials right here on Needle ‘n Thread, along with over 75 how-to stitch videos, and an alphabetical index of embroidery stitches here.
excellent how to lesson. i need to try this soon. i am working bountiful season one of hazel’s designs and i need to stitch a shape with raised chain stitch and then switch to a second color and weave over and under the the threads after each knot of the chain stitch and i am not sure how to do this but todays blog makes me more confident in trying this technique. thanks again for your wonderful blog!
What a gorgeous stitch to learn this morning. Thanks Mary.
Carol, still trying to recover from pneumonia in bitter MN!
PS. I just recently learned how to do the Cretan stitch, which I sort of used (in a very free/messy way) on a “painting” I am working on (with paint and threadwork). I have a book I really like, don’t know where I found it… Called Stitch-opedia by Helen Winthorpe Kendrick. Have you seen this book? It has some reasonably well done “how to’s” on stitches, nice photos of all the finished stitches in the back, some projects, etc. I really like the book, and it is spiral bound, within a cover, so lays nice and flat too.
Hi, Carol – hope you’re feeling better soon! I don’t have that particular book, but I’ll look it up! Thanks for the tip!
I checked it out on Amazon, it gets somewhat mixed reviews. I know I got it used and cheap somewhere. LOL. I can see it isn’t as good as one by Mary Thomas, but still, I’m happy with it. And… guess whose name comes up as a wonderful place for online videos and how tos! 😉 You are famous, Mary. 🙂
Ah – that’s a pleasant surprise! Now I really must look the book up! 🙂
Dear Mary
It’s play time again I love the Stitch Fun series and as you say it’s good to play around………..with embroidery stitches I mean in case you thought I was being naughty. I agree that even though your are playing with stitches it is also practising as well so double bonus. Anyway I love the Mountmellick stitch above and the spikes and French Knots they had a fun element to the stitch. I really like the Fun Stitch series and Thanks for showing us how to embroider the Mountmellick and adding another dimension to it, it’s lovely.
Regards Anita Simmance
FUN!!
OH what fun!! Lovely! Can’t wait to try this stitch. Thank you Mary for your inspiring posts. Highlight of my morning.
Glad you like it, Tania!
What a lovely stitch. I wonder where it got its name?
Shelia in Oklahoma
Well, Mountmellick stitch comes from Mountmellick, in Ireland. It’s a “staple” of Mountmellick embroidery, which is a kind of Whitework. The rest of it I just added to describe the whole composite.
I love this stitch – so lovely.
thanks
Mary, Another beautiful stitch for future work. When you did your French Knots did you stitch each one separately or did you carry your thread from one to the next? I often wonder about the extra details. Thanks for your consideration of this question. Have a great day.
Hi, Louisa – good question! I zig zagged them across, rather than working them along in straight lines. That way, the thread doesn’t show, because it’s crossing over the bulk of the stitching on the back.
Mrs. Corbet,
I’m noticing that the Stitch Fun articles you’ve written after the Beaded Drizzle Stitch aren’t in the Stitch Fun Index. Please help?
Haven’t had a chance to update that yet. Just click on Stitch Fun at the end of the article and you’ll get all the articles tagged with Stitch Fun. When I get back to my computer later today, I’ll update those….
Dear Mary,
I just LOVE your Stitch Fun series!! Keep doing them!! They are awesome. Just love it!
Best wishes.
Paula.
Thanks, Paula!
Simply gorgeous, Mary! Thank you so much for all you share.
Mary, wouldn’t this make a beautiful border for a sampler? I think I will try to design one using your stitch fun blogs. I send you a picture if this works out. Thanks, blessings, Charlotte
Hi, Charlotte! I think that’s a great idea! And do send a picture! I’ve got all kinds of “little samplers” with Stitch Fun stitches on them, but I’ve not put them all together into one. I think it would end up being a never-ending sampler! Look forward to seeing what you do!
I was just thinking that this combo stitch would make a gorgeous border!
Now, to work out how to turn the corners without messing up the design…that’ll be the trick.
Hi, Liz – I actually worked out corners already, though I haven’t really perfected them. I’ll share it as soon as I can photograph it. But don’t let that stop you from working it out, too! It’s a fun stitch!
Oh my gosh, Mary, I’ve been playing with this stitch all day, changing up lengths, widths, stitching circles, swirls, zig-zags! I need to quit playing and get to work on figuring out those corners!!
Beautiful & creative Mary! I wonder how you combine stitches & bring out something like the one you have done above?
I love the Stitch Fun series.
Lovely!^))) Thank you very much!^)))
Es muy hermosa esa puntada. Pero lo intentaré nuevamente. Hace unas semanas atrás quise hacer esta puntada en el borde de una toalla de cocina y no pude hacerla. Me sentí muy frustrada. Pero tú explicación es tan clara que es imposible no intentarlo nuevamente. Eres una maestra extraordinaria.