Whenever I talk about embroidery, I use the term love a lot.
But “hate” rarely comes into my embroidery conversation.
Hate is a strong word. When I was growing up, it was one of those words that garnered a quick reprimand from the Powers that Were.
“Don’t say hate. Say dislike.”
But there are certain areas of embroidery where I find myself courting a love-hate relationship.
As I ventured into this crewel embroidery project, I remembered that crewelwork is one of those areas.
Now, before you write me off, hear me out!
I love the project. And there are many aspects of crewel embroidery in general that I love.
But no matter how much my heart overflows with love for crewel work and this project in particular, there are some aspects that I dislike. Strongly.
Today, I’m going to share with you the deep, dark secrets of this love-hate relationship.
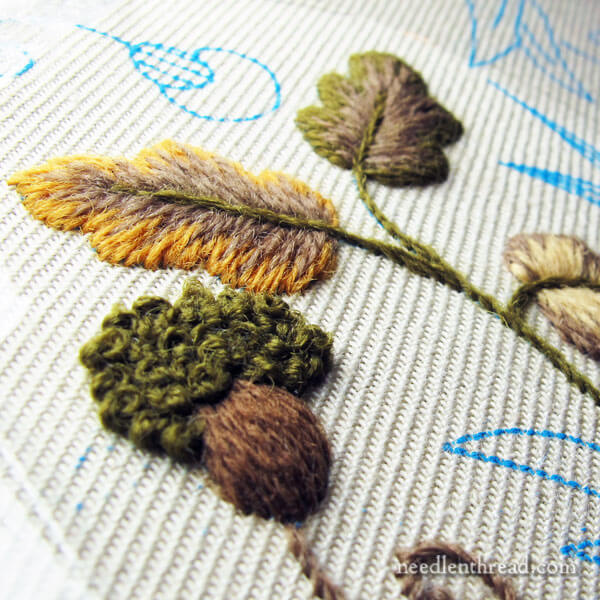
The project that I’m working on is the Mellerstain Firescreen Kit from The Crewel Work Company, which I reviewed here.
I love the kit! It’s fantastic! And I didn’t really realize how fantastic it was, until I really dug into it to begin stitching.
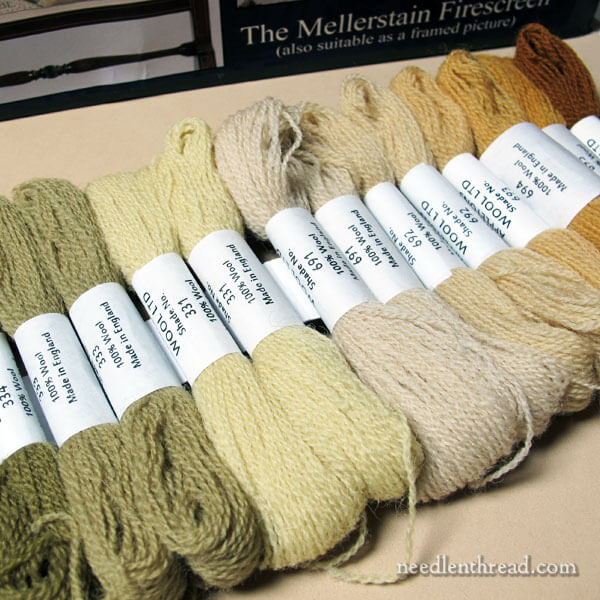
Right out of the package, one aspect that I love is the line-up you see above. It’s not so much the crewel wool thread itself, but the fact that the wool skeins are adhering to a strip of heavy paper.
There are two long rows of skeins like this, all the skeins tucked cozily next to each other, stuck onto paper strips.
If you have one of the Crewel Work Company kits, take my advice: don’t unstick the skeins! Leave them on the paper strip – they are there for a reason.
With the skeins stuck together onto the strip, you can lay out all the skeins in a relatively small space (because they’re cozied up to each other so snuggly), and see clearly the colors of the threads and the numbers on their sleeves.
This arrangement makes accessing the threads for multiple color changes while stitching very easy. As long as you’re pulling the right end of the thread, the crewel wool comes easily off the skein, you clip it, and you stitch away. Next time you need a color, you glance over the numbers, find your victim, pull the thread, clip it, and go. It’s a super easy arrangement, and I love it.
But this also brings me to something that I strongly dislike.
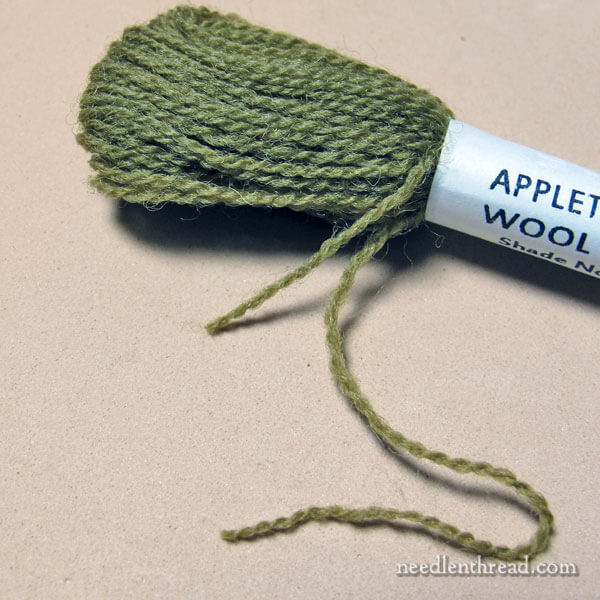
Appleton wool comes on a pull skein. I’ve talked about how to conquer the pull skein before, when dealing with regular cotton embroidery floss.
Well, the Appleton crewel pull skein requires conquering as well.
In the photo above, you can see two ends coming out of the same side of the pull skein, and neither end gives any real indication of where it’s coming from in the skein itself.
Generally, I pull on the longer end that I can find extruding from the skein. And generally, this works.
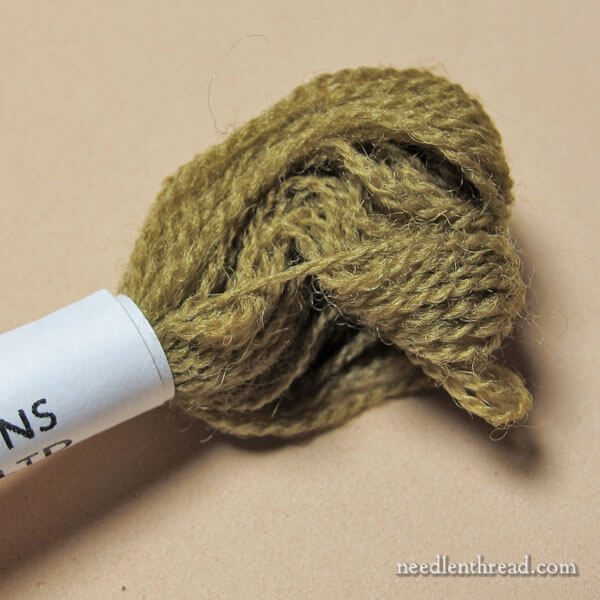
But sometimes it doesn’t! When it doesn’t, you can end up with a knotty mess in your skein.
The solution: pull extra gently at first, until you know for sure which end is the end for pulling. If you’ve got the wrong end of the thread, the other side of the skein will buckle, so you’ll know right away whether or not you’ve got it right.
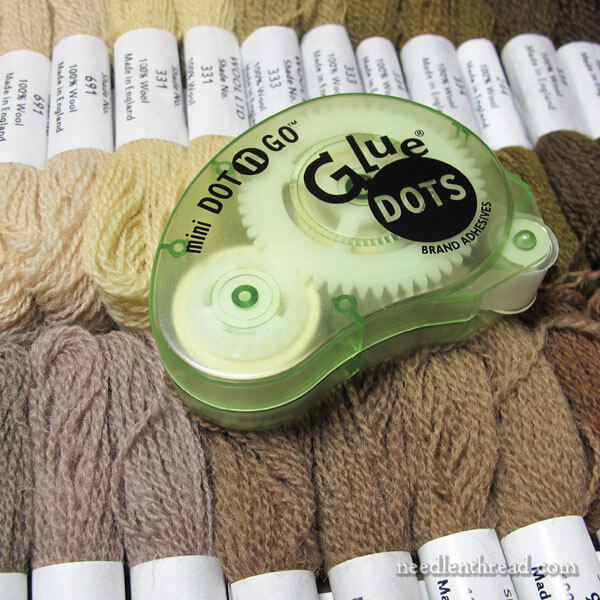
Incidentally, some of my skeins didn’t want to adhere well to the paper strip. And a couple of them had loose sleeves on them.
If you run into either of those difficulties, some strip glue – or, in my case, some strip glue dots – will do the trick. Just tighten up the sleeve and re-glue it (avoiding the yarn), or add a strip of glue or a couple glue dots to the back of the skein sleeve and re-stick it to the paper.
You won’t regret this step! I’m telling you, the paper strips are brilliant.
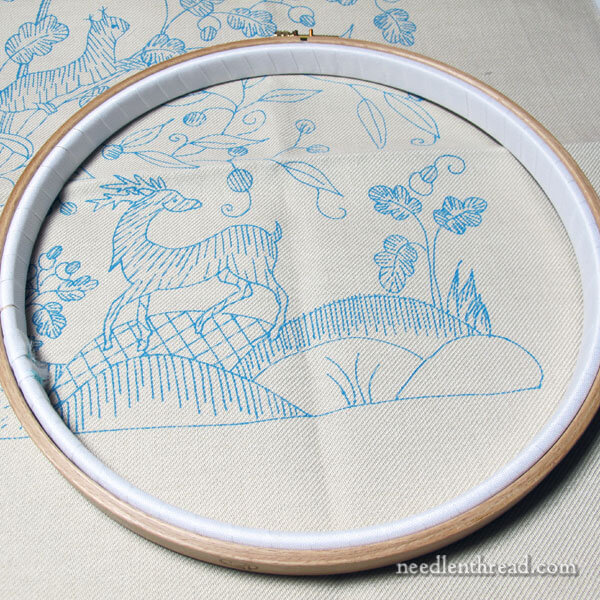
I love the linen twill in this project. It’s super-dee-duper sturdy stuff. I’m pretty sure you could upholster your footstool with it, use it daily with your shoes on, and it would withstand the strain and live to tell about it a hundred years from now.
And I love the clarity of the screen printed design on the linen.
I’m using a large and thick wooden hoop (5/8″ thick) on this project. The inner ring is bound with twill tape, which accomplishes two things: it helps maintain terrific fabric tension, and it helps protect the fabric and previously stitched areas.
The directions in the kit recommend starting in the top right corner of the design, but I hesitated, because I strongly dislike having a lot of excess fabric hanging in the front of the hoop. I prefer to start in the lower corner of a design, when working with this much fabric.
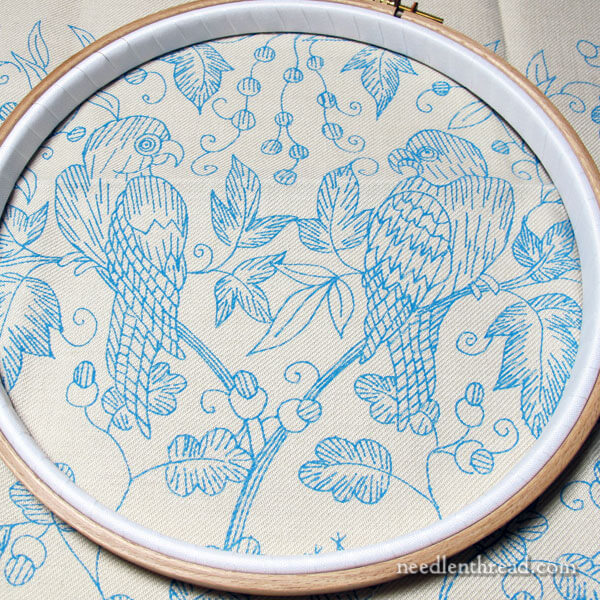
Still, I couldn’t really make up my mind where to start. So I laid the hoop all around the design and checked out different possibilities.
Should I start in the middle, with the birds?
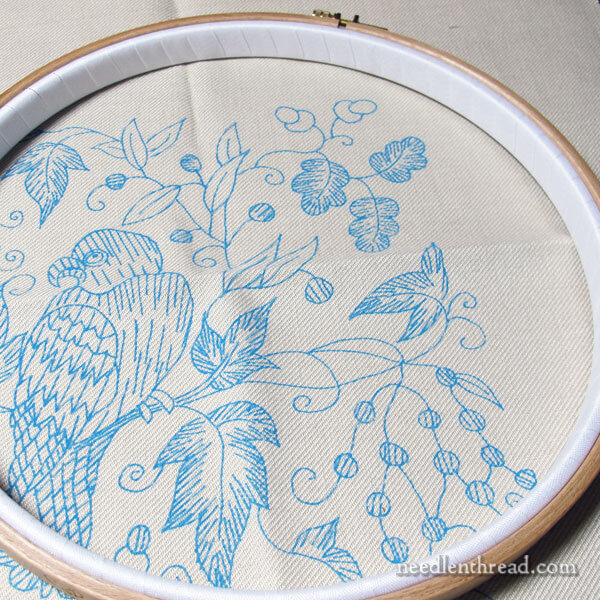
Or maybe I should start in the top right corner. Maybe, down the road, it will make a difference that I don’t foresee.
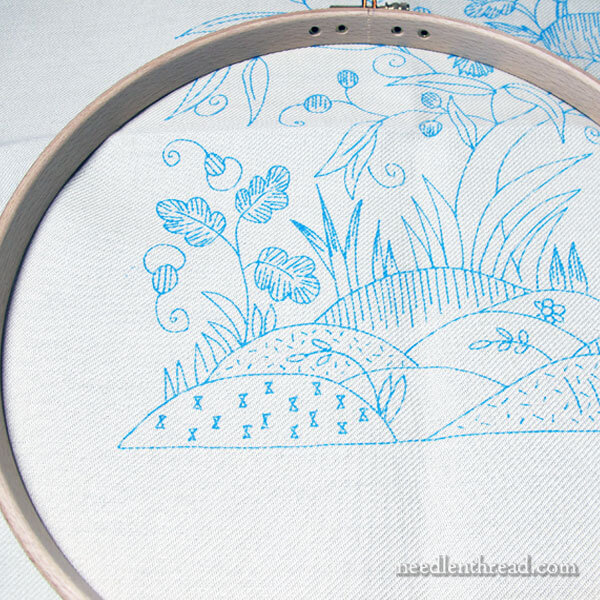
Oh, blast! I strongly dislike not being able to make a decision when it comes to starting. So, what the heck? I’ll just start in the lower left corner, just to be as contrary as possible.
So this is where I decided to start.
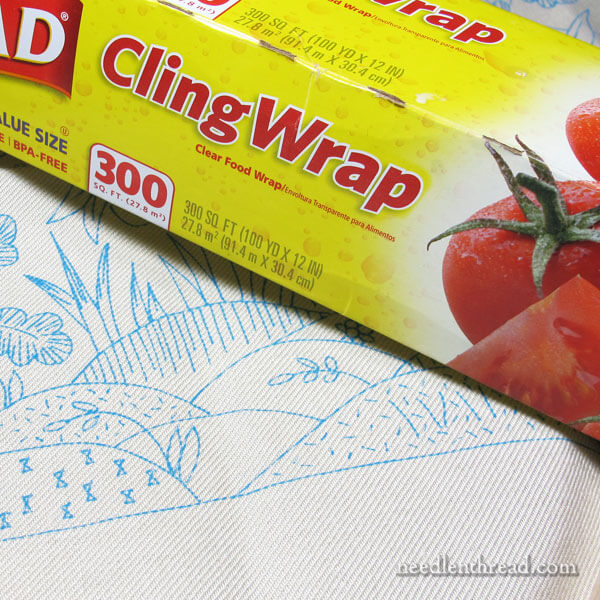
True confession: there are two indifferent things in the world I consistently and freely use the word “hate” for:
1. Scary movies. I hate them. Call me a wimp, but I can’t take horror films – not even on mute.
2. Cling wrap. I hate it. I don’t use it for food storage. I don’t use it for anything. I swear, the stuff is the devil.
The amazing thing is, cling wrap loves me. At any given opportunity, it will cling to me with a tenacity that defies even science. Nothing should be able to stick to a person as well as that stuff sticks to me.
Mind you, it never sticks to a bowl when I need to cover food. And it never sticks to itself when wrapped around a loaf of bread for the freezer. But boy oh boy. It sticks to me. It sticks to my hands when I’m trying to do anything with it. It sticks to my clothes when I’m trying to throw it away. And of course, it sticks to itself! Manipulating it onto anything can end up being One Big Fight.
So I just avoid it.
Yet the kit suggests using it to cover the surface of the fabric in the hoop, hooping up both the cling wrap and the fabric together at once. You cut away the cling wrap to stitch any given area. The cling wrap protects the top of the fabric from dirt and grime and whatnot.
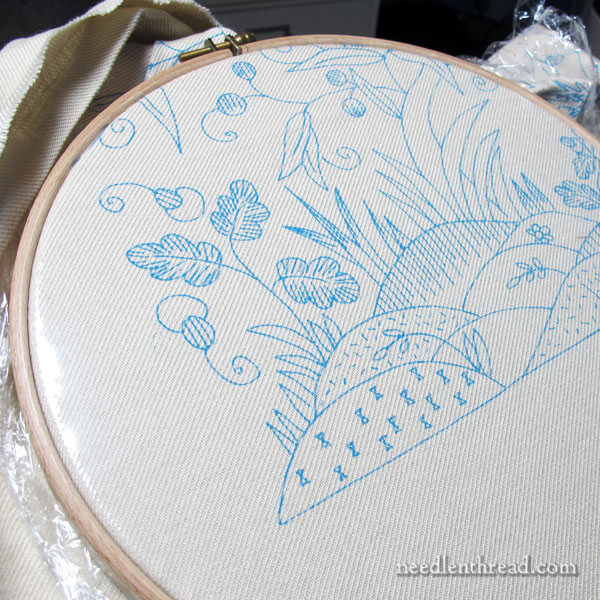
On this point, I decided not to be contrary.
I know there are many designers who use cling wrap in this way, and so I figured I might as well succumb and give it a try.
So far, it has behaved well enough. The little bits I clip away to expose an area for stitching are still floating around the house somewhere, clinging, waiting for me to pass by so they can hitch a ride. But overall, the experience with the cling wrap has been fine.
Who knows? Maybe I’ll grow to love the stuff!
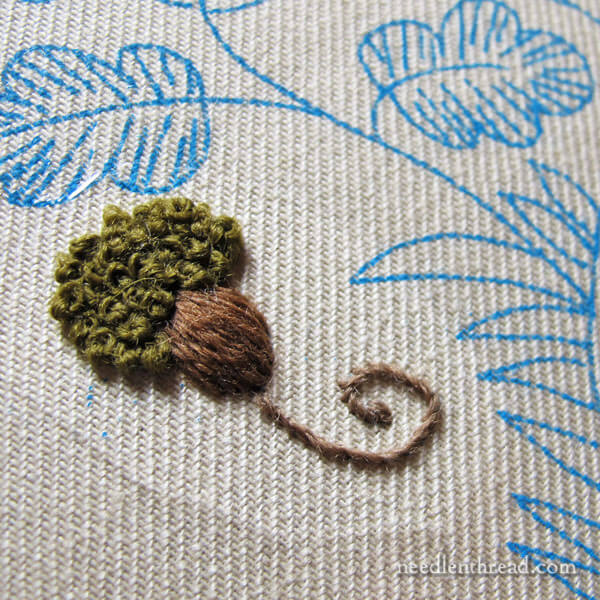
Here’s my first element on the firescreen!
In case you’re not sure what it is – your confusion would be understandable! – it is an acorn with the most elaborate head of curls ever seen on a nut. Takes me right back to The Brady Bunch.
I worked the knots far too loosely on this, hence the exuberance.
And this brings me to another point of loving and strongly disliking.
I love stitching with crewel wool because it covers so quickly! You can fly through an embroidered element in minutes, because it takes so few stitches to cover the area.
If I had worked that acorn in a single strand of cotton floss, it would have taken far longer to stitch it. But with crewel wool, it morphed into existence in less than 15 minutes!
But oh. I strongly dislike the general fuzz of wool, and I especially dislike working French knots with wool. There’s just something about that wooly thread passing through the wraps that gives me the shudders. The tighter the wraps are pulled around the needle, the more it bothers me.
And, if you pull the wraps too tightly around the needle, the thread wears down fast, getting fuzzier and contributing to more hairiness all around.
And if you get a knot in wool thread while pulling through to finish a French knot, you can pretty much just write off the thread. Resolving the problem is practically impossible, no matter how much hair-pulling and fit-throwing you do.
That said, I’m sort of smitten with the abundant cap on the little nut. I think it has personality. I’m dying to stitch a face on it! And, admittedly, I wouldn’t mind a few curls of that ilk myself!
I can get over the fuzzy-wool-French-knot-with-wool aversion without a problem.
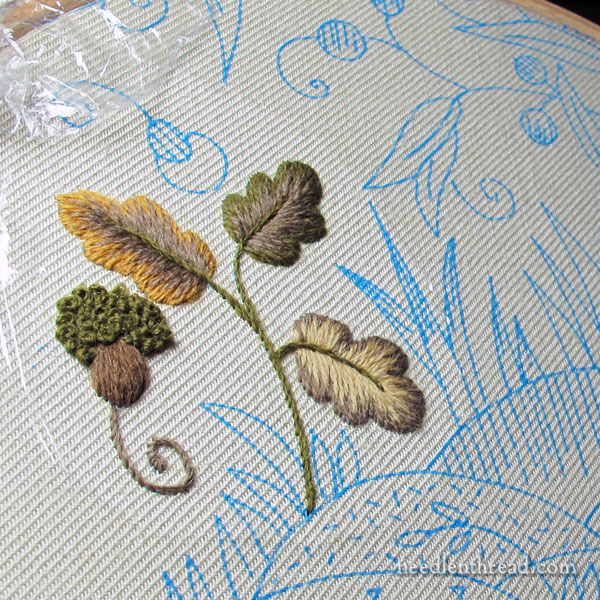
I love… and I mean L-O-V-E… how easy it is to work soft shading (long and short stitch) with crewel wool. The threads just magically meld together. With wool, it takes no time at all to produce a decently shaded leaf in long & short stitch.
This bunch was not an hour’s worth of stitching. And at that rate, the firescreen doesn’t seem like such a huge project after all.
Who knows? I might even finish it this winter!
I hate the fact that I can’t stitch on it today.
But I love the fact that it’s waiting for me, ready to go, for next time!
When it comes down to it, I’d say love wins. As usual, it conquers all.


I LOVE the way it’s looking so far. 🙂 I think your acorn has a ‘knopper gall’ on it! That would explain the head of curls. Not sure if I can post a link here but this is a knopper gall, so you can see what I mean. https://adventuresofawildlife.files.wordpress.com/2012/02/knopper-gall-1.jpg
LOL! Yes, I think that is it – perfectly natural! I have never heard of knopper galls in my life. It’s a wasp? Or the egg case of the wasp? This definitely bears looking into. With a name like that, I think they’re going to be one of my favorite creatures ever….
I’ve always wanted to learn crewel because like you said it stitches so fast because of the thickness of the thread and there are so many pretty designs. But I really dislike (I’d rather use the word hate but I’ve been though the same lesson you have) wool. It makes me feel so itchy! I don’t even like wearing it. So all in all it will be a while before I pluck up the courage to learn it. So in the mean time I will live out my fantasy through you 😉
I’m very excited to see you start this project, Mary.
I made the firescreen myself over a period of several years (well, I have a very demanding job – at least that’s my excuse). It is still the piece of embroidery that I am most proud of, and looks absolutely stunning framed in my fireplace. I think the subtle neutral colours are beautiful, and I love the curve on the neck of the deer – that was probably the most satisfying part of all to work. I also had the great benefit of a day’s workshop with Phillippa Turnbull while working on it, which had a miraculous effect on my soft shading.
Happy stitching!
I have to laugh at today’s column as I am about to start the Glasgow Bedspread
( talk about extra fabric!). One decision I made was that for some elements rather than use wool I would use a heavy silk. I love Crewel Work but as I work with a wider variety of threads and stitches I see no reason not to make a few modifications on
These reproductions. Make it a little more personal.
Good Luck. Hope you are feeling well and that there is recovery.
Darcy Walker
Oh boy I too have the Glasgow Bedspread on my to do list. It has been sent in three packages and will pick-up final mailing today.
Presently I am still trying to finish Mellerstain and love it. I have been fortunate enough to have been using a 30″ Millenium frame (no hoop) and it is working great. Will need to bring out Phillipa’s sit on hoop for bedspread.
Does anyone have suggestions for protecting the extra fabric while I work on the bedspread?
And one more thing. A question for Darcy. What heavy silk were you thinking to substitute? Because I had the same idea. Like perhaps chain stitched stems with silk just an idea. Any comment would be helpful. Thanks, Wanda
I use “Glad Press and Seal” instead…much easier to manipulate ..still can see through to cut out the section you need to stitch and also you can cut an extra piece to protect what you have stitched and it peels right off..I have also found it keeps my stitching and threads cleaner because it picks up bits of loose stuff. I actually reuse it if it hasn’t gotten to messy… Have used it on “crewel wool” and it works fine. I know it sounds that it works for me and it does! Just thought I would share because I am totally all for finding what works for our stitching to make it easier for us…( Definitely like to get rid of the hate)
Hi, Avis – I’ve used Press & Seal, too! Mostly, I’ve used it for medical things – it holds medication on my chemo port – but I did use it with needlework once. I thought about it for this, but the fuzzy thread threw me off. I will try it! Thanks!!
I love crewel embroidery. I look forward to watching your progress on the firescreen. I’m really excited to see how the birds turn out.
Mary
A hint I hope will help you with Cling Wrap. At Sam’s Club you can buy it in boxes that have a cutter on it. All you need to do is pull it out to your required size and then slide the cutter across the piece. I went from a Cling Wrap hater to a happy camper with this discovery. It still isn’t my favorite stuff but it works very well this way.
Hope this helps. And thanks for your great articles!
Sally
Dear Mary
I have a problem with the word ‘Hate’ as well I don’t like to use it, but find myself using it and regretting that I did. I dislike the pulling of skeins of thread as I always get it wrong and end up in a mess and having to take the thread out of the paper and disentangling the knots. I’ve never used cling film to cover a project as I generally don’t like the stuff and would find it cumbersome to use for embroidery covering, I much rather use a cloth as a cover. Glad to see that you have started stitching the Mellerstain fire screen kit and your stitching is beautiful as usual. I look forward to your progress on this project. Thanks for sharing your thread, cling film dilemma’s with us and for the photos of your new project.
Regards Anita Simmance
Oh,,, you have given me the courage to pull this kit out and give it a go!
Love the heads up on the thread! Also, what a great idea using the plastic wrap!
I will watch closely to your progress as it moves along. I have no clue why working with wool scares me so much!
Don’t be scared by wool, Lynn! It’s one of the easiest fibers to work with, because it’s so forgiving! And it covers fast! The key is to working with short lengths, because it tends to shred and lose its integrity after a while. I usually work with about 15″.
This is one project I will not be attempting. I can’t handle wool without breaking out in little red bumps everywhere the wool touches. And I won’t buy the kit and replace the wool with perle cotton…my stitching budget would be stretched too far out of joint. Problem is, I really like the look of it.
Yes, I agree, Joan! I think it would definitely be cost prohibitive to do substitutions on this. They do sell just the printed fabric on this kit – it’s a bit pricy, because of the type of fabric. I’m not sure how well the design elements would translate with perle cotton. Long and short stitch doesn’t work out as smoothly with perle, but you could use 4 strands of regular floss with it. It would look different, but I think it would work!
I’ve done The Mellerstain Parrots, which basicaly is the top part of the Firescreen and I so much enjoyed working on it, it has ‘goofy’ acorns too. I LOVE doing french knots, but as I also work with fine threads and silks alot…. in the beginning I had some difficulties doing the knots with wool. A fellow stitcher then guided me to Phillipa Turnbull’s video, where she explains her method for French knots with wool. Now I can do easy-peasy goofy acorn like nobody’s business. 😉
I love your work… all of it. You inspire me so much, thank you!
Ona
Hilarious posting Mary! I couldn’t stop laughing about all your dilemmas with the plastic wrap and the hairy wool!
The word Dislike reminds me of the Victorians using the word “bosom” to replace “breast” which would sound weird when ordering a chicken sandwich or when asked on Thanksgiving Day which portion of the turkey you prefer!
I read every word in your post and loved it!! You have great humor! you and my hubby seem to have the same love/hate relationship w/ plastic wrap!! 🙂 I’ve just done my first little piece w/ Appleton wool and was surprised at how it loves to knot, but I’ve developed a technique that seems to work for when I’m pulling the thread through. Your stitching looks so lovely. My long and short stitch needs improvement, but that will come with practice I know. Keep up the good work: I look forward to each of your posts! Hugs, H in Healdsburg
Mary, I am with you re cling wrap! My family say they will put in my obituary “she never managed cling-wrap” ! 🙂
You observations re wool crewel are spot on too!
Dear Mary
I have the Wemyss Lion kit to start (a rather lovely present to myself) which I chose because I loved the Lion’s expression. Having seen how your crewel work looks, I really need to stop feeling worried about not being able to do it and give it a go! I look forward to seeing how yours progresses.
Best wishes
Ellie
Mary, your articles are such a lift! I love reading them! They cheer me up and I love your sense of humor! Perfect article for today! I strongly dislike the word “hate” too. I agree love conquers all! I’m so glad I found your blog! I ordered the firescreen today, and I can’t wait to start on it! It looks gorgeous! Thank you so much for your extensive embroidery instructions!
Hi Mary, I have enjoyed this post immensely. Some years ago I was fortunate enough to do a 4 day workshop with Phillipa Turnbull and it was unforgetable, I loved every minute of it as she generously shared her knowledge with us. In particular she taught us how to do a perfect French Knot. Previously I just did a quick twist my needle to wrap the thread around and back into the fabric, oh no a perfect French Knot with an even tension and a depression in the centre in a perfect circle is quite an art and I so enjoy doing them now each one individually executed. Her video on this is well worth watching followed by a little practice to perfect your technique. One more thing I learnt in that workshop was that to find the elusive end in that crewel wool was to take the skein off the sticky paper and give it a good shake and the required end sticks out or up as the case may be, then put it back snugly in its place. Hope this has been helpful, I will enjoy this project progress as I love Phillipas designs and work,
I too have always had problems with plastic wrap not sticking to what I wanted to cover. I found out a secret – not all plastic wraps are the same.
The original was “Saran” wrap. “Cling” wrap and all the other brands were the plastic wrap copies that followed the original. Like everyone else I like to save money and would buy “Cling” with a coupon or other if there was none.
I then read an article and found out that ORIGINAL “Saran” wrap is different than the other plastic wraps. I switched to that and have been very happy using it. I still had a roll of “Cling” wrap in the house and I use that for times when I do not need it to stick to what I am doing – covering the cup on the kitchen scale when weighing raw chicken for example.
“Saran” wrap has since put out a cheaper wrap which is the equivalent of “Cling” and the other wraps. When last I purchased “Saran: wrap it was the “Premium” type of the wrap.
Also I found out from someone in the food industry that when one uses plastic wrap it is intended to stick to itself (something it does well when I don’t manage to keep it flat and it folds onto itself, when pulling it out of the box, so one must use enough of it (more than one thinks to use) to allow it properly stick to itself when it is used to cover food, etc.
thank you soooo much for your blogs, I’ve been reading them for a while now and really enjoy them…I try to follow the stitch tutorials but call it a free spirit (or in your words contrary) I just follow my nose and just do it regardless of if I’m doing it right, but hell sometimes the mistakes are when you discover things you like better….anyways please keep that hate (haha my uncle use to say the say thing, no for hate and use dislike) for cling wrap and lets see if we can use something a little kinder to the planet….all those little pieces of plastic no matter how hard we try to bin them properly end up in the birds and fish we love to embroider’s stomachs..I also found the same thing it wants to cling to everything but what you want….once again thanks and will continue enjoying your musings…x
Shared your frustration with commonly used threads for crewel/Jacobean work. Then discover Heathway Crewel Wool from Tristan Brooks and I never looked back!
Absolutely LOVE the look of the wool on the piece you are doing. And I LOVE your little acorn. SUCH personality. Your shading is turning out beautiful. And oh how I love the Cling Wrap idea. That is a new one on me. Definitely going to be trying that one. Anxiously following the progress of this beauty.
Finally my favorite project! I love crewel. I hate Appleton’s! I swap out Renaissance Dyeing Wool whenever I can. I think Appleton’s is made from too many sheep breeds, vs the Renaissance which is Merino. I was so disappointed with the Appleton’s that I bought several different types of yarn and dyed it myself looking for better yarn. Renaissance sells a big enough hank that I can get repeatable dyeing. Go Mary Go! Firescreen hurray!
I have the same problem with tape that you do with cling wrap. Box tape…nasty stuff, always sticks to me. I get it in my hair, and generally stuck everywhere except for where it should be.
Love the acorn! Love Phillipa. Love Crewel. Love you too!
I LOVE your little acorns’ curly cap. I am so glad you posted about your love-hate with wool. I am new to Crewel and I am using Appleton wool. I think I got a little over ambitious with my first project since I have to learn each stitch before I use it on my piece and the wool seems easy to tangle and knot. Not sure if I am doing something wrong? I am also having problems with pulling the wool through the linen. I have to use 2 rubber thimbles to get a strong grip on the needle. Maybe the weave is too small? And I never gave any thought if there was a correct place to start the project – I just automatically started on the bottom left corner. I will have to try the cling wrap idea.
I do love the coverage of the wool. And I love the shading on your leaves – especially the gold and cream leaf on the left. I will be anxious to see how you stitch the deer as my project has a deer and I have been fretting over how to stitch it!
Thank you for sharing !
xo Jan
I strongly dislike horror films too, and suspense makes me squirm. Do not like suspense.
Next stop is to check out your tutorial on long and short stitch- I don’t know that one.
These acorns look like burr oak acorns – they have very rough, almost curly, caps. But then the stem is coming out of the wrong end for acorns. I’ll chalk it up to artistic license.
I too prefer Press n Seal, at least in the kitchen, I haven’t used it for needlework. Yet.
Oh, also, as for the recommended starting point at top right – is it possible that corner was picked since as most right handed embroiders work, they’ll be holding the hoop in left hand. And it seems like most people like to work the design right side up, as it will be seen when done. Starting at top right will generally allow for less crumpling of the worked areas, wouldn’t it? Which would also mean maybe the yarn gets less chance to shed or felt since it’s maybe less likely to be getting scrunched and folded.
Of course, you could always neatly roll up the worked areas as you go and not scrunch anything to tightly.
I, too, hate cling wrap. Yea, I despise it, forsooth. For the very reasons you cited. It would never have occurred to me to use it to protect embroidery. I can see how, in theory, it’s a brilliant idea.
Can’t wait to see the finished piece!
And Mother always said “Don’t say HATE”. But I do sometimes.
A big NO on horror films. Who thinks that stuff up? No one I want to Know.
Not only do I think you are the *best* at what you do; I love the way you write.
Have you tried Glad’s “Press and Seal?” It works wonders! One side has a tacky side and the piece is reusable. Try it! When there is way too much loose fabric around the hoop, roll up the fabric then take a piece “Press and Seal” enclose the roll in the wrap. No more problem. Hope you do try it. If you do, let me know what you think. Thank you!
What is your opinion on leaving the crewel work in the hoop between sessions instead of removing it. I am currently stitching the fire screen design.
Many thanks
Hi, Anne – I’d take it out. It probably isn’t as pressing to take it out, if you have plastic over the fabric in the hoop and your inner hoop ring has a binding on it, and you plan to pick it up again in the nearish future. But if you’re not sure when you’re going to get back to it, I think it’s better to be safe than sorry and just take it out of the hoop. The five or ten minutes it might take to set it up again to your satisfaction is worth it, compared to finding out, too late, that you have unremovable hoop marks or something on your fabric. Just my thought!
I have basted cotton fabric to the sides of the embroidery fabric and hooped it up. There is the smallest crescent of the embroidery fabric corner in the hoop which is well outside the design. (I don’t have a hoop large enough to fit outside all the embroidery fabric.) This has worked very well for leaving fabric in the hoop. And there is the carrot of finishing projects so the hoop can be used for something else.
Dear Mary, I love that you were brought up to not say hate. Same here! I love that you cover crewel embroidery, wool and fabric. Thank you! Ellen