


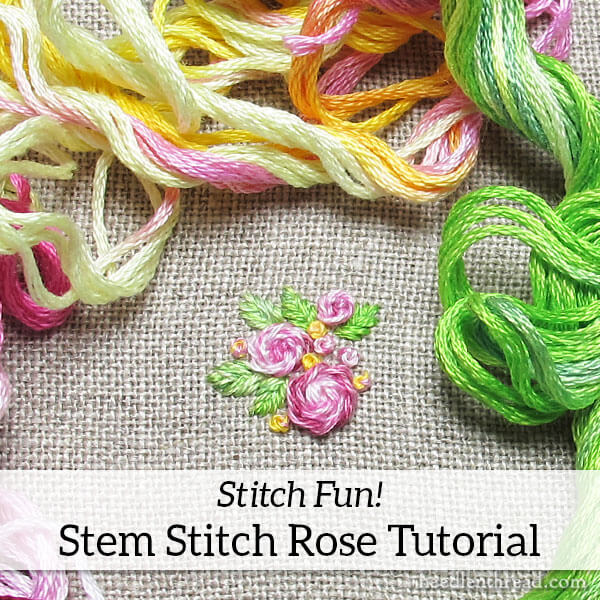
Before we kick off the weekend, here’s a little Stitch Fun! tutorial to get your creative juices flowing!
Now, before I go any further, there’s a caveat. I used a really awful piece of linen in this. So my apologies ahead of time. Sometimes, you just don’t realize how lousy a piece of fabric is, until you see the results when you’re editing photos. I should have known, I should have known!
Lately, I’ve received a lot of requests for information on this particular approach to creating a rose with stem stitch. Usually, the request comes in the form of a photo emailed in. “What stitch is this? Do you have a tutorial?”
So I figured I’d work one up, for the next inquiry.
The stem stitch rose is pretty simple in concept. The most complicated part about it is the center knot that’s often used to start the rose.
But I’ll let you in on a little secret below, after we go through the standard steps for the starting knot, in case you want to skip the knot altogether.
You can make any size roses with this technique. We’ll discuss that below, too.
Materials Used in the Tutorial
In this tutorial, I’m using three strands (from the six) of stranded cotton. I’m using an overdyed cotton in pinks, from Colour Complements.
I pulled each of the three strands out individually from the six (called stripping your floss – you can find a tutorial for stripping floss here), and then I reversed the direction of one of the three strands, so that the overdyed areas don’t line up perfectly. This gives a little variety in the colors as the rose develops.
The fabric I’m regrettably using is a 36 count Zweigart linen. You can see how uneven the even-weave is – and how fuzzy. Argh!
I’m using a size 7 crewel needle.
The Center Knot
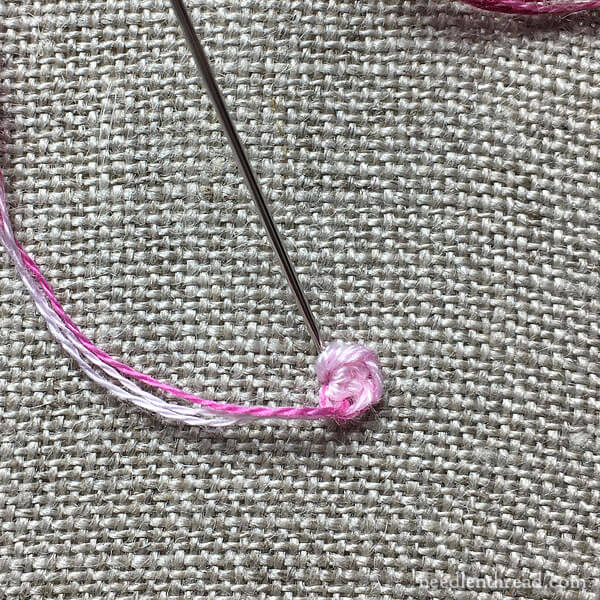
So let’s start with the standard center knot!
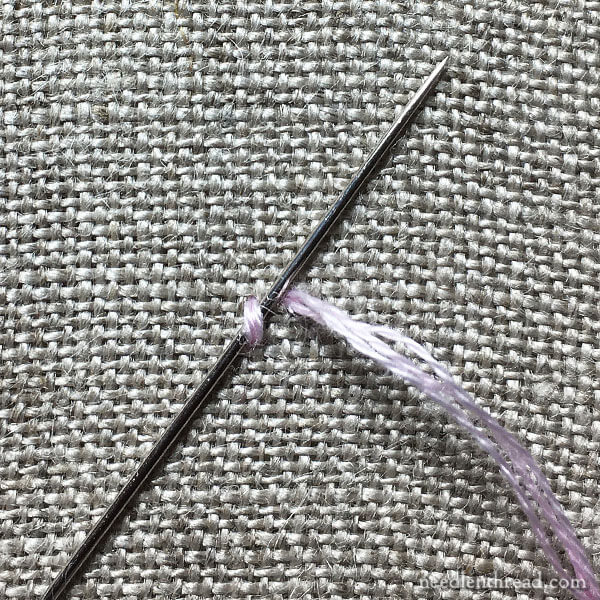
In this case, the needle is situated inside a larger loop of the working thread, so I don’t actually have to place the working thread directly under the needle. I just picked up the needle inside the loop and pulled, tightening the loop and wrap around the straight stitch and the working thread.
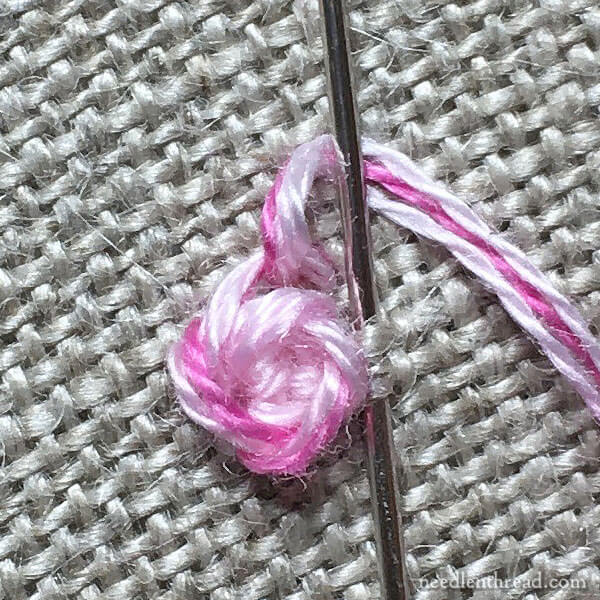
This is very similar to creating an individual Palestrina stitch, if you’re familiar with that stitch.
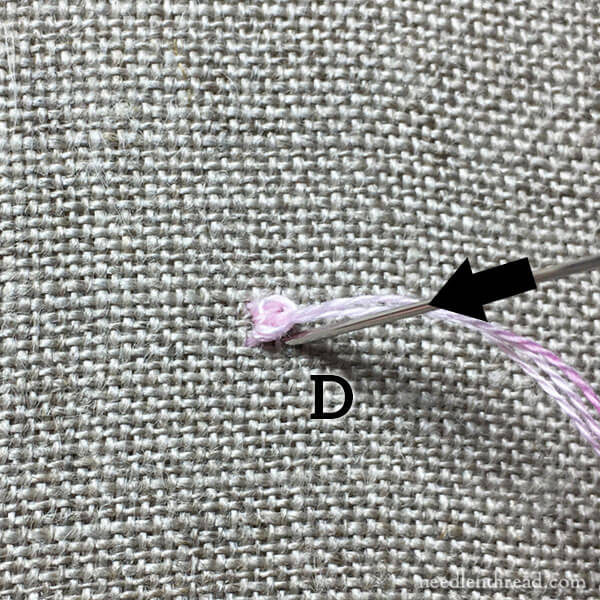
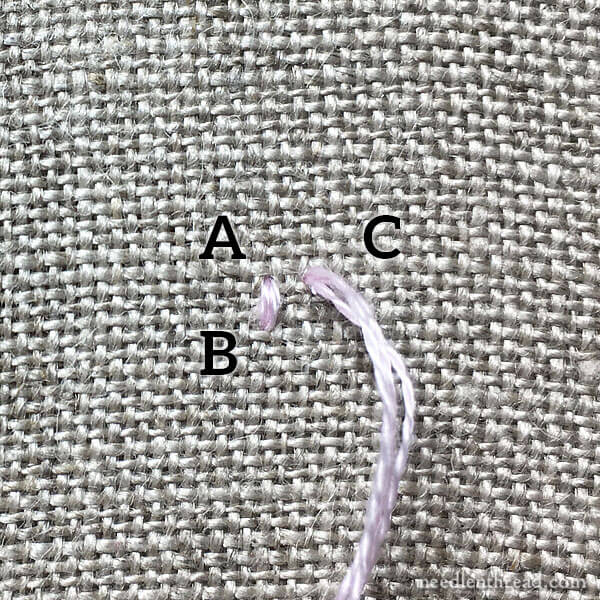
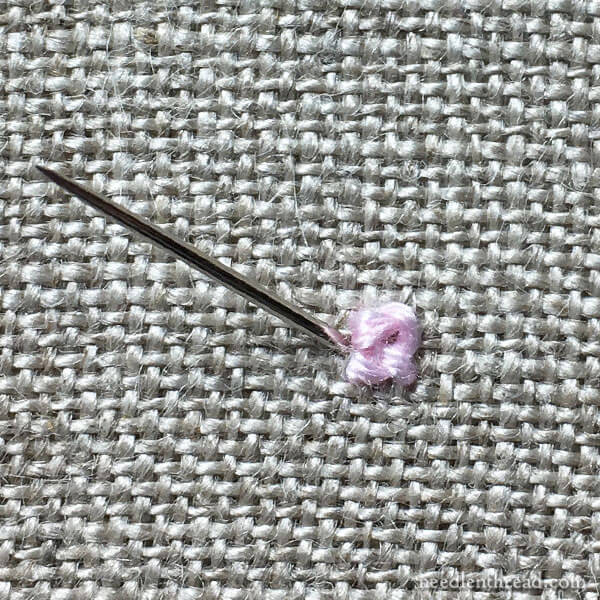
This is sometimes referred to as a square knot, and essentially, it creates a knot with 4 legs that enter the fabric at A, B, C and D.
Alternative Centers
You can actually simplify the center of the stem stitch rose by working either a simple cross stitch (which also has four legs, or points of entering the fabric) or just skipping the four-legged approach altogether, and working a center of French knots or whatever you want!
If your center doesn’t have four legs, you’ll just skip ahead in the tutorial to the point where you start stem stitching around the rose, picking up tiny bits of fabric along the way.
Stitch Direction!
I’m going to break in here and comment on stitch direction.
Technically, the direction I’m going in this tutorial isn’t entirely consistent with stem stitch. But with this particular technique for creating a rose, it doesn’t matter which direction you work around the flower – it will turn out looking the same, because the stitches are relatively large and somewhat separate from each other.
So you can work clockwise or counterclockwise around the center knot, keeping the working thread to the outside of the rose in either direction – whichever is more comfortable for you!
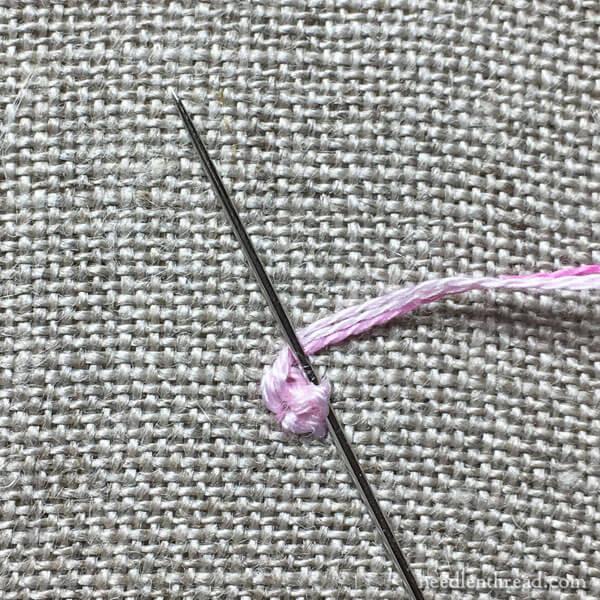
The Petals
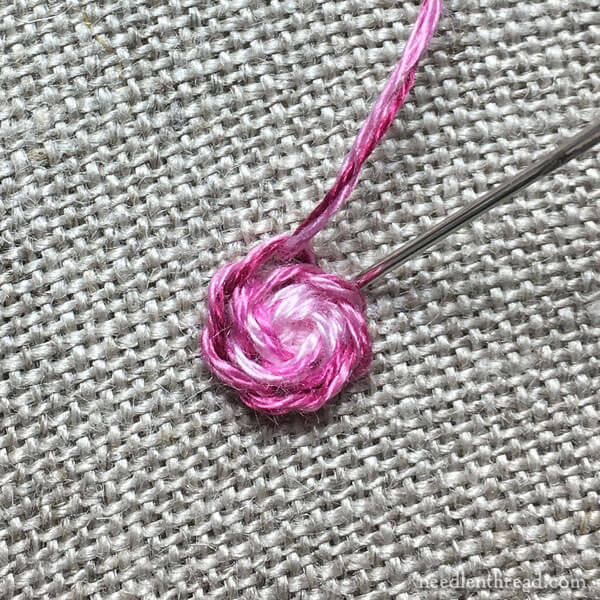
With the square knot finished, bring your needle and thread to the front of the fabric right next to the square knot, between two of the legs. This can be on any side of the square knot, as long as you’re between two of the legs and next to the knot.

Don’t pass into the fabric at this point. Use the legs as the anchor for the stitch.
Angle the needle so that the last stitch tucks under the first stitch, and you’ll end up with a tiny little rose.
Essentially, you determine the size of the rose by how many rounds of stitches you work from here on out.
We’ll just assume we want a fully bloomed rose and keep going!

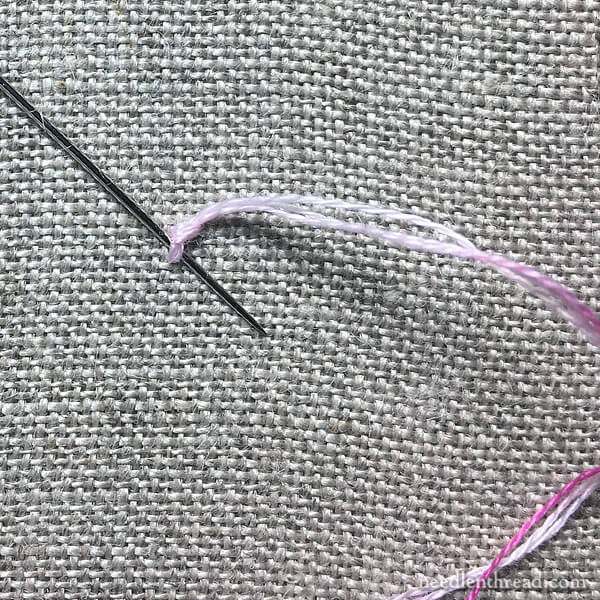
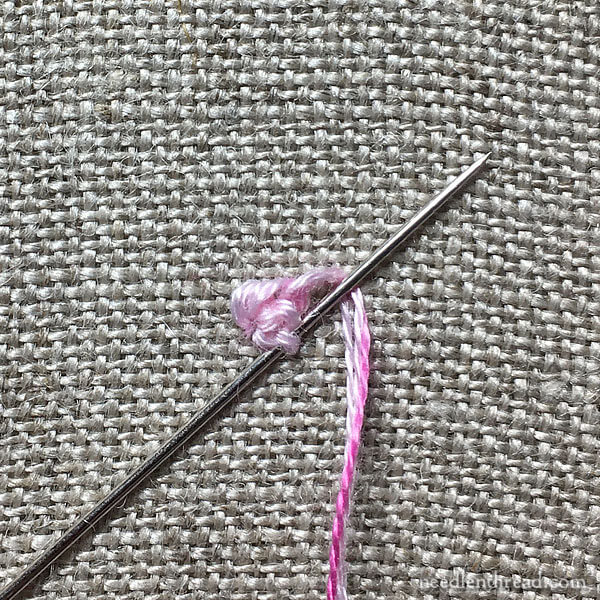
To balance the petal layout, pick up the fabric behind the center of the previous round’s petals. This will help create more of an off-set pattern.
That said, as your rose grows, you can add more stitches around the perimeter, depending on the look you want. The more you play with the rose, the more you’ll see how to manipulate it for a particular look.

My needle in the photo above is pointing upwards and coming out of the fabric over the working thread.
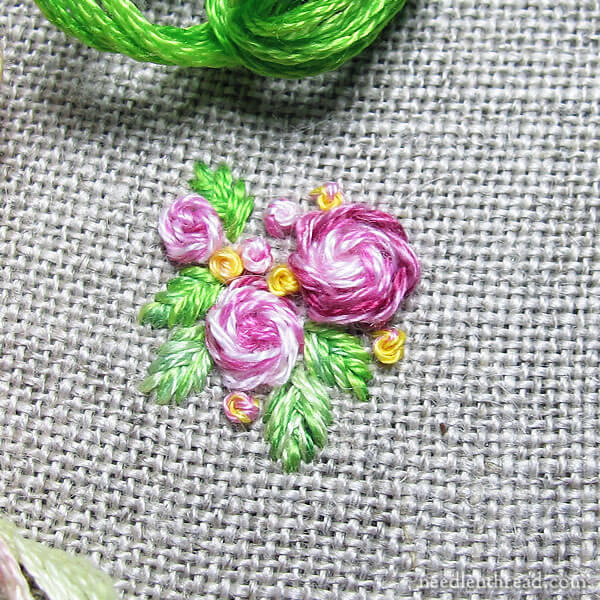
This is an easy, fun, and fast way to work up a pretty little floral cluster. The roses work up Very Quickly!
Differences
The stem stitch rose differs from the woven wheel or spider web stitch in a couple ways:
1. The stem stitch rose is not worked over a foundation of spokes; and
2. The loops of the rose sit higher on the fabric, thanks to the stem stitch, and create a more realistic looking flower.
More Stitch Fun?
Stitch Fun! is a series of photo tutorials here on Needle ‘n Thread, focusing on fun, different, or more obscure stitches, combinations, and explorations.
You can find the index for all the Stitch Fun! articles on Needle ‘n Thread, here. Why not try some this weekend?
You can also find my video library of embroidery stitches here, if you’d like to explore stitches via video.
I hope you enjoy this little tutorial and that you have a wonderful weekend with your needle and thread!
Oh! I love this stitch! Thanks for sharing Mary. I will have to give this a try this weekend. I am hoping to have some time to sit and just ‘play’. I find that I get so caught up in projects and don’t take the time to just see what/where a needle and thread can take me. ~sigh!~ TGIF!
Mary, thank you so much for this tutorial! Not only is it just in time for me to add to my pintangle TAST sampler, but I had never seen it before and love how it looks more so than the woven wheel rose. 🙂
Wow, that stitch looks amazing. I love how it has such dimension!
Oh, Mary, a big Thank You for this wonderful little rose tutorial! I’m dying to try it out myself – perhaps as one square of my still lying-still-and-waiting-patiently “mini-quilt”. 🙂
You were just reading my mind! I always wanted to learn this stitch! THANK YOU!
Thank you, Mary…always glad to learn a new way to make a flower and I have never used stem stitch for a rose. Such a nice addition, and it is very pretty with the little fishbone leaves. Also appreciate the tip to reverse one thread in an overdyed trio: “Stitch Fun” certainly nails it on this one!
Linda
Thank you Mary, your instructions are so easy to follow !
Oh, just beautiful! But … if we cannot obtain the lovely overdyed thread you are using, how would mixing three different shades of pink go? Wouldn’t have the graduation of colour I suppose, or do you think it would just look ‘clunky’??
I think it would look quite nice, actually!
Thank you! You have made this look easy enough for a beginner to try. Great close up photos!
I don’t think I’ve ever seen this version of roses done. I love the results!
About that fabric – it may not be the prettiest in the closeup shots, but I like the texture it has in the first photo.
Mary, this rose has “depth” on the fabric and looks terrific! Many thanks for the close up photos! I am going to work this into my current “crazy quilt” this weekend!
Dearest Mary, thank you so, so very much! This is exactly what I need. You are amazing and I think, a bit of a mind-reader.
I absolutely love the look of this stitch! I just started a little project from your Stitch Sampler Alphabet, and had in mind to do another after it… I might try the next one with these instead of the lazy Daisy flowers
Nifty stitch and a nice addition to the spiderweb roses. Must try it sometimes.
What I was wondering while waiting for my orders to come in: how is progress on Late Harvest (Hazel Blomkamp) and the Mellerstain firescreen? Late Harvest was nearing the end at its last post in late 2016. And the Mellerstain screen doesn’t seem to be finished either (as far as I could find). It’s just that those things are on my mind while waiting for customs to release my Blomkamp order. They have held it hostage for a week now and there’s no indication it’s going to be liberated any time soon. So the mind obsesses about other things, or at least my mind does.
It saddens me to read you seem to have Zweigart linen in disfavour… (of course 36 count isn’t suitable for traditional embroidery)
I remember you’re not a linen snob. I also know it’s a good manufacturer. Perhaps not on par with Graziano, but European cross-stitchers are quite content with range and prices of Zweigart linens and evenweaves.
I read your linen talk articles last spring. You didn’t say much about brands, you spoke geographically… mentioning Asia and Europe, but what about North America? Why should you depend on European manufacturers….
Perhaps some countries have better linen produce traditions than others, but i would think if a manufacturer decided to make quality linen they could import flax from anywhere and do that.
Thank you for the tutorial. In thread this looks much better than spider web rose, which is more suitable for silk ribbon
Hi, Lily – thanks for your comment! I’m not a linen snob, but there are different grades of linen. I’m a firm believer that the outcomes of an embroidery project depends a lot on the supplies used. Any 36 count linen can work for surface embroidery, and, when the weave is a bit looser, it can be backed with another fabric. Flax is best grown in certain climates, so the region in which the flax is grown definitely influences the quality of the fabric. As far as manufacturing goes, oversight and quality control make a huge difference in the outcome of any fabric. European fabric companies generally have good oversight and quality control. As far as North America goes, I don’t believe there are any full-scale linen mills currently operating in North America. I could be wrong about that, but I’ve not been able to locate any.
Thanks so much for this tutorial! Ive been looking all over for instructions on how to do this.
The woven ‘roses’ are very popular at the moment it seems but I find they look very clunky and not much like roses really and with french knots in the centre resemble bird nests rather than flowers. This does look better doesn’t it, pretty cute in fact? I think it looks ok with a french knot or two as well as this knot, but I like this most. Thank you 🙂
My 1st. Watching your tutorial. Easy to follow. Thank you.
Hi Mary, I have been diagnosed this year with dry AMD ..nothing they can do. If you have a good source for light I would greatly appreciate it. Lois
I’m sorry to hear that, Lois! I will be writing about the lights I’m using now. My dad also uses them – he has advanced AMD. I gave him one of my lights for Christmas and it’s the only reading light he uses now. His vision is quite impaired (total loss in one eye, and everything “below the horizon” – from about a horizontal line drawn about half across the eye – gone in the other), but he does manage to keep reading, ever so slowly and steadily, with his light.
Hi Mary
Hello Mary
I loved this rose!!!!
Are you going to make a video of it?
I’m trying to do it but I haven’t been able to yet..
Let’s keep trying…
Kisses from Brasil, Angela
Actually, I probably will. 🙂
I second that request. I would love to see a video of this stitch in your video library. I appreciate all of your helpful posts and videos and am in awe of your talent. Thank you for sharing it with us! God bless.
merci beaucoup ,c’est superbe.
Received your post just when I needed it. I want to embroider tiny flowers with different stitches. This is an addition to my list of stitches.
Thanks a lot.