


It ain’t pretty, but it works!
Lately, I’ve been free-hand drawing little motifs onto fabric using a pencil. Sometimes, I make mistakes.
Instead of re-drawing new lines over old lines and making a jolly mess with the graphite, and instead of washing the fabric and starting over, I use a little tool that helps me resume drawing on clean fabric with very little effort.
I’ve used this ugly little thing on several different types of fabric when I’ve wanted to remove pencil marks. It removes all or most of the graphite without smudging or damaging, fuzzing, or shredding the fabric surface.
For those who transfer embroidery designs with pencil or like to draw designs free-hand on their embroidery fabric, this tool is a time saver!
So here it is – a little handy tool that’s good to have in your arsenal in case you ever want to remove incorrectly drawn pencil marks from ground fabric before stitching.

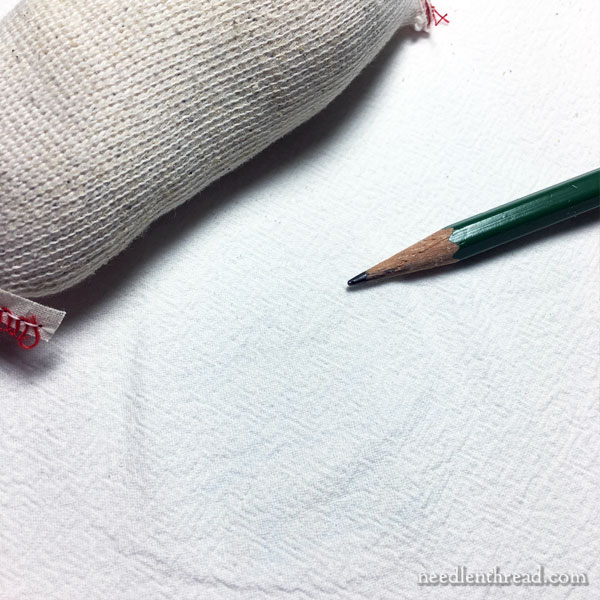
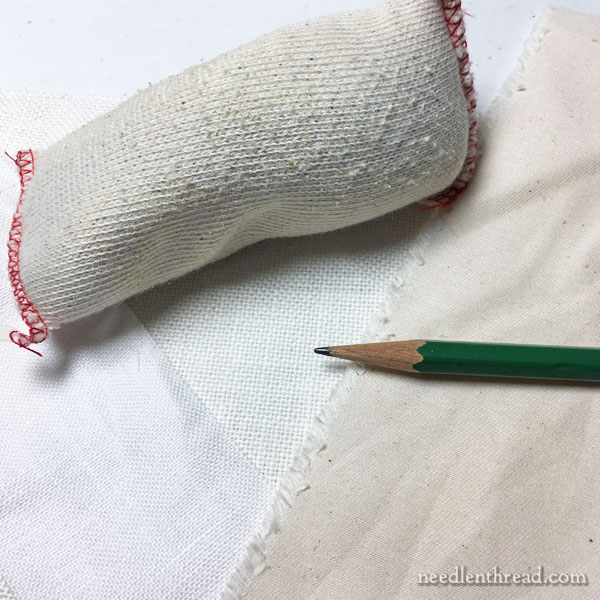
The tool in question is that ugly little sock thing in the middle of the photo.
If you’re an artist, an architect, engineer or draftsman, you are probably already familiar with it. It’s called a “dry cleaning pad.” It’s sold for drafting and artwork, to remove or lighten graphite markings from most papers and vellum without smudging and without ruining the “hand” or surface of the paper.
And it works on fabric, too.
In brief, it’s a little knit bag full of fine eraser crumbs. Let me show you how well it works…
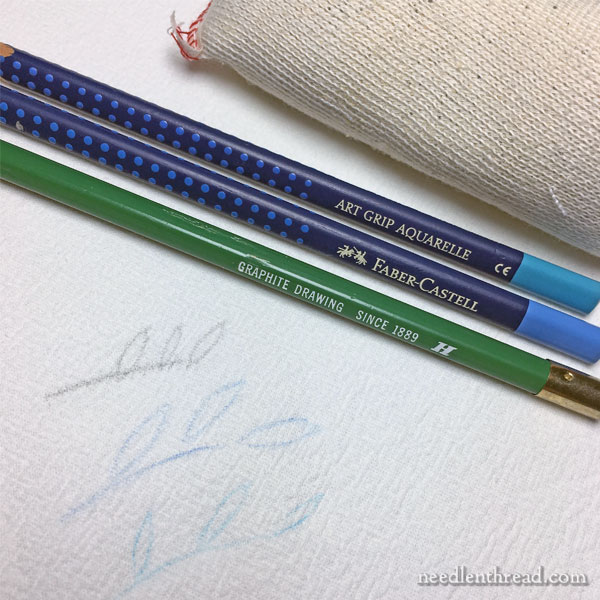
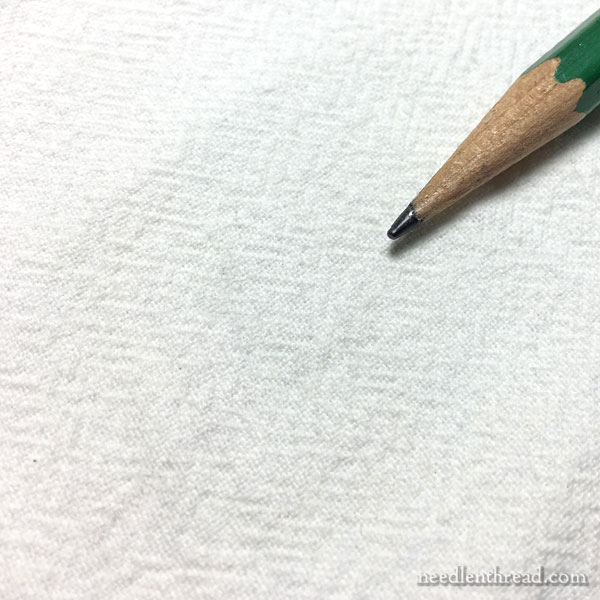
I drew three little elements on a piece of cheap cotton toweling, using the pencils in the photo above. One is an “H” graphite pencil. The other two are watercolor pencils by Faber-Castell.
The idea is to rub the little sock sack lightly on the marked area. Work in a small circular pattern over the drawn element that you want to remove.
If you need less surface area to the sock, just pinch a corner of the little sack to give yourself a smaller, firmer, more precise portion.
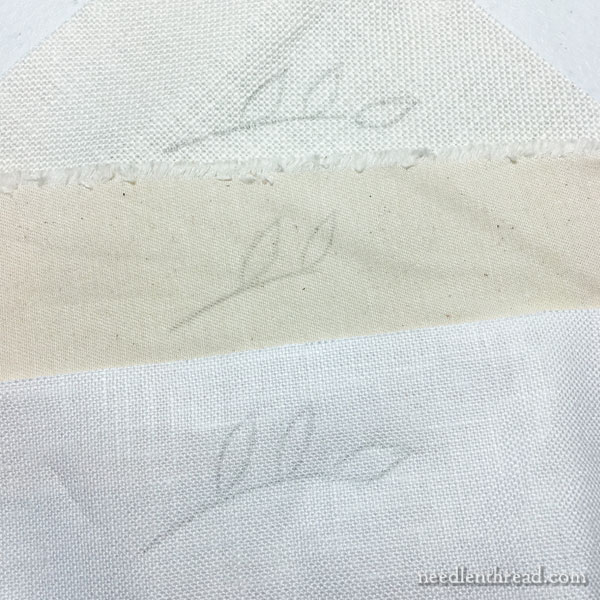
On the samples above (drawn, again, on cheap cotton toweling), after a few seconds of light rubbing, the blue lines came out completely, and the graphite line left barely a ghost of a mark.
The fabric still looks fine, even after being subjected to a good rub with an eraser of sorts.
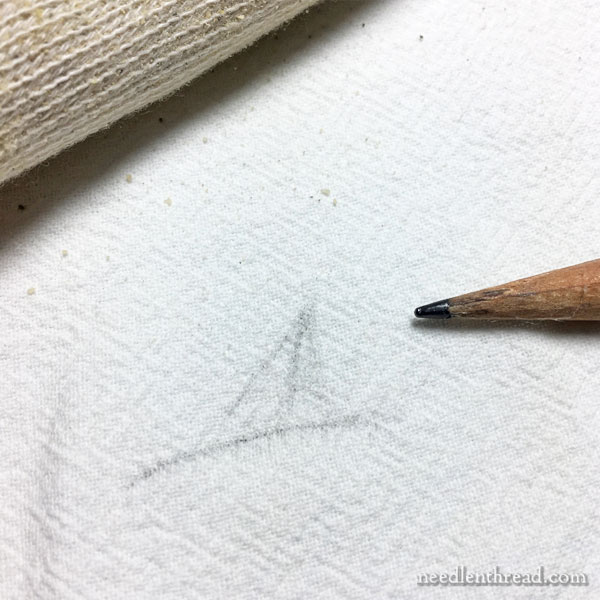
Here’s a slightly more smudgy graphite doodle – a sorry attempt at a sailboat, drawn right on the same spot as the previous little branches.
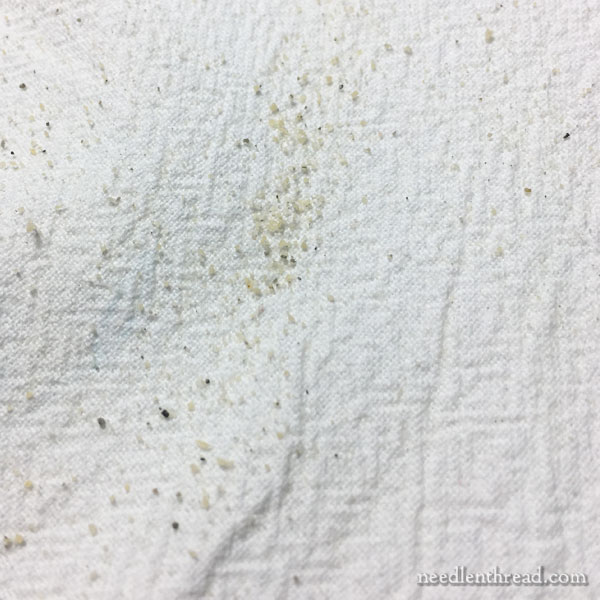
While rubbing the sailboat away, all the little eraser grits and bits scatter across the fabric…
…but nothing that a good brush-down won’t remove. Yes, it can be a little messy to use, but I think it’s worth the mess. I’d rather brush away a few eraser crumbs than have to start all over by washing the fabric, or grimace my way through stitching over really messy lines.
There’s slightly more ghosting on this attempt after a light rubbing, but it isn’t bad, considering the original smudgy drawing.
And again, the fabric looks good.
You could never do this with a regular eraser and end up with such unperturbed fabric.
So let’s go ahead and try it quickly on three other types of fabric: a fine white linen (lower left), a slightly coarser and heavier cream linen (back center), and a cotton twill (lower right).
The twill already has a bit of a speckle to it. The other two fabrics are smooth and free of blemishes.
Here are my free-hand elements with pencil.
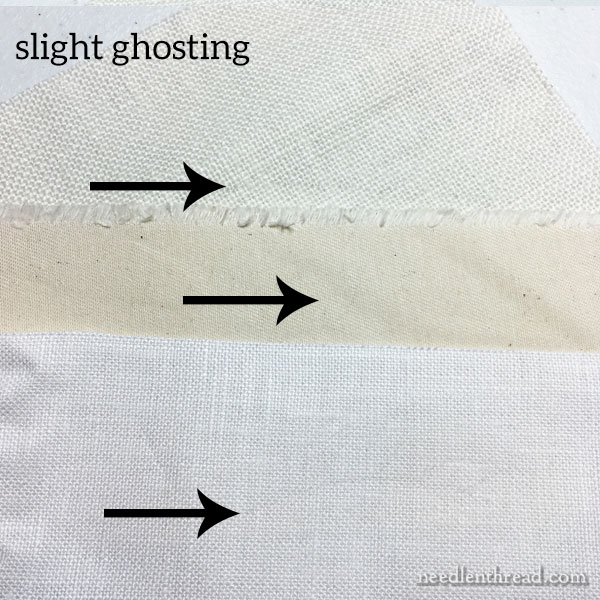
And after some quick, light rubbing, this is what we’re left with. The arrows point to the slight ghosting, but…
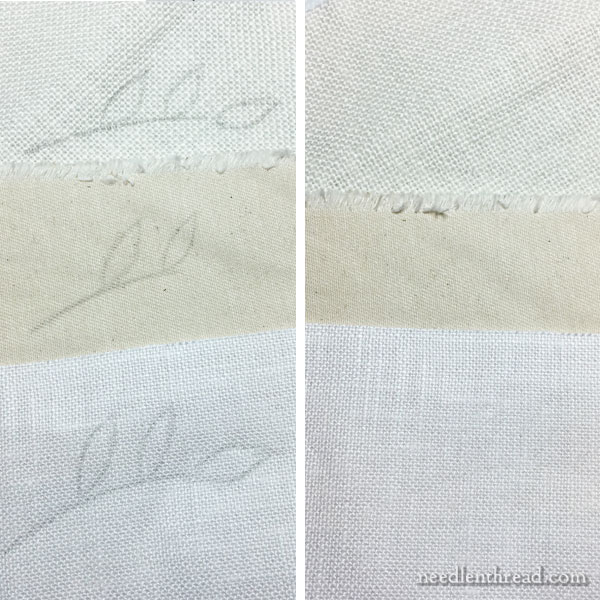
…in the scheme of things, not bad!
Where to Find It
You can find dry cleaning pads for drafting and artwork at art stores, of course, but in case you don’t have a thorough art store close by, you can also find them online.
You’ll find this particular dry cleaning pad available on my Amazon Recommendations page here, if you’d like to pick one up for your tool box, too!
How About You?
Do you have a solution for removing mistaken pencil marks from fabric before stitching a project? I’d love to hear your tip! Feel free to join in the conversation below!
Life in the new studio is going along splendidly! I’ve had my inaugural cup of tea with my beautiful new tea kettle (thank you very much!), and I’m getting used to the routine. Right now I’m still in the throes of preparing kids’ classes, and I’ll show you my headway on that on Friday, with a fun finish.
Hope you’re week is wonderful so far!
This article contains an affiliate link (to Amazon), which just means that, should you make an Amazon purchase through that link from my page, Needle ‘n Thread receives a small kick-back at no cost to you. Thanks!
I use a Pilot frixion pen. The marks come out with a hairdryer or iron. I now use it a lot, it works.
Yes, but if the finished item is ever stored in a cool environment, the pen marks will return.
I have found that Mr.Clean Dry Eraser for walls works very well for removing chalk marks ,I haven’t tried it on graphite but I will.
I have a quilt that was made in 1981 for my wedding with the quilting grid marked in pencil I will try this on it!
thanks
Hi Mary I just checked out the cleaning pad as I’m in the UK your Amazon link showed me that it doesn’t ship to UK aww!! Not to be defeated I checked out the UK Amazon site & sure enough there it was but I couldn’t believe my eyes £37.79 plus postage !! That’s a big difference from your USA product maybe you could get a sideline going !!??!!
Good luck with your new ventures
I love to see your work you’re a very talented lady !!
All the best from the UK
Sue x
Hi, Sue – I think you’ll find them more reasonably through art stores that carry drafting supplies. I’m sure there must be some in the UK!
Thanks so much. I just ordered one. I do not entirely trust frixion pens and washout markers tend to make fatter lines than I want. I use watercolor or mechanical pencils but have always struggled to remove my transferring mistakes. I am looking forward to trying out my new solution!
Amazing information! I will be in my local art supply store this week to scout this out.
As always- thank you for sharing your skill and kindness with us. Enjoy the rest of the week in your “Happy Place”.
Hi Mary! It’s fun to ‘watch’ the progress of your new space! You inspire me to get busy settling the last few boxes into my home.
The eraser sock is intriguing – I used to use pencils to draw on fabric all the time. Lately I’ve been using the erasable frixion pens to draw my embroidery patterns (and sewing patterns) either freehand or tracing a pattern. I love that the lines can be removed by a warm iron. I’ve been showing some ladies how to do Brazilian embroidery and often need to demonstrate something on the side – the frixion pens let me jot some quick lines to stitch on and then I can take the stitching out, run an iron over the lines and the fabric is as good as new. I also like that when the stitching is all done, the iron will make all the drawn lines disappear, whether they’ve been sewn over or not.
Thanks for sharing your good tips!
Mary, thank you for showing me something I had never seen before! It surely proves that one is never too old to learn (turning 40 in less than a month :)).
You can also get a fabric eraser from quilt stores. Like the eraser sock, it will remove pencil marks from fabric. I have used mine a lot for brazilian embroidery fabric boo boos. I learned the hard way that I have to keep it stored in a drawer because like anything else left out it will gather house dust which can transfer. But I have several of them and keep some in my embroidery supply cart all the time. It is not an expensive item.
I use a Frixion pen. Mistakes are removed by rubbing out with the eraser on the pen or by heat. Apparently marks can return with extreme cold. Mostly it seems to work fine.
Good morning Mary
Yes! I do need one of these. I am arthritic and make many bad lines while
transferring designs.
Thank you for this!
Sharon
I’ve used a quilters’ eraser on embroidery fabrics where the pencil in question was a mechanical one, #2 hardness, on linen and cotton. No damage to the fabric, and the lines are at least as well removed as what you show above. Any ghosting disappears when I wash the finished piece.
Thanks, Holly!
This looks worthy of further investigation for sure…as do the water color pencils!
Thanks, Mary
Linda
Hi, Linda – I’ve used the water color pencils for transfer before. This particular brand in the photos above are a little too waxy to be easy to draw with on fabric. I think Prismacolor and Derent work a little better, but just a word of advice: use the lighter blues. The other colors (reds, etc.) don’t wash out of the ground fabric as easily. The blue just sort of gets absorbed into white, if you’re using white ground. Hope that helps!
I have bought several from the laundry section of stores for removing stains from clothing. Same item.
Hi, Sarah – Yes, there’s one that is similar, for removing dirt from furniture and soft items, but not to be confused with the “dry cleaning sponge” that’s sold in laundry sections. Good point to look for it there!
Hi there Mary,
Lovely to see this article from you today. I was really interested as I am still playing and learning about Tambour work, and any helpful ideas about removing wonky designs gets my vote.
I thought you would find it interesting that when I looked at Amazon U.K. as usual the price difference from USA to U.K. is rather huge. The item you show available in the USA via Amazon is just over $6, the same item in the U.K. is over £20!! I have found similar – the item looks the same and is sold by a uk document company, saying that it is used to clean up documents. I have e mailed and asked if it is the same item as yours, as it looks it – that company are selling it for around £7.00. The hunt is on.
Again, as always, a pleasure to see you in my inbox.
Dear Mary
Cheers to you there’s nothing like a cup of tea to make you feel at home and good luck with the preparations for the children’s classes. This looks like a great product and I would love to have it unfortunately in UK Amazon its priced either £20 or £37.92 and I have checked generally elsewhere but to no avail, such a shame as this would be a perfect accessory to have and would be very useful. Thanks for sharing the Alvin pads with us and for the comparable photos.
Regards Anita Simmance
Hi, Anita – You might have better luck checking out an art store that carries drafting supplies. Also, Staedtler makes a similar product. Over here in the States, it’s more expensive, but in the UK, it might not be. Worth checking, anyway!
Hi Mary
Thanks for your reply very helpful. If anyone is interested I just found what looks like a cheaper version then Amazon at Arcare Cleaning Pads price £8.25 size 120mm x 50mm.
Regards Anita Simmance
It’s very expensive in Amazon UK..
Hi, Diana – If you’re in the UK, you’ll probably have better luck at an art store that carries drafting supplies.
You can order online from Dick Blick Art Supplies. They’re less than $4.00 [USD] a piece. I don’t know how much U.S., small packages cost to the UK but the cost of Royal Mail Small Packets from there to here is beyond outrageous. Good Luck Diana.
What great timing Mary ! I’ve been using a pencil recently to draw shapes and lines to practice a few stitches I haven’t done in awhile and a few new ones too boot! I blotched up on a few drawings and sitting there thinking if I could only erase the mistakes! Thanks so much for the info !
Oh Mary, how wonderful that today’s newsletter is about this… I am working on the “Magnolia Stitch Along” and I’m using Sewline graphite pencil. I had a section that didn’t draw correctly & used the eraser that is on the pencil… It took it off for the most part but has left it a little dirty looking. I’ve been wondering what can I use? 35 yrs ago I was a drafter and I have used the little pouch for graphite, never thought of using it on fabric… Thank you. Went and bought one immediately.
Now what do you use to ‘brush’ off the crumbs?
I shake them off and then just lightly brush over the fabric to make sure they’re gone. If you have a soft brush, you could use that, but I find a good flick and a shake does just fine!
I have a couple of TDP Graphic A-1 fabric erasers that I’ve probably had for more than 10 years. Have no idea where I originally got them….but they have worked for me for all these years.
For all from the UK!
There’s a “Document Cleaning Pad cleaner” (looks exactly like the one on Mary’s photos) on amazon.co.uk under “Home and Kitchen” for £8.54 + £5.24 delivery! Still a bit more expensive than the US version, but just a bit. It says “only 4 left in stock” – don’t know if this is to be taken serious or just a marketing trick.
Gerstaecker in Germany has it (Radier Pad) for €11.69 + €4.70 delivery, unfortunately they ship overseas from €150 merchandise value only. There’s Gerstaecker UK anyway, called GreatArt, but they don’t seem to carry such a cleaning pad, at least I couldn’t make a find on their website. Maybe you could ask them directly?
Angela from the Ore Mountains
When I first started to learn to stitch (age 5 or less) I was told to always cover all of the lines and never presume that even a pencil mark could be erased afterwards.
As a result if I am drawing the piece I draw what I am going to do on paper and then transfer it to the piece to be done. I used to use dressmaker’s carbon to transfer the design. I now use a light box.
I try not to need to draw the design on the fabric. I did one piece that was designed to be a platter for a table top exhibition. I drew a oval around the area that would be the center – and would be stitched with gold color thread using an oval shape cut to size. I made 3 lines of pins to follow to keep the stitches the same around the outside edge of the piece and removed them as I stitched. For the roses in the center I put down nickels and arranged them where I wanted them and then drew circles around the nickels to use as reference marks – the flowers being larger than a nickel in size, the circle marks were entirely hidden.
Somehow, I did end up with a stray pencil mark in the center area. I just stitched a stem over it and added a couple of other stems. If I didn’t mention that they were the result of an accident, no one would know.
This was a very interesting post today! I’m a hand quilter and use pencil to mark my quilting lines….and they can be a bear to remove even when you think you are using a light touch. I’ve tried all sorts of fabric erasers and they all tend to wear the weave down. I’ve ordered my dry cleaning pad!!
Wow, not only do I have nothing to contribute to removing pencil from fabric, I have never before learned about the dry cleaning bag. And I’ve been an artist all my life. Thanks a million for the tip and demo!
Kathryn
I buy mine from Dick Blick Art Supplies online. Less than $4.00 a piece.
Why not just use a transfer pencil or disappearing fabric pen? Is there an advantag to using pencil that I’m missing out on?
For some projects, the disappearing pens are great! But for others, especially if the lines extend beyond the stitching, they might not be the best choice. They can tend to re-appear, which can be problematic. Plus, a fine pencil (I like to use a .05 mechanical pencil when tracing) is usually pretty handy, without having to purchase a special pen. They make very fine line lines that are easy to cover, and they rinse out easily afterwards, with embroidery that’s meant to be cleaned.
here’s a little lol story re frixion pens
while sitting at my sewing machine
glanced over at my ironing board
and noticed my frixion pen
had rolled next to my iron
hmm..thinks I …I wonder
sure enough just the heat from the iron
was enough to make the ink in the pen disappear….forever!!!
so it’s true that heat really does work to remove the ink
just dawned on me
wonder if I put the pen in the freezer….
will let you know if cold really does rejuvinate the ink
I keep several Fabric Erasers on hand. They work great!
I found a tip on a sewing website that I’ve used since I renewed my love of embroidery. Thank you by the way, your site has allowed my renewed love to grow. Anyway there is an ink pen that is on the market that works so well (I don’t know if I can make you understand how well without a video.) PILOT FriXion is the name of the pen. Sold in a 3 pack of red,black & blue.
I free hand most of the things I embroidery, I mess up more than I get right. To remove the ink literally all I do is turn on & point my blowdryer at what I want to remove and poof it’s gone. An iron works also. Blowdryer is so easy though. I feel the blue ink disappears more completely when I use the blowdryer. But all 3 colors work. Remove all the ink with heat before you wash the fabric.
Anyone who sews anything should have one of these in their seeing basket.
your week, not you’re week.
I wonder if grating an eraser with my fine mini grater would work. Or a nicely warmed-up kneaded eraser? I’ll try both. I’m freehand-drawing with an HB pencil on natural linen, so I have to draw pretty dark.