


Today, our kids & youth embroidery classes wind down for the summer.
We’ve had two 1.5-hour daily sessions with different age levels of kids over the past three weeks, and it’s been a lot of fun!
And the results have been good! I think all the kids enjoyed the classes. There were only a few who were there because they were sent, rather than because they wanted to go, but even these participants worked steadily (perhaps chatted more steadily than they worked!), learned a bit of stitching, and had a good time.
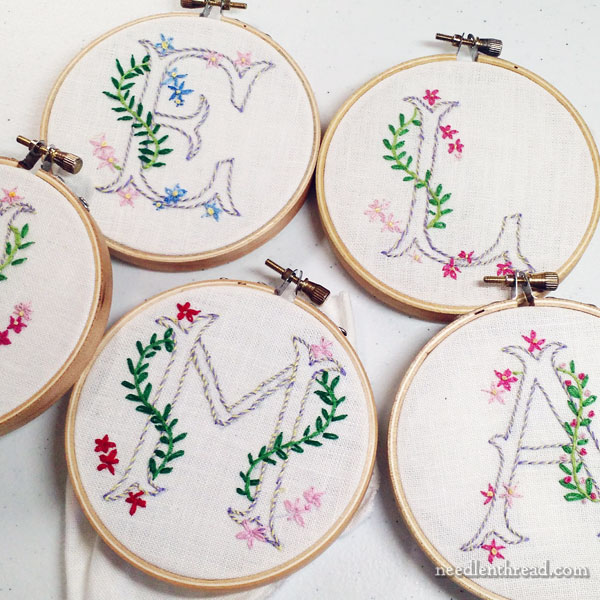
The first class projects were the simple monograms I wrote about here.
For this project, the kids learned backstitch, whipped backstitch, stem stitch, daisy stitch, and the French knot.
They also learned embroidery basics, like separating floss, threading a needle, starting and ending threads, setting up fabric in a hoop.
Finally, they learned how to finish the back of their little hoop art monograms.
The photo above is a group of finished monograms from the youngest classes. They did a great job!
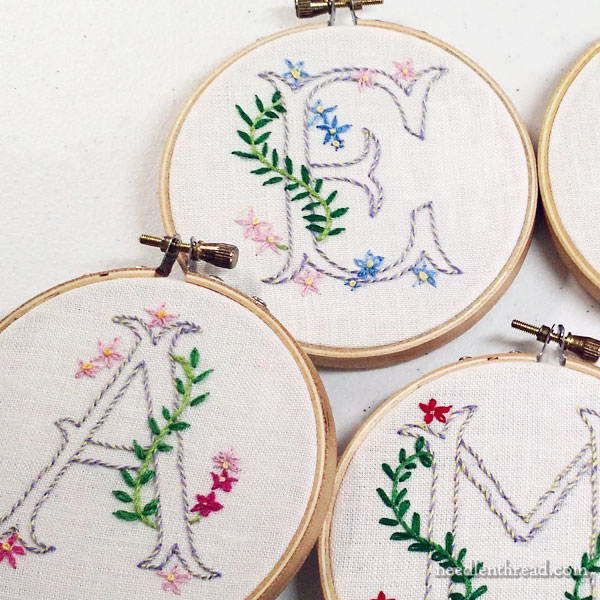
Some of the kids took the initiative to play around with their colors a bit, which was good to see. We started with a set color scheme, but, as kids will do, they asked if they could change the colors. Since they had a hearty selection of threads, there really was no reason why they couldn’t, so those who wanted to, did.
On their second project, they had much more color freedom – I’ll show you what I mean a little later!
We All Learned Things
The classes reminded me of a few good points to keep in mind for future classes:
1. Just because children have small hands doesn’t mean that small things are easy for them. In fact, it pretty much means the opposite, since they younger they are, the less control they have over their fine motor skills.
2. Especially with the younger children, basic concepts must be reinforced frequently – and I mean, frequently (several times in a class!) until the basic concept becomes second nature.
3. Take time to teach how to read diagrams, whether teaching younger children or older youth – or even adults!
4. The class time length was perfect. It could even have been longer (2 hours), but not longer than two hours.
Smaller Hands, Larger Hoops
Regarding the first point above, the 4″ hoops for the monograms were a bit small for the youngest children. When they switched to six inch hoops to work on their doodle cloths (for practicing stitches) or to work on their second project, they seemed decidedly relieved and they looked (and were) more comfortable and relaxed when holding their work.
They also seemed to progress a little faster when working with the larger hoop.
Lesson learned!
Reinforcement & Repetition = Efficiency
Regarding the second point, reinforcing basic concepts repeatedly at the beginning is key to efficiency. It may sound inefficient, to constantly repeat a concept that’s already been taught, but it’s not.
For example, we discovered that many of the younger kids, when they took their work home and stitched on it there, forgot to end off threads on the back. They would simply cut the thread after the last stitch. Then, when they started whipping their backstitches, the stitches popped out. So we had to do a bit of surgery along the way, to put things back in order.
They learned the lesson, but it would have been more efficient had we constantly reinforced that particular instruction during class time, rather than taking for granted that they understood the importance of it completely.
Diagrams
We discovered that even the simplest of diagrams for stitches can be confusing to kids. You know the stitch diagrams where we see “A” marking the start of a stitch and “B” marking the next movement?
It’s easy for stitchers to take those for granted. For us, they seem simple to understand! But with kids (and adults, too) who have’t seen step-by-step instructions laid out this way, you have to explain what A means, what B means, and then show them how their movements as they work a stitch correspond to the steps on the diagram.
It may take a few one-on-one diagram-reading sessions before it clicks. But once it clicks, diagram-reading opens a whole world of further instruction to the student, so it’s definitely worth taking time to teach how to read a diagram!
Length of Classes
We found the 1.5 hour class blocks practically perfect.
Initially, we planned to work 40 minutes of instruction, a break, and then 40 minutes of reinforcement on project stitching. What we ended up doing was instruction followed immediately by project work, with no break.
The kids didn’t really need a break in the 1.5 hour class. They had plenty of opportunity to chat while they were working on their projects, and the atmosphere was relaxed and fun. The 1.5 hours went by quickly.
More to Come!
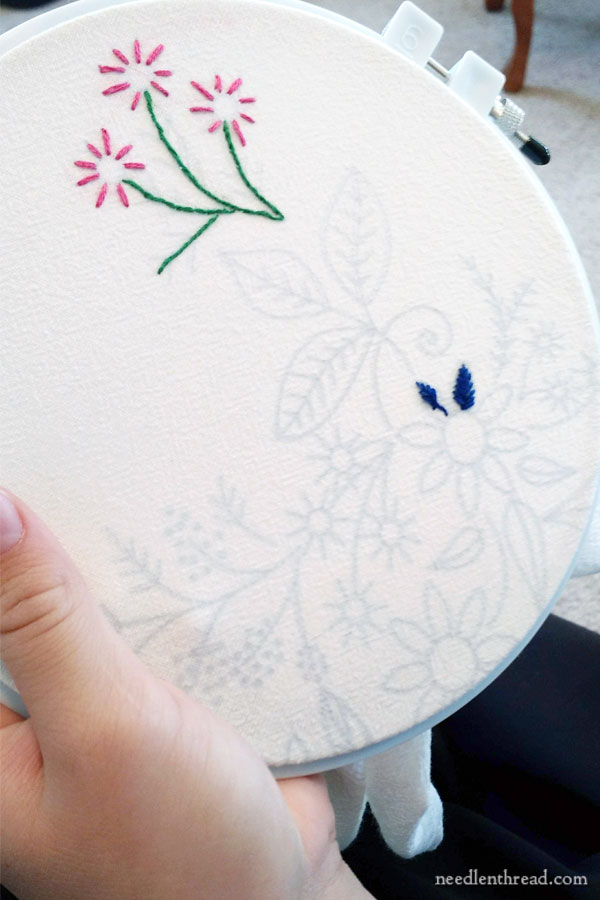
We knew that the second project would probably not be completed before the classes finished, in most cases. The idea was that the kids would have something to work on beyond the classes, but that they would have the skills and (hopefully) the interest in continuing the project over the rest of their summer vacation.
Still, many have made good progress on their floral corner designs, and I’ll show those to you and share a few more insights with you once I wind things up today and edit some photos.
In the meantime, I’m off to prep for the Last Day of Class. Gee, it’s just like being in school, all over again!
I hope you have a terrific weekend with your needle and thread!
Sounds like you had a great success with your new classes! How many students attended?
It ended up being 30, due to a couple last minute cancellations.
Dear Mary
Well the children seem to have enjoyed themselves the completed monograms are really well stitched for beginners, much better then I did when I first started hand embroidery. I have to say I can relate to the children as I sometimes have difficulties with diagrams I have to really examine them to understand them. Thanks for sharing your embroidery class projects with us and for pros and cons of running a class. I hope you have a great weekend.
Regards Anita Simmance
Thanks for your post! I did a class with ages 10 – adult, and the mentoring was good for the kids, but I would definitely have separate beginning program (public library) next time! And a set project rather than a sampler.
So impressed by the youngsters’ work! I would love to teach my granddaughter some day. I tried once, and she showed a bit of interest, but it flagged. I think maybe a bigger hoop will be better as you advise.
I am curious how you taught the kids—with a projection of your hands on a screen, or one-on-one or small groups, or how did you demonstrate?
I remember how I learned; with yarn and burlap from a teacher in elementary school. She demonstrated on a large piece of burlap she hung on the front of the classroom and we copied her. Then we graduated to muslin tea towels. My grandma taught me a lot too, by just watching her.
Small groups demos. So we took three at a time to teach a stitch. They watched us work it out, then we referenced the diagram to show them the steps on the diagram while we worked it out, then we helped them work through it individually, and then we let them practice on their doodle cloth and we circulated and helped as they got the hang of the stitch. I would like to have a video projection option. I’ve got the camera for it, but I don’t have the TV, and it isn’t in the budget at the moment and probably won’t be for a while. Some day!
Mary, last year summer I did stitching with my nephew. His stitching improved dramatically, when I used either a barrel or seat frame for him. The barrel clamped to the table worked best. I used the 6″ frame and he was great with it. But I sent him home with a 6″ regular hoop and he seemed to have trouble holding while stitching. I bought my barrel clamp at the SF School of Needlework and Design. The clamp goes up to 1 1/2″, so it didn’t fit my lifetime table, but worked perfectly on my butcher block kitchen table. He’s 11 and did very well with the entire project. We stuck to two stitches, starting, threading the needle, and stopping. We used perle cotton.
Sounds like a great set up! I would like to have the sit on hoop stands for students, but these are things I’ll have to work out over time as they budget allows.
Hi Mary, very interesting lecture and very nice works, indeed. I’m curious how the “surgery” along the way was done: Did the kids whose threads popped out, because they didn’t end them off properly, stitch them all over again? Or did you do it for them?
Angela from the Ore Mountains
Omg! Their work is beautiful! So amazing they added their own flair in color and flowers (?) to their initial! Love, love, love it! Any chance, going forward, you can have a “reunion” class to see/share progress on the 2nd take-home-&-finish project? Might add a little incentive to finish, as well as keep up their interest in embroidery! They are so blessed to have you as their teacher! Thanks so much for sharing pictures and progress with us!
Looks like the kids did a great job!
I had 3 of my grands here tonight and we worked on learning cross stitch. Do you have any ideas for teaching a 5 year old, or is that just too young?
Also, my 3 older grands are boys, but I would still love to teach them embroidery and instill a love for needlework in them. They all love to “craft”! So, my question is, could you recommend one of your monograms that would be good to learn the basic embroidery stitches but more masculine? My grand boys are 9, 12 and 14.
Thanks for any tips!
Gina
Hi Mary. I’ve really enjoyed reading along as you prepared the classes and then worked through them with the kids. I’m sure that all of your planning helped make it such a great success. I ordered the new feed cloth towels that you recommended and they came quickly and feel lovely. Now i’d love a pattern and stitch guide for the project that you did with the kids, because this “big kid” isn’t imaginative enough to come up with a design on my own!
Can I ask how you teach beginners to thread a needle? I’ve lead 1-2 beginner embroidery workshops where I spent a large chunk of time showing people how to thread needles. Often I have to fall back to using needle threaders. I’d much prefer to teach people to thread a needle without tools, as some threads just don’t pass easily through the eye when doubled in a needle threader.
I show them how to fold the thread over the needle, pinch the folded thread between the pads of the fingers so that only the tiniest bit of thread is showing, and then how to “saw” the eye of the needle down onto the pinched thread bit. It’s pretty much a no-fail method, unless the eye of the needle really is too small for the size of thread – in which case, you might have to graduate to a larger needle. But for the most part, it always works!
I’m looking for instructions for an animal baby quilt. I have a printed cloth but no color instructions on choice of thread colors. It is all printed. It is about 40 years old. Help please I would like to finish it. 13-no677-F