


One of the Many Wonders of hand embroidery is that it can be accomplished on practically any ground fabric (and even stuff other than fabric).
Lately, there’s a trend in full swing in the hand embroidery world to embroider on organza, which is a sheer fabric with a bit of body to it.
Embroidery on silk organza is actually nothing too new – it’s gone on in the clothing industry (especially in couture houses) for a long time – but working stand-alone, framable embroidery projects using organza as the ground fabric is pretty trendy right now.
To successfully embroider on something like organza, you have to keep a few things in mind. So I thought we’d chat about the whole concept of stitching on organza and I’d share some tips, resources, and inspiration with you.
This little mini-series on embroidering on silk organza will come in different parts. Today, we’re just going to look at the basics.
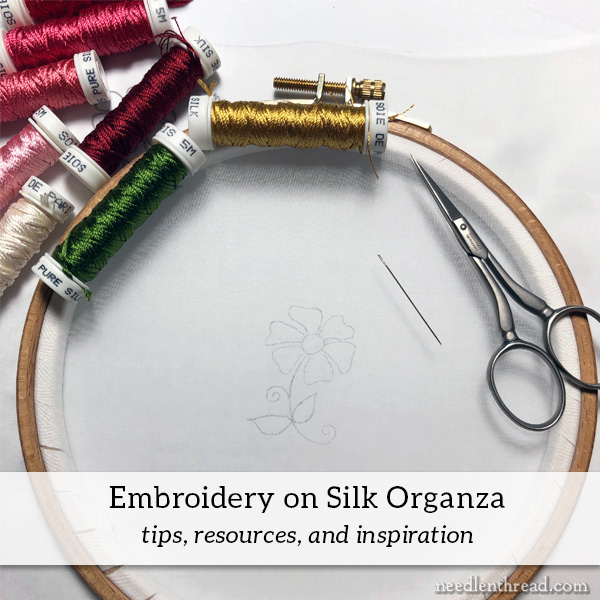
No matter what kind of embroidery you’re doing, and no matter what kind of materials you’re using, pretty much every hand embroidery project starts with the basics: fabric, thread, needle, hoop (or frame), design, and scissors.
So that’s what I’ve gathered.
Let’s talk first about the fabric.
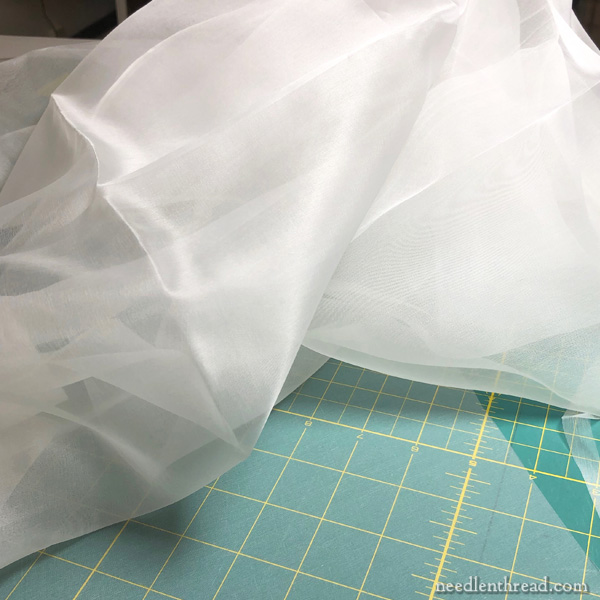
As I mentioned above, organza is a sheer fabric that is somewhat crisp with a little body to it. It’s not usually limp and flowy, especially right when you purchase it.
Organza can made out of silk or out of polyester, or the two combined. For hand embroidery purposes, silk organza is usually the favored fiber.
Silk organza is made from twisted filament silk. It’s a light, plain-weave fabric that looks very delicate, but, because of the filament fibers, it is actually pretty strong stuff!
Organza has a “semi-twin” fabric in cotton, called “organdy.” Both fabrics are plain-weave from fine fibers, but organdy is made from a combed cotton rather than from filament silk. Organdy is crisp and prone to wrinkle, and because it is made from combed fibers, it’s a fairly delicate fabric that you’d normally hand-wash. Organdy is used frequently in heirloom sewing for christening and First Communion gowns and similar special-occasion clothing.
Silk organza is often used in bridal gowns and the like, due to its crisp lightness and almost ethereal quality – there’s a kind of sheeny-sparkle to it, thanks to that glorious fiber we call silk! It really is a pretty fabric.
Because silk organza often comes folded when you order a small (say, a yard) cut of it, you might find creases from folding in it. You can iron it easily and the creases smooth right out. Because it’s silk, it takes higher heat pretty well. It does soften or limp up a bit with ironing, and it’s very easy to iron it “out of square” – that is, stretch it inadvertently in one direction or another.
Incidentally, it’s also prone to static cling when it’s ironed. And you know what I think about static cling. (If you don’t, you can read my thoughts about it here.)
Finally, when it comes to embroidery on silk organza, it takes stitching well. It’s not something you’d use alone as a ground, say, for heavy goldwork, but surprisingly, despite its extremely delicate look, it will handle semi-hearty stitching pretty well.
And just so you know, while organza is not a ground I’ve used often on its own for hand embroidery, I have used it successfully on several projects in a completely different way from what we’re discussing here. I use it more as a tool rather than as part of a finished product, but this is something we can discuss down the road a little bit!

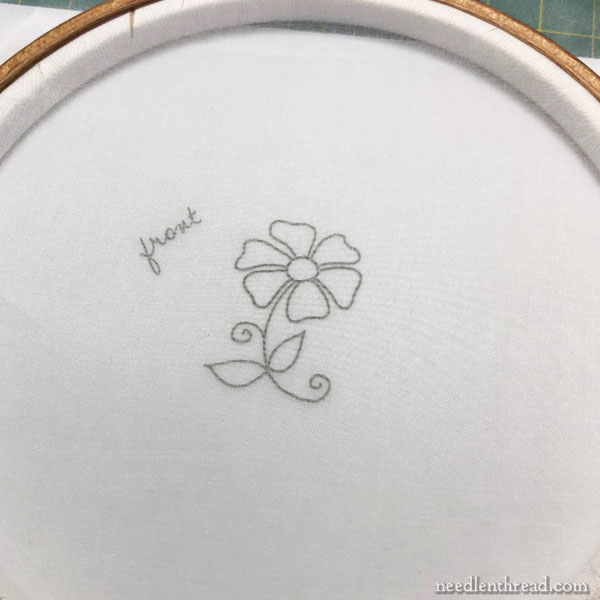
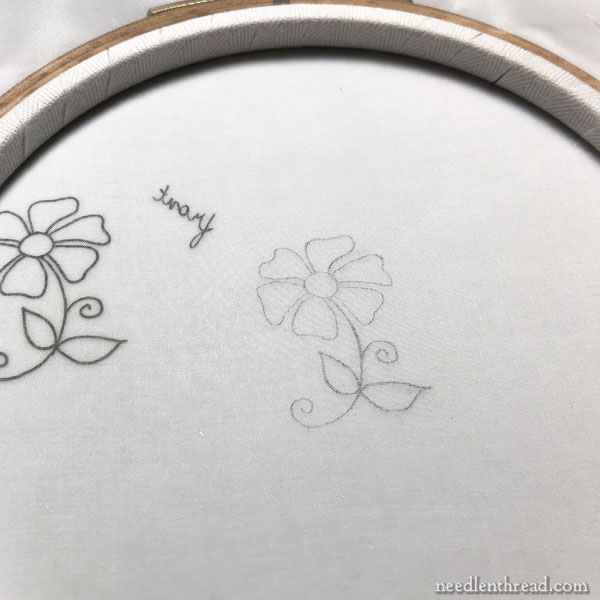
Let’s move on to stitching with silk organza. I’m going to stitch that wee flower in the photo above, and I’m going to hoop my piece of organza in a 6″ embroidery hoop.
Normally, for stand-alone embroidery projects that would be framed or finished somehow for display, you definitely want to use a hoop or a frame to keep the organza taut. This will help ensure a non-puckered, beautiful finish for your embroidery.
Transferring a design to organza is a very simple process. Tracing works great, for reasons that are very clear. You couldn’t see through fabric better if you wanted to.
However, I go about transferring a design onto organza a little differently.
First, I start with a design that’s either been traced onto tracing paper or printed from my computer onto a heavier semi-transparent vellum used for paper crafts. The tracing paper and vellum, being semi-transparent, can be easily flipped so that the design can be traced onto the fabric as a mirror image.
Why as a mirror image?
Well, it’s easier to transfer a design well and clearly onto organza with the fabric already under control in the hoop, and the mirror image is going to help me do this in a way that makes sense.
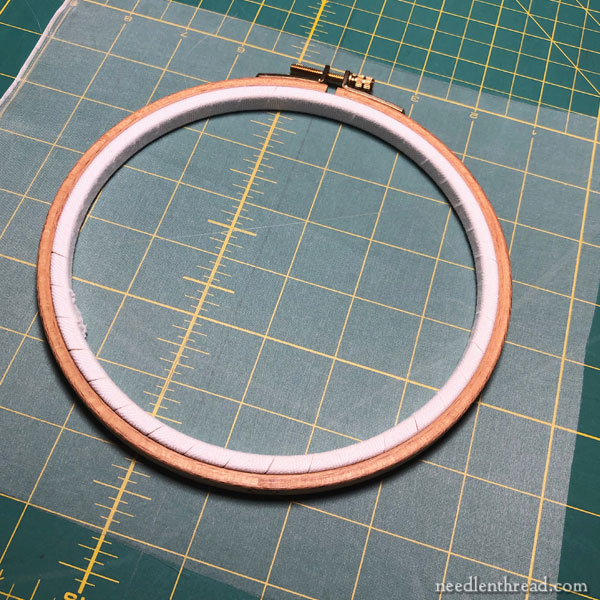
So, first things first: hoop the organza. Your fabric should be cut large enough to have a good two inches or so around your hoop, and if you’re using a hoop, the whole design (and it’s area of finished visibility) should fit inside the hoop.
You can neaten the edge of the organza using a sewing machine if you want. For this project, which is a quick one that I don’t plan to hover over for too long, I didn’t bother. Still, sometimes the fabric can shed its threads a bit and they can be annoying. So feel free to neaten the edge if you want!
When you hoop up the organza, you want it to be taut in the hoop, and you want to get it in the hoop in one go!
Hooping organza can displace the fibers around the hoop area – it’s easy to pull them out of whack a bit – but don’t sweat that part too much. Release the screw on the outer ring just enough so that you have room to push it down onto the inner ring, pulling the fabric evenly taut all around. Then tighten the hardware a little, if necessary.
If you have to adjust the fabric a little, that’s fine. Do it as you normally would with any fabric, but try not to warp the organza. Remember, despite its sheer and delicate look, it’s a pretty strong fabric!
You can feel around the surface of the organza once it’s in the hoop to see if the tautness is equally distributed. Your fingers will detect areas where the fabric is looser or tighter. Try to adjust the fabric all around so that, when you feel the surface of it in the hoop, it’s smooth and you don’t feel ridges of “give.”
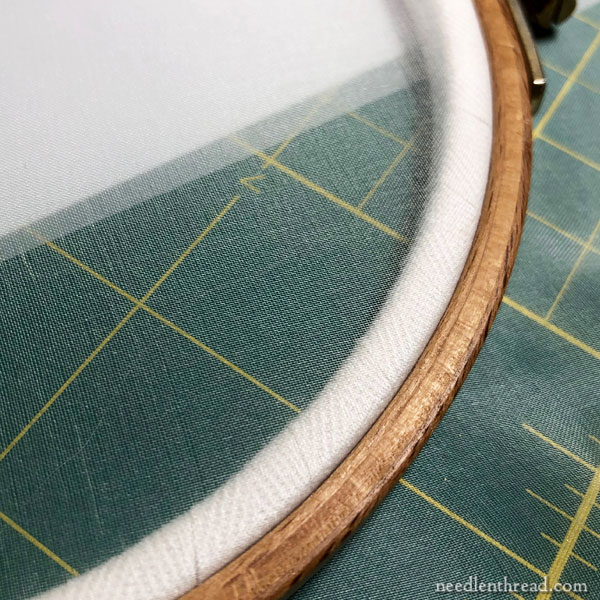
Now, if you put your design right side up under the hoop, with the fabric in the normal configuration, you can definitely easily see the design. But this isn’t a great way to try to trace the design!
As you can see from the shadow in the photo above, there’s considerable space (corresponding to the thickness of the hoop) between the organza and the paper with the design on it.
Don’t try to trace it in this configuration. And don’t bother taping the paper inside the hoop, either. You wouldn’t have a hard surface behind the design, so it would be trickier than necessary to trace it that way.
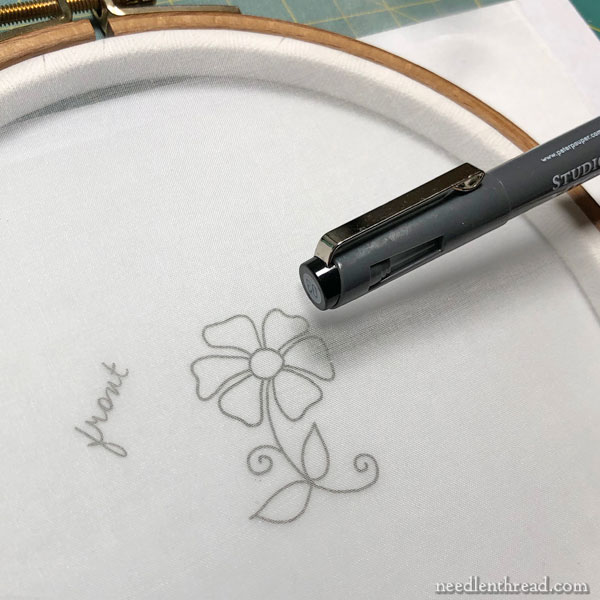
Instead, flip your design over. This is why you traced it on vellum or tracing paper.
And now flip your hoop over so that the taut organza is in direct contact with the paper that you’ve drawn your design on.
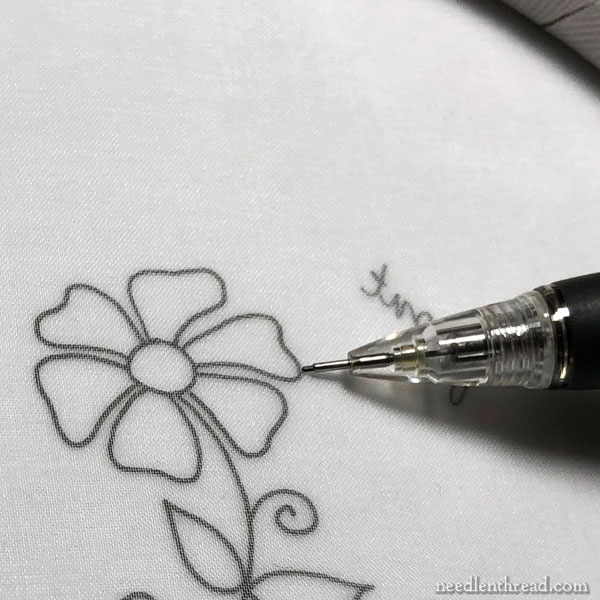
Use a mechanical pencil to lightly trace the design onto the back of the organza.
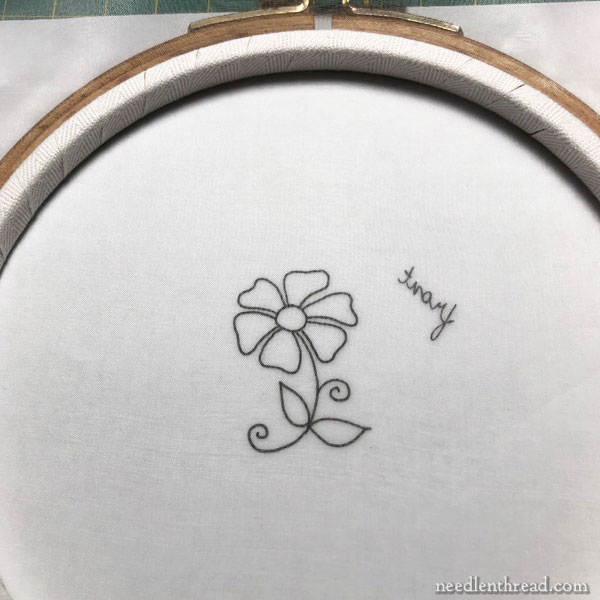
When you flip your hoop over, you’ll have the right orientation of the design on the fabric.

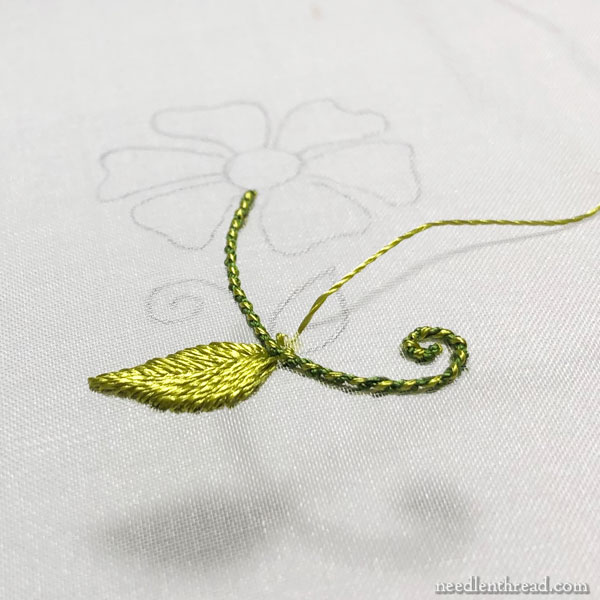
Now you’re ready to stitch!
I’m going to use Soie de Paris (a lightly twisted, stranded filament silk) to stitch this little flower. For a needle, I’m using a #10 ballpoint needle, rather than an embroidery (or crewel) needle.
The tip of this type of needle is not as sharp as an embroidery or crewel needle. I may switch to a #10 crewel later on, but for the first stitching I’m doing here, I don’t need to pierce the fibers of the fabric – I can just move them apart. The fabric is so finely woven and yet open, that you can easily follow your design line even if you’re not using a really sharp needle to pierce the fabric fibers.
We’ll talk about the stitching a little later! There are some tricks to stitching on fabrics like silk organza – and in fact, if you adopt those tricks for the rest of your embroidery, you’ll develop some really good habits. So we will look at those tricks in the next article on this mini project.
Inspiration & Resources
If you want to see silk organza used to stunning effect in hand embroidery, take a look at the embroidery of Gary Clarke. You’ll have to Google him. He has a Facebook page here, but his website is unfortunately defunct at the moment. Still, if you Google his embroidery, you’ll find some gorgeous designs worked on silk organza!
If you’re looking for silk organza to stitch on, there are many sources to scour, including local fine fabric stores that carry bridal fabrics, or even online spots for fabric dyers. Dharma Trading is a good place to pick up small lengths affordably, if you want to try it out.
So delicate and awesome Mary I don’t comment so often but I’m subscribed to your newsletter and I have to tell you it’s a delight to read you and watching your photos. So much to learn… thank you so much for sharing
Thanks so much, Meli! I’m glad you enjoy Needle ‘n Thread!
Dear Mary
What a lovely idea to embroidery on silk organza I’ve just seen some images and they are so nice and what a lovely trend. These images show such unique designs and because the fabric is thin and sheer the embroidery stands out and is more prominent. I’m looking forward to more stitching on organza. Thank you for sharing with us how to set up and transfer on organza fabric and for the photos.
Regards Anita Simmance
Thank you for doing this series. I’ve been working with this fabric lately and your tips are alway invaluable.
Thank you for delving into this topic, Mrs Corbet, I can’t wait to learn more about embroidering on sheer fabrics! 🙂
Gary Clarke specifies synthetic organza in his book, not silk. How would you characterize the difference for embroidery?
I don’t know that there’s that much of a difference – I prefer silk myself, but then I usually use organza in a different application with embroidery, which requires me to cut and sometimes pull threads from the fabric. I find it easier to do that with silk organza than with synthetic. I also find that the silk wears on the embroidery threads less, but this could just be my imagination or sensation – I haven’t done any scientific experiment or study to establish that as fact.
I’ve had a few goes at stitching on polyester organza, making dragonfly wings and the like, so I’m really fascinated by your facts and tips, Mary. Looking forward to the rest of the series, many thanks!
Thanks, Mary! Especially appreciate the hoop tips.
Hope things will be cooling off in Kansas soon!
Linda
I love seeing silk embroidery!
Some more inspiration, and another use for embroidery on organza: rutholearytextileart.co.uk/dog-roses-embroidered-panel. she worked the roses on gold organza then cut out the embroidery & stitched it to velvet – very lush looking, and keeps the embroidery from sinking into the velvet pile.
Thank you Mary,
I can’t wait for the rest of the series. I want to embroider something and then appliqué to the main piece, without it being too heavy. Would it be suitable for that?
You won’t get the stability you’d get with other fabric. If you cut out the silk organza around the embroidery, I think you’ll lose a lot of structure. It’s not stiff fabric.
This is so timely for me! I am struggling with this very skill: an old pattern from Inspirations of a snow drop, my mother’s favourite flower. Thank you!
Very nice informative article, thanks for sharing
I am making some tiny lavender sachets and early last week I was seeking internet tips for embroidering on sheer fabrics but mostly struck out. I visited your site this morning to reread your article on how to bind a hoop and I was so blessed to see your most recent articles on working with sheer fabrics. What lovely timing! I look forward to incorporating your tips as I continue on with my little project. Thanks!
I think this type of embroidery ranks right up there with the Japanese two-sided embroidery. You do it so well. I wonder, to make a 3D type embroidery scene, could you stitch on separate pieces of organza and layer them? There would have to be some sort of space between the layers, wouldn’t you? Thanks for doing this set of articles – love it!
Hi, Becky – yes, of course you can! Check out Gary Clarke’s embroidery on organza. He often layers the organza over a background.
Hi,
In 2004 I did a course with Gary Clarke and used his organza techniques in textiles for a Vis.Arts degree. He advised us to use a Japanese synthetic organza as it did not stretch. I have run out of fabric bought at that time and cannot find where to buy more.Is the organza you use the Japanese synthetic he recommended? I hope so and that I can purchase it from you.
Thank you in anticipation,
Helen Terauds.p
Hi, Helen – No, I’m afraid I just used silk organza, because that’s what I had on hand. I think the synthetic does hold up better, and it would be worth trying to find a source. Unfortunately, I don’t have a source for it. :-/
In the past 23 months i have embroidered over 225 hoops and given them as gifts.
This week I embroidered on organza for the first time. My question is..
When I trim the fabric, how do I “finish” the edges so they are not showing when the hoop is hung. Do I trim and glue? Appreciate your response
I think you would have to trim it carefully, cut small notches in it to reduce build up, and fold over the inside of the hoop and glue. That’s my guess. I’ve not finished organza in a hoop before. But I think that would work.
Hello Mary
I am starting a bumble bee on a small bag. A friend gave me a packet full of bag clasps which have sat for six or seven years and I now must get a move on using them. So – small bags for a cell phone or credit card, hankie and car keys type of thing. I did a few with bead knitting. My question, – I want to make the wings very light and transparent and appliqued (not stumpwork). Should I use washable iron on for some body and any tips and hints for cutting out the wings. Fray Stop?
Many thanks – Paddy (Patricia but never called that) in South Africa
Hi, Paddy – Well, I’m not quite sure. I can see why you wouldn’t want to use stumpwork. The problem with a stabilizer is that they aren’t really transparent, if you’re looking for transparent. I wonder if you could use something like silk organza, cut it out, and over-stitch the edge (with an overcast stitch) to appliqué it. Maybe use a very fine metallic thread or shiny rayon or something, to further enhance the transparency / lightness of the wings? Might be worth a try!
Hello, Was hoping to transfer an embroidery pattern onto organza with a screen printing technique. Need to have a laser stencil done first? Have you ever come across this technique. Thank you. Regards Sophie
Normally with screen printing, you have to make a screen first, before doing the transfer. You should probably contact a professional screen printer, or perhaps look up some how-to videos on YouTube. You’ll likely find quite a few tutorials out there!