


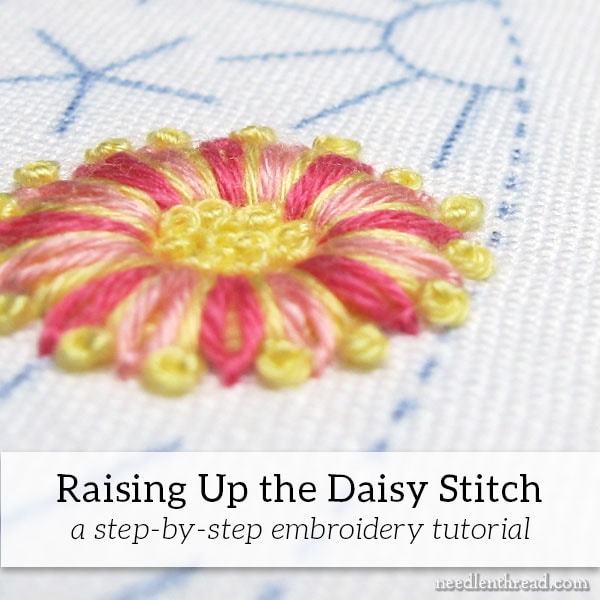
How about a little bit of simple Stitch Fun! to start off the week?
With the voided floral monograms I’ve been working on lately – and the other floral filling I’m playing with on another sample – I’ve been fiddling a bit with how to take simple stitches just a notch upwards. In this case, I’m raising the daisy stitch.
This is a fun way to stitch a ring-like flower that has a little lift to it!
At a glance, if you’ve been stitching for a while, you probably know exactly what I’ve done with this ring to lift the daisy petals up.
This is not a difficult or intricate process, but it’s a good reminder that you can make just a few simple adjustments in your approach to the basic stitches, to give them a little bit more kick than they might usually enjoy!
So, with this particular piece, I’m working on a linen called Tailor’s Chalk (it’s available through fine needlework stores and online), which is rapidly becoming one of my favorite linen. It’s a fine linen, rather lightweight, with a beautiful hand, and perfect for surface embroidery.
The thread I’m using is cotton floche, but you can accomplish this with regular floss as well – just use two strands from the six.
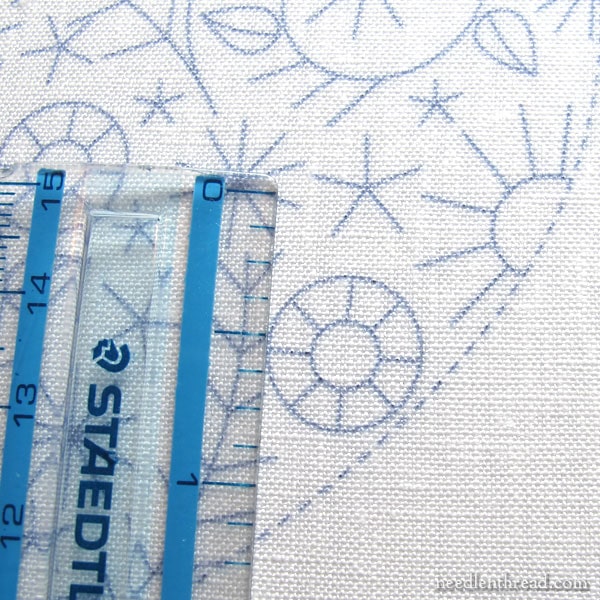
The ring that I’m stitching in this tutorial is approximately 1/2″ in diameter.
In fact, it’s bigger than I meant it to be. I need to shrink down the design I’m working with right now – I enlarged it as a test, but I’m not happy with the size. It seems almost gargantuan!
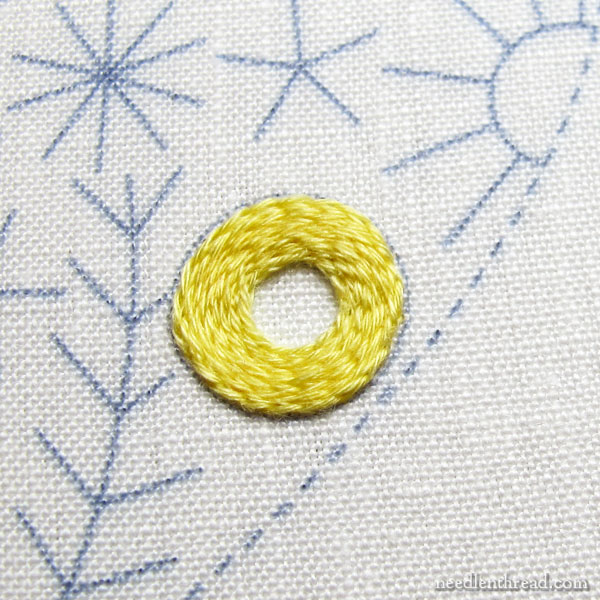
To pad the ring, I used split stitch.
You can use stem stitch – and it would probably work up quite a bit faster – but when I’m working with floche, I like split stitch. If you’re working with two strands of stranded cotton (floss), I’d probably just use stem stitch for the filled padding.
Pick a color that works with your whole scheme for your finished ring.
In this case, I was going for what I call the “pink lemonade” look, combining pinks and yellows. I like this combination when I’m working with cheery brights!
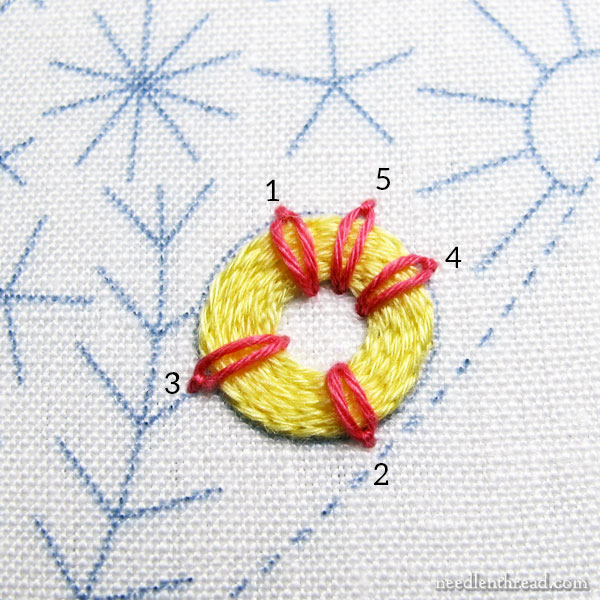
I’m using two alternating colors of pink for the petals. So I started with one color – the dark pink – and began stitching daisy stitch petals over the ring.
I worked them in the order shown in the photo above, kind of cutting up the ring into equal-enough proportions.
When working something round that is divided, I always find it easier to start with stitches laid out as if I’m cutting up a pie. Then, I go back and fill between them. It just helps keep the slant on the stitches correct and it helps me gauge spacing a little bit.
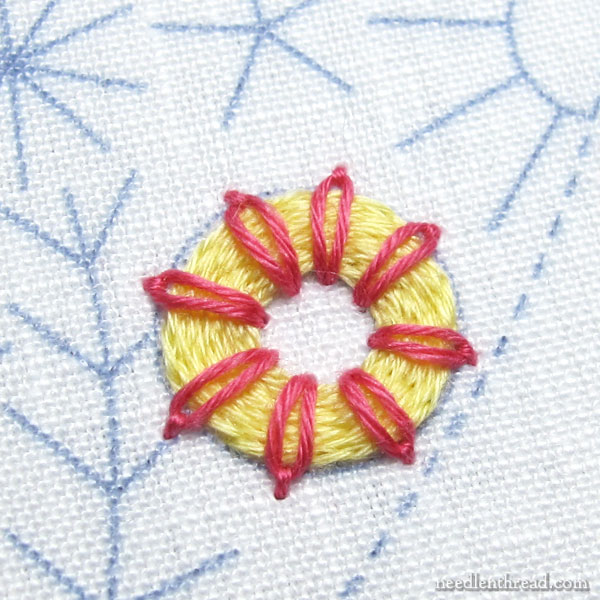
My spacing isn’t perfect, but it will work fine. You don’t have to obsess over spacing in a little element like this – as long as the spacing is “equal enough,” it’ll look just fine!
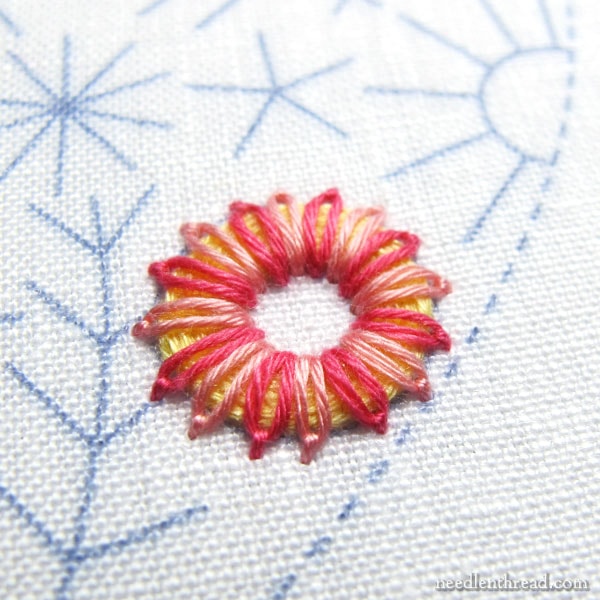
Once the first color of daisy stitch is finished, go back and fill between them with the second color, if you have a second color.
You want your daisy stitches to sit right up next to each other without looking tight and without overlapping.
Make sure that they extend just beyond the edge of your design circle, too, so that your design line is hidden by the embroidery.
When I finished the alternating pinks, I wanted to pull the yellow a little more to the front again.
I had room to do this by working a long straight stitch between each petal. It would have been far too crowded to try to fit a whole daisy stitch in, but a single straight stitch worked great and helped bring the yellow back into a more prominent role.
At this point, the ring looks a lot like a piece of candy, doesn’t it? Yum! (Don’t worry, I didn’t lick it.)
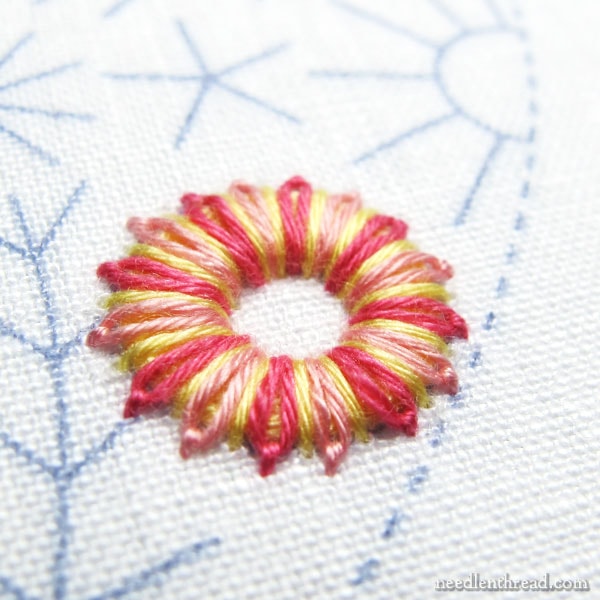
Time to add a little texture!
I tipped the yellow straight stitches with a French knot.
Now, you could just work a pistil stitch when you work the straight stitches in yellow – after all, it would eliminate the need to go back over and add the French knots.
The pistil stitch is essentially an elongated French knot – or a French knot with a long tail leading up to it. You can find a tutorial for it here.
But I’m not a huge fan of the sideways pull on the French knot that often results from the pistil stitch. So instead, I just work a separate French knot at the tip of my straight stitch, which gives me a much rounder knot in a normal orientation on the fabric.
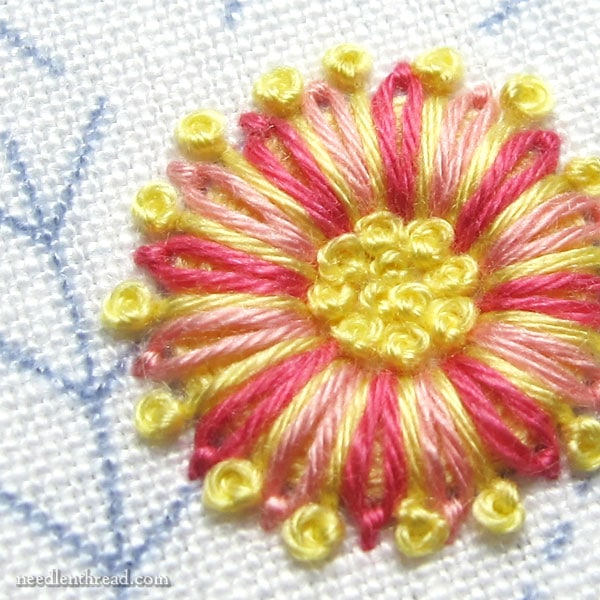
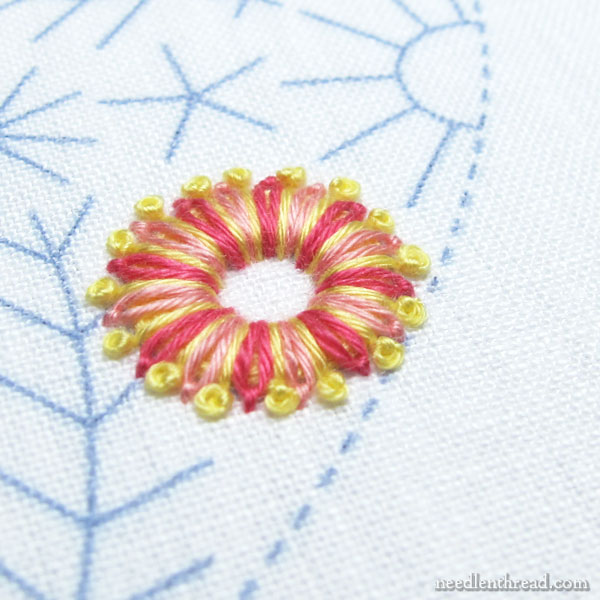
With the texture taken care of on the outside of the ring, it’s finally time to add a little to the center, by filling it with French knots as well.
If French knots give you trouble, check out my French knot video here – it may help save a lot of your knot problems! If French knots are a real bane for you, perhaps a Colonial knot would work better? You can find a tutorial for Colonial knots here.
That’s it, my friends! A fun and cheery way to lift up the daisy stitch ring a little bit!
If you’d like to explore more Stitch Fun tutorials, you’ll find a whole list of them here.
Happy Monday!
What a pretty combination of stitches! I may have to make something up just to do a bunch of these sweet flowers!! 🙂
This is a great idea; I’ll be giving it a go soon. Thanks for the inspiration.
Hi Mary,
Quick question. When you are using split stitch to fill a shape do you start on the inside center and work out to the design line or the other way around?
Thanks so much,
Vickie
Wow, Mary!
I love this flower.
I greatly appreciate that you mentioned why you chose not to use pistil stitch. Learning about your thought process helps me develop more detailed judgment of my own and to look with closer eye–I hadn’t thought about the sideways orientation of the knot in a pistol stitch.
Thanks for writing such a great resource.
Beth
Dear Mary
Back to posting comments after all my hospital appts are finished thank goodness. Anyway I love your stitch fun tutorial on the daisy petal and it looks perfect as far as I am concerned. The raised daisy stitch looks great and I love the colours blend as red and yellow are some of my favourite colours. I always have trouble with the daisy stitch I invariable can’t get the each stitch the same size and I have trouble spacing them in a circle. But yours look great, thank you for sharing with us the stitch fun tutorial on the daisy stitch and for the photos and diagram.
Regards Anita Simmance
Welcome back, Anita!! I hope the recovery is going well!!
Dear Mary
Yes it’s going very well thanks and improving daily. Glad to be back.
Regards Anita Simmance
Morning Mary ~ what a delightfully fun flower and so simple to create. I have problems creating a good pistil stitch too so do as you do with a straight stitch and a French knot, works every time.
Happy stitching, Brenda
Mary…it looks great! I will definitely use this idea in my current project!
Plus, since I love to combine embroidery stitches with enhancements, I might substitute small yellow beads in place of the french knots. Might add a little “bling” to my project!
Regards,
Bonnie
Amazing – thank you
Mary, you do love things on a small scale, just as I like things on the large side. (I’m in accord with Georgia O’keefe, I guess.) But I really like this flower an am thrilled with the stitching instruction, so I will be trying it out soon. I do think it would work up fine in crewel.
Mary, could you use a piece of wool felt to pad the surface?
Sure you can! If you have the right color on hand, you’d sew it down along the edge (outside and inside of the donut – might be a bit fiddly to cut and then tack down on both edges, but it can be done) so it doesn’t interfere with the way the stitches sit.
What a lovely effect you get from such humble stitches! I just love combinations like this that make simple stitches more interesting and a little more sophisticated. Do you have a collection of more examples of stitch combinations?
Hi, Barbara – Sure do! You can follow the link at the end of the article, to the Stitch Fun tutorials collection. 🙂
Beautiful flower!
That’s so so pretty! Love it!
Thanks, Heather!
Oh, that is so lovely. I want to try that on my doodle cloth. I can see that done in shades of yellow and purple.
This is a perfect fit for the kitchen towel project I’m working on. I have 2 flowers left that would work for this technique. I especially like the little french knots evenly spaced around the outside of the flower. Thanks for sharing!
Perfect timing! On the project I am working on, I am about to have to make a daisy. I’m reviewing a set of three embroidery kits which are pretty simple but I wanted to take them up a notch or two or three and your tutorial here is what I needed to see so I can make a great daisy. I may be weird, but I have never really liked MY lazy daisy stitches. They always seem too straight and not rounded even though I try to not pull everything too tight. But this idea I think will work. So thank you!
So I have a question,Mary. You’ve discussed using the Tailors chalk linen a few times on various projects but described it as lightweight. Have you needed to use a backing fabric? I’ve been scouring your posts and comments but I haven’t seen this mentioned. I’m really hoping to find a linen that I don’t have to bother with this step. Hopefully you find time to answer!
Thank you for this post, I found your Tutorial that is very helpful, I am trying to make something with this idea.
I would love to be on your email list. Love all these stitches.
Hi, Carolyn – you can subscribe via email to Needle ‘n Thread by visiting my home page (www.needlenthread.com), and in the left column (if you’re on your computer), you’ll see a place to enter your email address to subscribe. If you’re on a mobile device, you can access that information by clicking on the small stack of lines in the top right corner, and scrolling down the menu that opens, to find the subscription box.
Hi Mary, I tried searching for Tailor’s Chalk Linen but keep getting results for regular tailor’s chalk; do you have a link?
Your work is beautiful!
Olá
Eu adorei este tutorial!
Muito obrigada
I must try this. It is very pretty and I love how you raised the stitches. Lovely.