


On Monday, we started a series of tutorials on how to embroider strawberries five ways, and in that first article, which you’ll find here, there’s a materials list and a free pattern for the strawberry design.
You can stitch along with the series – it’s not too late to start – or you can come back to it here on the website whenever you want! If you’re on my Patreon membership page, you can also download the PDFs for the series to your own computer for future use or printing.
Today, we’re going to start very simply. We’ll chat about blending colors, and we’ll work through the first strawberry.
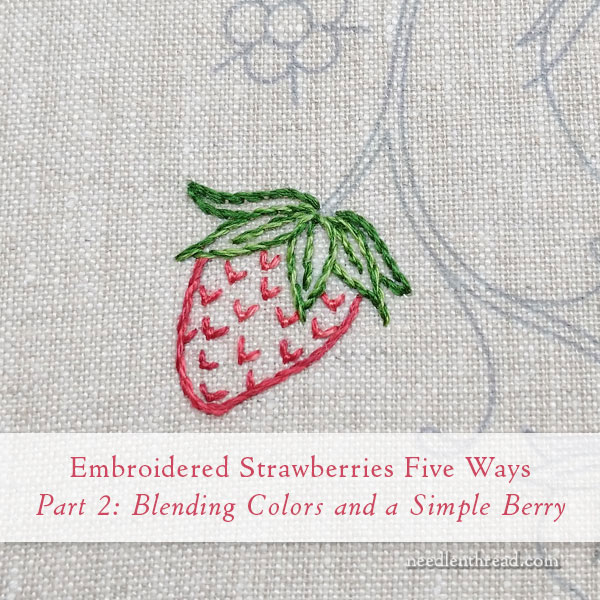
See what I mean? It’s a simple strawberry!
This is the second smallest strawberry on the design, in the lower right.
Now, you might notice we’re not starting with stems. You certainly can start stitching the stems if you want. We’ll be stitching those later on, using stem stitch for the most part and the greens in the materials list. So if this strawberry isn’t enough for you this weekend, feel free to start on those stems!
I decided we’d start with the strawberries first, because sometimes, if you get stuck into stems (which can take a while) and all green stuff, you might lose interest if there’s not a lot of variation.
I figure with five different ways to stitch the berries, there will be enough variation to make it fun, and by the time you get to the relatively large quantity of green in the stems, you’ll be So Excited to see the whole finished piece that you won’t mind spending time on the stems!
Colors
On this berry and its green little hat, the sample is worked with two strands of floss, using the following colors: 304, 321, 3705, 703, 986
To give some variation to the color, in most cases, there are two colors in the needle at once.
For example, for the lighter green leaves, there’s one strand of 703 and one strand of 986 in the needle.
For the outline on the strawberry, there’s one strand of 321 and one strand of 304 in the needle.
For the fly stitched little pits in the berry, pink and red are combined in different ways, depending on location.
There are only two stitches on this berry: stem stitch and fly stitch. I’ll include links at the end of the article to tutorials and some helpful tips.
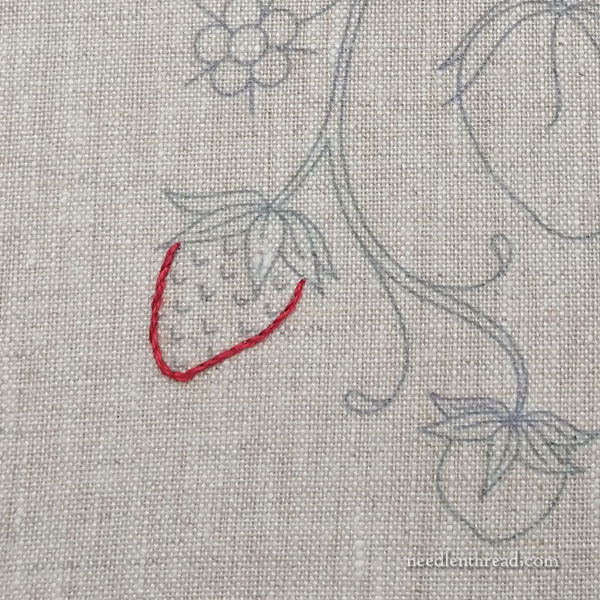
Begin by combining one strand of darker red and one strand of lighter red (321 and 304) in the needle. Work the stem stitch around the outline of the berry.
With the same thread, work a few of the small fly stitch “pits” on the body of the berry, at the base of the berry. Just two or three will do it, around the lowest point on the berry.
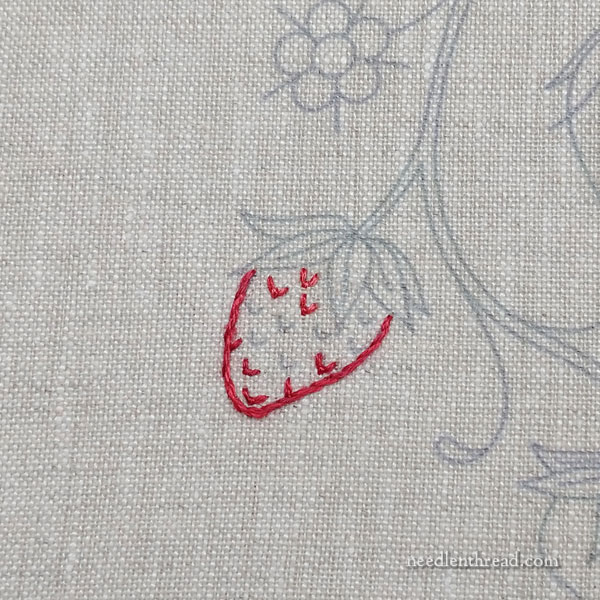
Switch to the lighter red and the pink, one strand of each in the needle, and fly stitch a few of the “pits” at the top of the berry near the leaf.
Switch to the darker red and the pink – one strand of each in the needle – and work the fly stitch on the “pits” in the center of the berry, covering the rest of the little dents on the design.
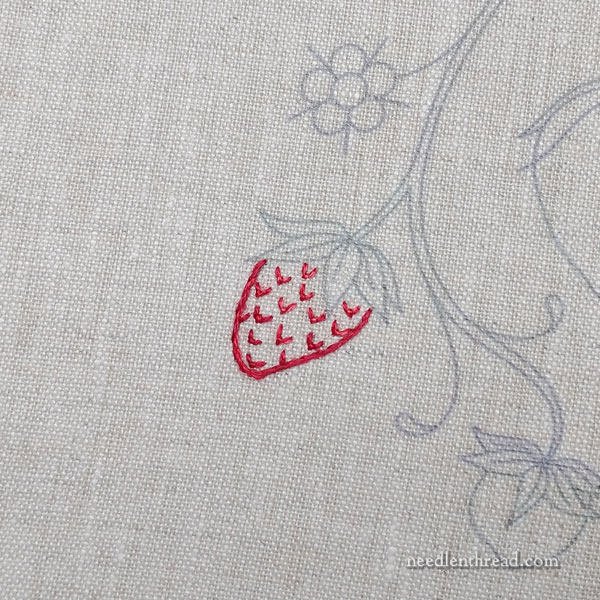
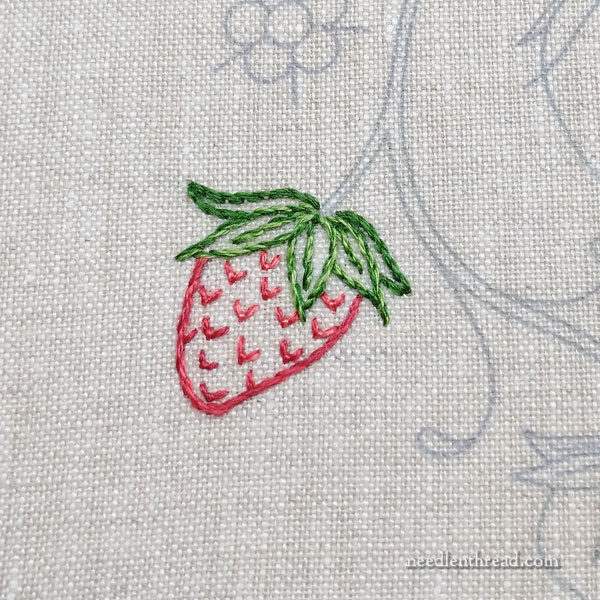
Voilá! Simplest strawberry ever! (More on this point, below.)
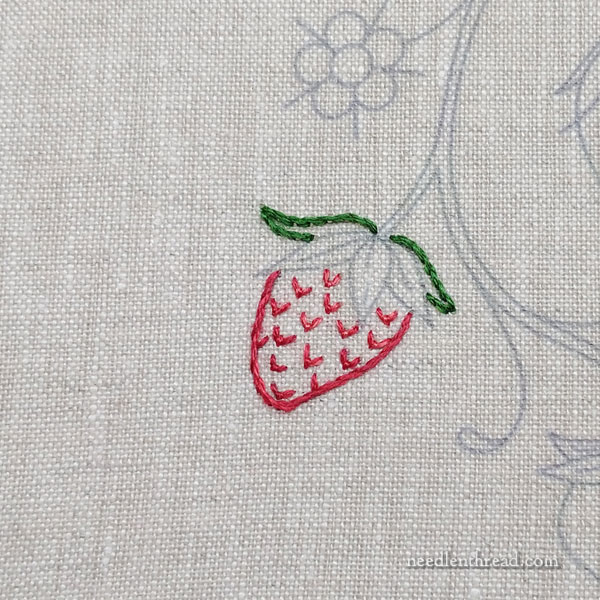
Using two strands of the darkest green in the needle, work the farthest back leaves on the head of the berry in stem stitch.
Switch to one strand of light and one strand of dark green in the needle, and embroider the foreground leaves and their center veins using stem stitch.
And that’s the end of strawberry #1!
Simple is OK!
If you like this approach to a very simple strawberry, there’s nothing keeping you from embroidering the whole design with similar strawberries. You would just have to adjust the leaves on the tops of the larger berries so that they worked with this concept.
There’s nothing at all wrong with keeping things this simple! If you were, for example, using the design on the corner of a kitchen towel or something similar, chances are, you would not wish to embroider the towel with some of the more complicated methods coming up. You might be perfectly happy with simple outlines and little seed dents.
Stitch Instructions & Tips
Here are some tutorials that will help you with this berry:
Working stem stitch a corner or point
Coming Up Next
In the next article in this series, we’ll tackle one of the larger berries in a technique that you might not expect, but that works great on something like a strawberry.
Looking for More?
You can find the first article in this series, with the materials list and free pattern, here.
If you’re following this project on Patreon, too, look for the PDF printable of this installment – with stitch instructions included – later today!
Hello! It’s beautiful design but I have question. What is colour 3205? I’m not sure is is DMC, also I cannot find it on the material list in previous post.
Yours Sincerely
Sylwia
That color is called a typo. :-/ Thanks for catching! It’s 3705.
Hi Mary! The first strawberry is beautiful! I can’t wait to see the rest!
Hi, Mary. Thank you for this series. I love strawberries! What does the back of your work look like with this little berry? I’ve watched many of your videos but I still struggle with finishing off the thread when I only make a couple stitches of a color. Thank you!
It criss crosses between the little dents. There’s not as much space as it seems – the berry is much smaller in reality than in the close-ups, and the fabric hides the threads, so no reason not to travel between each dent.
You should rip The Thing. It sounds like you don’t like it and don’t know what to do with it. Why fret over something you dislike? It’s supposed to be fun—right!
I cannot locate part 2 of Strawberries on Patreon.
Please advise.
If you go to the main page: https://www.patreon.com/marycorbet It’s the article right below the current article, under “recent posts.” It’s titled “Strawberries Part 2 – PDF Available.”