


Today, we’re going to explore how to make small, consistent bows to use in finishing embroidered items.
I’m also going to announce the winner of last week’s pre-Christmas give-away at the end of this article, so read through, in case it is you!
As you create embroidered goods, you’ll likely find that there are many times when an accent bow can finish off a project perfectly.
For example, the Christmas Tree Ornament for the Stitch Snippet stitch-along we’re working on right now features a rather prominent little bow at the top of the ornament.
But Christmas ornaments are not the only items that benefit from bows! There are plenty of made things in the arts and crafts world that can be topped by a little bow.
After struggling with tying small bows for many years, I finally resorted to this method, and I’ve been able to tie nice looking, consistent bows ever since. It may seem fiddly at first, but once you practice a couple bows, you’ll get the hang of it and you’ll be able to produce consistent, perfect, pretty little bows quickly.
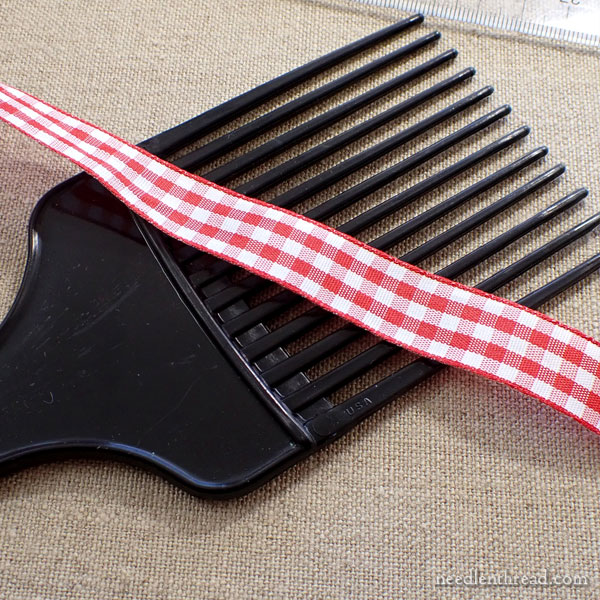
For this tutorial, I’m going to tie a bow that is approximately 1.5″ wide. I’m using about 12 inches of 7/8″ taffeta gingham ribbon.
(Note: If you’re making the Stitch Snippet Christmas Tree ornament, I have corrected the materials list on the previous article to 7/8″ wide ribbon.)
For my measuring tool and tying rig, I’m using a hair pick that I keep just for craft purposes. You can also use a wide fork if it has an even number of tines on each side of a center opening, and if it is as wide as you want your bow to be once the bow is tied.
You can also rig dowels in a thread holder, or something to that effect.
These types of bows can also be tied using your fingers as “tines,” but if you want the bows to be consistent in size (if you are making a number of them), it’s better to use some kind of rigid rig other than your fingers. I also find it’s more difficult to tie them with your fingers if you are using a wide ribbon (over 1/4″).
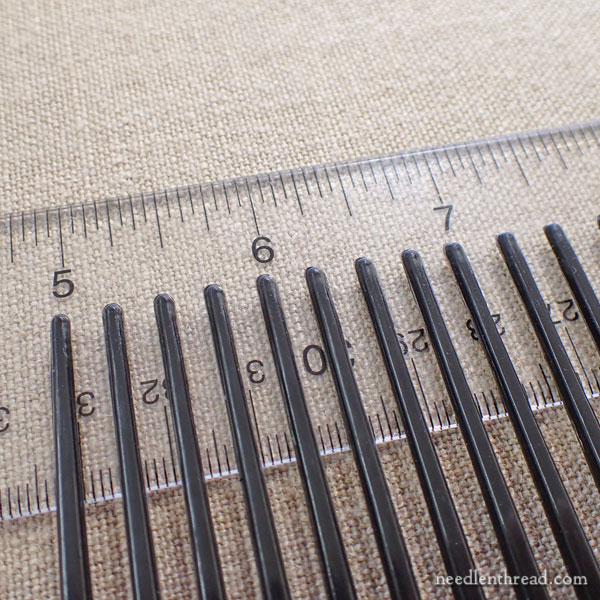
Since I want my bow to be about 1.5″ wide when tied, I’m counting off an even number of tines on my pick that measure out to about 1.5″ wide. In this case, I can use 8 tines on the pick for a bow that’s just slightly over 1.5″ wide.
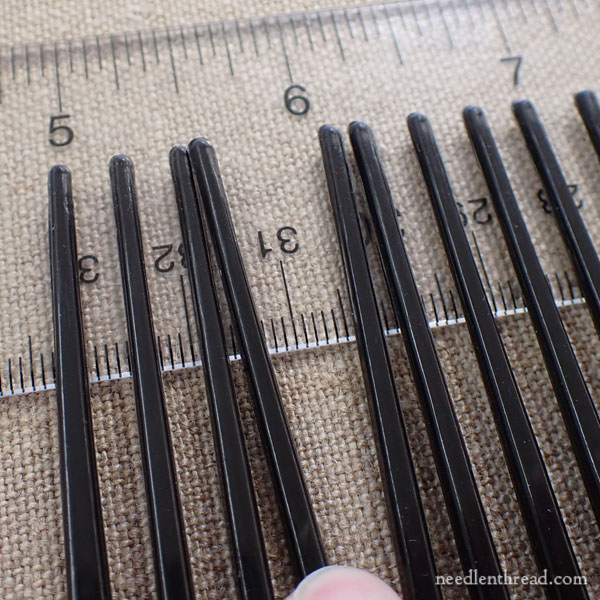
I’m using four tines on each side of an empty space, which will serve as the halfway point when tying the bow.
I’m just pushing the tines apart there, so you can see that you need an empty space as a halfway point.
So you can see that you don’t use the whole pick in this case – you just count up the number of tines that will give you the width you want on your bow, with an empty space between tines as the halfway point.
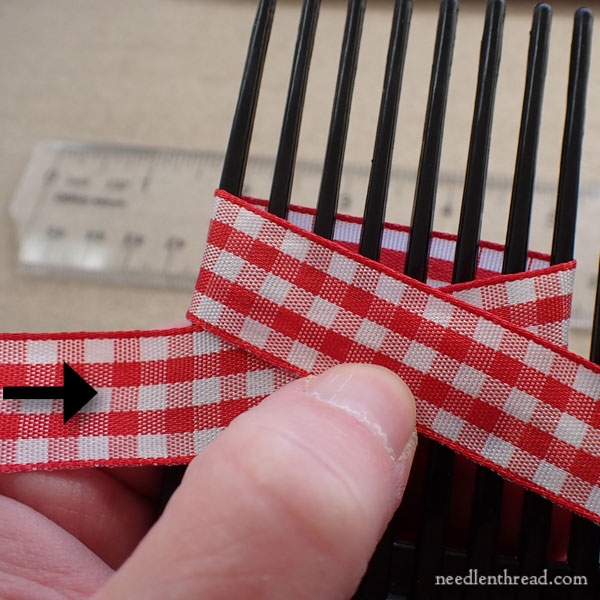
I’m holding the pick in my left hand.
Starting with the left end of the ribbon held off to the left and moving the ribbon to the right, I pass the ribbon over the front of the pick, across the 8 tines that will form the width of the bow.
I pass the leading end of the ribbon between the 8th and 9th tine to the back of the pick, and back around to the left, bringing it over the front of the pick again, to cross over the ribbon.
At the intersection, I hold the ribbon in place with my thumb.
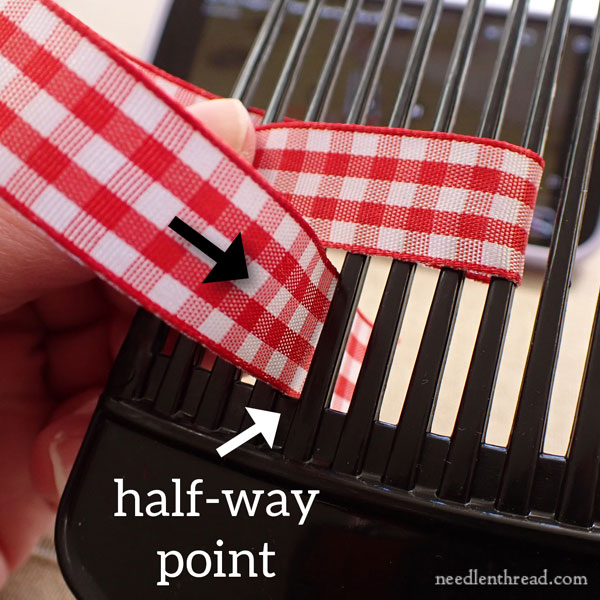
Then I pass the leading end of the ribbon between the 4th and 5th tine, in the halfway point, below the ribbons that have already been wrapped on the pick.
Allow the ribbon to rest on top of your thumb that’s holding the intersection.
Take the leading end of the ribbon from the back through the halfway point to the front, above the wraps on the pick.
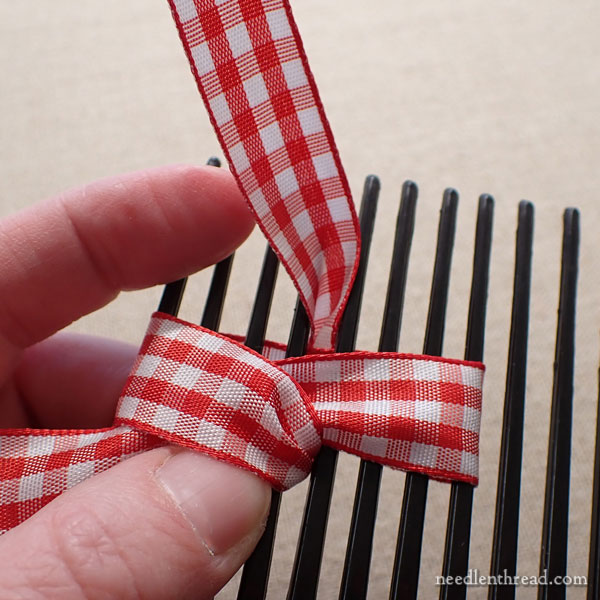
Pull the working ribbon (the leading end) down into the configuration in the photo above.
Pay attention to that loop just to the left of the vertical ribbon.
This is the loop that rested on the tip of your thumb and that was formed when you first took the leading end of the ribbon into the halfway point below the wraps on the pick.
It is this loop that you will now pass under in the next step.
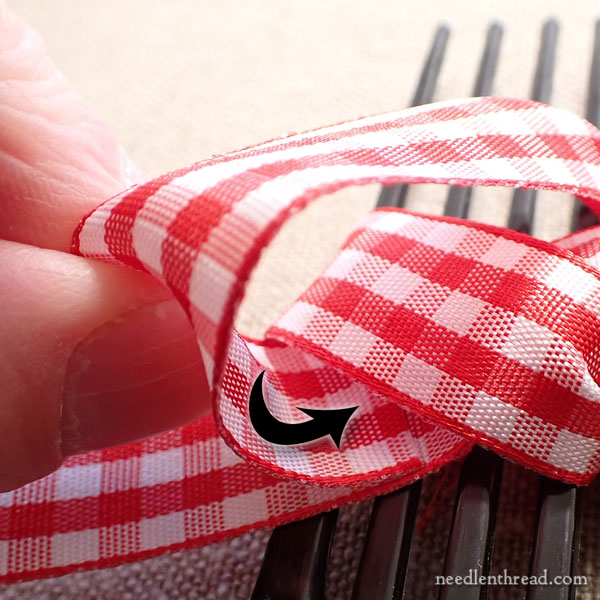
Now move the leading end of the ribbon UP under that loop to the left, through it, and out the top.
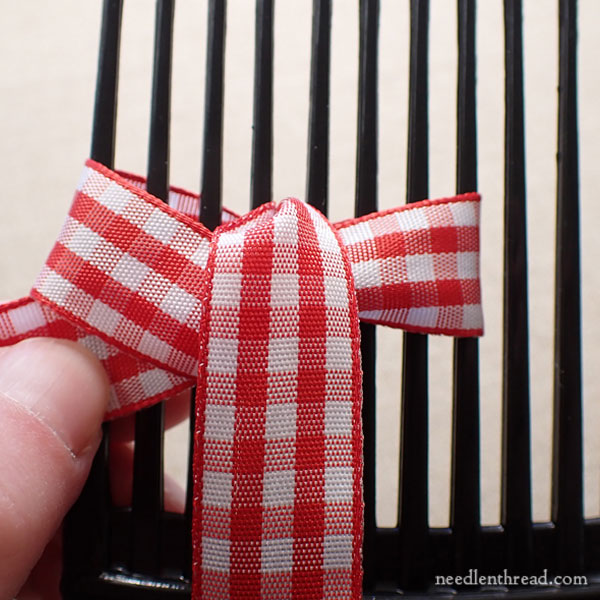
Pull the leading end up through that loop, and using that piece of ribbon that you just pulled up and through, pull it back and forth (right and left) in front of the bow, to tighten the knot around the bow.
You can only use that side of the ribbon to tighten the bow, so you’ll need to work it left and right, to get the knot to snug up around the wraps of ribbon.
You want it to be fairly tight so that it will hold the bow, but you don’t need to warp your pick or break the tines or anything like that.
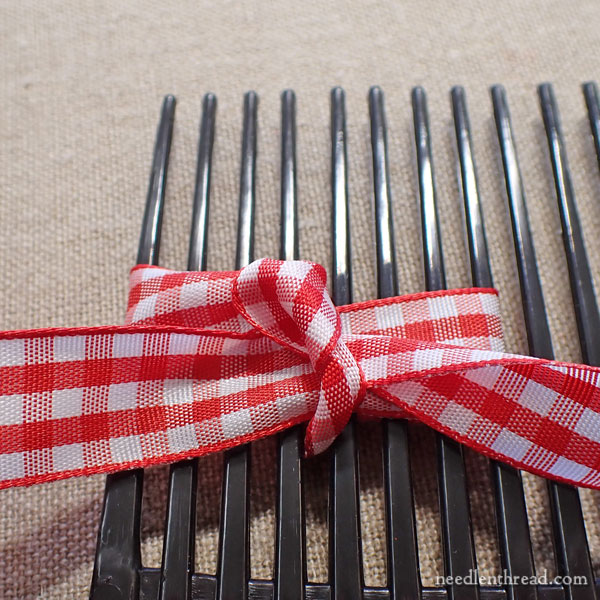
Get it nice and snug, and there you have the bow… but it is the back of the bow at this point!
Flip the pick, and you’ll see the front of the bow. Notice that both ribbon ends hang off the back of the bow.
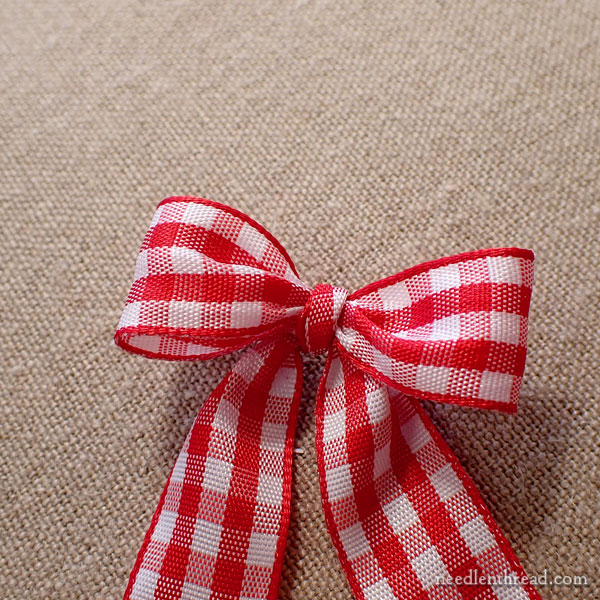
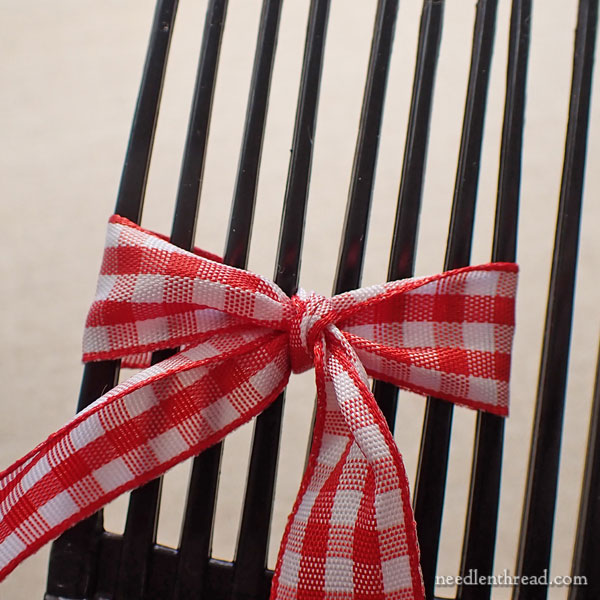
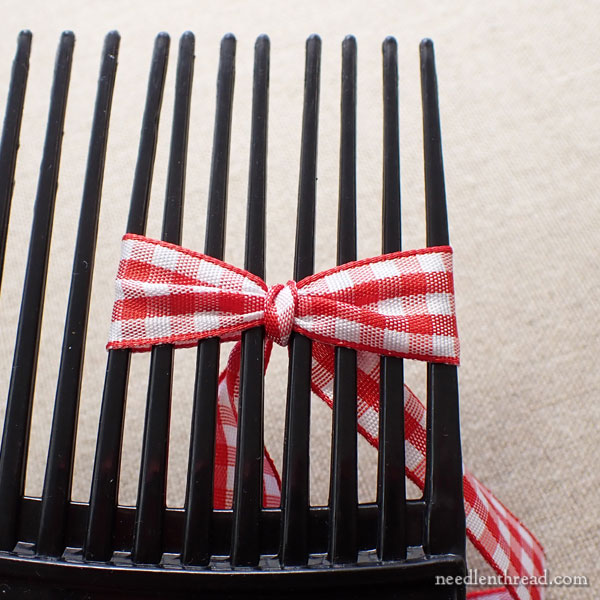
Gently slide the bow upwards off the tines.
This is the bow as it came right off the pick. It’s looks pretty good! But it’s not finished yet!
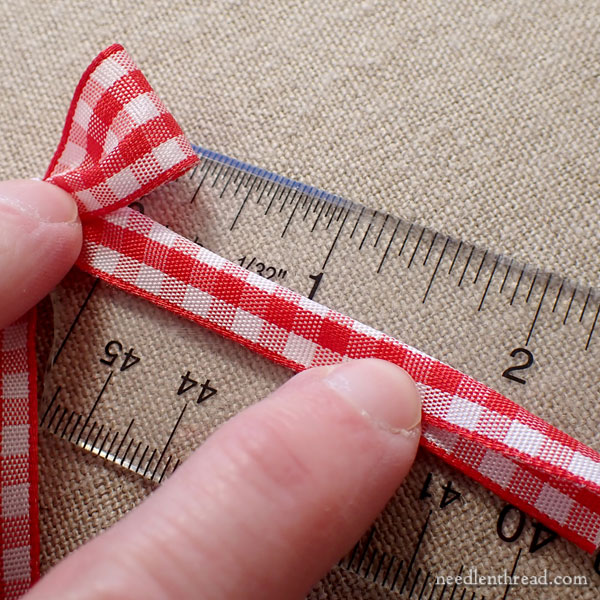
Fold each ribbon end coming off the bow in half lengthwise and measure about 1.5″ length.
Cut an inverted “V” into the ribbon, cutting from the outside edges upwards to the folded edge, to make the classic inverted “V” ends of the ribbon.
The cut on this ribbon should be about 1/2″ long up into the center (or from the outside edges upwards to the fold).
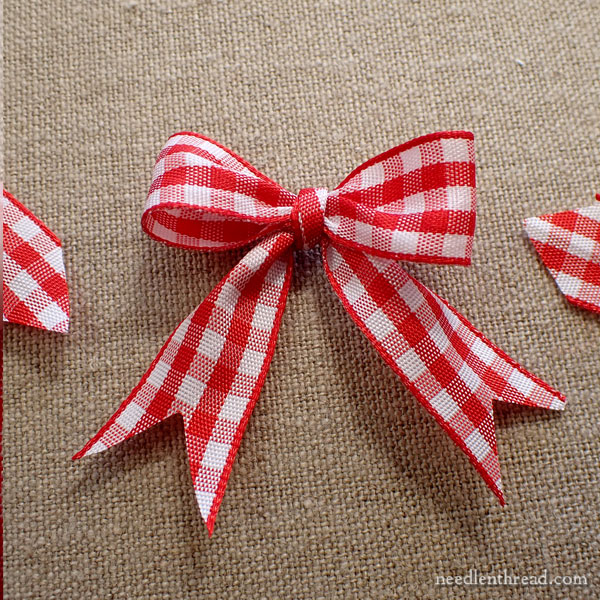
Use your fingers to adjust the sides of the bow to plump them out a bit, and that’s it! The perfect little bow.
If you use the same pick (or fork, or whatever rigid rig you manage) and the same ribbon, you can tie a dozen bows that will all look consistently good and that will all be the same size. Yay!
And the more you do it, the easier it will become and the faster it will go!
Hope you find a use for it!
If you’re following the Christmas Tree Ornament Stitch Snippet project, you’ll need to make one bow for the top of your ornament, using the gingham taffeta ribbon in the finishing kit. Feel free to use this method if you wish!
Give-Away Winner
Last week, I announced this Favorite Things give-away, and today, I’m happy to announce the winner.
Using a random number generator, the winner produced is Linda Luther W, whose answer to the question was:
My favorite Christmas hymn is “O Come, O Come, Emmanuel.” When my son was a youngster and I was a working single mom, we would sing this hymn during Advent every evening after dinner while we lit a candle on the Advent wreath. He would then move Joseph, Mary, and donkey figures closer to the manger. Such fond memories. Now my son does the same thing with his young son.
Congratulations, Linda! I’ll drop you an email this weekend to get that package on its way!
Coming Up
On Monday, we have another pre-Christmas giveaway, from the queen of silk ribbon embroidery, Di van Niekerk. Keep an eye out for that!
I also hope to show you around the new studio next week. Ok, I’m trying to do a video. I’m also not making any promises… but I’m doing my best!
Have a great weekend!
Thank you!
Thanks for the tutorial on the bow making. I do have a hard time with making bows for a finish. I like them a lot so I’ll give this technique a try.
Thank you for sharing this bow tutorial. It’s such a great idea!
I’m so grateful for all of your tutorials, every one is a gem.
Thanks, Rebecca! 🙂
Congratulations to the winner! And Mary, thank you so much for doing this Stitch Snippet. I made **so many** mistakes but pressed on and your hints helped so much. The finished ornament is just darling, and I think I can apply some things I learned to other projects.
Congratulations to Linda! And thank you Mary for the Tiny Bow Tute!! What a clever solution to a vexing problem.
They all look beautiful!
My favorite treat at Christmas is a box of chocolate truffles.
How much ribbon do you need to make a bow for 2.5 inch and 1.5 inch ribbon? I would like to put a nice bow on my hand-made Christmas gifts.
This is the only way I finally managed to make my bows, thank you SO much for sharing this tutorial!
Glad to hera it, Lucie!
Thank you so much for your site. I love the finishing tutorials.
Still exploring ….
Thanks for this helpful tutorial.
Merry Christmas!
Thank you for the wonderful bow tying instructions. Wonderful!!!
First, I love receiving your newsletter.
Thank you for the little bow-making tutorial! I always assumed there was something mystical about the process that I would never know!
Holiday blessings to you and yours.
Linda