


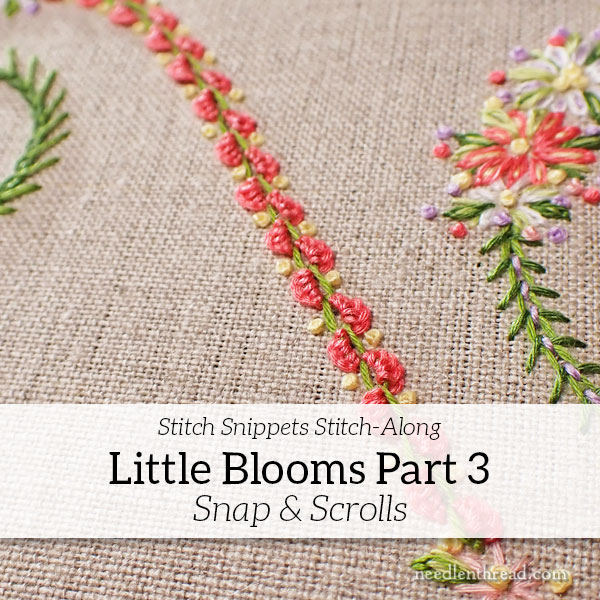
Welcome to Part 3 of Little Blooms!
If you are just joining along with this stitch along, we’re working through a small project together here on Needle ‘n Thread. You can read the preliminary information in the project preview here, and you can find Part 1 here and Part 2 here. Next week, I will post an index where you can find all the lessons for the project listed chronologically in one spot.
For those who have asked, we will be restocking a supply of Little Blooms kits later in May. We have to wait for supplies to arrive and then prepare them. We won’t be able to start preparing them until the beginning of the second week of May.
If you are a member of the Needle ‘n Thread Community on Patreon, you will find the PDF download for today’s lesson posted later today. If you are signed up as a Dedicated or Avid Stitcher, I’ll have a supplementary video for you later this weekend.
As usual, please read through all the instructions before you begin stitching! Often, the questions you might ask if you jump in to stitch have already been answered a little further along in the article.
Before we begin, we need to talk about thread colors!
I apologize that I didn’t post the thread color list in the last installment. I meant to, but I ended up editing out some of the bulk, and for some reason, I inadvertently cut that section out.
Thread Colors for Little Blooms
The following list of color numbers for the floche that we are using in this project corresponds with the DMC color number list for their floss, so if you can’t get floche, you can substitute regular stranded cotton (floss). Use two strands of floss to make up the approximate weight of the floche (which is more like 1.5 strands of floss, weight-wise).
210 (purple), 470 (medium green), 745 (yellow), 761 (light pink), 893 (bright pink), 3346 (dark green), 3348 (light green), and B5200 (bright white)
The Snap
Before you begin stitching in the vines, it’s a good idea to sew on your snap!
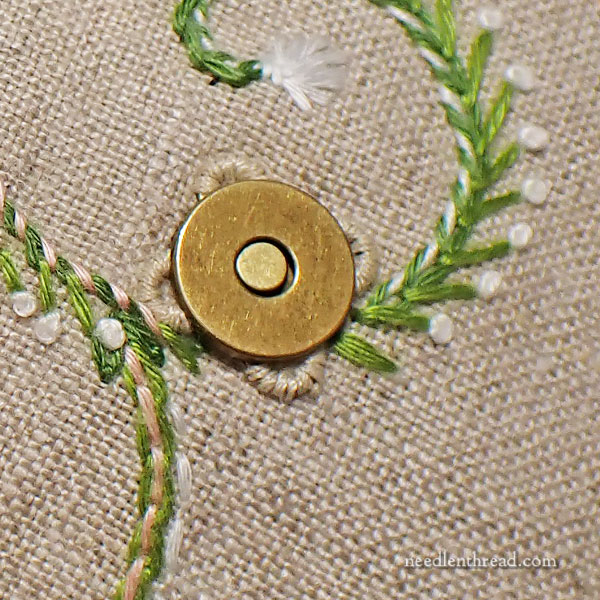
The “receiving end” of the magnetic snap is the heavier or thicker side of the snap, and that’s the part that gets sewn on to the design area of the project. The other side of the snap is sewn onto the lining of the pouch.
To sew the snap on, use a natural colored sewing thread. I had a quilting weight cotton, so that’s what I used, but regular thread will work fine. Hold your snap in place over the transferred mark on the fabric. Passing around the snap once, sew one or two holding stitches in each loop of the snap. Then you can pass round the snap again and sew a few more stitches over the loop to secure it better.
If you look at my snap in the photo above, you can see that I stitched over the whole loop in a kind of satin stitch or overcast stitch. I had the notion that doing so would reduce the “visual footprint” of the snap and cause the loops to fade into the fabric somewhat. In fact, it probably doesn’t make a difference, but I’m pretty sure the snap is very secure and won’t go anywhere!
The Scrolls: Foundations
Now we’ll stitch the foundation of all the scrolls. All of the scrolls on this project start with a chain stitch. I used medium and dark green for the chain stitch foundations, in this color layout:
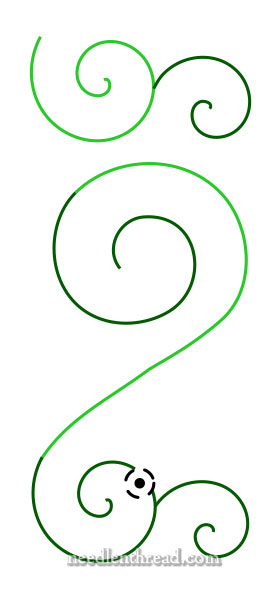
You can mix up your color layout as you wish. I saved the light green for brightening up the greenery, embellishing the vines, and filling in around the flower clusters.
Try to keep the chain stitch consistent in length on all the foundation stitches. Strive for a length of a little more than 1/8″ – so, about 3/16″. A quarter inch is too long, but an 1/8″ might be a little bit short, especially for the scalloped buttonhole.
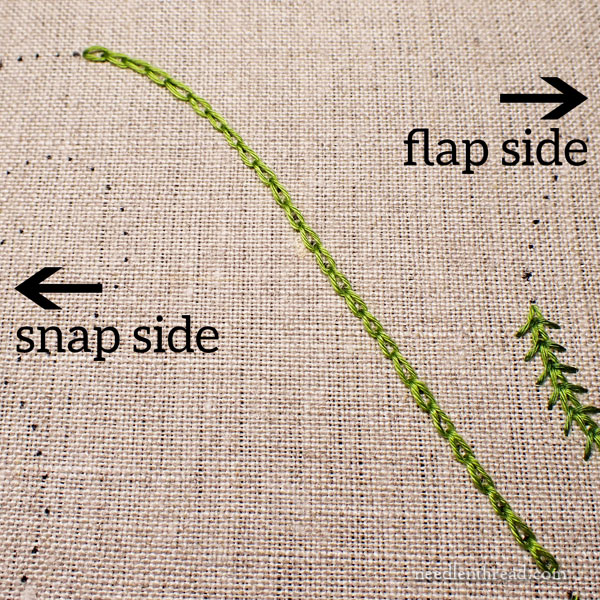
Above is the chain stitch foundation for the section of the scrolls that we’ll concentrate on today. This is the “straight of way” around the center of the larger part of the design, indicated by the dotted line in the diagram below:
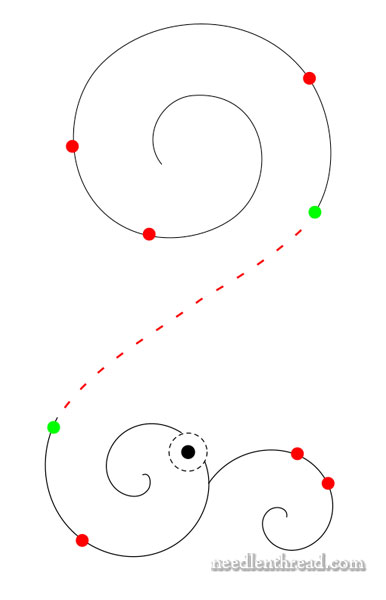
The orientation between the diagram and the photo of the chain stitch foundation is different, because of the way my fabric is mounted on my frame and the stitching direction that I prefer while I stitch.
When you’re working this section, arrange your hoop or frame so that your design is oriented in the most comfortable way for you to stitch the buttonholed chain stitches. If you are right handed, you may find it easier to stitch from the top to bottom of the chain stitch (as I did) working on the left side of the chain stitch.
If you are left handed, you may prefer to work from the bottom of the line of chain stitch upwards, buttonholing the right side of the chain stitch.
Once you have your chain stitch foundation worked, it’s time to buttonhole the chain stitch!
Switch to the bright pink floche – or whatever color you prefer to use – and to a tapestry needle.
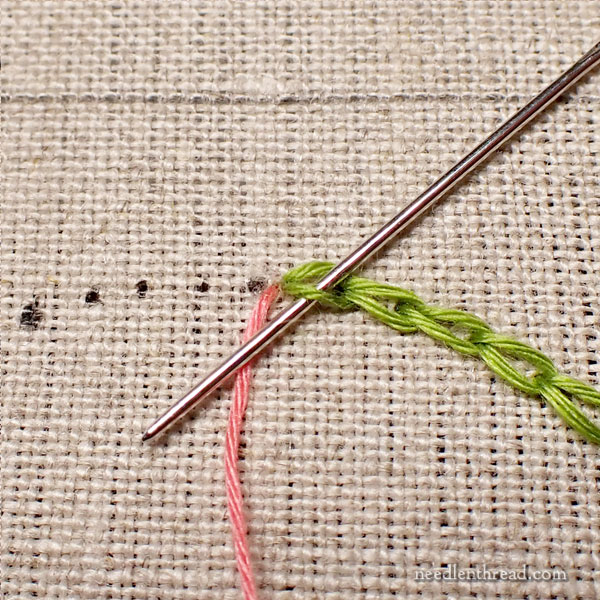
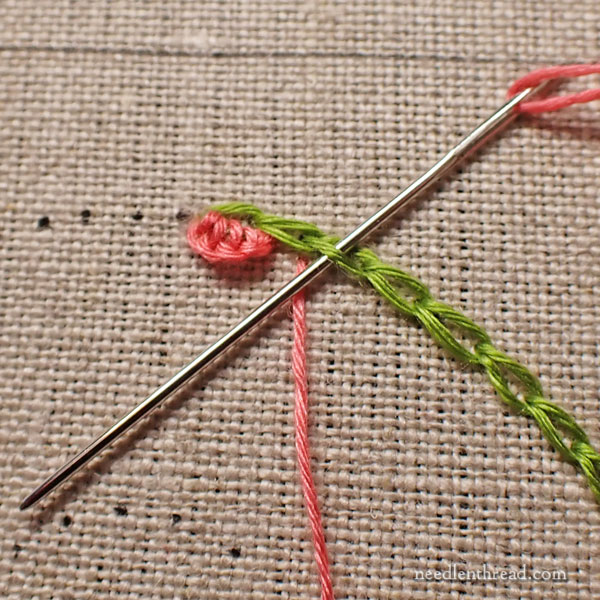
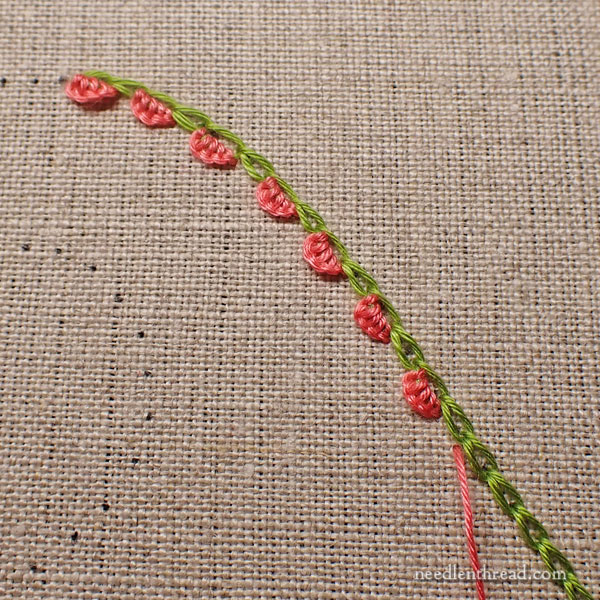
We’re going to be buttonholing just the left side of the chain stitch. Bring the needle and thread to the front of the fabric at the top of the line, just at the tip and just to the left of the chain stitch, as shown above.
Pass the needle into the center of the chain stitch and out the left side, passing from right to left, and out over the working thread for the classic buttonhole set-up.
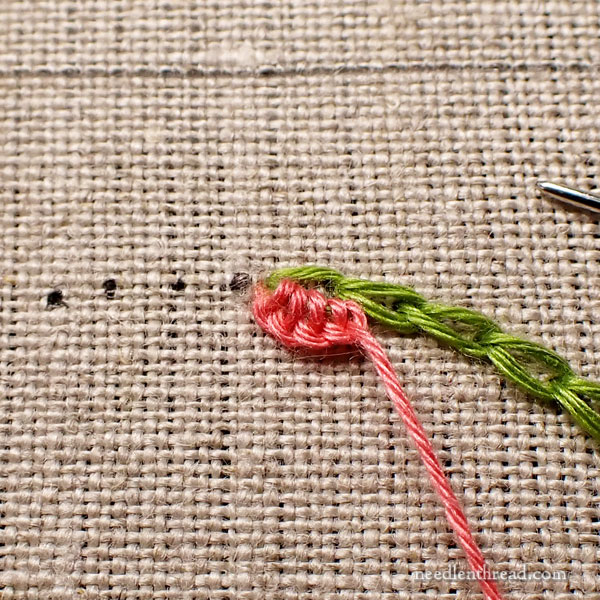
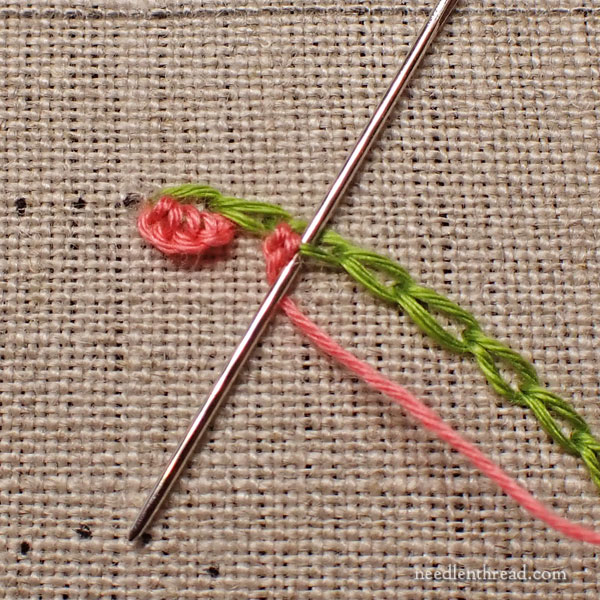
On each chain stitch in my sample, I fit five buttonhole stitches. Try not to crowd too many buttonhole stitches onto the side of the chain stitch. This will cause your buttonhole scallops to ripple and look unruly.
As you work the buttonhole stitches over the left side of the chain stitch, always pull your thread through gently. The first buttonhole should be pulled snug up onto the chain stitch, pulling it tight. The second should be a little looser, the third a little looser, and then the forth slightly tighter and the fifth should be pulled firm and tight. In this way, you will create a scallop effect.
If you end up having to work more than five buttonhole stitches on the chain stitch, just keep in mind to pull the first and last buttonhole stitches relatively tightly, but to gradually work from tighter to looser to tighter again as you fill in on the chain stitch.
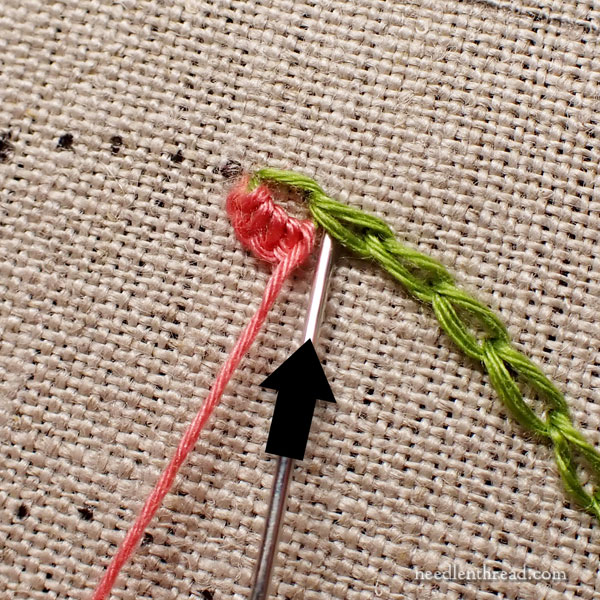
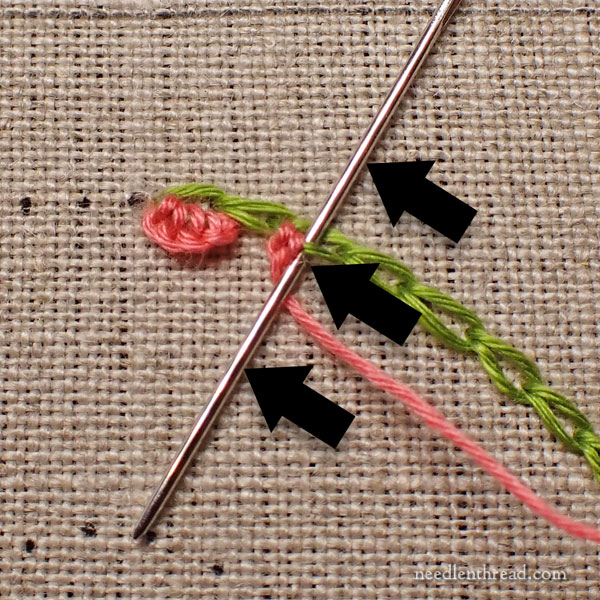
When you get to the end of the chain stitch, take the needle and thread into the fabric just under the end of the chain stitch, close to the chain stitch line.
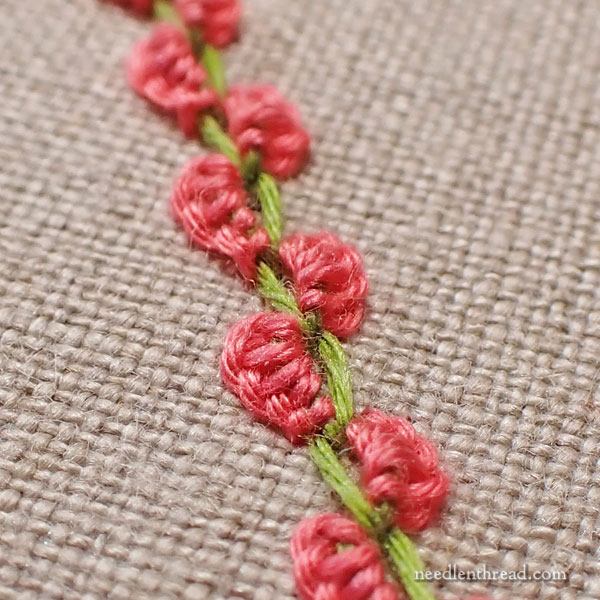
Then, skip a chain stitch and bring the needle and thread to the front of the fabric just next to the third chain stitch down the line. We’re scalloping every other chain stitch this way.
Work the buttonhole over this third chain stitch in the same manner as the first, going from tighter on the first buttonhole, looser towards the middle buttonhole stitches, and tighter again at the end of the scallop.
As you work the buttonhole stitches, use the needle to gently push them together on the chain stitch.
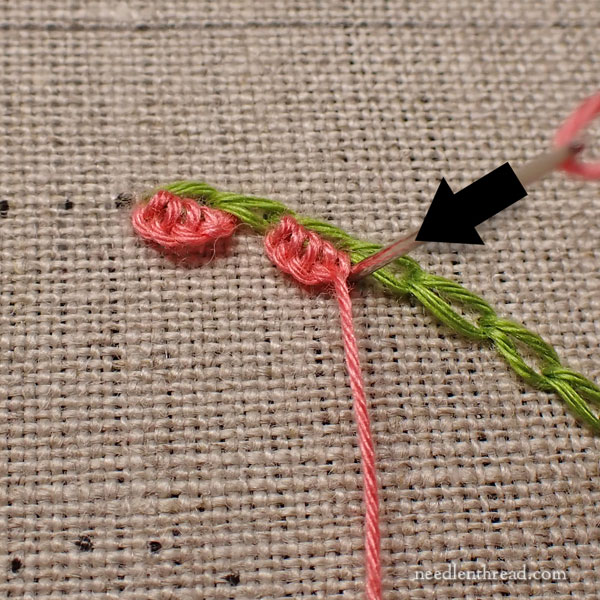
And when you get to the end of the scallop, take the needle and thread to the back again as before.
Continue this way all the way down the left side of this chain stitch section.
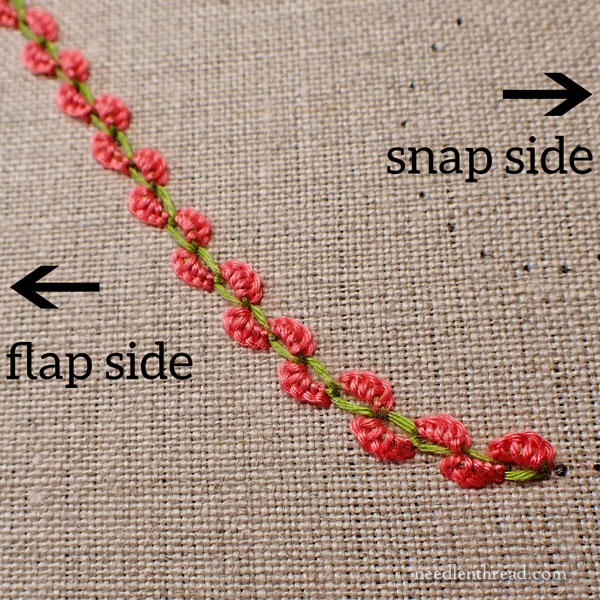
Then turn your frame so that the un-scalloped side of the buttonhole (which was the right side when you finished the first pass) is now on the left side of the chain stitch again.
Start at the top and buttonhole the left side of the chain stitch, skipping every other chain stitch, so that your scallops on this side are off-set with the scallops on the side previously stitched.
You might find it easy enough to work down both sides of the chain stitch at the same time, moving from one side to the other and alternating the side that you buttonhole, but I found this difficult. Since I’m right handed, I preferred to always buttonhole from right towards left.
Again, for left-handed stitchers, starting from the bottom and working up, from left to right, will work out better for you.
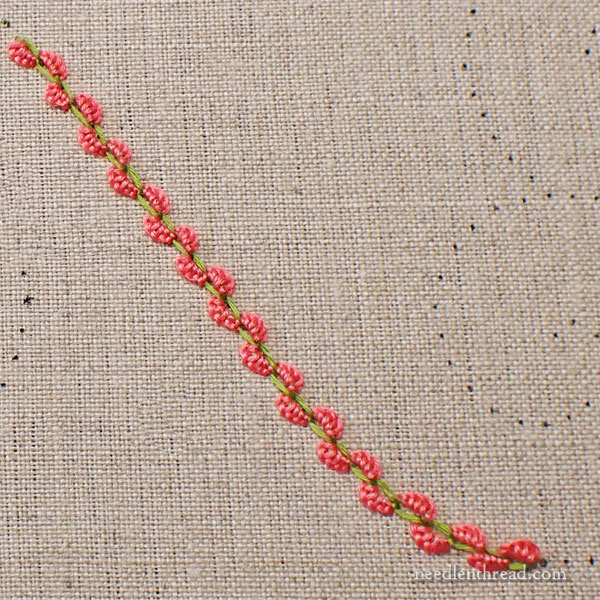
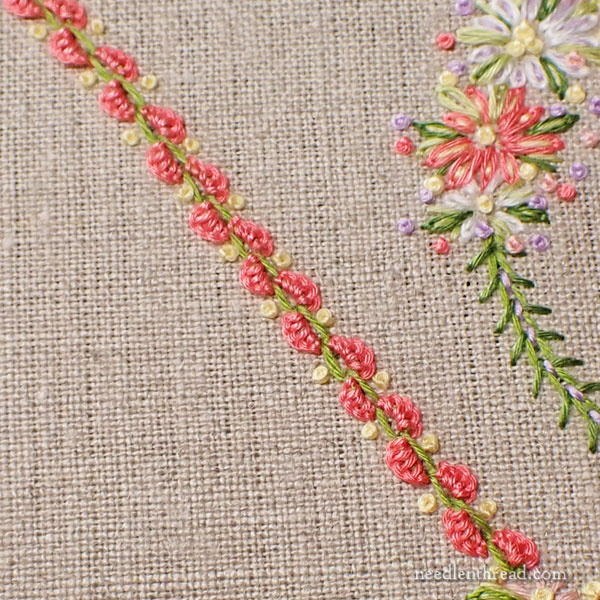
Here’s the whole alternating buttonhole scalloped chain stitch line.
Thread & Stitch Tips
If you have trouble with your thread twisting up as you are working this stitch, here are a couple tips:
1. Work with both hands free. If you don’t have a stand to hold your hoop or frame, lay your hoop on a table and work the buttonholing with both hands, so that you can use the non-stitching hand to control the working thread. Controlling the working thread is best done with a laying tool, but if you don’t have one, a larger tapestry needle will work fine. If you don’t have that, use your fingers just to keep some tension on the thread as you are working the stitches.
2. Occasionally, untwist your thread. You can do this by holding your hoop or frame up and letting your needle drop towards the floor. Let it hang there until it stops spinning. Or you can run your needle along your thread, down to the base of the thread near the fabric and up again, allowing the thread to untwist. This latter method should only be used if your needle’s eye is quite roomy. Another method to untwist your thread is to roll your needle forward between your finger and thumb every few stitches, so that it’s turning counter clockwise. This will help untwist the thread. If you habitually do this, your thread is less likely to twist up in an annoying way.
3. Pull through Slowly! As you work each stitch, pull through gently and slowly. Don’t try to hurry the buttonhole stitch.
4. Always pull the stitch in the direction that you’re working the buttonhole and downwards, to maintain the tension on the stitch you just finished so that it keeps its formation.
If you want further information on buttonhole scalloped chain stitch, you can find a step-by-step tutorial for this composite stitch here. Reading through another tutorial might help you, if you’re new to the techniques. Today’s alternating version is simply a variation.
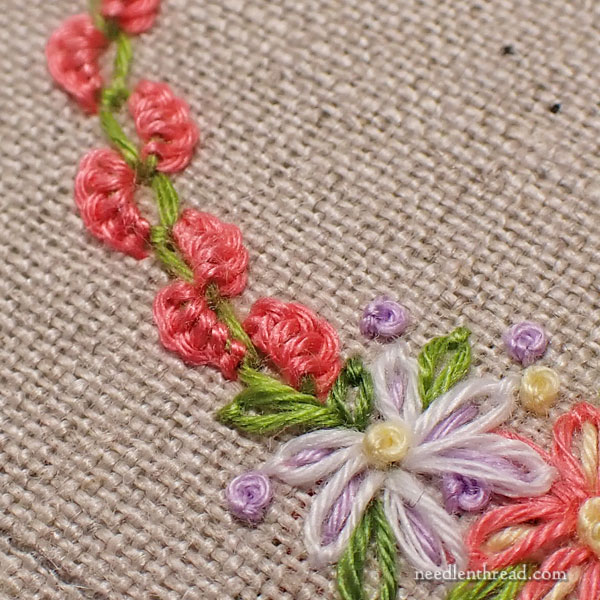
Here you can see the line meeting up with the floral clusters.
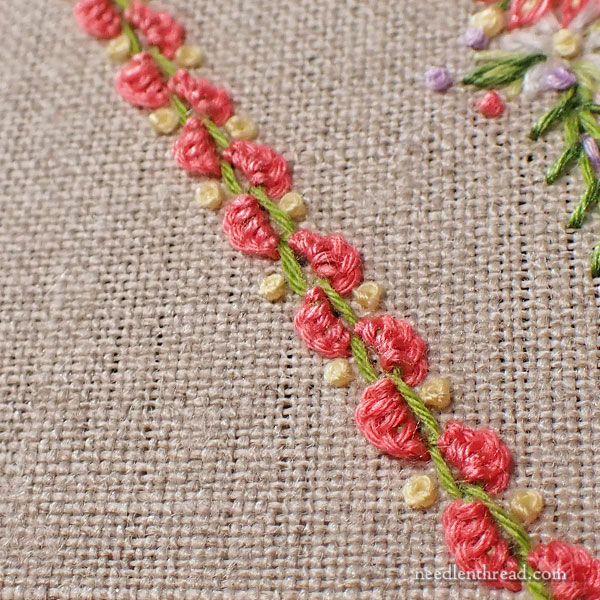
As a further embellishment on this line, to fill it out a bit and add a little more color, I worked French knots between each scallop in yellow, as shown above.
This alternating buttonhole chain stitch scallop composite is not really a difficult stitch, but it might take a little bit of patience to get the scallops just as you want them. It doesn’t hurt to practice a little bit before you start it on the project, but mostly, if you take the buttonholing slowly, try to keep the thread from twisting, and maintain tension on the stitching as you go – a gentle tension that doesn’t pull the stitch out of whack – you should be ok!
In the next installment, we will cover more vine embellishments.
Coming Up
Next week, we’ll move forward with another lesson in Little Blooms, working more embellishment on the chain stitch foundations of the vines.
I’ll also update you on the goldwork project – today, we are 12 days from our deadline.
Have a wonderful weekend!
BEAUTIFUL!!!!!!!!!!!!!!!!!!! I don’t embroider as well as you do but, I love getting your e-mails. I love all the projects you do. That Altar Cloth was awesome!!! I’m going to try this buttonhole chainstitch and see how it looks. Thanks for all your beautiful work. Love your site