


Welcome to the next installment of Little Blooms: A Mini Snap Purse – a Stitch Snippets stitch-along on Needle ‘n Thread. If you are just joining us, you’ll find all the previous information on this project, plus a chronological list of previous lessons, in the Little Blooms Project Index here.
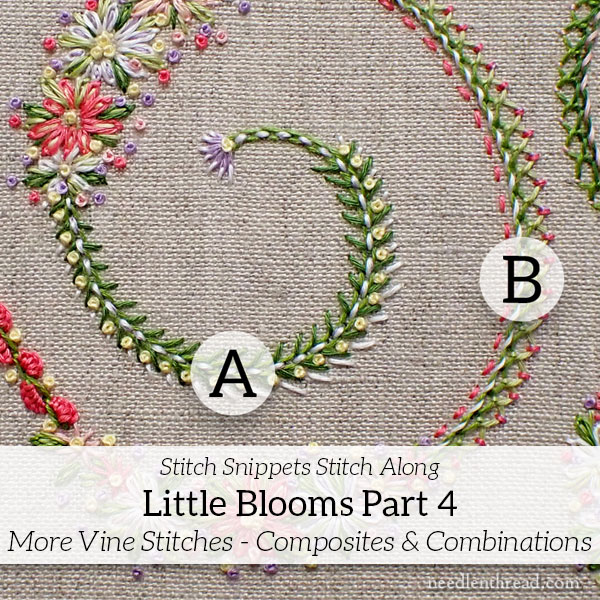
In Little Blooms Part 4, we’re going to take a quick look at two more vine treatments.
For members on Patreon, the PDF will come out next week. It will cover the vine stitches in general. Today’s installment here on the website will get you going on the vines, if you’re ready to move ahead. Otherwise, next week, I’ll map out all the stitch combinations for the vines in one PDF.
Today, we’re going to stitch two parts of the vine, using some composite and combination stitch techniques.
Last week when we looked at the alternating scalloped buttonhole vine, we started by stitching chain stitch foundations for all the vines. Now, we’re going to start dressing up those chain stitch foundations in a variety of ways.
If you click on the photo above, you’ll get an enlarged view.
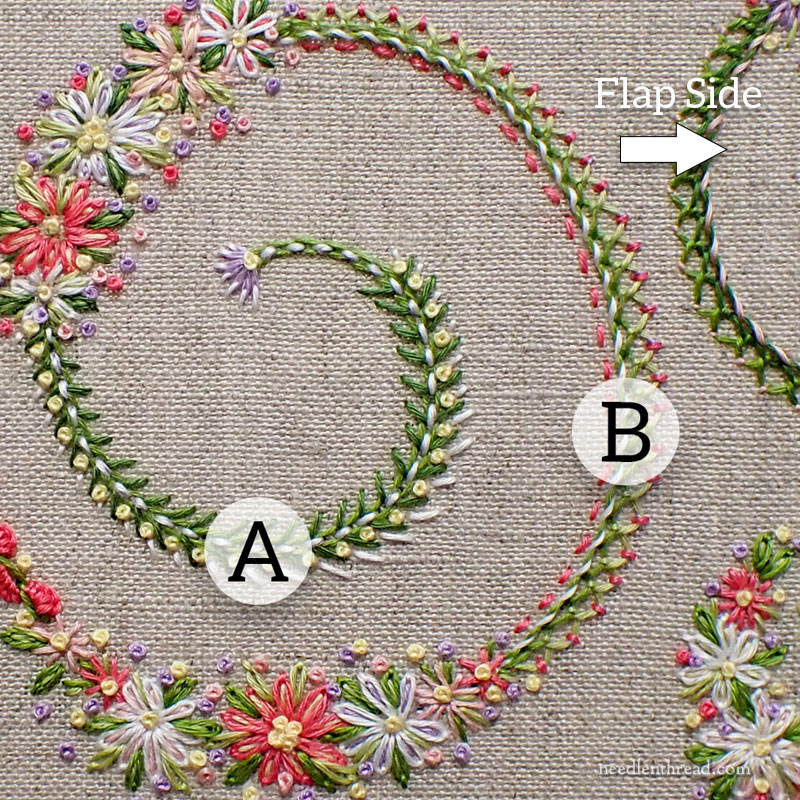
With the flap side to the right, and the scalloped buttonhole vine that we finished last week to the left, we’re going to address in the rest of this swirl on the largest central vine on the design. If your floral bunches are placed differently, that’s ok! Just work out where these stitches will work best on your vine.
“A” is a stitch combination made up of several simple elements.
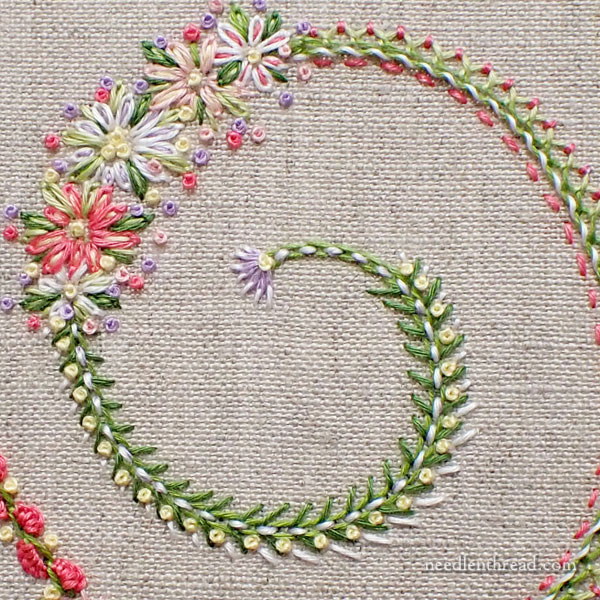
I started with the chain stitch foundation in medium green. Then, I worked a “mock wheatear stitch” by adding dark green straight stitch “arms” to each chain stitch. You can find a tutorial for mock wheatear here.
I ended the mock wheatear about 5 chain stitches from the end of the inside of the scroll.
With the mock wheatear complete, I backstitched in white down the center of the chain stitches, all the way to the last chain stitch at the inside of the scroll.
Next, using yellow, I worked a French knot between each wheatear “arm” on the right side of the chain stitch only.
Using the white again, I worked a straight stitch at the tip of each chain stitch, graduating the length of the straight stitch from short to longer to short again, as I worked around the scroll towards the inside of the curl.

At the inside tip of the curl, I worked a small fan of straight stitches in purple, which I split at the tips with white. This ended up looking somewhat like a little claw with white fingernails – you can make adjustments to your approach if you wish!
I added a yellow French knot at the very end of the chain stitches, just at the top of that purple “tassel.”
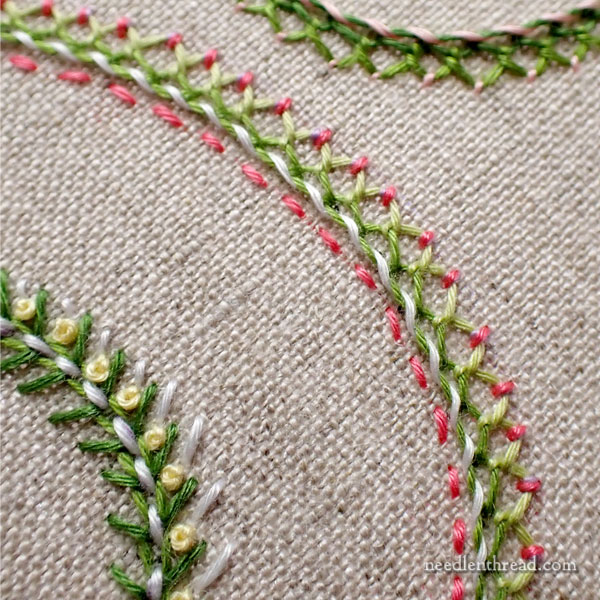
“B” begins with a composite stitch called interlaced chain stitch.
You can find a tutorial for the interlaced chain stitch here.
This decorative band can be further embellished, too – so my composite stitch band ends up being a combination of other stitches, too – again, all simple elements.
I began with a medium green chain stitch foundation.
Then, I worked the lacing of the interlaced chain stitch band on the right side of the chain stitch only. I used light green and a tapestry needle.
The couching stitches for the interlaced chain stitch are bright pink. Make sure when you’re couching them to pull the lacing stitches out enough to give them a distinct “peak” on the outside of the scroll.
After working the right side of the chain stitch with the interlacing, I whipped the left side of the chain stitch from top to bottom, passing from the center of each chain stitch out to the left, using white. Don’t pick up any fabric – just whip the left side of the chain stitch. If you’re not sure how to whip a stitch, this video on whipped backstitch will help you!
If you are left-handed, you’ll want to start at the bottom of the chain stitch and stitch from outside the left side into the center, passing from left to right.
Then, I took the bright pink again, and I worked a very simple running stitch along the left side of the chain stitch band, to add just a little more color and to balance the bright pink couching stitches on the right side.
And that, my friends, is this section of the scroll complete. This is the largest scroll on the design. The other scrolls will involve similar stitch combinations, and we will look at the rest of them next week! At that time, I’ll have a PDF available for Patrons, covering all the scrolls in one PDF, and I’ll have a highlight video as well that demonstrates one of the stitch combinations.
Have a wonderful weekend!
The vines are beautiful, I love them!
You’re ability to see and take the possibilities with your work are outstanding. I do embroider but yours is out-of-this-world!
Just beautiful,I love the work from needles and thread. Have saved heaps to my Pinterest embroidery.