


Good morning! (I think I missed morning today. Sorry! A little life-glitch in the schedule.)
And Happy Monday!
Today, we’re going to continue forward with Sweet Marguerite. The work that we’re doing at this point is still “preliminary,” but now we’re looking at those steps that build the foundation of most of the whitework. Before we get there, though, we have to tidy up our transfer work.
For members on Patreon, there is no PDF today. Later this week, I will post a PDF that will cover all the embroidery, including this lesson and the rest of the whitework, in one document. I can’t cover all the embroidery in one article here on the blog because it’s just too much information for one blog post, but the PDF for Patrons later this week will have everything you need to finish the whitework embroidery. In the meantime, you can follow along here on the blog to start the foundation steps.
Ready?
In many types of whitework embroidery, satin stitch plays a fairly dominant role. To achieve the smooth, sturdy, and somewhat raised look of the satin stitch that’s seen in most whitework embroidery, the satin stitch is almost always padded. At the very least, this padding is a split stitched outline over which the satin stitch is worked. But frequently, it is more than that.
So we’re going to address the whole padding issue today.
But before we get to that, we have to do some clean-up work, and I need to answer a couple questions that came in.
First, the questions.
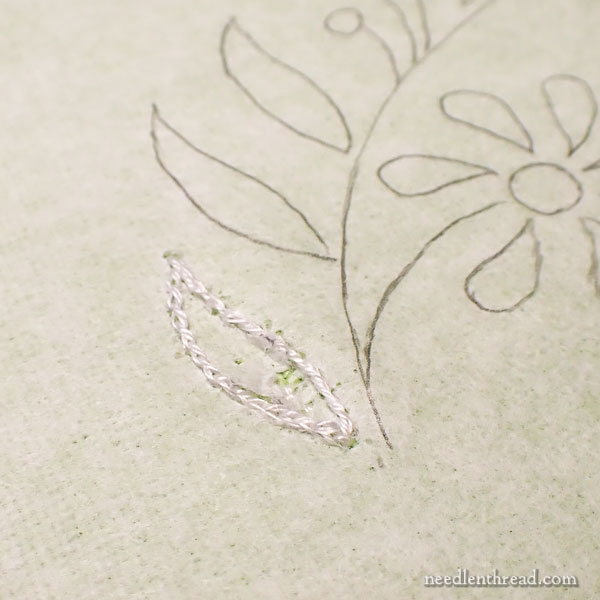
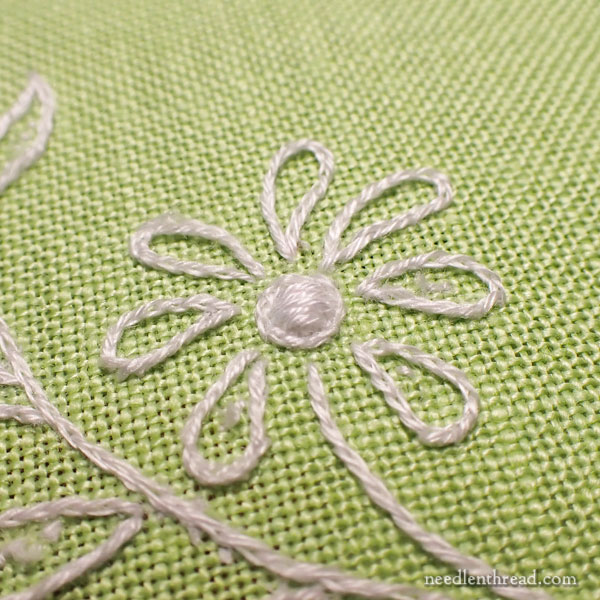
This is the front of the embroidery, when I’m working the split stitch outline over the tissue paper and fabric.
Some folks asked about the back of the embroidery at this point.
I don’t normally stress out over the back of embroidery, but when you know that the back will not be covered and that people will see it if they are cheeky enough to flip it over and look at it, then it’s a good idea to be aware of what’s happening on the back.
That’s not to say you should go all weird and worried over the back, but you should strive to keep it as neat as possible. Be aware, too, of your working thread. If it suddenly feels shorter, check the back – you might have a slip knot that needs removing.
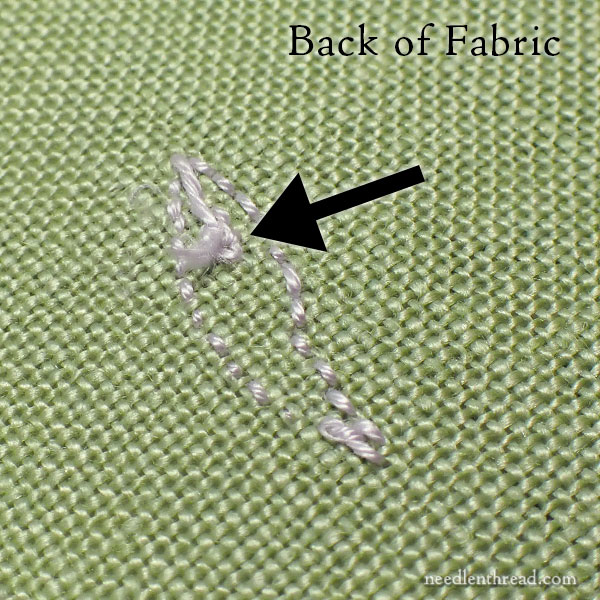
On this type of work especially (but really, pretty much on all my embroidery), I use a waste knot and tacking stitches to start embroidery threads.
With a knot at the end of the thread, I take my needle and thread to the back of the fabric in a spot that will be covered with embroidery, and that’s near where I’m starting to stitch with that thread.
The knot ends up on the top of the fabric. Near the knot, I work three tiny tacking stitches very close together, and then I cut the knot off. These tacking stitches might only cross over one thread of fabric. They are small and therefore easily covered with future embroidery in that spot.
You can use this method even on a line with line stitching. I have a tutorial for starting a thread using a waste knot and tacking stitches on a line, here.
In the photo above of the back of the embroidery, you can see the small blob area inside the leaf, where I worked those tacking stitches. And around the blob, you can see the backs of my split stitch on the outline of the leaf.
I always start a thread as close to my new stitching spot as possible.
I end threads the same way if I can. If I can’t, I either whip around the backs of the stitches on the back of the work, or, in case of larger filled areas, I run my needle and thread under the backs of the stitches.
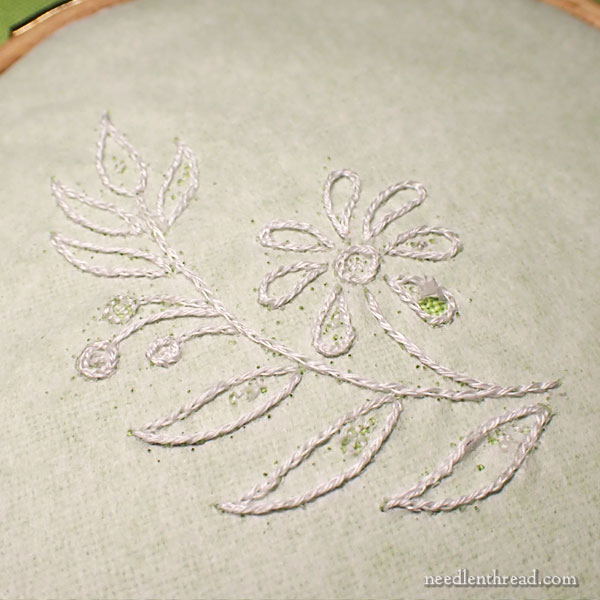
So that’s what the back of the work pretty much looks like at this stage of working the split stitch outlines over the design.
The other question that came in from several stitchers was about all the little holes throughout my tissue paper. I think once you stitch this part of the project, you’ll understand the little holes. Or maybe not! Maybe it’s just me who does this!
When bringing my needle from the back to the front as I stitch, I rarely come up exactly on the design line right where my needle is supposed to go, on the first try. So all the little holes are simply where my needle poked up from the back, in the places where it wasn’t supposed to be!
The Tidy Up
Before moving on to the embroidery proper, we need to tidy up our transfer by removing all the tissue paper.
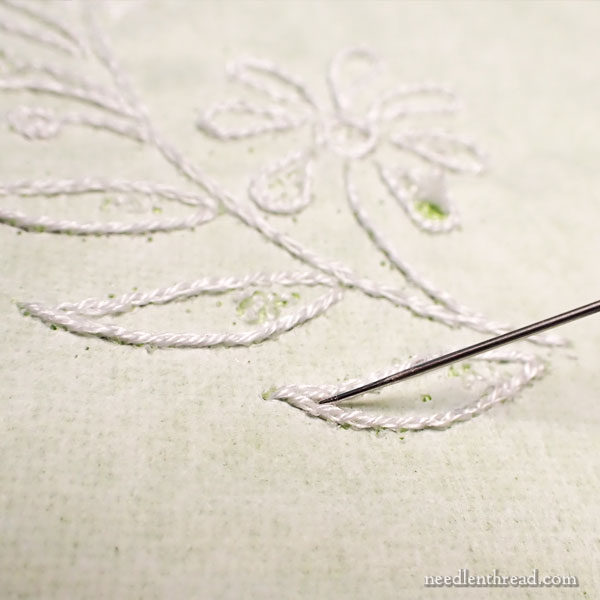
The easiest way to do this is to take your needle and, holding it at an angle to the fabric as shown in the photo above, draw the tip of the needle along the tissue paper next to your stitched lines, pulling it lightly along so that it “cuts” the tissue paper.
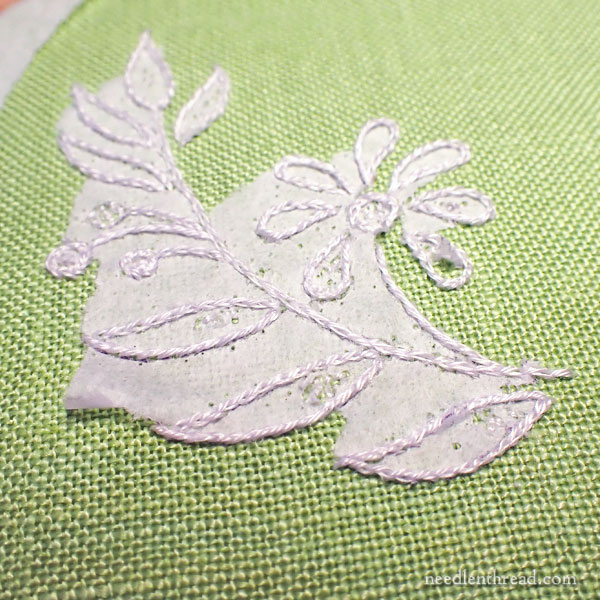
Begin removing the tissue paper from the outside of the design area towards the inside, tearing most of the tissue paper away. Pull the paper away gently. If it isn’t cut near the stitch line, use your needle to slice anywhere that you missed in the previous step.
Eventually, you’ll just have little bits remaining. The tissue paper likes to stick under the stitches, so pay close attention to the stitched area, the insides of the leaves and petals, and anywhere that the stitching is a little more dense (like the small circles).
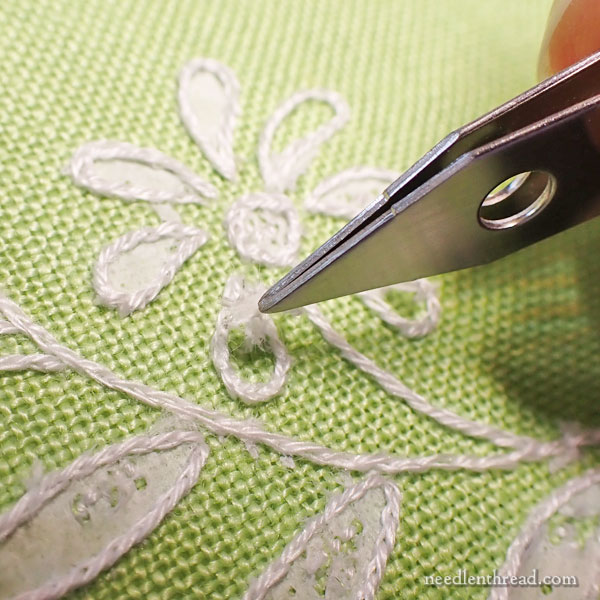
Use tweezers to remove the bits. If you have the materials kit for this project,the tweezers in the kit are great for this!
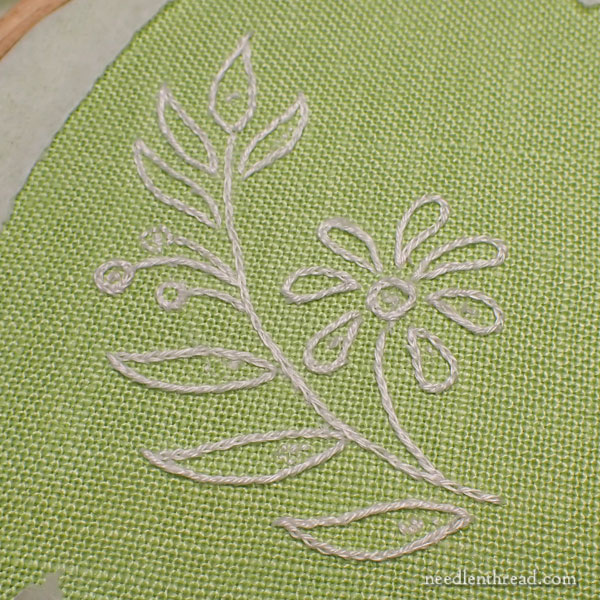
Once you’ve removed all the tissue paper and any scrappy bits, it’s time to move on to the foundation padding for the satin stitch.
You’ll use the white coton a broder #25 to build up the padding in all the areas on the design that are satin stitched – namely, the dots (including the center of the flower) and the flower petals. The leaves are not satin stitched, so you do not need to pad them further.
To build up the padding in the satin stitched elements, we’re going to use two extra layers of stitching.
To determine the direction in which to stitch your first layer of padding, you need to know in what direction you will stitch the outer layer of satin stitch on any given element.
Let’s look at some diagrams to figure this out.
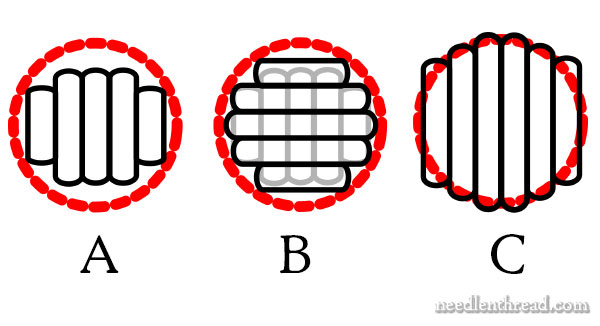
The red line in these diagrams indicates the split stitched outline of the element.
In C in the photo above, the satin stitch is running vertical.
Since we are working two layers of padding, and we want our second layer of padding to not be in the same direction as the top layer of satin stitch, we’ll start the first layer of padding with vertical stitches, too (A). Work a few small vertical stitches inside the outline, leaving enough space to work another layer of padding stitches on top of those.
Then, work a second layer of padding stitch perpendicular to the first (B), and inside the outline, filling up the rest of the inner area inside the outline.
Finally, when we get to the satin stitch (C) (which we will talk about in the next lesson), the satin stitches will be perpendicular to the second layer of padding (or at least, they will not be stitched in the same direction as the second layer of padding).
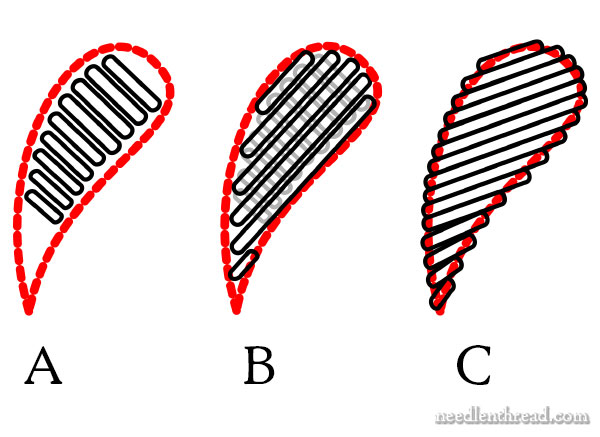
This is the same technique you’ll use to pad the inside of the petals on the flower. Diagram A shows the first pass of padding stitches. Diagram B shows the second pass, and Diagram C demonstrates the angle of the final layer of satin stitch.
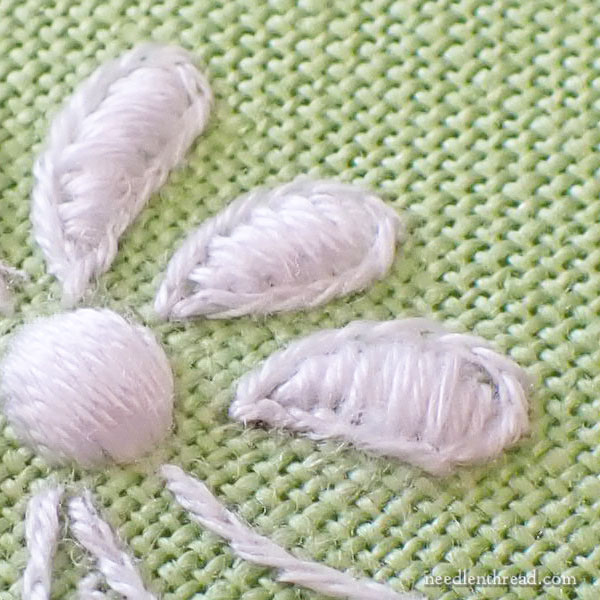
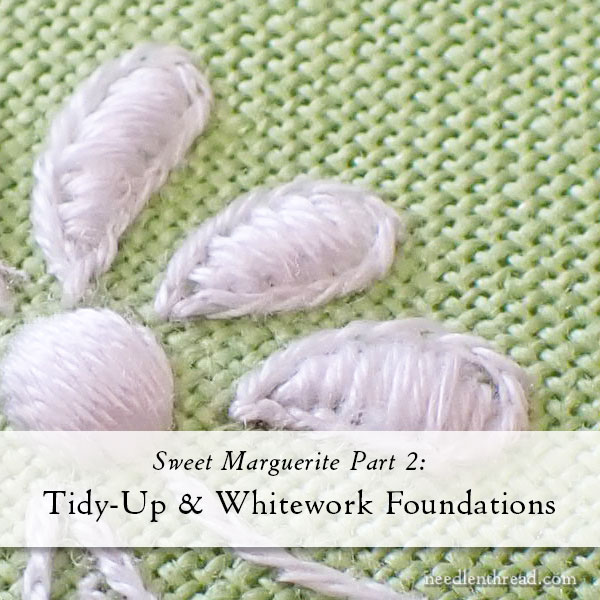
You can see in my padded petals above that the stitch direction is slightly different.
For this project, the direction of your padding stitches in the petals doesn’t matter too much, as long as the final layer of satin stitch over the padding (and over the split stitch outline) is off-set somewhat over the padding stitches.
Catching Up
If you’re not up to this point on the project, don’t worry! You can find the previous articles involving Sweet Marguerite listed here in the index for the project.
By the time you finish this lesson, you should have your fabric set up, your design transferred using split stitch (or your own favorite method), your transfer tidied up and the tissue paper removed, and all the padding worked inside the petals and inside the dots on the design.
Note about dots: if you have difficulty padding those smaller dots on the side of the design, work just one layer of padding, or you can even skip the padding altogether. Some of the dots are pretty small!
In the next lesson, we will tackle the satin stitch! I have a few satin stitch tips to give you, to help you create smooth, beautiful satin stitching.
Coming Up!
Oh man oh man oh man oh man! Have I got a treat for you! On Wednesday, I’m going to share with you a fascinating series of videos about some absolutely incredible embroidery and the women behind the embroidered pieces. I can’t wait!
Hope your week is off to a great start!
Help! My kit for this has a problem, the linen measures 8 X 9. Do I need a different piece of linen or will a 8” square work? I’m stuck.
Yes, the 8 x 8 square works. You just want a square – it can be anywhere from 8″ (or even 7.75) on up.
I’m far, far behind most of the others, but I’m greatly looking forward to the videos!
Watching experts like you, Mary, is always a spur.