


My friends, a little heads up: if you are planning to travel to Kansas in the next week (because I know that Kansas must be the vacation mecca of the world), don’t. We are melting here. We’ve been shortening our work days somewhat, to accommodate this uptick in heat indices. By mid afternoon – with the southern sun pelting the front of the building – we’ve been wiped out. So we’ve been going home early, where we can sweat in peace. It’s putting a crimp in my catch-up plans, but such is life! It’ll pass soon – autumn is coming!
My last act of today, then, before heading to potentially cooler accommodations, is to leave you with this installment of Sweet Marguerite, where we finally finish the embroidery by stitching the leaves.
Members of the Needle ‘n Thread Community over on Patreon, I posted a PDF this morning for you. It covers all the embroidery on the project, so please pick that up over there if you’re on Patreon.
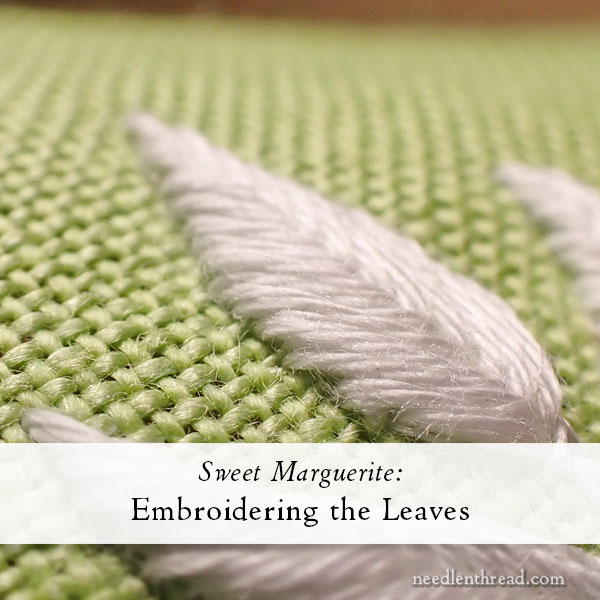
I used fishbone stitch to embroider the leaves on Sweet Marguerite, but I did it differently, depending on the transfer method I used. If you’re not familiar with the fishbone stitch, you can find a video tutorial for it here.
For the samples that involved the tissue paper and split stitch transfer (which is what we covered in the set-up of the project here), I worked the fishbone stitch backwards over the split stitch outline. I’ll explain this below.
I also worked a couple samples that involved imprinting the design on the fabric. These types of transfer methods would include prick and pounce, the prick and pen method we used in previous snippets, iron-on pen, tracing with a light box, and the like. In this case, I used a regular fishbone stitch and I didn’t pad the leaves.
A little tip: If you’re not familiar or experienced with fishbone stitch yeet, it is helpful to mark a light center line down the middle of the leaf, following its curve.
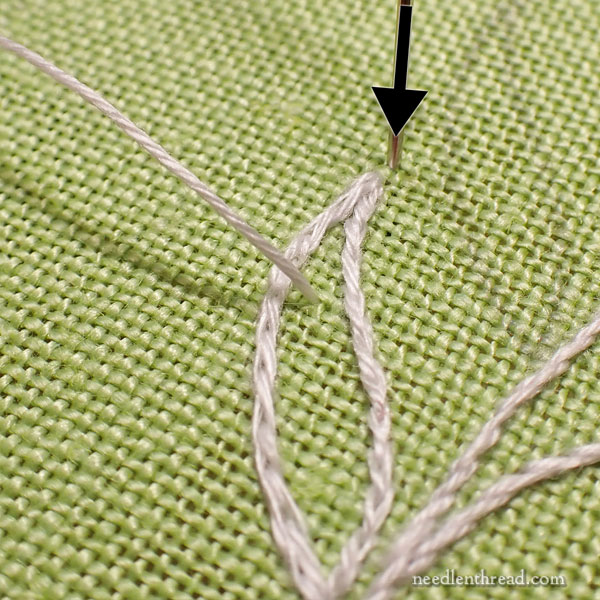
When working over the split stitch padding, I started the fishbone stitch inside the leaf shape, bringing the needle and thread up inside the leaf, on an imaginary center line, about 1/4″ below the tip of the leaf. I took the thread to the back just outside the tip of the split stitch outline, about 1/8″ away from the tip. This ensures a nice pointed tip to the leaf.
For the second stitch, bring the needle up just to the right of the center, below the first stitch, as shown above.

Cross over the base of the first stitch and enter the fabric just to the left of the end of that stitch, outside the split stitch outline. It helps to push this second stitch in close to the first stitch. It will almost seem like you are entering the fabric underneath the first stitch, if you’re right next to the split stitch line. You don’t want to be underneath the first stitch, but you want to be very close to it.
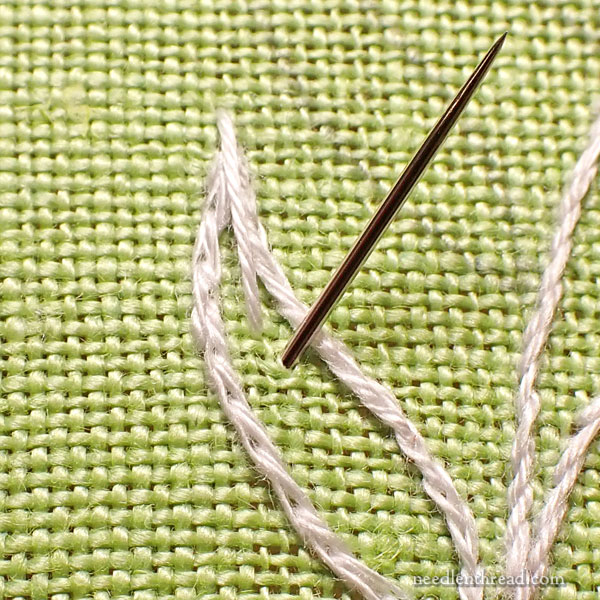
Now, bring the needle and thread to the front, inside the leaf, just to the left of the center line, and slightly lower than the previous stitch.
Crossing over the base of the first and second stitch, take the needle and thread to the back of the fabric outside the split stitch outline and just to the right of the first stitch, very close to it.
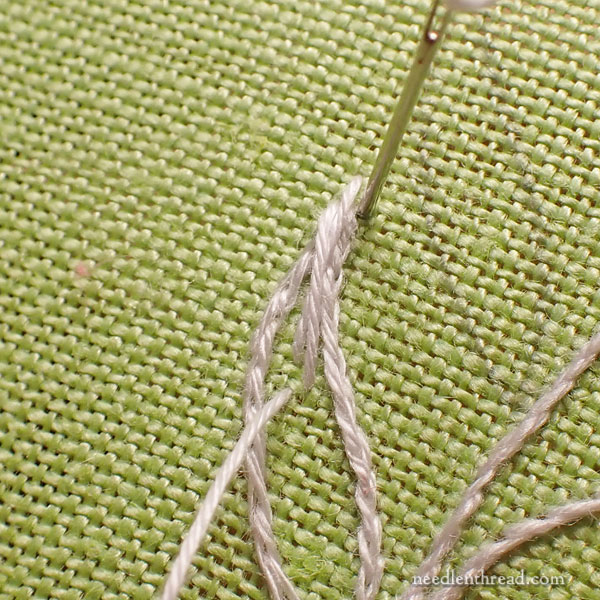
Continue alternating back and forth in this manner, moving down the leaf and working from the inside out over the split stitch line.
If you run out of space in the center of the leaf as you get to the base of the leaf, finish with satin stitches over the lower edges of the leaf, to cover the split stitch outline.
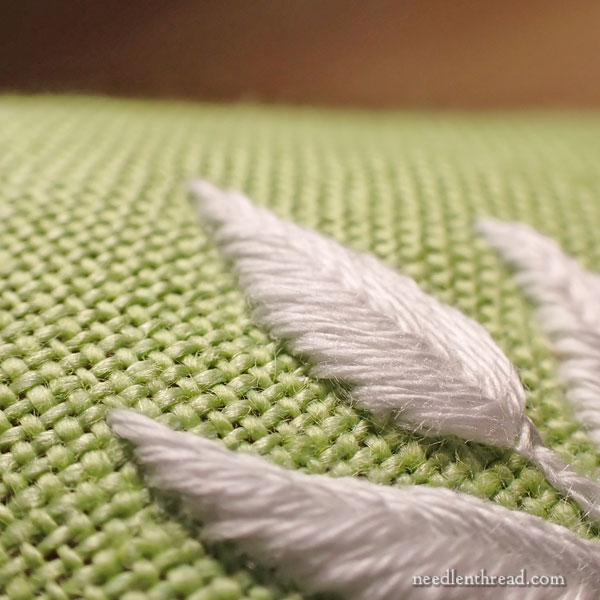
The result will be a slightly raised fishbone stitch leaf with a smooth edge.
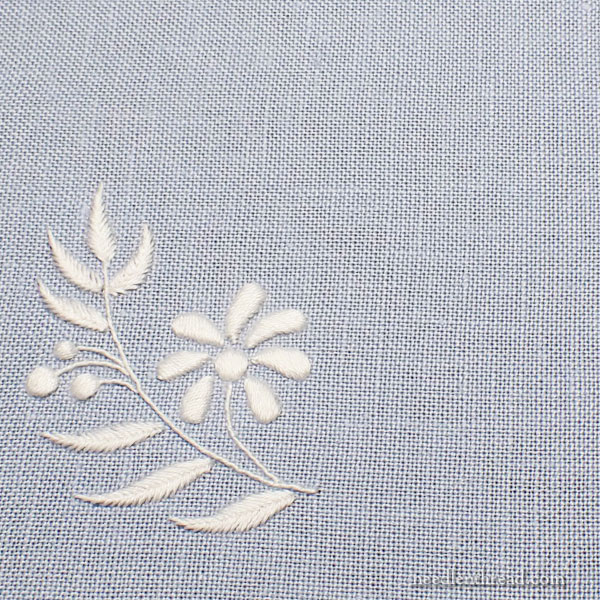
This is a blue sample that we worked here in the studio, with the embroidery completely finished!
In the next installment, we will prepare the fabric for the decorative hem stitching!
Looking for More?
If you’re just joining in on this project, you can find all the articles relating to it listed in chronological order here in the Sweet Marguerite project index.
If you would like to purchase a kit so that you have the supplies on hand to stitch along with this project, you will find the kits listed here.
If you are a member of the Patreon community, the PDF for all the embroidery was posted on Patreon this morning.
Coming Up…
I’ll touch base with you a little later this week with some embroidery chatter, and then, in the next installment of Sweet Marguerite, we will prepare the fabric for the decorative hemstitch. This includes withdrawing the threads and finishing the edge of the withdrawn thread areas, turning the hem, mitering the corners, and basting everything together so it’s ready to stitch!
We’re working on something autumn-ish and something winter-ish, because we figure it will help keep us cool. I’ll share our new project with you soon!
I have posted before, have never received in answer. I am wondering if I am not doing something wrong.
If you get this please send an answer and/or the correct way to comment.
Thank you,
Hella
Hello, Hella – This is the correct way to leave a comment, and I do have some previous comments from you on the website (the last one was in November of 2022), but I don’t have any recent comments from you. You can also email me at mary (at) needlenthread (dot) com.
Que faut-il faire pour -être membre Patreon?
Bonjour, Gisèle! If you visit the website here, it is explained on the main page: https://www.patreon.com/marycorbet