


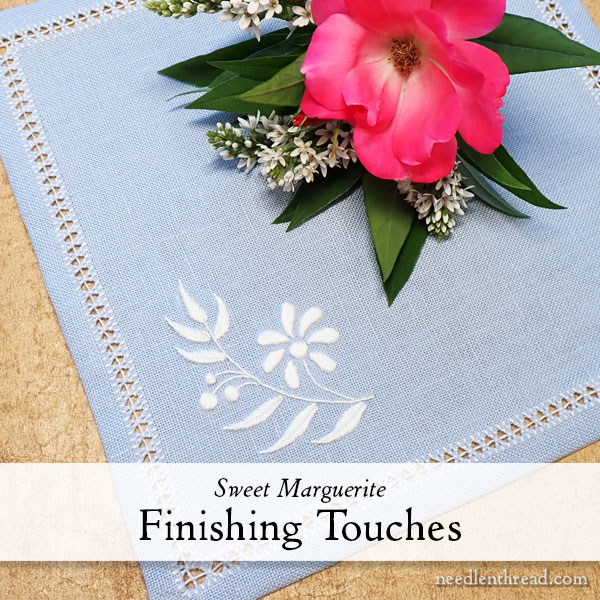
And here we are! At the final installment of Sweet Marguerite – the longest stitch-along in the history of the world, in relation to the size of the actual finished piece of embroidery (or so it seems!).
This project has been quite a journey, not so much because of the project itself (which is relatively small, but somewhat challenging), but mostly because of all the interrupting episodes of life that have gone on in the last five months.
But today, we draw the project to a close! Yay! Then we’ll have a little break in stitch-alongs before we approach the next one. Never fear, though – we’ve got lots of Other Stuff going on to share with you during that break.
Just a reminder to members on Patreon, you presently have all this information in the last PDF that was posted over there.
Come! Let us finish up Sweet Marguerite!
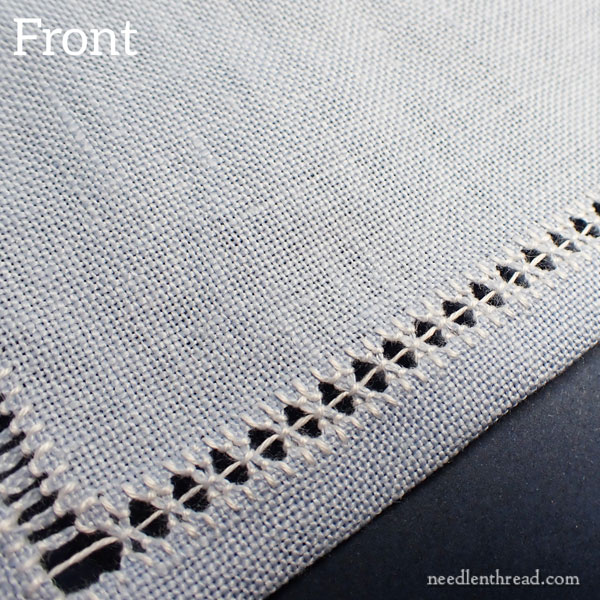
In the previous installment of Sweet Marguerite, we worked the inside edge of the hemstitched area. This resulted in the bundles of vertical threads forming a “ladder” inside the drawn thread area.
Today, we’re going to cinch together the bundles by running a thread down the middle of the ladder and knotting every two bundles of threads together.
Start with a new thread that’s at least 20-22″ long. You want to give yourself plenty of thread because you can’t end the thread and start a new one in the middle of this process.
Thread your needle and knot the end of the thread.
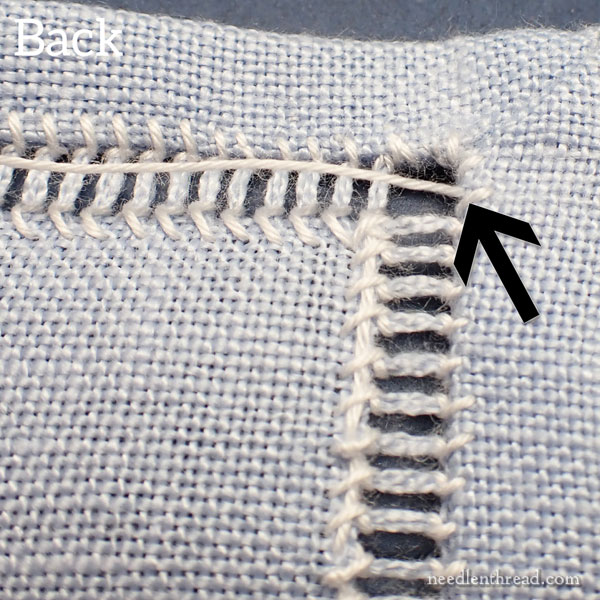
Turn the work over. You’re going to bring the needle and thread out where the arrow is pointing in the photo above, at the edge of the empty square on the corner, at the halfway point along that edge.
So to start the thread, pass your needle and thread into the fabric somewhere on the back, inside the turned hem or mitered corner, where the knot of the thread can be tugged into the fabric and hidden. Your best bet is to pass between the turned hem and the front side of the fabric, in a place that makes sense for accessing the point where the thread is going to emerge.
If you are right handed, you will be working from right to left down the hemstitched corridor. If you are left handed, you will be working from left to right. The method of stitching is the same either way.
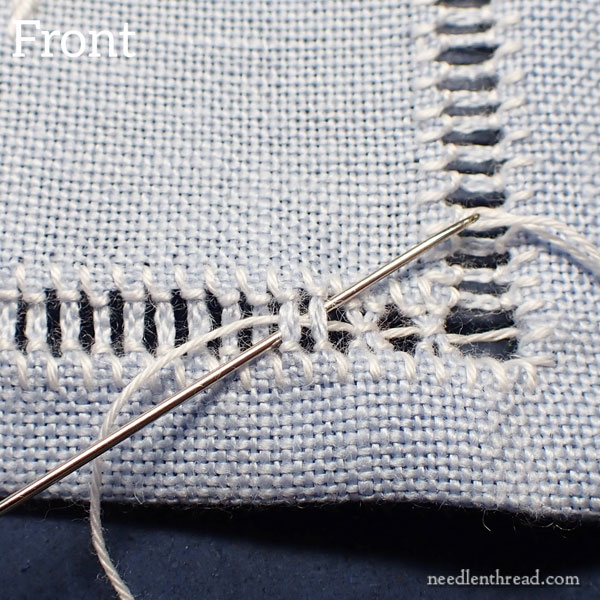
To cinch two vertical bars together, pass your needle behind two bars and to the front and pull the thread through. Then, pass your needle back behind the same two bars, to wrap them, and come up inside the loop of the working thread, or over the working thread.
Cinch the two bundles together by pulling gently on the thread in the opposite direction – upwards and a little backwards – so that the thread hitches around the bundles snuggly and pulls them together.
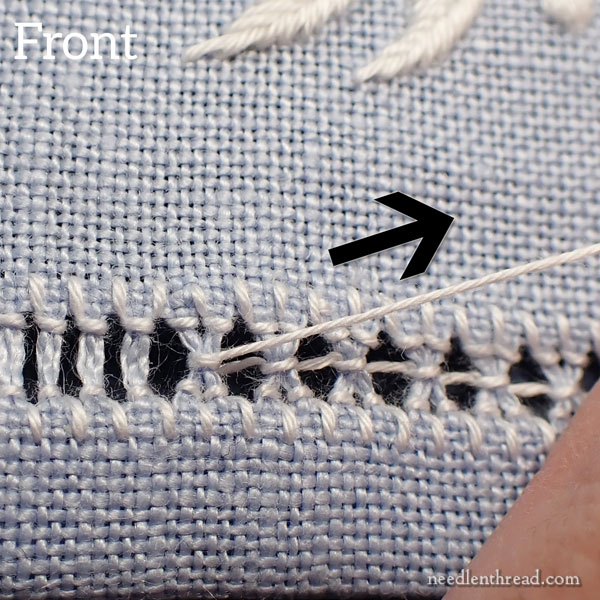
Then, move forward again behind the next two bundles and do the same all the way down the corridor, cinching together every two bundles of thread in this manner.
When you get to the end, if you have an odd number of bundles (two bundles and one bundle, instead of four bundles), cinch the three remaining bundles together.
At the end of the corridor, pass the needle and thread into the edge of the empty corner square opposite where you began this journey. Anchor your thread by making three tiny holding stitches in the back of the fabric as discreetly as possible, somewhere near the edge. These stitches can be over only one thread of fabric, so that they’re very small. Then snip the thread close to the fabric.
Turn the work and work the remaining sides in the same manner.
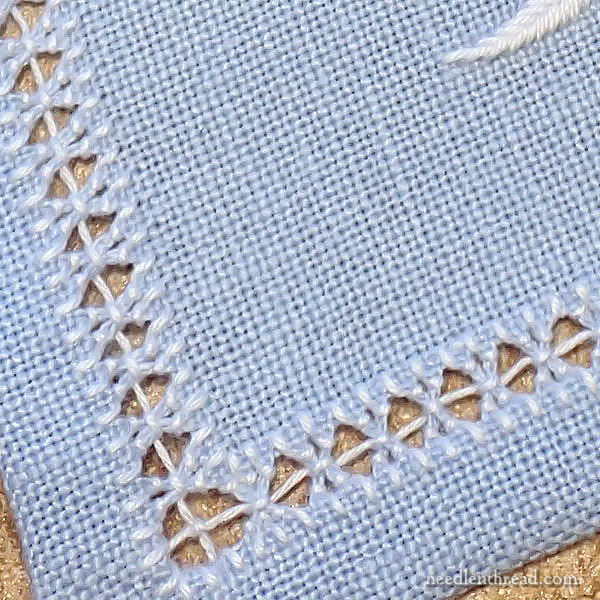
When you start a new thread to stitch the subsequent corridors, you’ll have the thread from the previous corridor splitting the middle of the empty corner square. Work a knot in the same manner over that thread before you start bundling the vertical threads together. This will keep the corner threads together.
You may need to use your needle to situate your knot as you pull through to cinch it around that thread. Go slowly and finagle the threads into place so that the crossed threads in the corners are straight.
When you finish the fourth side, you may need to iron the piece again before displaying it. I recommend padding your ironing surface well and ironing from the back, with the embroidery side face down.
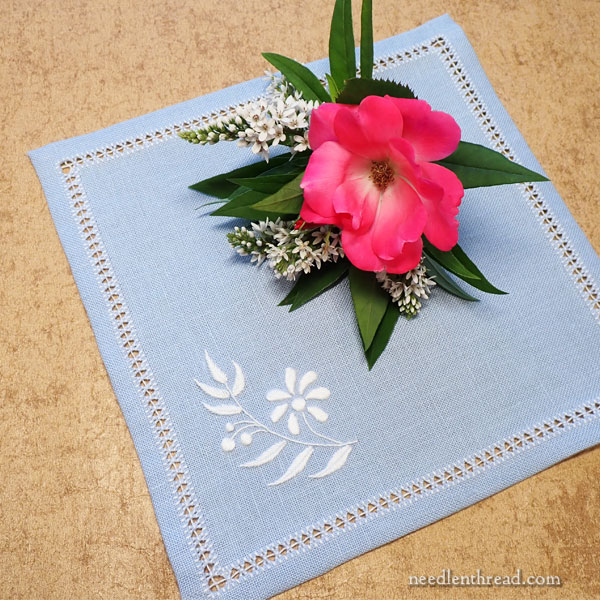
And that, my friends, is the end of Sweet Marguerite.
You can apply the techniques that you learned in this series of tutorials to all kinds of projects, large and small, that would benefit from a decorative hemstitched edge like this. It is an especially nice technique to use on household linens like finger towels in a guest bathroom, cloth napkins and tablecloths, small tea cloths, dresser scarves or table runners, and the like. For a minimal look, a plain strip of linen down the center of a table, with the two ends hemstitched like this, is very elegant.
You can find the rest of the lessons for this project here, in the Sweet Marguerite Project Index.
We’re planning a final Stitch Snippet stitch-along for a little later in the year. We should be launching it by the end of October / beginning of November, if all goes as planned! Look for it!
Coming Up
And between now and then, we’ll continue with our normal coverage of embroidery-related topics, goodies, reviews, and so forth.
One thing we are definitely going to address – I get so many questions about it – is Lighting. I’m going to share my studio lights with you. We’ve been working with these lights for the past several years, weeding out most of our other lights and replacing them with these, slowly but surely. My favorite one is a cordless portable task light that has proven to be a real gem – nothing else on the market, as far as I know, comes close to it (and I’ve tried many). So yes, we will talk lighting soon!
We’ll also talk tools. I want to show you a new set that came my way. We’ve talked about these particular tools before, but every now and then, it’s good to drool over some tools together.
And then there’s stitching. I’ll catch you up on what I’m working on! There are several projects in the hoop and on the frame at the moment.
Stay tuned!
And have a jolly weekend!
Merci Mary
C est très bien expliqué