


Today, very quickly, we’re going to look at the functional side of the hemstitch on Sweet Marguerite.
Last week, we worked the functional hemstitch on the drawn thread area, using the hemstitch to pick up a bit of the hem with each stitch.
Today, we’ll work the opposite side of the drawn thread “frame” in this short tutorial.
If you are a member on Patreon, you have already received all this information in the most recent PDF posted for members over there. The PDF covers all the hemstitch and takes you through to the end of the project.
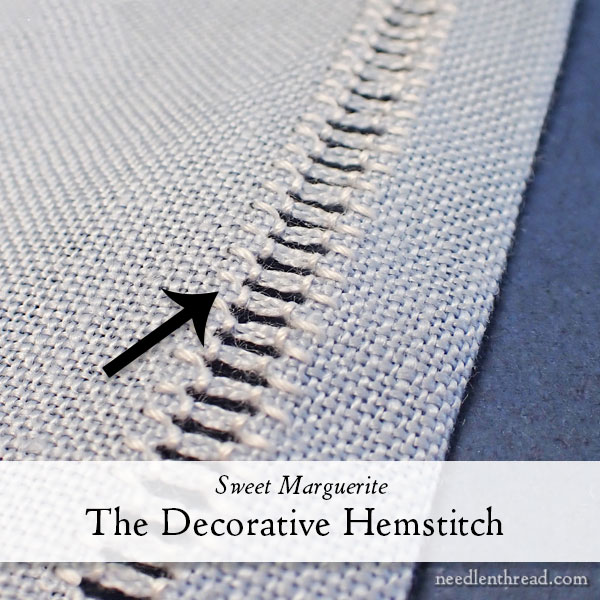
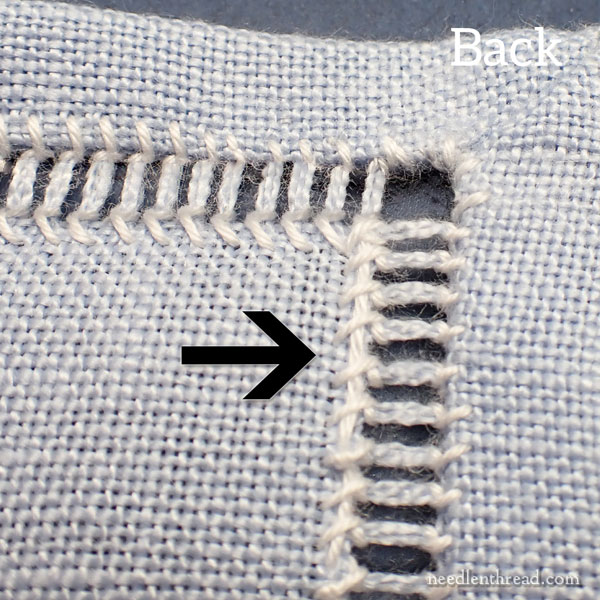
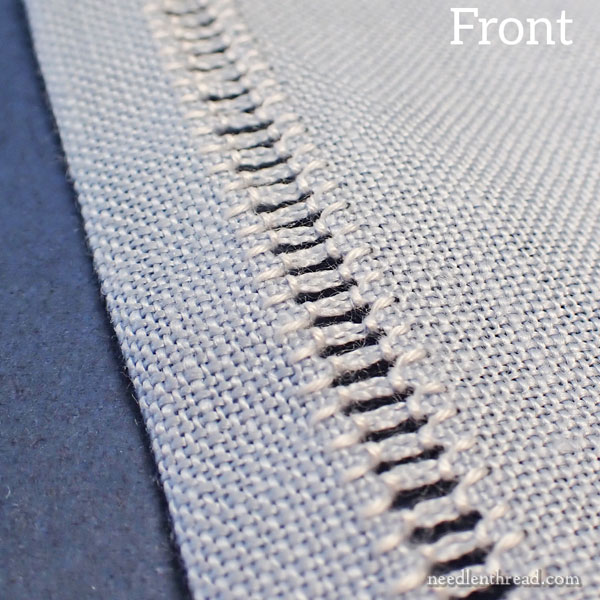
In the image above, the arrow points to the side of the drawn thread area that we’ll address today.
This side is a little trickier than the functional side, mostly because of the way we’ll go around corners and the way we’ll start and end threads. But don’t worry! If you’ve gotten into the rhythm of the hemstitch and you are accustomed to the movement of the stitch, you’ll find this easy once you get going!
First, we’ll look at starting your threads. Cut a long piece of thread – at least 24″ – so that you don’t have to end your thread in the middle of any one side. If you want to cut it longer, feel free! The fewer stops and starts, the better. BUT…
Just remember that you’ll need to change the thread if it starts looking fuzzy, and the longer the thread, the more fiddly it can be to work the embroidery. Longer thread tends to twist and knot more frequently. You can help avoid twisting and knotting by stitching slowly, especially when you pull the thread through at any point in the stitch.
A 24″ cut of thread should get you through about two sides of the piece.
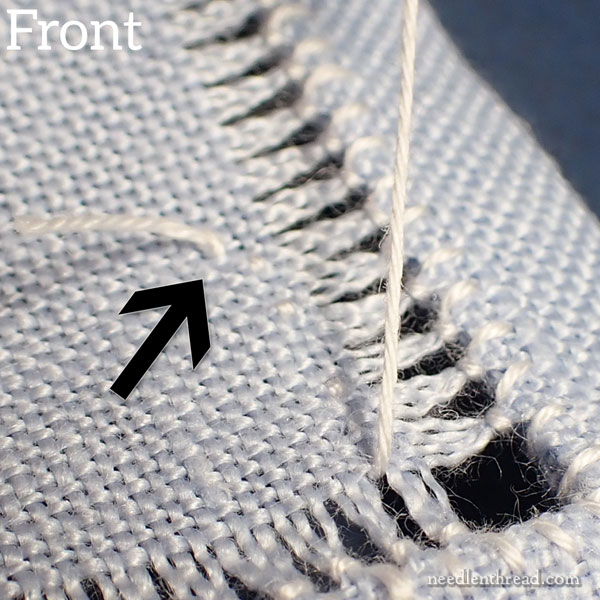
Start your thread with a knot. You can see the knot in the photo above. Starting about 1″ – 1.5″ away from the corner, go down into the fabric just above the split between bundles of threads formed by the hemstitch on the opposite side. You should see a definite split between vertical thread bundles. You’ll want to be two or three fabric threads away from the edge.

Then, working towards the corner where you’re going to start, make about two or three tiny backstitches in the fabric, just above the splits between bundles, working towards the corner. Backstitch over one thread, so that the stitches are really small.
You can see two tiny backstitches circled in the photo above.
Because these little stitches are situated above those splits, within the hemstitch area, they’ll be more or less covered by the stitching you’re about to do.
You want to start in a corner that will allow you to stitch towards that knot, and as you get close to it, you’ll cut it off.
This will get your thread started securely, and as you approach the knot, you’ll be stitching over the carried thread on the back. You’ll clip the knot off close to the fabric as you get close to it.
I’m working from right to left, starting in the top right corner, and working counterclockwise around the whole linen.
If you’re left-handed, work from left to right, starting in the top left corner and working clockwise around the whole linen.
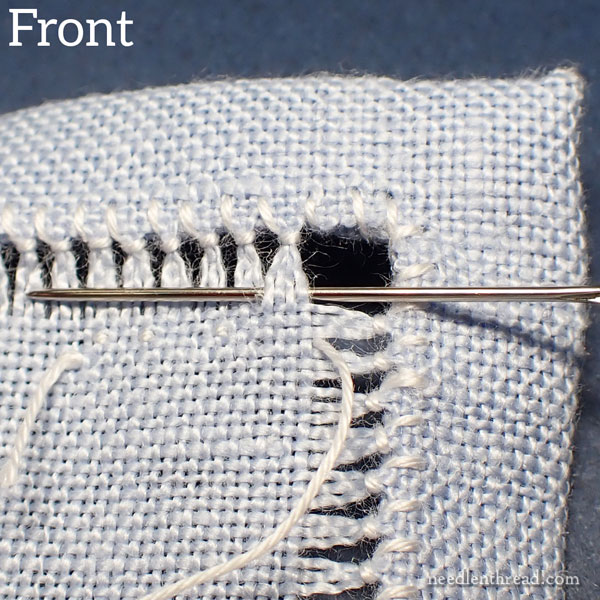
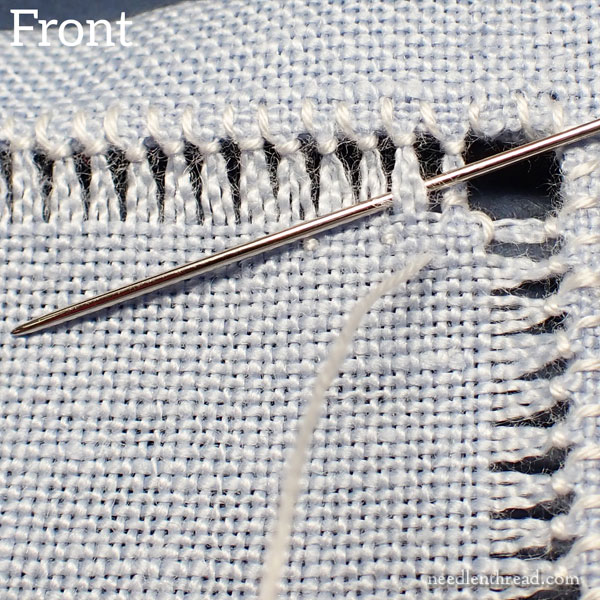
After working the backstitches towards the corner, bring the needle & thread to the front between the last two bundles on the adjacent side, as shown above. You’re coming up “around the corner” from the side you’re going to stitch.
Pass the needle into the empty corner and under the first bundle of threads already formed by the opposite hemstitch, and bring the needle out to the front as the first movement of the hemstitch.
Then you’re going to pass back into the corner and out into the fabric, counting down three holes below the split between the bundles, just like you did with the previous hemstitch.
As you pull the thread through to wrap the bundle, pull firmly.
Now you’re ready to move to the second hemstitch. Pass the needle behind the next bundle of threads, and keep working the hemstitch down the line until you reach the opposite corner.
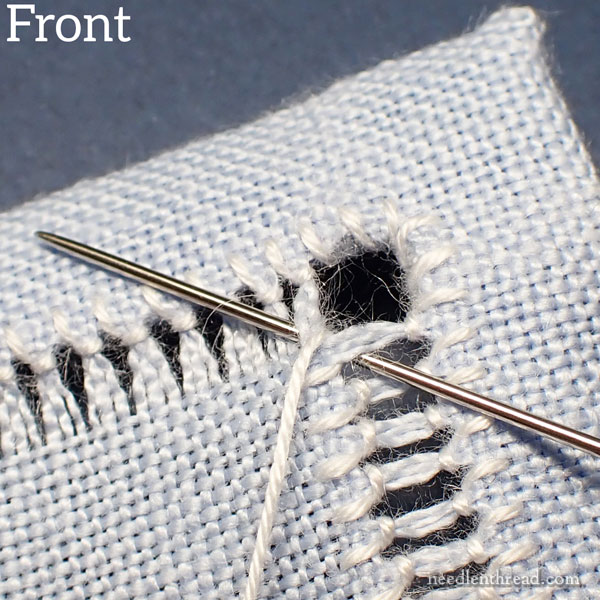
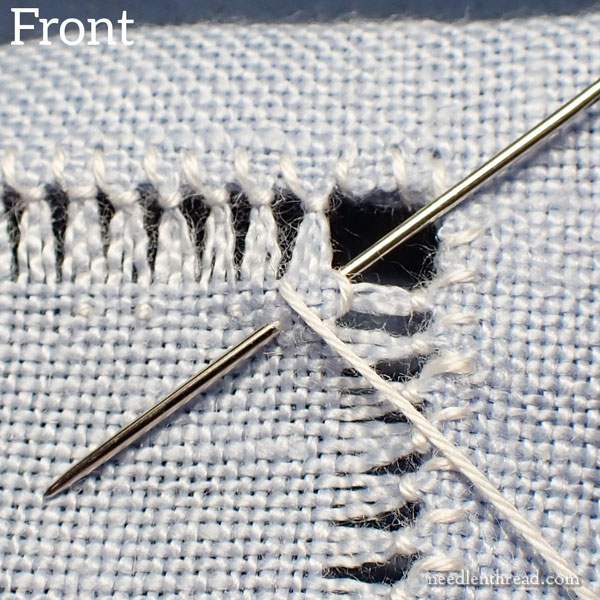
When you reach the next corner, you’ll turn the corner by passing the needle under the last bundle on the side you’re working on and diagonally out after the first bundle of the adjacent side that you’re getting ready to stitch. You can see the configuration in the photo above.
Pass back into the corner and out in the same hole as the last vertical stitch in the adjacent corner, as shown above.
Now you can continue the hemstitch forward along this new side.
When you meet up with your first corner as you progress around the frame, you’ll end with the final hemstitch meeting your first stitch.
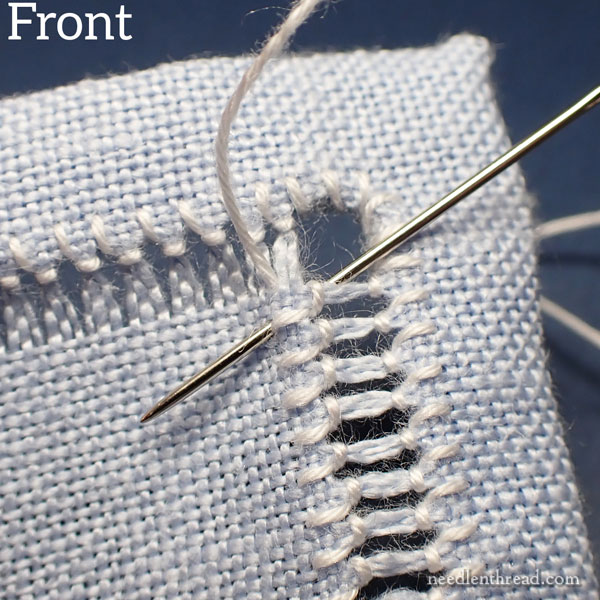
To end the thread, you can run it under the stitches on the back of the fabric, as shown in the photo above. You can’t really hide these ending threads on this side, the same way you could on the opposite side, because you don’t have a turned hem to hide them in. So just run them under a few stitches, backstitch over one of the stitches to kind of “hitch” the thread, and run it under a few more and cut it.
Now, you have a drawn thread “frame” around the inside of your fabric. It should look like a ladder of sorts, with vertical bundles within the drawn thread area as shown above.
On Friday, we will further embellish this area and finish the project!
Looking for More?
You can find all the articles relating to Sweet Marguerite, a Stitch Snippet stitch-along, here in the Sweet Marguerite Project Index.
Wishing you a Wonderful Wednesday!
Leave A Comment