


Whenever I start working on the preparation stages of a new embroidery project, it tends to occupy my thoughts quite a bit.
That’s what happened this weekend. We recently started preparing a new goldwork project here in the studio, and it was on my mind a lot this weekend. Mostly, I was thinking about the order of work in embroidery.
The order of work is the logical sequence you follow when working on a project. Sometimes, order of work doesn’t matter at all. But sometimes, it matters quite a bit. In the goldwork project that’s coming up, the order of work is quite important. And that’s why it was occupying my thoughts.
But even on little projects, order of work can be important simply because it might save us a little frustration. I’ll illustrate this with the recent wool embroidery project I’ve been piddling about with.

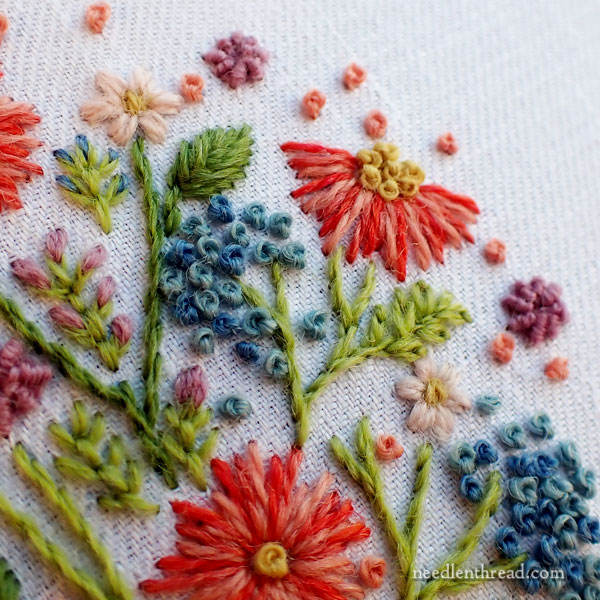
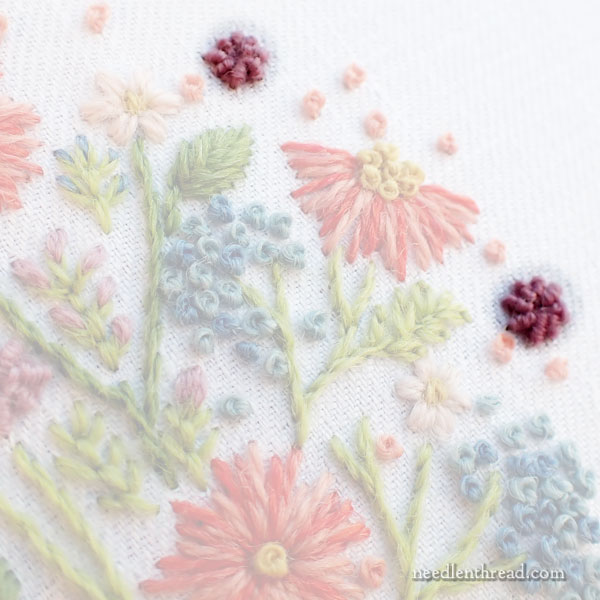
Besides, it gives me a chance to share a splashy bit of color on a Monday morning! This photo was taken in the early morning light as the sun – which is remarkably bright first thing – beams on the east side of the studio. I love how the morning light (and my camera’s interpretation of it) changes these colors from the more muted, natural palette that they are to something this vivid.
When I worked the first doodle on this project (you can read previous articles about it here and here), I hadn’t entirely decided on what stitches I’d use where. While I had sketched out some ideas, nothing was set in stone. I just knew I was going to keep the stitches simple.
So the order of work didn’t really matter at the time. I was just working my way through the project, seeing what I liked and what worked, and making some decisions as I went along.
And that’s all well and fine! There’s really not a lot in this project that demands any attention to the order of work. Yes, it would be nice if the stems were stitched before the flowers, just in case parts of the flowers overlap the stems.
But other than that, at the time, there was nothing particularly planned in the project that would compel me to pay too much attention to the order of work.
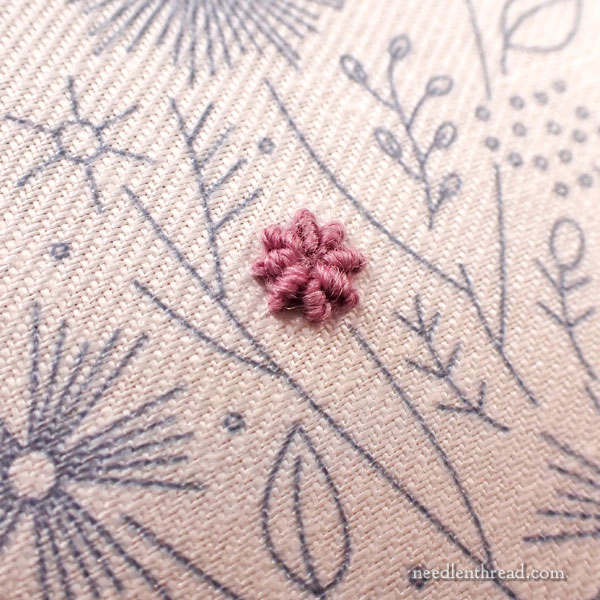
And then somewhere along the way, I decided that these little fellows needed to be what they are: ribbed wheels, or ribbed spider web stitch, or ribbed stitch.
This stitch is comprised of a foundation of radiating spokes over which you work a backstitch that wraps each spoke and creates these high-sitting, nicely textured little morsels. I love this stitch!
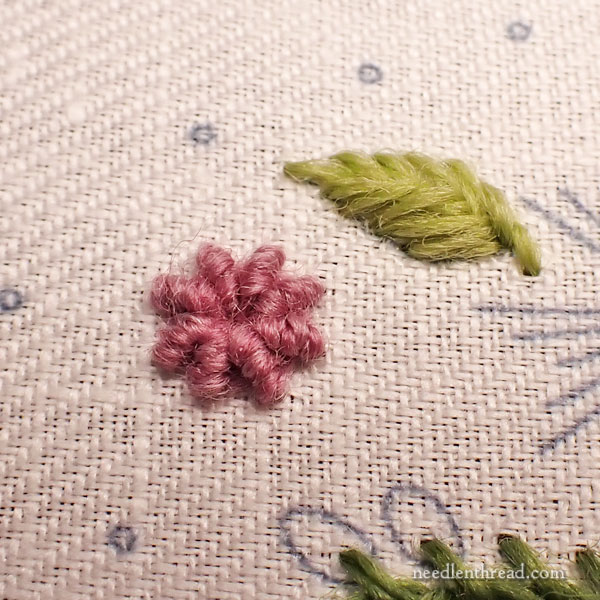
When considering the order of work, though, if you leave this stitch to the end and the elements are surrounded by other embroidery, you’re just asking for a headache.
Because you have to wrap around each spoke on the top of the fabric – your needle doesn’t pass through to the back of the fabric at this point – you risk running into every bit of embroidery around the element.
And that can be frustrating, because, with every wrap, you’ll be trying to avoid all the previous embroidery surrounding the element – especially because you don’t want to snag previous stitches.
Leaving the elements to the end, when they’re surrounded by other embroidery, just makes it harder to work them.
And that’s why the order of work can be important when you have these types of elements in your embroidery project.
It makes sense to put them first in the order of work, while your fabric is blank and you have plenty of room for manipulating your needle as you work the wraps.
Once they’re finished, you can embroider all around them. And then, down the road, you’ll have no worries about avoiding previous embroidery or snagging your beautifully placed stitches.
Now, in the Whole Scheme of Important Things that Govern One’s Life, does it really matter if you leave these elements to the end? Will it affect the outcome of your embroidery or the Order of the Universe if you don’t work them first? Are the Embroidery Police going to come put you in Embroidery Jail if you decide to leave them to the end?
Well, no.
But it might save you a little frustration as you stitch.
And that’s not a bad thing.
These delectable little morsels are only about 1/4″ in diameter. They’re a delightful way to add an extra touch of color and a bit of texture to a project like this. And they’re fun to work! I just like to work them first, so that they don’t cause me any frustration down the road.
I hope this little tip on the order of work gives you something to think about for your next project!
Happy Monday!
I am doing a SAL that consists of many adjacent wagon wheels and have this very problem. Would a curved needle or J-shaped needle (if such a thing exists) help?
It looks like this:
Oh wow! That’s a lot of woven stitches. There are curved needles out there, but they’d be a pain in the neck to work with. I think your better bet would be to just manipulate your needle by pushing it from the back when you need it to rise above other stitches – or by pushing down on the eye. The woven stitches in your project a slightly different, because they are woven, not ribbed. So your needle is always going forward, not passing backwards around a rib. You’ll have a different type of control over the needle. But you can always push up on the back of your fabric slightly, or push down on the eye of the needle, to get the needle tip to rise a bit above the surrounding stitches.
Does embroidery jail come with good lighting, three meals a day and a comfy chair to sit in while I stitch? Hmmm…
HAHAHAHHAHAHAAA! If it does, I’m IN! Take me away! Cart me off!
I really like this piece, in particular your colour palette, it’s very pretty! I was just wondering if you will have a pattern for it? And, is that crewel wool that you used for it?
Yes, it’s actually going to be released as a kit and as an e-book for those who want to source their own materials.
Love this little bit of thinking.
And yes, the pop of color is beautiful.