


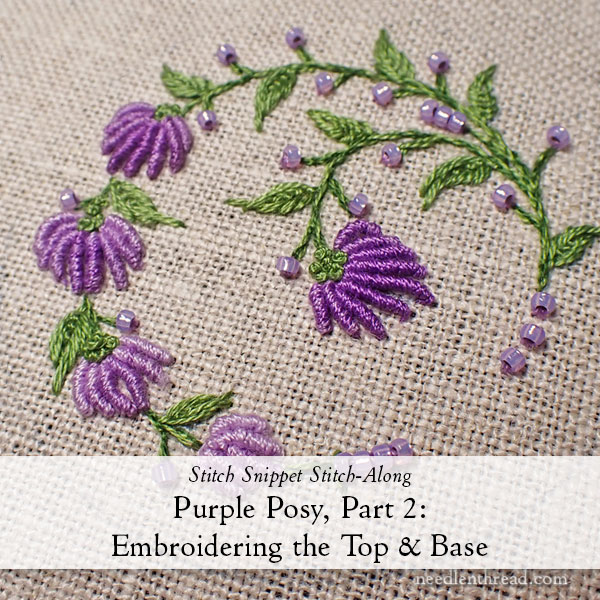
Today, we’re going to get going on the embroidery for Purple Posy. We’ll be embroidering the decorative top and base of the tape measure cover.
If you are just joining in, we started this project last week and you can find the first installment here.
If you would like a materials kit, we still have a small number of kits available here.
If you are a member of the Needle ‘n Thread Community on Patreon, you have already received all of this information in a handy-dandy PDF format for downloading and printing, so you’re good to go! Still, it won’t hurt to read through today’s article below, just in case I mention something or link to something that you might find helpful.
Let us begin to stitch…
For embroidering the top and base of the tape measure cover, I’m going to use the base design to illustrate the embroidery process.
The methods are exactly the same for the top of the cover (which is the larger design).
For the embroidery on the stems and leaves, use two shades of green in the needle at once: one strand of 3345 and one strand of 3347 in the #7 crewel needle. In the kit, this is the needle with the medium-long eye and the sharp tip.
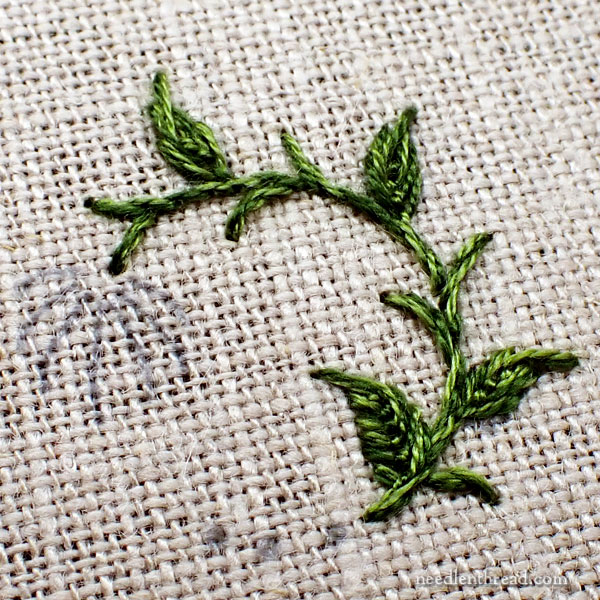
Embroider all the stems and little straight offshoots in stem stitch. If you’re not familiar with stem stitch, you can find a video tutorial for stem stitch here.
Strive for stitches that are about 3/16″ long – not as small as 1/8″ but not as long as 1/4″.
Pay attention to how you end the stem stitch lines (I cover this in the stem stitch video). The last stitch in any stem stitch line – if you want it to come to a nice, tight stopping point – should be a very small stitch, just barely beyond the end of the previous stitch. That way, you don’t have a straggly last stitch that stretches out and looks thinner than the rest of the line. It also keeps the resulting “rope” of stem stitch nice and neat.
The leaves are worked with the same floss as the stems. They are embroidered using a vertical fly stitch, but with a curved tip.
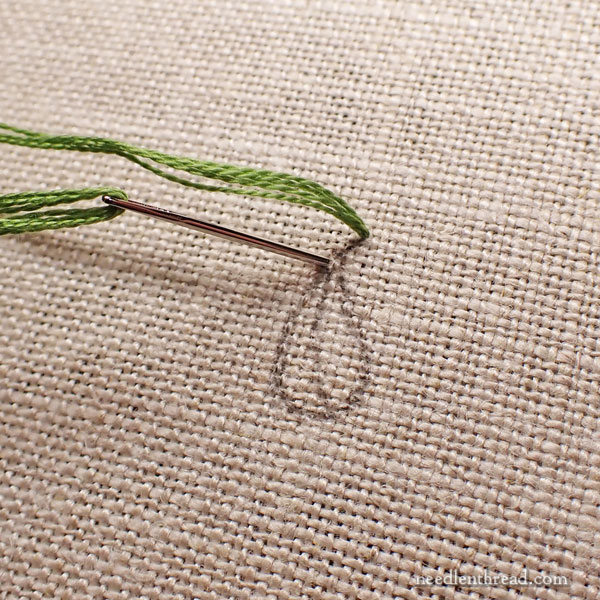
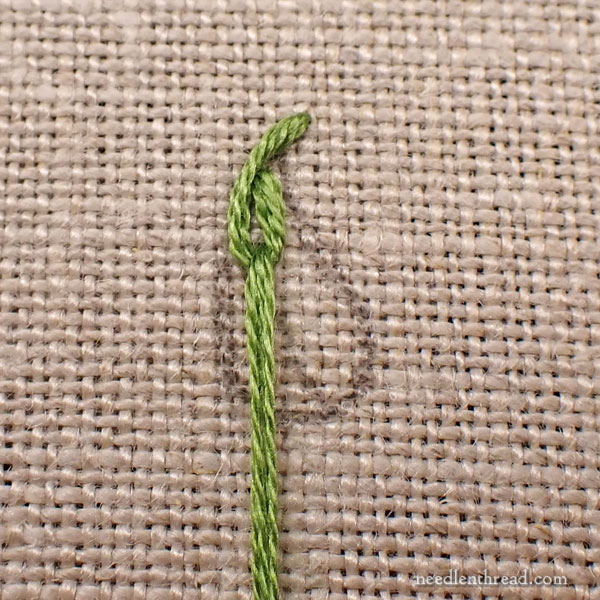
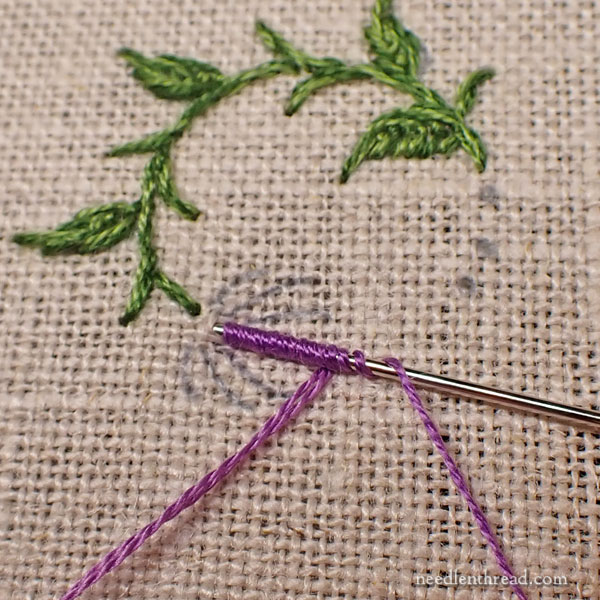
To achieve the curved tip, bring the needle and thread to the front of the fabric at the outermost tip of the leaf, and then take it down into the fabric on the left side of the leaf outline, as shown in the photo above.
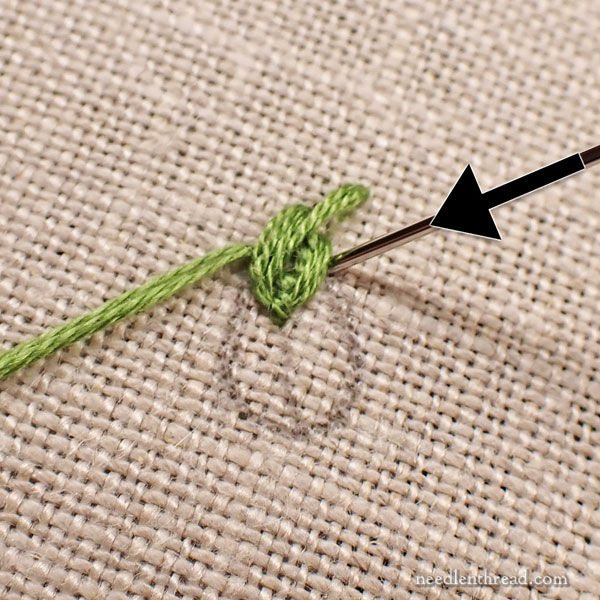
Pull the working thread through, but leave a small loop on the front of the fabric. Bring the needle up in the middle of the leaf, where you imagine the center vein of the leaf to run (and about 1/3 the way down the leaf from the tip). Come up inside the loop, so that you can catch the loop in the typical manner of a fly stitch.
If you’re not familiar with fly stitch, you’ll find a tutorial for fly stitch worked vertically here.
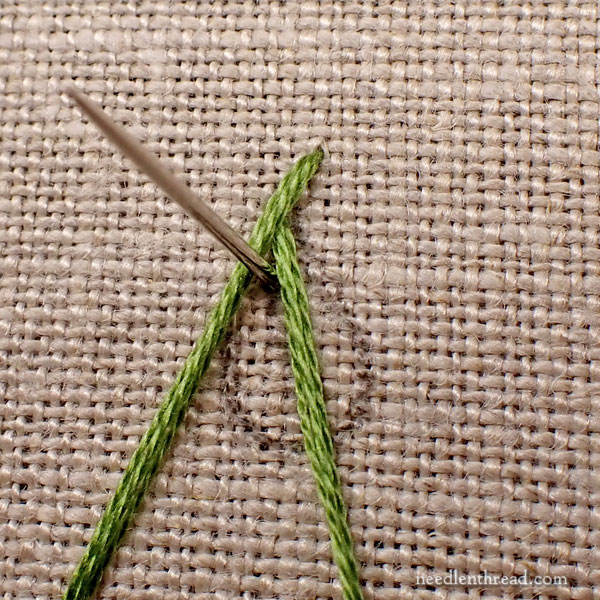
You can see here the fly stitch, ready to be anchored on the inside of the leaf.
NOTE: you can use a pencil (I normally use a mechanical one) to draw a center vein line down the middle of your leaf, if you need one to guide you as you stitch the leaf.
Fill the leaf with fly stitch, making sure that the beginning and end of the stitches (the “arms” of the fly stitch) follow the shape of the leaf’s outline.

This is a finished curved fly stitch leaf. On the project, your leaves will not be this big, nor will they have this many stitches in them.
Once you’ve reached the base of the leaf with the fly stitch, if you still need to fill in a little on the sides of the base, just work a straight stitch parallel to the arms of the fly stitches.
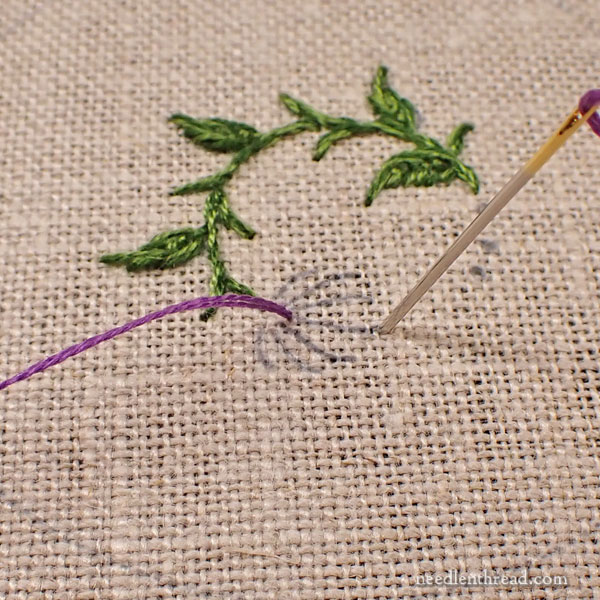
With the greenery finished, move on to the bullion knot.
On the design for the base, use two strands of dark purple for all the bullions, and use the milliner needle to work the bullions. If you have the kit, the milliner needle is the needle with the longest shaft and the round eye.
If you are not familiar with the bullion knot, please watch this video tutorial for bullion knots. This is the method I use for bullions, and the photos of the process below show different steps in that method. But you’ll need to watch the video to get the whole method clearly down.
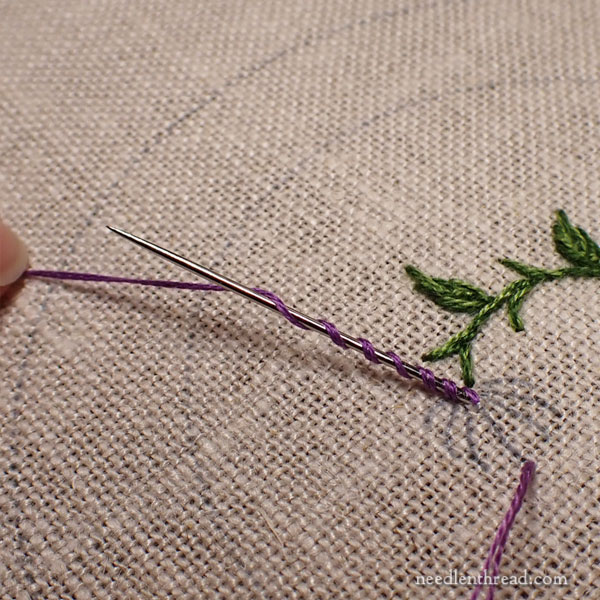
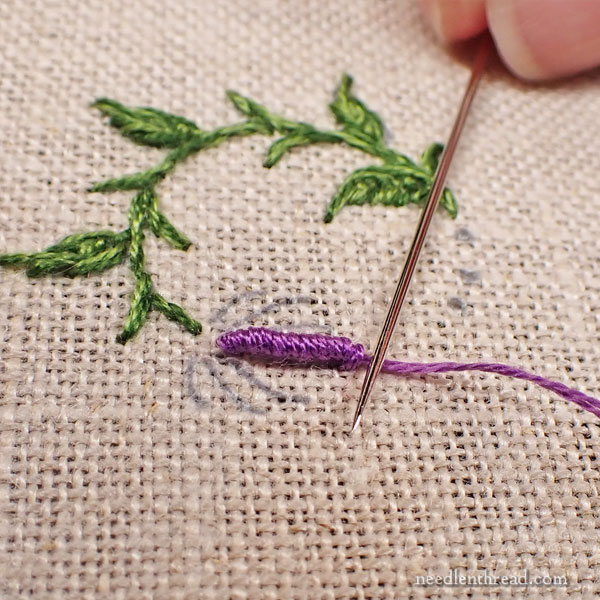
Wrap the thread about 15 times around the needle at first. You can pivot the needle from the eye to help you wrap, or just wrap the threads.
I usually wrap counterclockwise with my left hand (my right is under the fabric), but if you’re working with the right hand above, you will probably wrap clockwise. Either way works for this project.
To test to see if you have enough wraps on your needle, make it lie down on the fabric by bringing the tip down to the fabric (still not pulling the needle through). Just manipulate it from the eye, behind the fabric.
If the wraps cover the design line, you’re good! If you want a little wiggle or arch in your bullion (you’ll see that some are curved), wrap beyond the length of the design line so that the bullion bows out a bit.
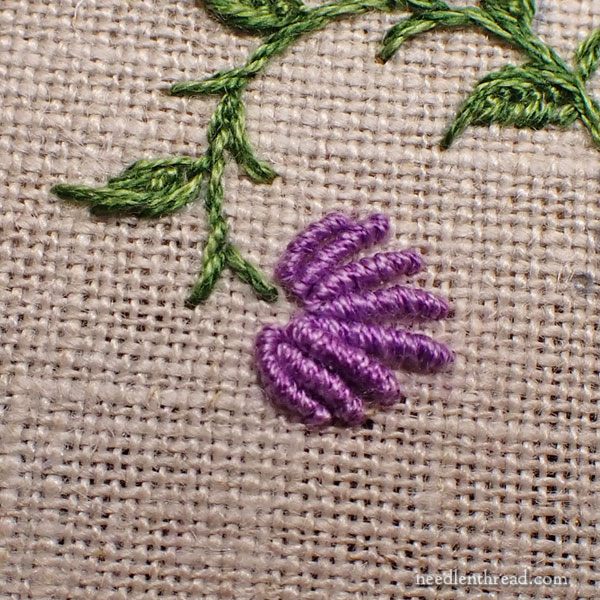
After you’ve pulled the thread through (refer to the video if you haven’t done this before), use your needle to help you keep the wraps in place while you tension the thread.
You can also use your needle to stroke the underside or top of the bullion, to get it in place. Or you can even roll your finger over the bullion to help put the wraps in order, if necessary.
Note: You may wish to add more bullions than the pattern dictates, to get a fuller flower. This is up to you. On some flowers, I added one or two extra bullions. On other bullions, you might reduce the number by one for a better fit in the design area.
If you want to, you can lighten the color of the outermost one or two bullions on each side, by switching to one strand of dark purple and one strand of medium purple in the needle at once for those bullions.
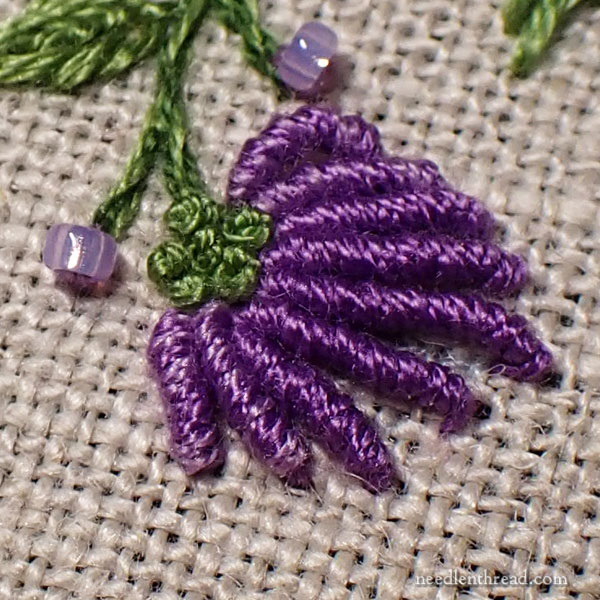
When you have finished all the bullions, return to your green thread (two strands of both in the needle or you can use just two strands of the lighter green, to lighten it up) and work a cluster of French knots at the base of each bullion flower.
If you are not familiar with French knots, you’ll find a video tutorial for French knots here.
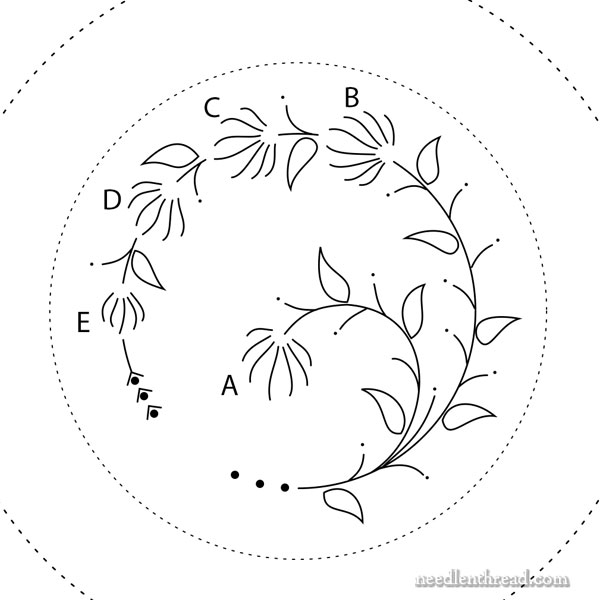
When you embroider the top of the tape measure cover, the flowers progress from dark to light, following a specific sequence.
Because we’re only working with three shades of purple, we will get a wider range of shades by combining two colors of floss in the needle at once.
Refer to the diagram above, and work the shades for each lettered flower according to the information below:
A: The inside bullions on the flower are 2 strands dark purple; the last two outermost bullions on each side are 1 strand medium and 1 strand dark.
B. The inside bullions are 1 strand medium, 1 strand dark; the outermost bullions are 2 strands medium.
C. The inside bullions are 2 strands medium; the outermost bullions are 1 strand medium, 1 strand light.
D. The inside bullions are 1 strand medium, 1 strand light. The outermost bullions are 2 strands light.
E. All bullions are 2 strands light.
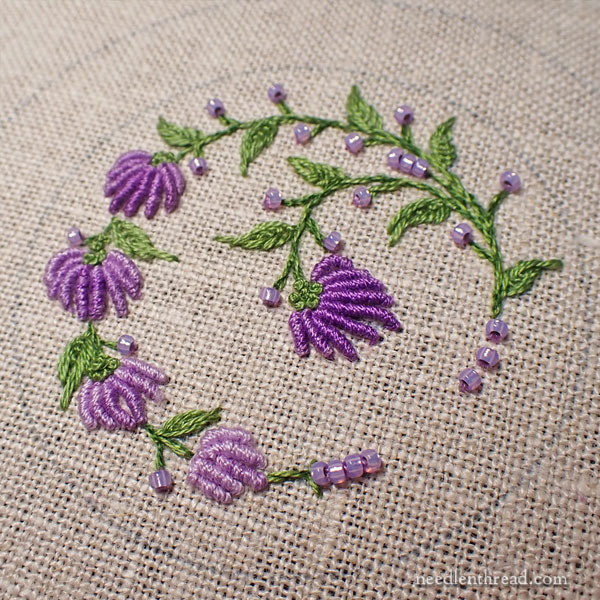
The finished embroidery!
We will add the beads and work the decorative band for the side of the cover in the next installment.
Trouble With Bullions?
If you have trouble with your bullions and you are facing the prospect of Bullion Despair and contemplating giving up, don’t!!
You don’t have to work the flowers as bullion knots. You can work the daisy stitch (detached chain) in the place of the bullions, fanning out in the same overall shape of the flower head.
Follow the same color principles. Inside each daisy stitch, work a straight stitch in a lighter or darker shade of the purple that you used for that daisy stitch.
If you’re unfamiliar with daisy stitch (also called detached chain stitch), you can find a video tutorial for daisy stitch here.
Coming Up
Next week, we will work the decorative side strip on this project and we will add beads to all the embroidered parts.
I have a few more bits and bobs to share with you as well. We’ve started a couple (ok, four, if you want to get technical) goldwork and silk embroidery projects here in the studio this week.
I’ll finish up the wool embroidery project and reflect upon it. I’ll also show you some wooly comparisons. And we will chat about linen!
Amidst all of that, I’m having great fun doing taxes (or not – not) and putting together another design e-book that has been a Very Long Time in the works. That’s my night time work lately, because I really know how to have fun at night, gosh darn it.
Hope you’re having a splendid week!
Mary!
Those leaves are a revelation!
I adore them!
Thank you for the introduction, my dear.❤️