


I’m afraid today is going to be a big photo and information dump, as we assemble and then work the decorative edge on Purple Posy, our current stitch-along project.
I intended to divide this in two parts, with the first part posting this past Friday. Unfortunately, I’ve been under the weather with whatever virus / cold / flu / etc I’ve picked up again. Third time since January! Anyway, I’m working on recuperating.
And that brings me to this point: I need to recuperate on many levels at this point, so after today’s post, I’m taking some time off. We still have the fob to finish on this project, but I won’t be able to get that out until next week some time. I still have photo editing to do on that, some diagrams to make, some video to edit, and I just can’t put that much screen time in on the computer right now.
Funny how the past month has been one slam right after another. Sometimes, I guess life is like that.
But in the meantime, you can get your tape measure covers sewn up and the decorative edges finished! So let’s do that…

Last time we visited the project, we transformed the embroidery into the pieces required to build the tape measure cover.
Today, we’re going to sew the cover together – with the tape measure inside – and we’re going to decorate the edge.
In all functional aspects, the tape measure will be finished and usable. The fob – which we’ll address next week if all goes as planned and hoped – is not necessary for the workings of the tape measure, but it is a pretty addition to use as a pulling assistant.

We’re going to use regular sewing thread here to sew the pieces together and assemble the cover.
Use a strong thread that matches the foundation, in natural.
You can knot your sewing thread as you normally would for sewing things. Make sure the knot is strong and sizable enough that it doesn’t slip through the fabric.
Bring your needle out on the very edge of the top round (the largest embroidery design) near where the gap is in the circular design (where the beads don’t quite finish out the circle on the design). You’ll pass the needle under the turnover of fabric on the back and out on the very edge.
Technically, you can begin this anywhere along the edge, as it doesn’t really matter where your tape measure pull peeks out in relation to the design on the top or bottom, but I liked lining up the gap in the design with the gap on the side where the tape measure will peek out.
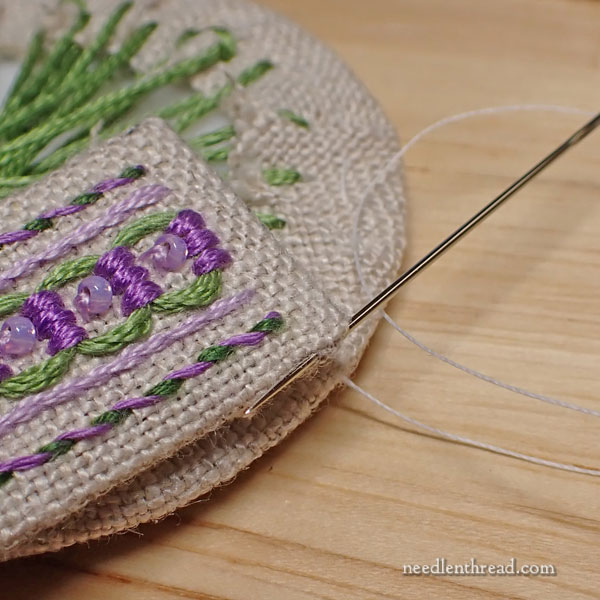
Bring up one end of the side strip and take the needle into the side strip on the very edge, as shown in the photo above.
Pick up a little bit of fabric on the very edge of the side strip to take a stitch forward along the strip.
Now you’ll need to start holding the side strip perpendicular to the round piece.
After taking a stitch forward in the edge of the side strip as shown above, you’ll move back over the edge of the round piece (directly across from the end of you stitch on the side piece), go into the fabric on the edge of the round, and pick up a tiny bit going forward.
Then, move back to the side, take a tiny stitch forward, then back to the round, taking a tiny stitch forward.
This is a blind ladder stitch. We’ve seen it on other finishing projects in the Stitch Snippet series.
It is a series of straight stitches worked alternately on each side of a seam that’s being sewn together invisibly.
As you work around the seam here, gently bend the side strip to align with the round. If you’ve used the right foundation plastic inside, you will get a nice, smooth bend.
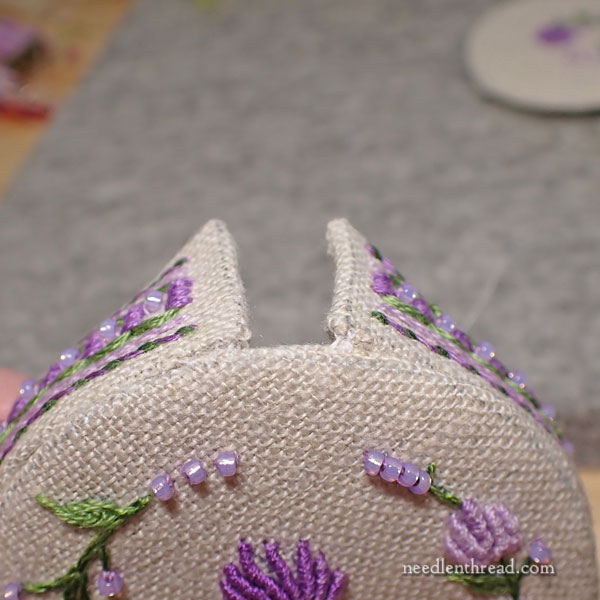
When you finish sewing the side strip on, you will have a small gap in the side, as shown.
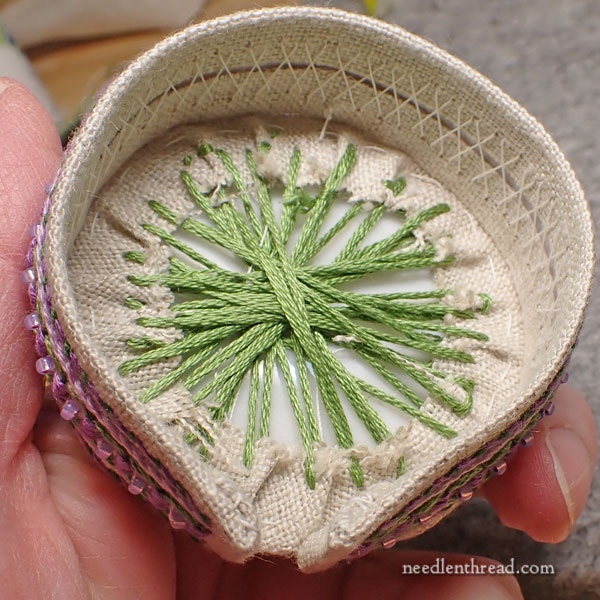
If you turn the piece over, that’s pretty much what the inside looks like. Don’t worry. No one will see it.
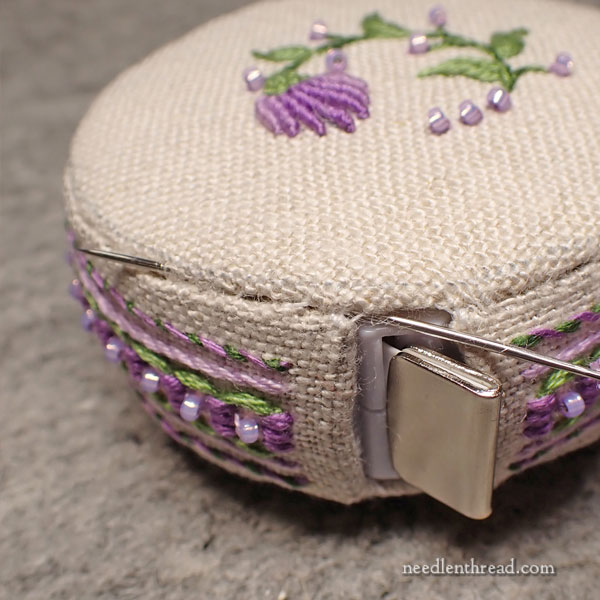
Now, situate your tape measure in the cover, so that the retraction button is up. The retraction button should be covered by the base embroidery design, not the top embroidery design.
Sew the base round onto the side using the blind ladder stitch, as before. At the end of the process, knot the thread discreetly and take the needle out on the edge close by to snip the thread.
Your case is finished!
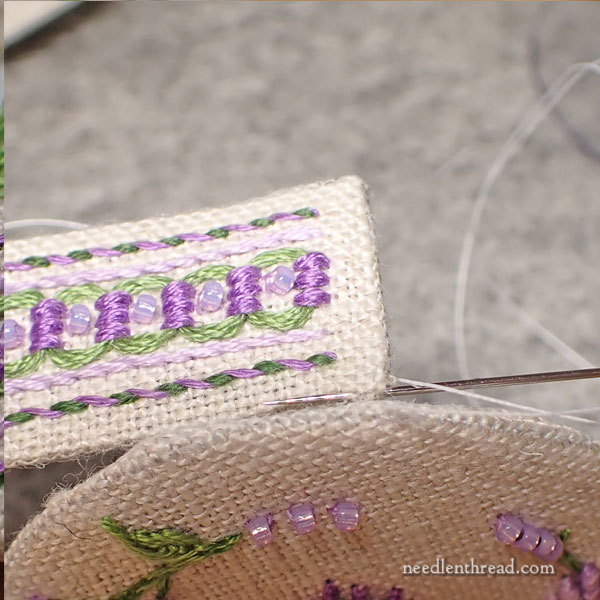
The decorative edge is beaded Palestrina stitch, worked with all six strands of the lightest purple floss and the 11/0 (larger) beads.
If you are not familiar with the Palestrina stitch, you will find a video for it here.
You’ll want a long piece of floss for this, around a yard. This means that you must stitch slowly – otherwise, the thread may twist and knot and be frustrating. But it’s easier to stitch with a longer piece than to switch the thread partway through the edge. Still, if your thread shows signs of wear, you should switch it out.
Knot your floss and take the needle and thread in through the gap on the side and start stitching a little ways away from the gap.
I found it easiest to hold the tape measure cover oriented like a tire in front of me, and to work along the edge towards me.
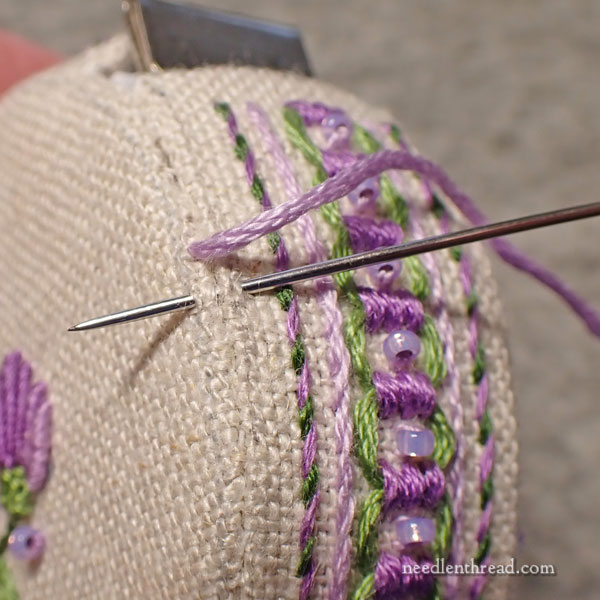
Starting on the left side of the seam, move forward a little down the seam, pass into the right side of the seam picking up a little fabric and out again on the left side, as shown in the photo above.
This will result in a diagonal stitch across the seam.
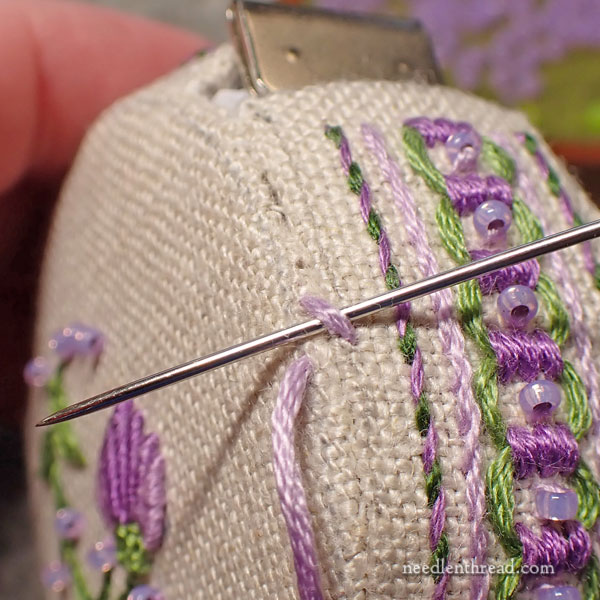
Pass the needle and thread under the diagonal stitch from right to left and pull through.
Then pass the needle from left to right under the diagonal stitch again, coming out between the two “legs” formed by the wrap, and coming out OVER the working thread.
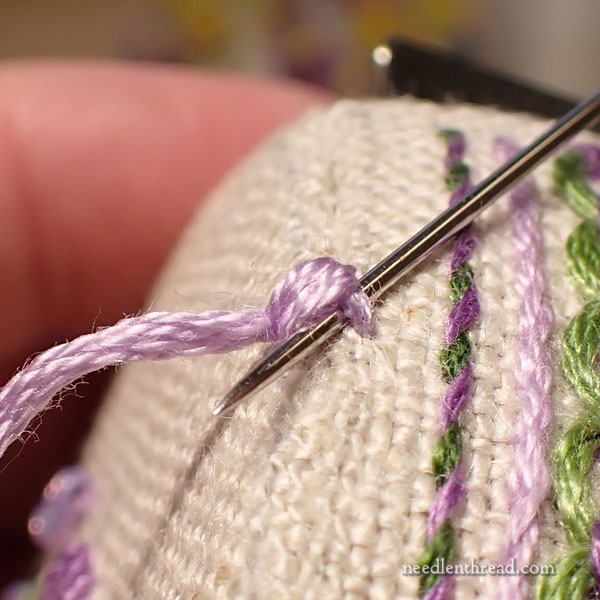
Your working thread will naturally form a loop in the last part of the stitch – you want to make sure you’re coming up inside that loop or OVER the working thread. This will result in a knot forming, as you tighten the thread.
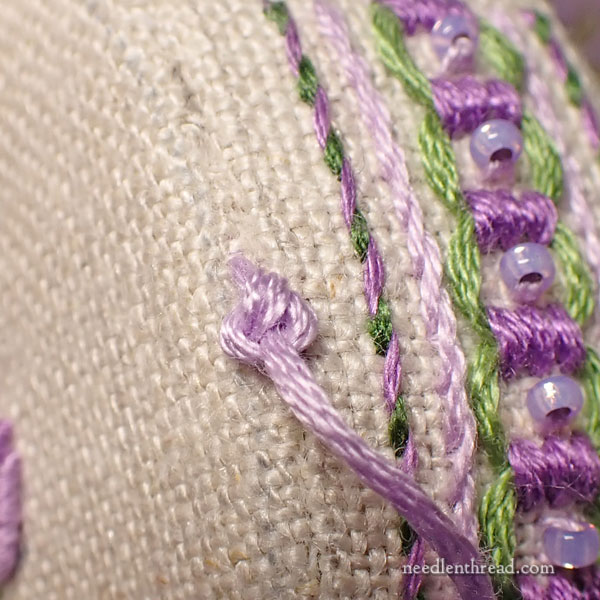
Pull the thread through until a fat knot forms. Don’t pull it through too tightly, or your knot will end up small and tight.
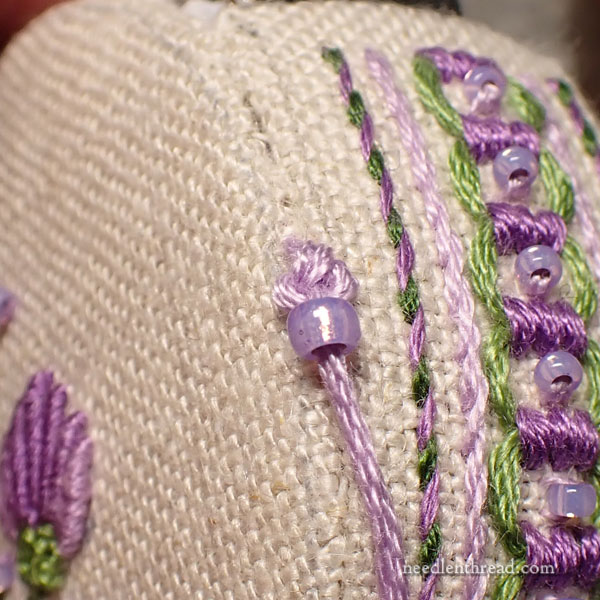
Pick up an 11/0 bead (if you have the Purple Posy kit, it is the larger of the two beads used in the embroidery) with your needle and bring it snugly up to the Palestrina knot.
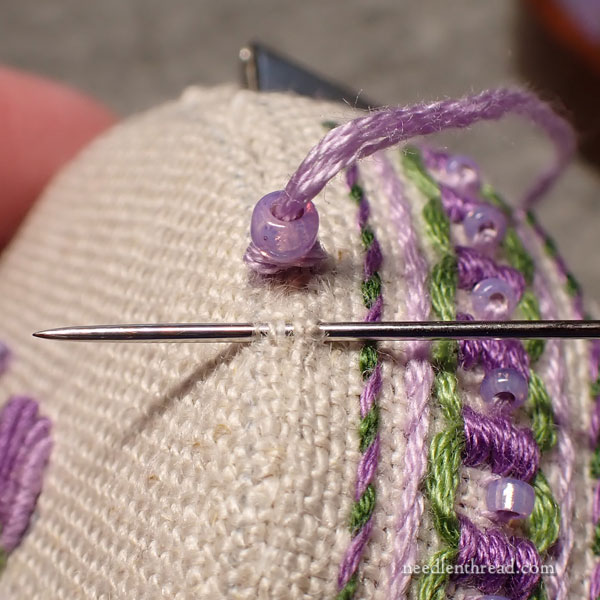
Once your bead is on, begin the next Palestrina stitch, as shown above.

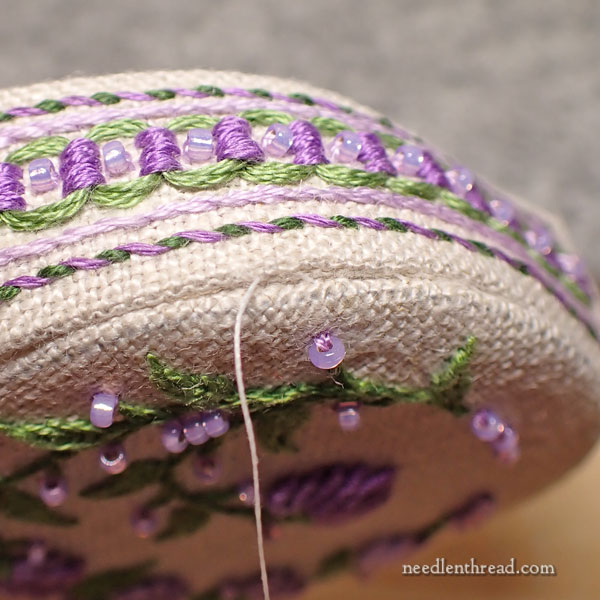
Work your way all the way around the first seam.
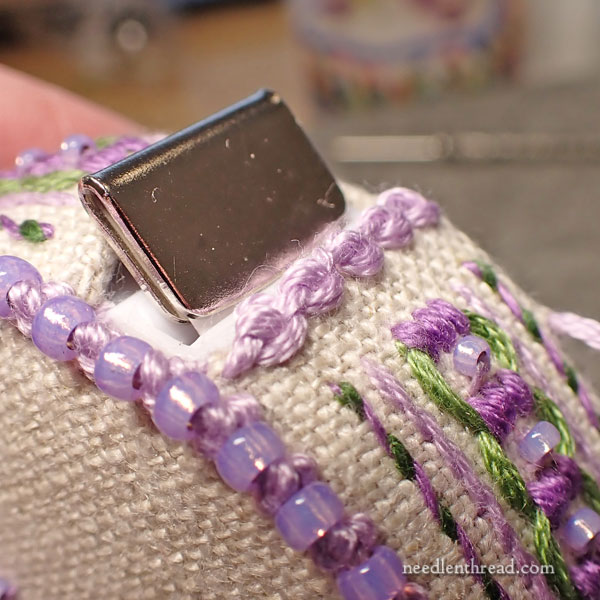
When you get back to the beginning, if you have thread left and it’s in good shape, you can cross over to the other side at the gap, working the Palestrina stitch WITHOUT beads over the top of the tape measure pull.
The underside of the tape measure pull has no stitching (as the tape measure would rub on the stitches. Make sure that your tape measure pulls out in the direction indicated in the photo, and that edge above where it pulls out is the edge that gets the plain Palestrina stitch.
At this point, if you didn’t do it before, definitely end your thread and start a new one, so that you can work the beaded Palestrina stitch over the opposite seam in the same manner.
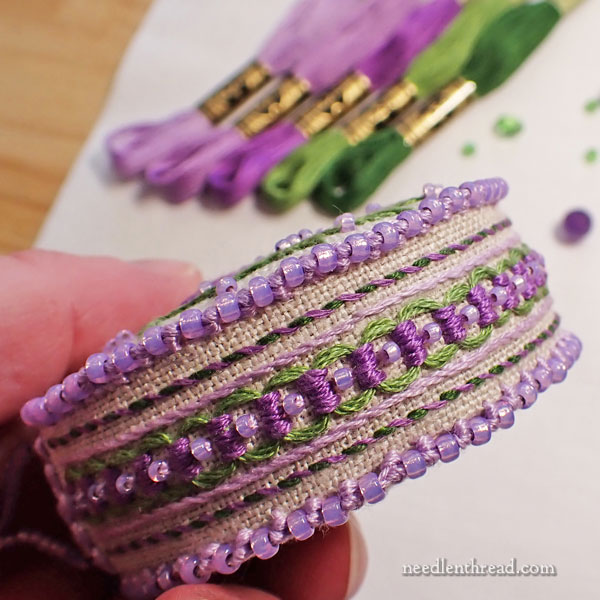
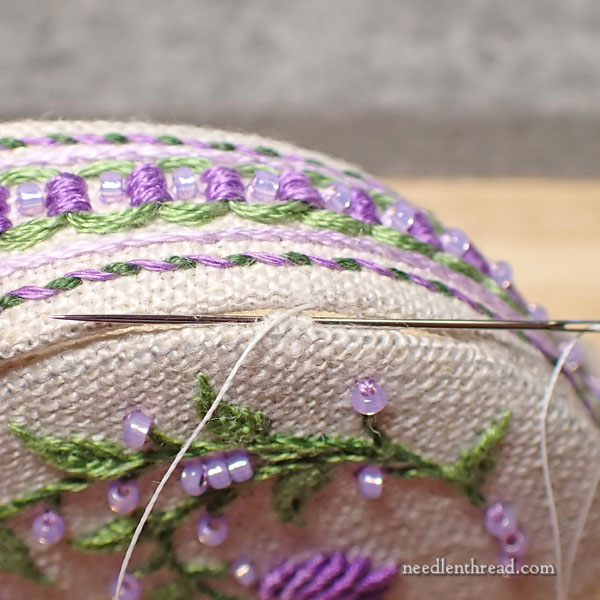
When you are finished, you will have two beautiful beaded Palestrina stitch edges adorning your finished (minus the fob) tape measure cover.
If that is not the fanciest looking, almost-edible-looking Ding Dong, well… I don’t know what is!
(Ding Dongs are American snack cake things that have been around for decades and decades, and that are decidedly underwhelming.)
Coming Up
If you are just joining us on this project, you can find the rest of the stitch along articles related to Purple Posy in the Purple Posy Project Index here.
If you would like to purchase a kit, we have an ever-dwindling number of the kits available here. We will not have more kits for this project this year, so if you plan to eventually stitch it, grab one now!
Members of the Needle ‘n Thread Community on Patreon have already received the downloadable and printable PDF that covers the instructions in the article above. The next PDF will cover the fob. I also plan to have a video available.
The next instructions for the stitch-along will involve the beaded fob. This will not be published until next week (if all goes as planned). I really have to take some time off and get all the way better right now.
I do have some pre-planned posts for you between now and next week, so the blog won’t be entirely silent.
Hopefully, after Easter, everything will spring up fresh and perky and back to life, including yours truly!
Thanks for your patience!
Hope you feel better soon!
It is just beautiful, Mary … but I really don’t want to eat it. 🙂
But you! You need to get better. Get extra amounts of sleep (cause that’s when we heal) and I’ll put in some extra prayers. Hopefully, you’ll be good as new for Easter!
Merci c’est très clair mais soignez vous bien !
C’est bizarre un rhume qui revient trois fois !
Vous avez peut-être des allergies.
I hope your health improves. Listen to your body and take all the time you need.
Dear Mary, I hope you get some true downtime, give yourself room to recuperate, and find yourself on the mend! My guess is that your loyal following will miss you, but are more interested in your long term recovery. It sounds like you need this! Best, Jennifer
Lovely to see the assembly.
I admire you for keeping the blog going and the embroidery happening inspite of the health ups and downs. Thank you. You are an inspiration to many of us Mary across seven seas.
May this Easter bring you complete recovery and good health for years to come.