


Today, I wanted to answer a couple questions about embroidering on these 3-dimensional felted hearts that I showed you last week.
The tips below can apply to any similar 3-dimensional object. This is pretty much how I go about embroidering on any pre-felted shapes. In fact, I’ll show you some more explorations of a similar nature in the weeks to come! And share more tips along the way.
But for starters, these two tips answer the majority of questions that arrived in my inbox, so here we go…
Tiger Tape
I received a lot of questions that are variations of these three:
How do you mark your design lines on the felt? or How do you get your lines so straight? or How do you transfer your pattern onto the felt?
First, I don’t really use a pattern for stitching something this small. I stick with elements (lines or individual stitches) that can be “free handed” as I go.
The hearts are just around 1.5″ at their tallest point and 1.5″ at their widest point, so they aren’t large.
Because of their small size, they’re not quite the space for complicated designs. Simple is best. And because the stitches and designs are simple, they can mostly be “free handed” – as in, you don’t need a marked design to work them out.
However, a straight guideline is helpful, and if that line can be marked in evenly-spaced increments, even better!
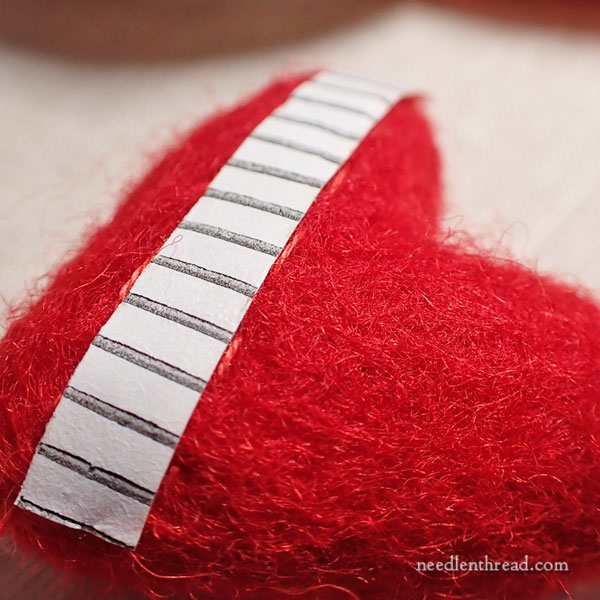
To wit, Tiger Tape. Tiger Tape (the kind sold in the quilting industry) is a pre-marked, narrow tape that provides a stitching guideline.
I put it where I want it and I stitch alongside the edge.
Sometimes, I’ll stitch a series of guidelines along the edge of the tape, using a sewing thread that’s the same color as the felt, that I can easily cover with my embroidery thread.
Most of the time, though, I just stitch my embroidery stitches right alongside the edge of the Tiger Tape, using the marked increments to help me create nice, even stitches.
The tape is a little tacky so that it stays in place, but not tacky enough that it pulls the felt fibers all out of whack when you remove it. It works great for this kind of project.
Where to Find Tiger Tape
You can find Tiger Tape online though various quilt shops and the like. If you have a local quilt shop, check there. It’s also available on Amazon.
I like both the 9 and 12 1/4″ tape (meaning nine marking lines or 12 marking lines per inch, on tape that’s 1/4″ wide).
No Knots, No Front and Back
Some folks asked about starting and ending the threads, and if the back of the felted hears are like the back of embroidered fabric, where you see the backs of the stitches.
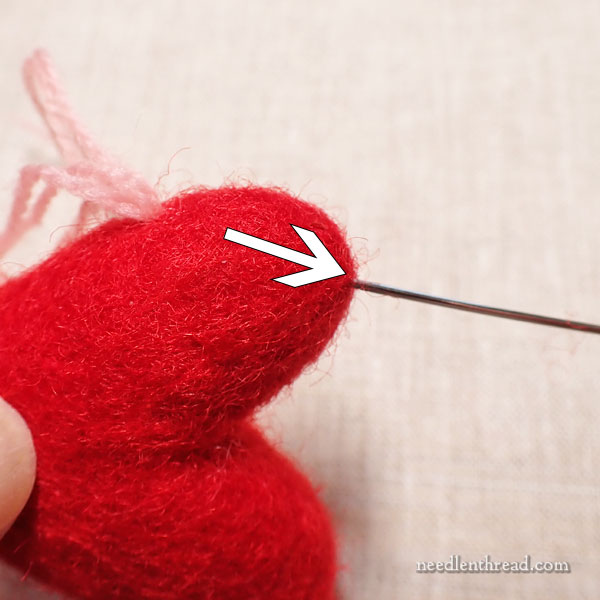
To start a thread, I take the needle and embroidery thread into the shape, anywhere, emerging in the vicinity of where I want to start embroidering. I pull through gently, just until the tail of the embroidery thread disappears inside the shape.
Alternately, you can knot the end of the thread and just plan to clip the knot when you’re finished stitching, close to the surface of the felt and pulling on the knotted end, so that the thread sinks into the shape once clipped.
But if you pull your thread tail into the shape gently, you don’t really need a knot.
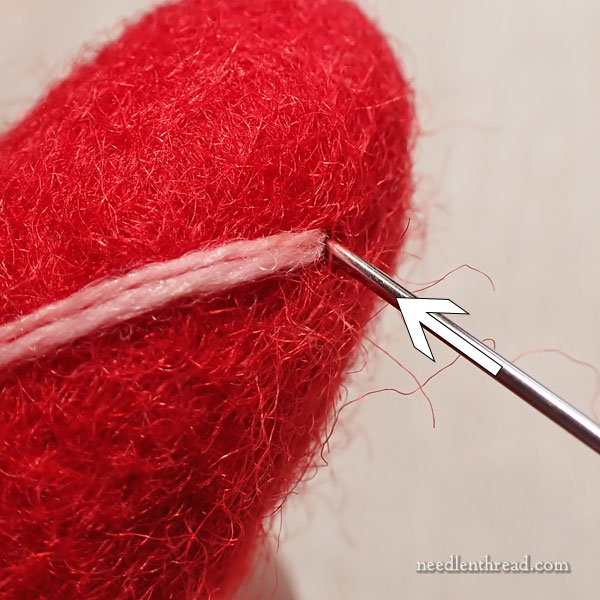
Then I turn the needle around and enter the shape again, right in the same hole where the needle just emerged, but coming out exactly where I want to start stitching.
I tug the thread a bit to get to sink it into the shape, making sure it can’t be seen.
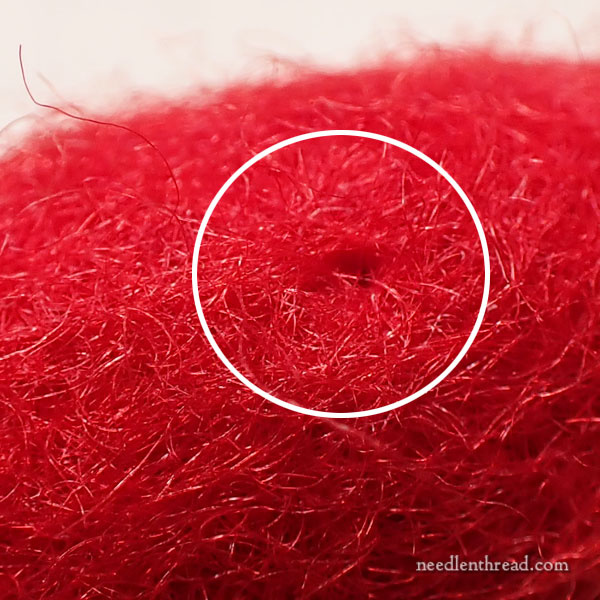
I might end up with a little dimple, like the one you see in the photo above.
To eliminate the dimple, I just poke all around it with the point of my needle and it disappears.
Stitching
When stitching a 3-D shape like this, the needle does not go all the way to the back of the shape with each stitch. Instead, “scoop” the stitch. Work from the front of the shape and “scoop” into the shape and out again on the front.
This is the typical “sewing” method of embroidery, where you don’t stab through to the back. Instead, you “scoop” your fabric, poking into the fabric and out again and pulling through all from the front of the work.
This movement is easy enough on line stitches, daisy stitches, and so forth. On knots like French knots and bullion knots, you just have to “scoop” between the last movement of the stitch and where you want to emerge for the next stitch – and you might have to manipulate the way you hold the item so that you can hold the stitch in place while you pull through.
Once you get the hang of it, it’s really very easy!
On felted objects, you don’t have to scoop too deep – just deep enough that the embroidery thread doesn’t show through the surface of the shape.
On the hearts that I showed you last week, I stitched completely around the shapes for most of them. I used the Tiger Tape to make a band around the shape, where I wanted my design lines to be, and embroidered along the band around the front and back.
More to Come!
I’m working on some other 3-D embroidered pieces here and there, and I’ll be sharing those with you soon.
For those who have asked for a source for the felted hearts (and for some other shapes), I plan to have some of those available for you in the not-too-distant future. They’re So Fun!
Embroidery with Wool
If you’re new to embroidery with wool and it’s something you’d like to try, why not check out my Wildflowers in Wool embroidery kit?
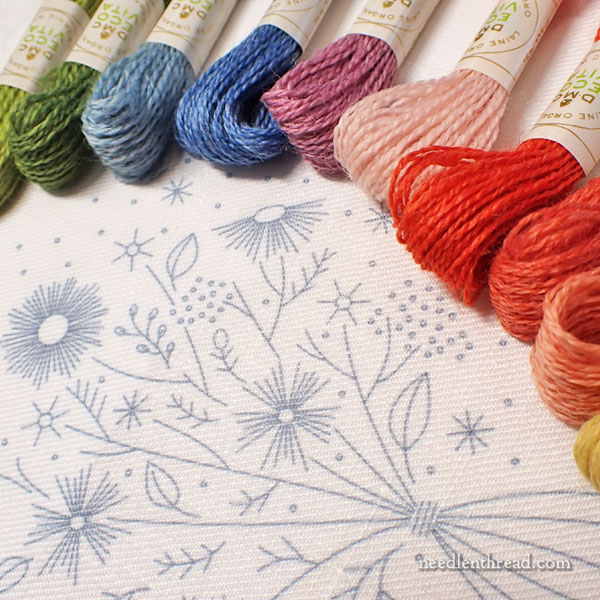
It’s perfect for beginners! The kit contains full skeins of ten beautiful colors of wool threads, which leaves you with plenty of excess to use on other projects, too.
It’s a very satisfying project to stitch – and perfect for beating the winter blues!
You can read all about Wildflowers in Wool here.
Stay Warm!
Out here in the Midwest, we’re having a little cold snap (below zero temps – as low as -20 F! – and highs in the day time just a degree or two above 0 F). It’s a perfect time to cozy up to the fireplace and get some stitching in!
Or, in my case… the space heater.
Spring is just around the corner, though.
I can feel it in my bones.
(Hardy Har Har.)

Leave A Comment