Following up on yesterday’s blackwork pattern, I thought I’d talk a little bit about developing designs for blackwork and show you a bit of the basic process of coming up with myriad patterns all from the same basic design.
I don’t normally sit around drawing blackwork patterns, but since it was part of the spot sampler series, I messed around a bit with one theme, and developed it into several different looks. So I thought I’d show you how I did that, and encourage you – if you’re interested in blackwork – to sit down with some graph paper and doodle out some designs. You’ll be surprised what you can come up with, employing only slight variations on a theme.
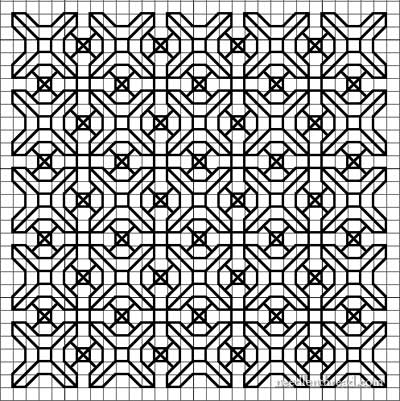
Above is one of the final blackwork squares I came up with, after starting with just this:

After drawing out one line, the next step seemed natural. I mirrored it:

Most blackwork patterns I’ve come across feature a lot of repeats. So why not repeat the line?
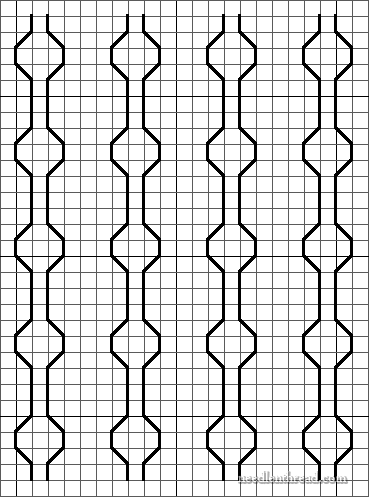
The repeated vertical lines begged for some horizontal accompaniment:
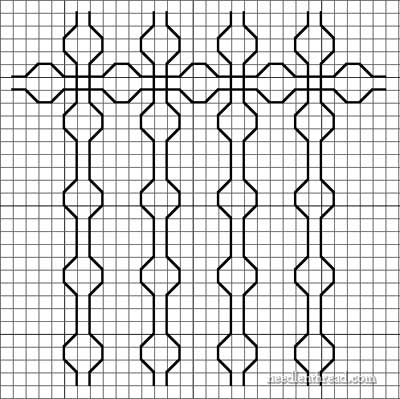
That seems to work. It fits well in the middle of the vertical lines, and it squares up the pattern a bit. So let’s fill in the rest of the square:
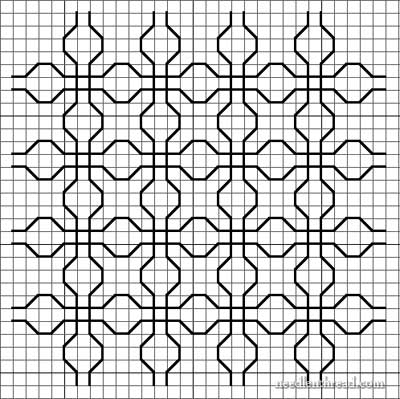
Now we have a basic square design to work with. The design can be repeated for a filling pattern as it is. But crossed lines always make me think of weaving possibilities, so let’s see what happens when we alter the way the lines overlap:
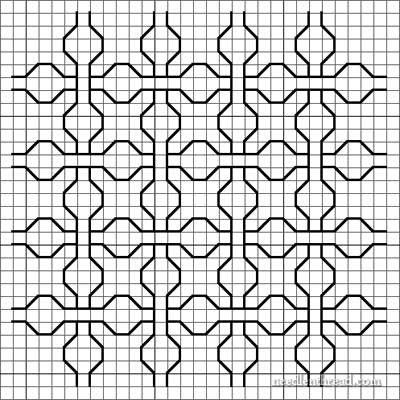
It looks similar to the previous square, but there’s a bit of variation and depth, with the over-under pattern. That’s ok. But it’s still somewhat bland. How about decorating the original square?
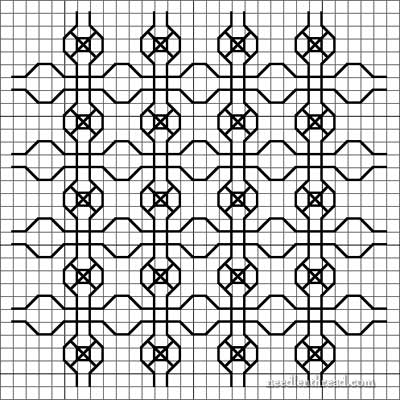
Ah. Yes. A bit more intricate. But we can go farther still:
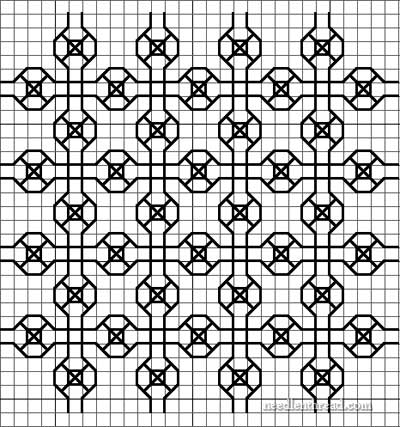
It’s more or less a checkerboard kind of pattern now. The next step might be to play a bit with the background:
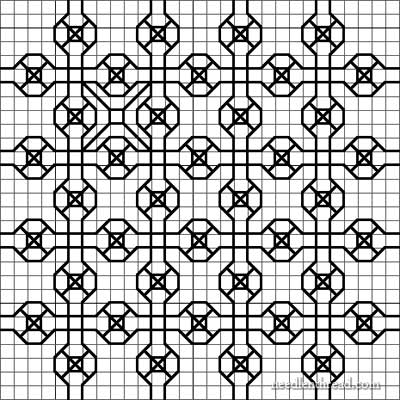
There’s one option of filling in the background areas. I like it, so I’ll repeat it:
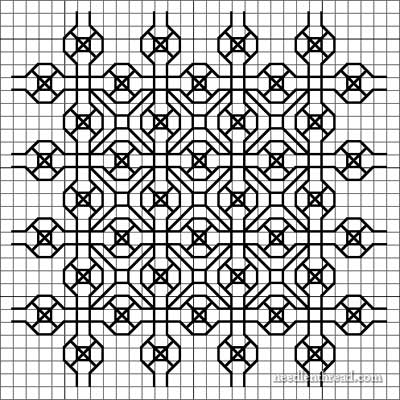
Which finally brings us to the full square, which has lost some of the bumpy-line-striped-look that we originally started with:

If you worked the design above on 28 count fabric over two threads of fabric, it would come out to approximately 2″ square.
Tomorrow, I’ll show you a further development of the design, for a completely different look, and give you a printable PDF with all the variations of finished squares, in case you’d like to play with them, too. My plan is to show you a stitched version soon, along with a tutorial on working a design in Holbein stitch.
Have a wonderful weekend!


I love the way your brain in wired!!!
I am looking forward to your blackwork series.
THANKS so much for doing this as I have often thought about creating my own but just never did it.
Hi Mary-
Have you already talked about how one figures out the pattern of stitching in blackwork? If it is supposed to end up the same on both sides it seems like it would take some brilliant method/order of stitching.
Thank you!!!!
Hi Mary.Thanks for sharing. It looks like you have drawn in a computer programme. Which one do you use? And Im looking for a programme that converts a sketch into redwork (a line drawing). Would you or one of your zillions 🙂 of readers be able to help?
Thanks
Regards
Phillipa in New Zealand
Hi, Phillipa – I use MacStitch for anything counted. For other line drawings and so forth, I use Photoshop for some things, and for vector line drawings, I use Inkscape. I like all of them! ~MC
Thank you for sharing all your thought processes with us. I love how you explain how you went from one point to another. I haven’t done any blackwork in 20 years. It is really not done much any more but to me is very classic and elegant.
Thanks Mary for the your generosity in sharing info. And I hope you’ve manaaged to sneak out 😉 to see a few shops on your weekend.
Regards Phillipa in NZ
sunday. in answer to your question, the interest is out there. yes, yes, yes.
terri sue
Hello Mary,
Every day I’m looking forward for your newsletter,
now I do have a problem, I am an embroiderer but I have here a pattern for doing Blackwork.
I can read patterns and I know the use of the stitches but I have no Stitching Guise or Working Method added to the pattern.
I see a figure but don’t know how it bilds itself from A to Z …
Please can you help me
Kind greetings
Vera
I am very much thrilled with designs and the way you tell how to do it step by step . It is very nice
muy clara la explicacion de como sacar el patron
Hi, I have drawn many small pieces, I just love the freedom. I wonder if you could share how I would go about getting my patterns in a digital format. What programs do you use? 8 am struggling to get information on this subject.
Thanx in advance for your help.
Hi, Tarien – I wrote a post on this question of going from a drawing to a better digital format for embroidery patterns here: https://needlenthread.wpengine.com/2017/08/how-to-make-printable-hand-embroidery-patterns.html
Hello, really enjoyed reading this post , I am very keen to start experimenting with patterns! Can I ask what software do you use for drawing ? I’ve been browsing the internet and becoming a little overwhelmed with what’s available, would appreciate your recommendation. Thank you
I’ve been using Ursa Software for almost 15 years now, I reckon. (It’s updated, of course!) You can read about it in this article: https://www.needlenthread.com/2024/09/from-photo-of-filet-to-counted-chart.html