


Last week, we looked at how to switch to a new thread when working the chain stitch. And we found out that you can actually get away with be Technically Incorrect when you start a new thread.
Today, we’re going to look at joining up the end of a circle with the beginning of it, when working the chain stitch. Now, keep in mind, this techniques isn’t just for circles. It’s for any time you need to join one section of chain stitch to another section from the “back end.” You’re not continuing forward with a length of chain stitch, but you’re running into some already-stitched chain stitch at the point where the previous stitches started. Ovals, irregular shapes, twists, stars, knotwork – there are lots of instances where you bring your chain stitching back to where it began.
So let’s take a look at how to join up the chain stitches when you arrive back at where they began.
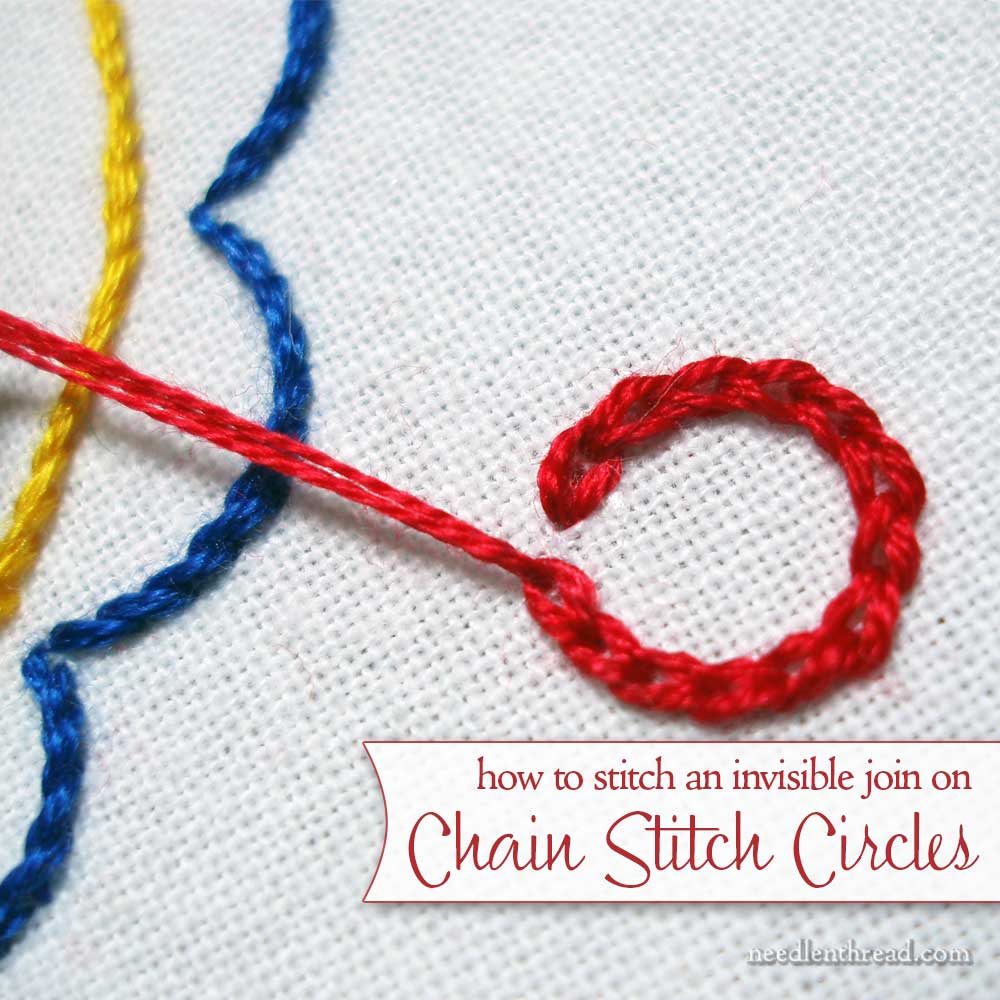
The idea here is how to make an invisible join, and for most stitchers who have been embroidering for a while and are familiar with chain stitch, this may seem like common sense – but in fact, with beginning stitchers who have only learned one way to end chain stitch (with a little anchoring loop), it’s one of those things that create an “ooooh” moment. Once it’s pointed out, it seems obvious, right?
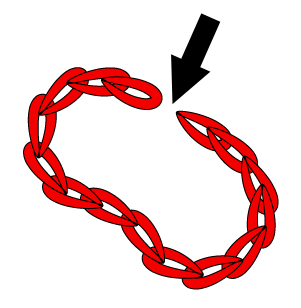
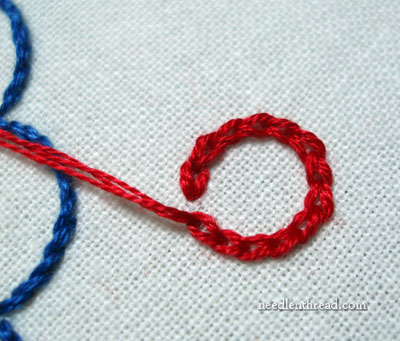
So this is what we’re trying to do here – to close that space where the arrow is pointing. I’m going to work through all the steps of stitching a circle to get to that joining point.
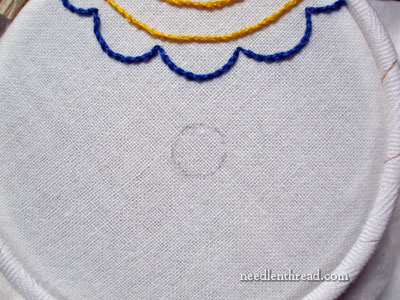
I started with a little circle, about half an inch in diameter, which is part of this design on a flour sack towel. I’m stitching with three strands of cotton floss, with a #7 crewel needle.
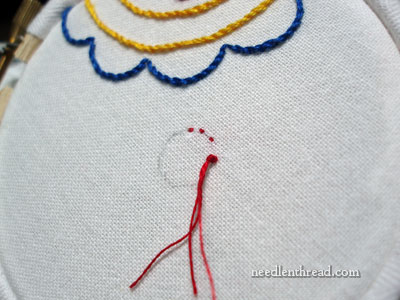
For line stitching, I find this method of anchoring the thread the easiest and surest. (There are several photo tutorials here on Needle ‘n Thread about beginning your stitching without a permanent knot, if you’re interested.)
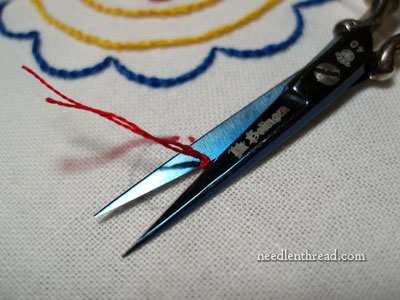
Once the anchor stitches are in, clip off the knot.
Then bring up the working thread on the other side of the anchor stitches, and you’re ready to start the chain stitch.
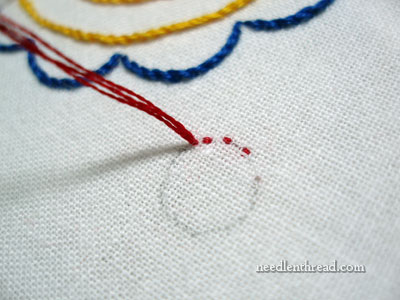
You can see that, on a little circle like this, it isn’t going to take too many chain stitches to make it around the circle. It’s important to keep the stitches small, so that they work the curve without “flattening” any part of it out.
The end is in sight! This is when you have to start looking ahead, gauging the length of your stitches so that they look approximately the same size, but they fill the area, without being too crowded, or too elongated. About three more stitches, and the gap will be closed.
Now we’re at the final stitch.
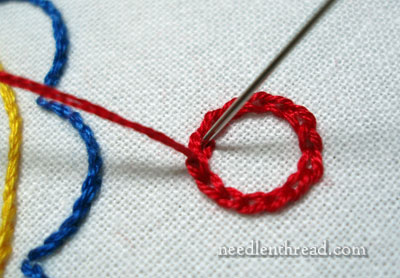
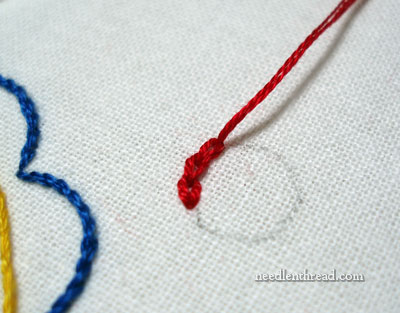
If you’ve only been taught one way to end a line of chain stitches, then you might be tempted to do this to close the gap. I’ve taken a regular chain stitch (which is now overlapping the back of the first stitch), and I’m getting ready to take the little anchor stitch down into the middle of the first chain stitch.
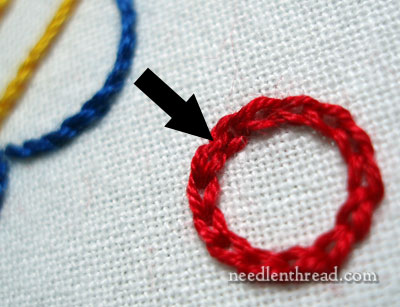
But oh! Alas! Woe is me! The join is obvious. No, no. This won’t do!
Let us unpick that stitch. Whenever you’re unpicking stitches one at a time, it’s helpful to use the eye of the needle instead of the tip. The eye is blunt, and it won’t catch on the fabric or other threads as readily as the sharp tip will. With chain stitch, when you unpick, be careful! If you pull on your working thread, you can very easily pull out all the stitches. Put your thumb over the last correct chain stitch to hold things in place, and you should be ok.

The stitch is removed, and we’re ready to try again.
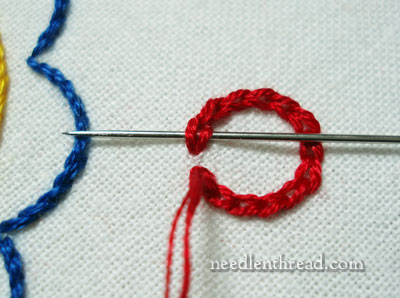
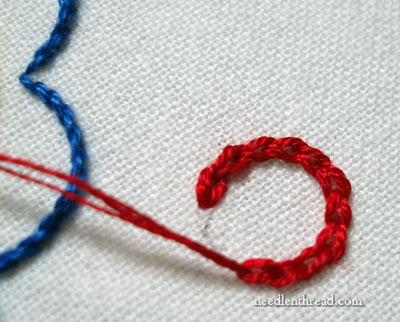
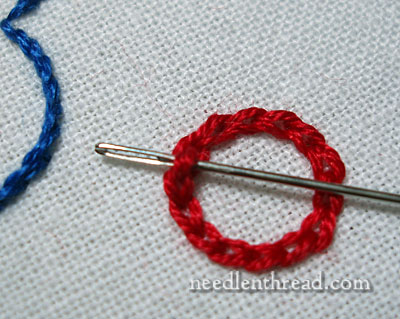
The best way to join chain stitches from the rear is to slide your needle under the first chain stitch that you’re trying to connect with. Pull the needle and working thread through…
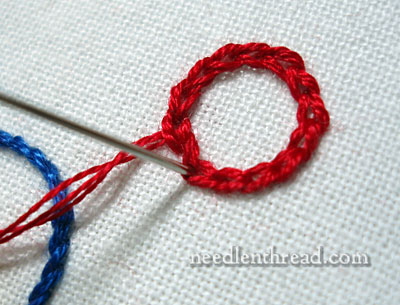
… and then take the needle back down in the middle of the last finished chain stitch (where your working thread came up).
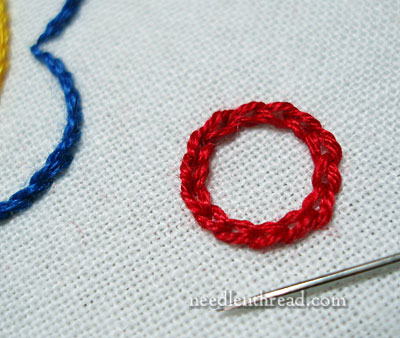
And there’s the join. Easy, yes. But not always obvious to beginners.
Hope this comes in handy for your chain stitching endeavors!
Ohmygosh, Mary! Thanks so much for this tip. I’ve been embroidering since my single digit years (started with Erica Wilson kits) and never learned this. Sometimes it’s the little things that are so amazing.
Oh, this is how a wheatear stitch is done.
Thank you very much for this tip, Mary.
Geezzz So simple! So obvious once you see it!! Thanks so much!!!!
I hsve now had my “ah-ha” moment for the day! I have been stitching for decades (won’t admit how many lol) and so obvious but I never figured it out – thanks!
Love your tips and tricks. Easy once you know how to do it.
Thanks!
i’ve always done it the, “no no this will not do.” way. thank you for showing us a much prettier and polished way to join a chain stitch.
terri sue
WooHoo! Finally, something I’ve been doing it right all these years!
Dear Mary,
Thank you so much for the tip for this. I am glad to have learned it early on my embroidery journey.
Also, I was looking for an expanded definition of ‘chain length’ and how to determine it in your work. If already here, I did not find it. Thanks again.
Hi, All! Thanks for your comments – I’m glad this tip is handy!
Angela – I think the stitch length for chain stitch depends on a couple things, but most especially the size of the thread you’re using. A chain stitch made with #5 perle cotton, for example, can be longer and still retain the nice, round plump look of the stitch, but one made with one strand of cotton would have to be a lot smaller, if you wanted a round, plump-looking stitch. I like my stitches to be rounder and plumper, rather than elongated, but perhaps that’s personal preference. When using three strands of cotton – like in the photos above – I’d say the stitches are about 1/8″ at the most.
Hope that helps!
~MC
Thank you, thank you, thank you!
It’s so obvious after seeing… 🙂
I think I’ve set it before…but in case I haven’t…Thank God that Mary Corbet is in the world!!!!
Another fabulous tip!!!
*facepalm* it seems so simple when someone else points it out to you. I have joined my chain stitch as the first example or taken the anchor stitch down the hole where I first started my other stitch. Thanks Mary.
And speaking of chain stitch and ovals, if you were outlining a paisley motif, could you use chain stitch instead of stem stitch??
Good morning, everyone! Let’s see if I can answer some questions here:
Sharon – yes, that’s a good idea. I’ll see if I can drum up something on the question.
Marian – oh yes, you can use chain stitch to outline anything, really! I love stem stitch, because I just love the look – but if I want a line that’s a little bolder, I’ll often use chain. And then if I want something even bolder, I’ll go with a heavy chain stitch or braid stitch or something of that nature….
~MC
Simply brilliant,thank you so much.Time to add another one cheering you on.
Kindest reguard Michelle
Mary, these tips on how to finish off a stitch, connect a stitch, or change threads in the middle of stitching are really invaluable. Also, the subject of stitch length is one that has puzzled me, too, as a beginner. I have not seen it addressed in any of the stitch dictionaries I have. It seems that, as a general rule, it is important to consider both the type of thread (and number of strands) and the size of the motif being embroidered? Would this be a subject you might consider for a future post?
Well, duh! Something so simple and yet so brilliant – how come I didn’t know that?
Can u send a video of chain stich circles
of course i can anyways wow i love hoe the person who had stiched this did this its so wonderful
Thank you so much for your wonderful explications.
Wow, it is so obvious lol. i just read your tutorial on switching to a new thread and i wondered about this. thanks!!!
This looks so obvious now that I see it! LOL. Thank you a million times for showing us all your tricks and sharing your knowledge.
Hi ma’am,thank you for your tip on how to end the chain stitch when it comes to a circle. So I used to end my stitch just like how you showed in the first photo,over lapping the first stitch, but now I know. Thank you so much.
Your embroidery lessons are excellent. I have used pre maid patterns, but hope to make a drawing from a childhood experience with my grandmother. My older sister and I quietly tip toed downstairs to our basement and looked over the banister at out grandmother WBW in her small sewing area. She was making clothes for our walking dolls, and then later embroidered designs. She also made us doll blankets. I will keep the design simple. Thanks ATK
Mary, deparei-me com o seu “site” e fiquei viciada. Os seus trabalhos são absolutamente deslumbrantes. As suas dicas são o melhor que eu encontrei. Adoro bordados mas deixei de bordar há muitos anos. Recomecei e estou muito entusiasmada.
Recorro aos seus vídeos no youtube e vou aprendendo.
O meu sincero agradecimento pelas suas partilhas e sugestões muito úteis.
Thank you Mary for this really really helpful tip.
sandhya
Thank you Mary. I keep forgetting this technique in between uses. Your demo here helped me finish off a crochet surface chain in the round. Your teachings and sharing are timeless. With appreciation, Alexine
So glad it came in handy, Alexine!
Me siento ilusionada con todo lo que estoy aprendiendo. Las labores quedan mucho mejor MIL GRACIAS
Thank you so much for this tip! If you want your work to be clean and perfect, I think this is it for this stitch! Very invaluable advice for sure, seen that this does not only apply to circles, using the chain stitch but to many other shapes were two “links” have to join in and finish the chain. Thank you Mary!
This is awesome!!!!!!!!!! Thank you! 🙂
merci !c’est génial!
Hermoso el bordado gracias por compartir, los seguiré para ver sus hermosas creaciones
Super! Loved it! So nice to know!
Not a beginner but I didn’t know how to do that! Thanks!