


Have you ever noticed that there seems to be an infinite variety of surface embroidery stitches that you can play with? Ok, infinite might be an exaggeration, but there sure are lots of them! And playing around with all those stitches can provide all manner of fun for those of us who are stitching-prone… or stitching-obsessed, however you want to look at it!
But even with the simple stitches, you can run into little glitches that slow you down, right?
Today, we’re going to look at a stitch glitch. Here’s the glitch: You’re whipping a line of stitches (say, chain stitch or backstitch or running stitch). So, what do you do when you run out of thread right in the middle of the line?
Let’s look at it.
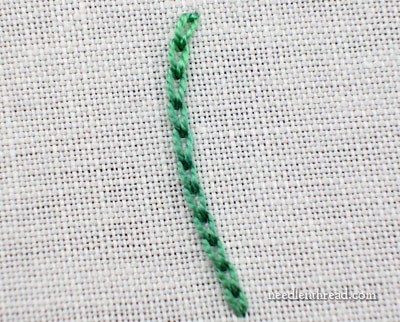
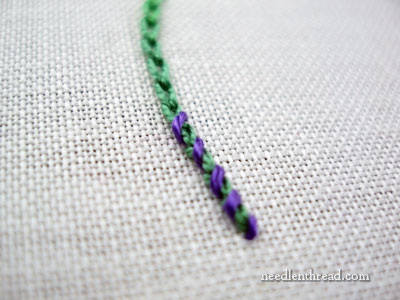
Here’s a line of chain stitches. What we want to do is to create this effect on the chain stitched line:
This is called “whipped chain stitch.”
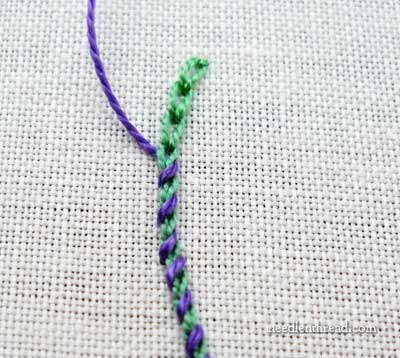
To whip the chain stitch, bring your purple thread out at the base of the chain stitch line, and “whip” the chain stitch by passing under each chain stitch from right to left (or left to right, if you’re a lefty), without picking up any fabric. Just run the needle right under each individual stitch, always passing the needle under the chain stitches from the same direction.

If you happen to be working with a sharp-tipped needle, you can ease the passing of the needle under the stitches by pushing the eye through first, instead of the tip. This keeps the sharp tip of the needle from catching on the previous stitches.
Notice that in the second stitch, I’m still taking the thread through in the same direction as the first stitch – from right to left.
Continue up the line this way, until you’ve whipped the whole line of chain stitches.
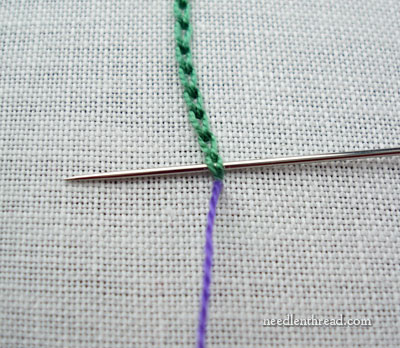
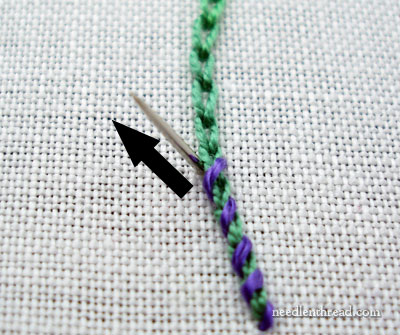
The glitch: You just ran out of thread right in the middle of whipping your line of chain stitch!
Here’s the fix: To end the thread, move up to the next (un-whipped) chain stitch. About halfway up the length of that chain stitch, working from the side of the stitch, angle your needle into the fabric, so that the tip enters the fabric underneath the chain stitch, not off to its side.
Pull the needle and thread through to the back of the fabric. This will create a slanted stitch over the chain stitch line, at the same angle as all the other whipped stitches.
Turn your work over, and run the thread through the back of the chain stitches there to secure it, and then cut it off.
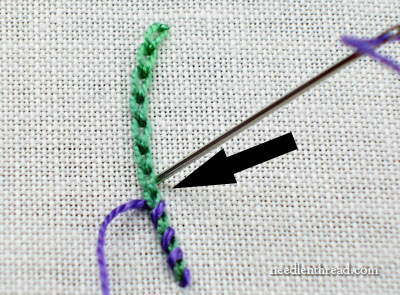
Start your new thread by running it under the back of the chain stitches on the back of the fabric to secure it (the same way you secured the previous thread).
Then bring the needle up just opposite to where the last stitch ended, on the other side of the same chain stitch. Emerge from the fabric underneath that same chain stitch, and angle the needle out to the side of the chain stitch.
Pull your new thread through, and you’re ready to start whipping the line again.
Can you tell where I changed threads?
So that’s how you get around that stitch glitch!
When you’re whipping any line of stitches (whether chain stitch, running stitch, backstitch, stem stitch…) it is much easier if you don’t have to end the thread and start a new one. If you can, cut your thread long enough to whip the complete line. Sometimes, though, this isn’t possible. In such circumstances, it’s good to know how to start a new thread in the middle of the line!
If you have any questions about individual stitches or glitches that you’d like to see explained here on Needle ‘n Thread, feel free to leave a comment below and I’ll see what I can do to help you out!
Mary,
can you me what to do when I run out of thread when doing the Spanish Knotted Feather Stitch?
Or do you just cut a really long thread?
Thanks!
Thanks, Celine – that’s a good suggestion! No, you don’t want to use a Really Long Thread, because after a while, the thread will start to wear. I’ll work up a little photo tutorial on it for you, ok?
MC
Hi Mary,
Very helpful information, thanks! I was wondering what type of thread you were using. Since there are so many types of thread, and I am not very familiar with them, if I see a thread in your pictures that I like, it would be nice to know what it is! Usually you tell us what you are using and I appreciate that.
Thanks alot, Jenny Packard
Hi, Jenny!
Good point. Thank you! I’ll remember to include that in the future! This is some stah thread I had on hand, and it didn’t have the label on it anymore, but I believe the green is a #12 perle cotton. The green is an overdyed, and my guess is that it is from Threadworx. The purple is a #8 DMC perle cotton.
Hope that helps!
MC
Thank you so much Mary. You are a fabulous teacher!
🙂 Well…. your wish is my command! Hope it helps with the outline on the Nesting Place! ~MC
You are so generous with your tips and sharing your knowledge with us! It’s so great because we aren’t able to empty your brain to access all you have stored!!!! thanks so much!!!
Hahaha :)!My mother had taught me this stitch just like you do…and without asking any questions I’m just stitching as I was taught.Now I understand why people say that never question your grandmother and mother when they teach you how to cook and stitch.
Anita.MM
Cool! Can you show us a picture of the backside as you change the thread?
Whipped running stitch in contrasting colours is something which I always use. Seeing your pictures of whipped chain stitch, I want to try that too. Thank you so much.
I am learning a lot from your instructions, but I have a very basic question. How do you start and end a thread without a knot?
Hi, here’s a series of photo tutorials that will help you start and end threads without a knot: https://needlenthread.wpengine.com/2008/09/beginning-and-ending-threads-photo.html. Hope that helps!
Thanks Mary, that would be great!
A friend told me about your site and I am so impressed. I love the pictures as well as the written information …. I’m a visual person, so both work for me. Thank you this is a lovely website and I will return often.
Thanks, Marty! I’m glad you find it helpful! Welcome aboard! ~MC
Dear Mary
Thanks so much for these posts on stitch glitch what a good idea and so generous of you to ask us what we would like to see. Do you remeber your Angus Dei symbol I’d love to know how you stitched the sheep fur I know you said you used whipped stem stitch but I would love to see a photo of how you did the stitch, its so beautiful. I hope you are having a great time in Alabama
Thanks
Regards Anita Simmance
It might help in the future to then show a photo of the back side of your example so we can see and compare your work to our own. Why do you not gently “knot” your threads together on the back side where they cross? For the sake of keeping the work piece as smooth as possible?
I am working on a piece that calls for whipped chain stitch using 6 strand of floss for the chain and one strand for the whipping. It looks chunky and I would prefer it be more smooth. Any suggestions?
Hi, Susan – cut the number of strands to three, make the chain stitches smaller, and then whip with one. That’s what I’d do!
Your stitching instructions are always helpful and easy to understand.
Thanks for all the help!