


Despite the proliferation of articles here on Needle ‘n Thread about embroidery design transfer methods, the question of what to use to transfer an embroidery design is still by far my most frequently asked question.
I always know there’s something new going on out there in the embroidery world – a beginner’s class, maybe, or a popular blog post that’s been circulated – when all of a sudden, my inbox is flooded with questions that are about the same subject.
So, today, I’m going to tackle two questions. One represents the repeated questions I’ve been getting lately about Frixion pens, and the other is an isolated question – a very fairly put question about design transfer from a beginner.
Finally, I’m going to ask you to chime in at the end. If you do something different from what’s covered here, and you’ve discovered it’s a no-fail method with certain types of embroidery, tell us about it!
First, let’s tackle Frixion pens for embroidery design transfer. I should title this section, “Why I Don’t Use Frixion Pens for Transferring Embroidery Designs.”
In fact, I think I will:
Why I Don’t Use Frixion Pens for Transferring Embroidery Designs
In the last few days, I’ve received at least 10 emails asking about Frixion pens for transferring embroidery designs.
I’m not telling you not to use them. I’m simply going to explain why I don’t use them.
If you want to use them, or if you have an instructor who’s telling you they’re the best thing to use for what you’ll be doing, go for it! I’m not trying to start an argument or step on anyone’s toes. I’m just going to explain my view on the Frixion Pen Approach to transferring embroidery patterns, and as always, you can take it or leave it.
First, what are you embroidering? An heirloom piece that you want to hand down for generations? Or a flour sack towel that’s going to go through the wash a hundred times? Are you practicing embroidery, or creating your Life’s Masterpiece? Did the supplies cost you $2.82? Or did they cost you $282.00?
Answer those questions, and you’ll be able to gauge better the risks you’re willing to take with your work.
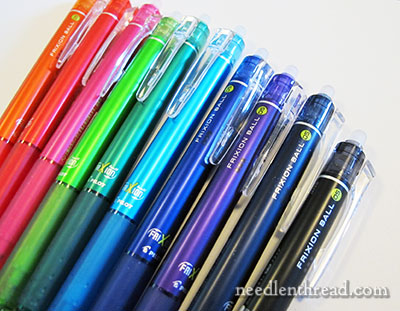
Frixion pens are gel pens, with ink that disappears with the application of heat, either through friction (rubbing) or through the presence of high heat (for example, ironing).
A couple years ago, I wrote a short blurb about Frixion pens in this article about using soluble ink pens for embroidery design transfer.
You can read that article for more detail on my thoughts about these types of pens, if you like. To recap the points about Frixion pens:
1. Yes, the lines erase with heat. So you can iron them and the ink lines will magically disappear!
2. But they can come back in cold conditions. And that means the ink itself is not really gone.
3. They leave a “ghost” line – you can still see the line on the fabric, even after application of the iron. This can change color over time. I’ve read of reports of a grey color coming about over time. What I’ve seen for myself is a kind of yellowy brown color. That may change depending on the color of pen used.
4. How will the chemicals left on the fabric affect the fabric and threads over time? This, I don’t know. I’d be interested to know, but only time will tell.
If You Are Going to Use Them…
If you’re going to use Frixion pens for transferring your embroidery designs, keep these points in mind:
1. Try to purchase the finest tip Frixions available – the 05 pictured above. These will give you the finest line, making it easier to cover the line completely. This size Frixion isn’t widely sold in the US, but you’ll find the 05 Frixion pens available through Amazon, if you really want them.
2. When you trace your design, trace very carefully, making sure not to “sketch.” You want smooth, fine lines that are easy to cover.
3. Occasionally, blot your pen. Gel ink can build up and blotch.
3. Don’t use them on something you won’t be able to iron. So, for example, goldwork is out of the question! But if you’re embroidering flour sack towels that will go through the laundry, you can cover the lines all the way, and you’re not concerned about ghosting, then by all means, if you want to use them, use them!
My Design Transfer Preferences
So, a beginner wrote and asked a very fair question: I’ve read all your articles on transferring patterns. What I want to know is what methods you use regularly that work.
I use a few methods to transfer patterns, depending on the type of project I’m working on.
Tracing Embroidery Designs
Probably the most common method of transferring designs that I use is tracing.
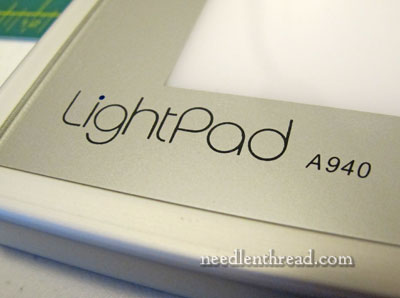
I have a LightPad that comes in very handy for tracing. You can read my review of this particular LightPad here.
I use one of two things to trace the design:
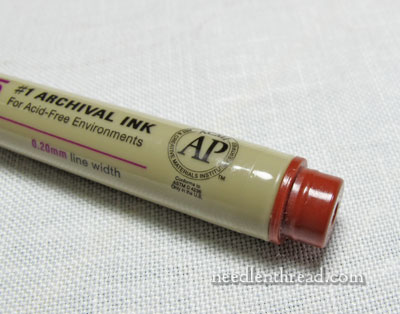
A Micron Pen (by Sakura) in brown, sepia, or even black in size 005 on the cap (that’s .20mm, I believe) is a great tool to use for tracing, if you are covering all your lines.
After tracing with a micron pen, I iron the ground fabric (with the design traced on it), face down. So, I iron the back of the fabric.
I’ve never had a problem with micron pen ink running or anything like that, but I always heat set it with the iron after I trace it. Keep in mind that Sakura does not guarantee their pens to be colorfast on fabric, just on paper. They are archival quality pens, and permanent.
By far the best pen I ever used for tracing designs was Martha Stewart’s archival craft pen, in size .20mm, in the color “moonstone.” If you can find those in moonstone, they create a nice line that’s not too dark and not too light. Unfortunately, the pens aren’t sold individually anymore, and they’re harder and harder to find in that color.
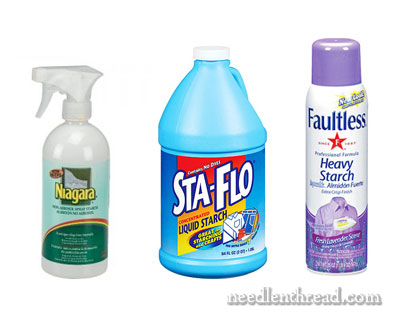
For embroidery on linen where the lines may not be covered all the way, and where the piece can be washed (completely submerged and soaked in water after embroidery – meaning the fabric and the threads are colorfast), then I use spray starch and pencil for tracing.
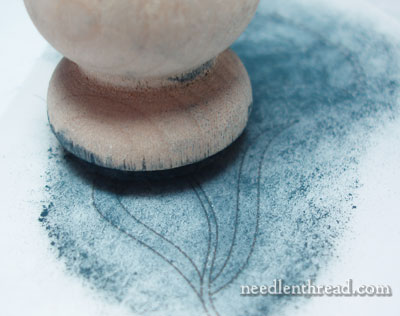
First, I spray starch the fabric thoroughly (using aerosol starch – the kind in the can on the right side of the photo above) front and back and iron it. Then, I trace it using a regular #2 mechanical pencil. I use a light hand with the pencil, drawing in continuous lines (not “sketching” in a hairy way), and putting only enough pressure on the pencil to get a line I can see, without it being too dark.
The pencil marks will release pretty easily with washing, thanks to the coating of spray starch.
Prick and Pounce Embroidery Design Transfer
For larger, more permanent embroidery projects that will take a lot of time, that would be difficult to trace accurately without making mistakes (think: ecclesiastical embroidery projects), I use the prick and pounce method of transferring designs.
I have some tutorials that can help you with this method of design transfer:
1. How to Transfer an Embroidery Design Using Prick and Pounce
2. An Economic Choice for Pounce Powder (if you use this method a lot)
3. Making Your Own Light Pounce Powder (for dark fabrics)
3. Making Your Own Pounce Tool
To connect the dots after pouncing, I use either watercolor paint and a very fine paint brush, a micron pen, or, on dark fabrics, a white ceramic pencil or white or yellow paint.
Wax-Free Carbon Transfer
For some embroidery projects, I’ve used with good success Saral wax-free “carbon” transfer paper or Dritz’s dressmaker’s carbon.
This stuff is used just like the carbon paper of old. You put your fabric down first, position the transfer paper on top of it, chalky side down, and then your pattern on top of that, and trace over your pattern with a stylus or a ball point pen.
I’ve used the white transfer paper on gold colored silk to achieve a nice clean design in white lines that are visible under my stitching lamp but not really visible otherwise. This whole silk-on-silk embroidery project was transferred this way.
I use this method rarely, but in a pinch, I’ll use it. It works. I’d probably opt for prick and pounce over this method now, because it’s hard to get the positioning right, and keep it right when transferring a large design.
Another version of this method, without using the carbon paper, is this quick & easy design transfer method for small embroidery projects.
Transfer-Eze and Water Soluble, Printable Transfer Paper
Sulky makes a product called Fabri-Solvy that you can put through your inkjet printer to print the design on it, then stick the product on your fabric, stitch over it, and then soak the fabric to remove the product.
There’s another product called Transfer-Eze that does the same thing.
Here are some articles on using Transfer-Eze. I’ve used both it and Fabri-Solvy interchangeably with beginners, and they both work satisfactorily.
Playing Around with Transfer-Eze
Transfer-Eze Finish
I don’t really use either product in my own stitching, but I do use it when I’m teaching kids or youth if they’re working on flour sack towels or something similar. They’re both good short-cut products for this type of stitching. I wouldn’t use them on anything particularly fine.
What’s Your Tried & True Method?
What’s your tried & true method of transferring embroidery designs? Feel free to chime in below! It’s always good to have options!
If you’re looking for other information on transferring embroidery designs, this article lists many ways to transfer designs and links up to several tutorials. You can also benefit from reading the comments at the end of the article.
Good morning Mary
I use every time the frixion pencils for white embroidery, and I never had any kind of problems ; but : when I finish my embroidery, I wash it in hot water and soap 2 times, (and the pencil disappear) and then it goes to laundry (I boil it with washing powder in water for 20 minutes) and then rinse carefully and then dry in a towel and iron. Hard and long work, but no problems. In think (and Hope) that all the chimical products are gone …
Have a good day.
I almost always use the prick and pounce method. I also use the baste and rip transfer method where you trace the design onto tracing paper, pin the tracing paper to the fabric, baste over the design’s lines, and then gently rip away the tracing paper. It’s accurate but not kind to gentle curves. I’m not a fan of tracing onto fabric because tracing small things inevitably comes out wrong for me.
Because I work on coloured backgrounds a lot, I like to prick and pounce and then thread trace. I use regular sewing thread to trace the outline with a running stitch. Then I never need worry about my lines disappearing before I’ve used them or showing on the finished embroidery.
I use a ‘needle’ tracing wheel to prick long smooth lines which speeds up the process a little.
Hi Mary–for “less that heirloom” projects, I often use the Micron pen, or chalk pencils, or a fine lead pencil (depending on the color of the ground fabric).
For those projects that I would considered heirloom (or things I’m considering for competition), I generally use the tissue paper/basting method. And I make sure to use really fine tissue paper. One time I used something that was a bit more substantial, and it was a pain to rip away. Lots of profanity exited my mouth that day.
I’ve never seen the Frixion pens, but might have to search them out.
Carol S.
When it comes to embroidery, I’m a flat out beginner. I’ve transferred designs using a plain old mechanical pencil. It worked well for me. I have used the Frixion pens on my quilts and they left ghost lines, so I don’t like them. Now I’ve got to read about the Prick and Pounce Method. I’ve never heard of that. That’s why I enjoy this blog. Thanks Mary!
I do a lot of heirloom embroidery on garments. I will use the blue wash away fine line markers on batiste but on linen I use pencil. Like Mary I always starch both sides of the fabric. If I am doing shadow work, which I love, I will starch both sides more than once. Make sure you have ironed it dry before tracing your design.
Hi Mary,
As a beginner embroiderer, when I first found your site a number of years ago, I had this same issue. What is the best way to transfer?
Over the last five/six years I ended up trying every version of your list above as you talked about them including the tissue/basting technique that the others have mentioned.
Mostly, I kept trying them all because I was truly avoiding the prick and pounce method. I was irrationally fearful of how long it was going to take and I was *sure* that it was going to be messy, and that I would be too unskilled to not leave a horrible mess that would wreck my project and that I’d have to start over.
Until I finally did it. (Um, late last year/beginning of this year…) And it *worked*! Just like you said it would. So now I love prick and pounce and my fear of that technique blew away like the dust off the vellum. And it’s my favorite technique now. Ha!
Thank you so much!
Dear Mary
I haven’t tried anything different from the above, I took your advice from your articles and my preferred method is a light box using a micron pen by Sukura and prick and pounce these I find the most accurate way of transferring patterns I use these methods for both long time and short projects. I haven’t tried the Wax free or Fabri-Solvy as I prefer the methods above. Thanks so much for the tips and techniques above as your views on transfer are always very astute and useful.
Regards Anita Simmance
Good Afternoon, Mrs. Corbet! Well, I’ll admit, I’m still working on my four sets of “craft store” pillowcases, because I’ve promised them as gifts for family. What I’ve noticed is that the so-called “washable ink” NO LONGER WASHES! 🙁 This makes me mad because the pattern numbers stay visible!
When I finally do start transferring onto ground fabrics, it won’t be me doing the hard stuff. Unfortunately, my CP hinders me in very-fine motor skills. My mother is more than excited to help me trace, etc. etc. so, we look forward to these posts with helpful tips and suggestions!
I do have one question though, have you ever used stencils, or rubber stamps to transfer designs? I have used stamps in the past and it works!
If I’m working on a small project, using a design I’ve gotten online, I use the printable fabric sheets (either cotton poplin or linen) that go through my inkjet printer. HOWEVER – when I have the design on screen, I lighten it down to the barest grey, so that when it prints on the fabric it’s just discernable. Otherwise I use a light box and a pencil, or the kind of ‘carbon’ sheet you describe. Mostly it depends on the size of the project, the fabric, and its future use.
Mary, Thanks so very much for this article. I have also read all of your articles and was having the very same questions and concerns as the other beginner was. You have answered all my questions concerning embroidery design transfer. I have bookmarked this page. I so enjoy your blog and look forward to your articles.
Mary,
I first became familiar with Frixion pens in quilting for marking either designs for embroidery for designs in quilts of marking quilting designs. I have heard of horror stories where folks marked quilting lines on quilts and “removed” the lines with heat. Then the quilt was shipped to a quilt show. In the shipping process, the quilt was exposed to some very cold temperatures, perhaps in the belly of the airplane and when the quilt was hung at the juried quilt show, voila – there were the markings shadowing the quilting and were the quilting did not exactly match the markings. So, there are more reliable products for removal of marks from fabric.
Dear Mary, I have just read this article on the use or not of Frixion pens for embroidery transfers. I initially used one for transferring onto either fine cotton, BUT when I outlined a design onto wool to make a knee rug for an older lady the pen outlines simply did not disappear when the iron was used. It was so disappointing, I had to add a lot more embroidery to cover unused design elements. I haven’t used these pens since either on wool/cotton or linen. Annie
I have another, related, question. I understand and agree with you about the FriXion pens — I would be hesitant to use something that is permanent like that. However, I use the water-soluble pens like Mark-B-Gone by Dritz and air soluble pens like Disappearing Ink Markers by Dritz. As I wash all my projects, the marks disappear. (I’m a cross-stitcher, but your site has given me courage to try something different!) I use the pens to mark the grid on my smaller projects or to mark a spot. What are your thoughts on these two markers? I also purchased a blue & a white pencil used in quilting for transferring designs that “disappears” when rubbed with a damp cloth. Your thoughts on those? And why do you prefer permanent pens? Inquiring minds would like to know! Thanks!
Hi, Phoebe – I mention those in the article linked to above, for more details on the Frixion pens. I don’t trust them – I use them when teaching kids, but I’ve experienced the return of disappearing ink…. And again, it may disappear, but it doesn’t mean the chemicals are gone…
Mary: Why not just use a sharp pencil? I am new to this and this is what I use. ????
Depends. Sometimes I do – mentioned above…..
“Are you practicing embroidery, or creating your Life’s Masterpiece? Did the supplies cost you $2.82? Or did they cost you $282.00?” I just LOVED your juxtaposition of a flour sack to something fancier!
I look forward to reading your tutorials on transferring designs, because I’ve had such bad results in using haphazard methods that I seem to get better results eyeballing things freehand. My comfort level is definitely on the flour sack level, but maybe with some more experience,mand with the wonderful guidance from your blog and community of embroiderers, I’ll work toward the heirloom masterpiece!
I do mainly canvaswork and most of the time if I need to transfer a design, I use the Micron pens. I have also used a super fine Sharpie pen. I have also used a plain pencil very lightly. If I am working on dark fabric or canvas I like the tissue paper/basting method. I tried the prick and pounce once in a class but it seemed like an awful lot of work. I only tried it the one time. I have taken classes from EGA certified teachers who provided a fabric or canvas with the design drawn on and when asked what they used to draw, the answer was the Micron or Sharpie. JoyceAnne
good morning
Good Morning Mary
I just wish to thank you for great site,
I dislike all methods that leave a mark on the fabric.
I prefer to trace my pattern onto tracing paper. Lay the tracing paper on the ground fabric and baste the line on using a good sewing thread. When finished you simply tear away the paper and you have transferred you design. This takes time but it leaves no marks on the fabric and if you change your mind where you wish to stitch you remove the threads and baste on the new line.
I agree with MLW! Handy on silk & other fancy fabrics.
A variation on what MLW says: I use Sulky Solvy. I trace onto the Sulky Solvy, which is transparent. (I suspect it’s basically a sheet of dried cornstarch.) I pin or baste or tack it to the fabric. I embroider. At the end, I pull off what can be easily pulled *and then soak the project in OxyClean solution* to get the rest of the Sulky solvy with lines out. Used this to good effect on my daughter’s wedding dress bodice, where the Flair pen traced lines on Sulky Solvy were buried undo so many beads that I couldn’t pull it out. And of course one can’t just agitate the doupioni with beaded vines in a bowl of soapy water! But one can soak with OxyClean. I figured it works for the purple stains on purificators, it’ll work for this. And it did. But this isn’t a 20-year long test, the wedding was last year. YMMV
Hi,
I’m doing an extensive embroidery project Mon Cahier de Broderie or My Embroidery Notebook and it called for Frixion pens for transferring numerous designs. Being a student of Mary’s Needle and Thread I was not about to take a chance with a ghost showing up later , so pencil it is. I have also given up my water soluble blue pen. I’ve always had good luck with it washing out but I don’t need such bright lines anymore. Otherwise prick and pounce is my favorite. What is everyones favorite for whitework? I’ve been noticing the pencil leaving a hint of grey on the white threads.
Enjoy your stitching everyone,
Sharon
Hi, Sharon – You might try to boil your linen after you’re finished with the embroidery. I know it sounds rough, but you’ll end up with pristinely white whitework. I’ve even used cream of tartar in the boiling water too help remove tough stains, like wine, from white linen. You can also try putting in washing powder (a tiny bit) to help with tough stains. But if you boil a piece for about 10 minutes, pencil markings should come all the way out.
I agree with your point of view regarding using the Frixon pens for transferring and don’t use them. Who knows what affect that ink will have years from now.
I’d add one comment. If you do not want to iron your work, you can use a hair dryer to remove the marks.
Thanks for sharing such great comprehensive information.
I use most of the methods you use — the decision rests on the nature of the project. A couple of comments — instead of spray starch, I try to use (if I can find it) spray sizing. It isn’t quite as “sticky”, but stiffens things up nicely. Originally I was taught to use to AFTER I traced a line onto fabric w/ a chalk pencil (to help hold it in place). And that has always worked fine for me. Another comment was about the paint you use to paint in the pounced design lines — I recently took a class that was RSN sponsored, and the instructor used gauche paint to draw these lines. I kind of liked the way it laid on TOP of the fabric and was easier to flake-off (instead of washing) if some of it showed.
Any suggestions for marking on dark fabrics.
Basted line as noted above or chalk pencil depending on the ground fabric. Chalk brushes off easily with a tiny spiral brush for that purpose.
This is timely as I have been pondering this subject having returned to embroidery and for the first time not using preprinted kits. I have used pouncing which I liked but the transfer pencil method didn’t work very well. I have just come across the lightbox method so will read your posts with interest
Hi Mary,
For larger designs,
I still use the method of tracing the design onto tracing paper via a light board or sunlit window. Then, I’ll baste the tracing paper to the mounted fabric. Next, I baste through the tracing paper to the fabric with needle and thread. When that is finished, I can rip the tracing paper off and it leaves a basted design on the fabric. It takes a little time, but I don’t have to worry too much about the lines I’ve drawn being totally covered. It’s most helpful with designs that have filling stitches when you aren’t real sure how the line up with the border on a motif will work out. It’s much easier to fudge a line a little bit this way. I always love your tips!
I just went total basic. I trace the design onto tracing paper, then tape that to the hoop and then just embroider through the paper. I just embroider the outline or the lines that need to be exact and fill in the rest later. Once embroidered I just tear the paper away and use some pinchers to get at the little stragglers. Works fine, doesn’t seem to snag the thread too much when I pull the paper away and if it does, I just reverse the work and give it a little tug. It’s been the quickest, non-messy approach I’ve found so far. I don’t like to have to faff with a lot of cleaning and ironing.
I did a long running test with these pens and i am happy with the results. I do agree if this is a never wash heirloom piece, I might not use them, however, I just pulled a cloth from my freezer that I did the test on….a year ago. the line does come back after getting cold. A warm rinse and back into the freezer….no line. let dry and back into the freezer for a year (okay, I kinda forgot it was in there and we just cleaned out the freezer)no line. I have pics if you want to see….I think I even blogged about it..let me look…….
http://thedistracteddomestic.blogspot.com/search?q=frixion
For my more precious pieces i prefer to trace onto tissue paper and baste method. Except on the most delicate fabrics, you have an outline that is reversible and no ghosts or permanent accidents.
When working with stitchers who haven’t acquired “all the toys”, I suggest a makeshift light table for smaller designs. Sit at a table, place a lamp on the floor between your feet and place your largest clear glass baking dish (19″ pyrex is good) upside down above the lamp supprting it with the table edge and your body. Tape on your design, overlay with your fabric and trace. I too don’t like Frixon pens and prefer a good pencil.
I’m pretty new to transferring designs, so thank you for the information. I had heard of using Frixion pens but was concerned about marks returning in the cold, so decided against using them. It’s interesting that ghost marks remain.
I recently came across Bohin Transfer Veils which you trace your design onto, then place over your fabric and trace again – the pen goes through the veil. If you use a water soluble ink you can rinse the veil and reuse it. I’ve found that these bleed a bit too much so have played with using a micron pen, which I like better. (Anita Little Stitches sells them; I am not associated with her apart from being a customer.)
I’d be interested to know what you think of this product.
I use tissue paper that I trace the design upon and then pin the tissue paper to the fabric and making tiny stitches, I “trace” the design through the tissue onto the fabric in a contrasting color of fine thread. Once this is complete, I remove the tissue paper going on to completing the blackwork design. This has worked well for me in other situations such as goldwork, thread painting etc.
It is a lot of work but I don’t have to worry about a bleed through of a pen whether it is guaranteed to come out or not. I just don’t trust them for this purpose.
I work in the field of preservation and conservation of cultural objects. As a quilter and needlewoman, I’ve very conscious of the materials I use when constructing my pieces. I’m cautious about adhesives and inks. That said, while the micro pens (archival quality) are good, they aren’t reversible and you can’t remove the ink. If you cover over the ink, it shouldn’t run, but there’s no guarantees. What archival really means, is the ink won’t become acidic.
You are better off marking patterns with chalk or lead pencil. Any of the chalk pencils are fine. They will rub off as you work with them or the chalk will fade away. Just be careful not to smudge them on your hands and then the fabric.
When in doubt, test it or don’t use it.
If you want to read more about the conservation of textiles, see http://www.conservation-us.org/about-conservation/caring-for-your-treasures/textiles
I’ve been using artists grade graphite paper to transfer my quick and fun embroidery designs. it gives a mid gray coloured line.I’d recommend it for your flour sack/cotton type fabrics that have a smooth stable finish.
Regards Phillipa in NZ
In earlier years I used a fine pencil to draw the design using a light table or window, more recently I have also been using the Micron pens. I was not happy with any of the “disappearing” ink pens.
I had always been taught that my needlework should cover the lines and I make sure that I cover them.
I have also done pieces where I used pins as markers for the stitches and one where I used the pins and drew circles where flowers were going to be placed with a quarter, the flowers being slightly larger than the quarter.
I did one project where I printed the design on regular printer paper and stitched an outline stitch around the exterior of the design, then pulled off the paper and filled the design. I am working on one project where I need to put names and dates and will print them the same way and stitch them through the paper and remove it.
I’m so unsophisticated! I’m a beginner, but so far, I’ve been tracing by sticking my fabric and pattern in a bright sunny window and using children’s washable markers. Hot water washes the marker right out. Otherwise, I’ll use the prick and pounce method for dark fabrics.
Hi, Mary!
I sincerely thank you for this post. I have long considered purchasing a light box for my transfers, and this has been very helpful. I have found that tracing is the most accurate method for me, and I am grateful for this information.
Like you I use the Art Pad light box and the Micron pen in sepia. I have also used the Sewline mechanical pencils with colored leads. I’ve used the yellow, hot pink, and the white. They’re supposed to be erasable but I haven’t found that to be true for me. The leads are very fine and may be more forgiving if a mistake is made than the permanent ink.
I use the tracing paper,HB pencil and stylus method learned from Jane Nicholas. this is for a design whose lines will be covered. Trace the design onto the tracing paper. Turn the paper over and trace the outline onto the back of the tracing paper. Turn the paper over so the original side is facing you. Lay on top of the fabric making sure there is a hard surface underneath. Using a stylus, go over the original outline on the tracing paper. the graphite from the underside will be transferred to your fabric.
Thank you so much for this blog post. I am planning a new project and this was a very timely, and extremely helpful, post.
Hi Mary, I agree the frixon pens leave ghosting lines. I mostly do embroideries which I can wash so I use Solvi vilene which I trace the design onto with an archival pen, place it over my fabric and work over it. Then when I’ve finished I just put it in warm water and it disappears. Great for working on dark fabrics or blanketing. You get a clear precise line and you don’t have to cover it exactly. Of course if the article can’t be put it warm water then you need another method.
I almost always use the carbon paper method. First I trace (or draw) my design. Then I position the carbon over the piece of fabric and roll over the traced design with a mechanical pencil without a lead in it. This prevents tearing and allows for a clean transfer. The carbon ink that is not covered gets washed away. The lines also stay fresh and sharp even on long projects when I am handling the fabric over a long period of time. You can also re-use the carbon many times, even tracing over designs already showing. A drawback to this method, in my limited experience, is that you do have to apply pressure as you are drawing over the design, and with my wrist that is hard.
Thank you for a really informative article Mary. I have used a light pencil tracing for years but didn’t know the ‘trick’ about the starch. I will certainly be using that method in the future.
Has anyone ever used Best Press Starch alternative? I have seen it advertised, but have been afraid to try it for needlework? I also use methods similar to Mary’s to transfer designs to fabric for quilting pounce works great in small areas at a time, other wise I use mechanical pencil hard lead #4 to get a fine line instead of a heavy line from a #2 soft lead. Pencils are available in art supply or office supply stores.
Hi Mary
I have been embroidering with silk thread on white linen for several years. Initially used chalk pencils to transfer the design– not a great idea. The chalk would never come out completely. I finally found the following online (also available at Joanne Fabrics): Fons and Porter Water Soluble Pencils and Sharpener, Graphite. This has worked well for me. I soak the linen after embroidering and usually add a little gentle liquid detergent to the water. I rinse well, and all the marks come out!
Miss Mary,
first let me tell you i love your website. i have been embriodering four about 5 years and it is like medicine 2 me. i have 2 do some form of every day or…
on the tracing techniques:i ,too, like to use my lightbox my husband made me. or if it a sunny day i will put my image taped 2 window with piece i am going 2 embriodery on over it,taped( so it does not move)
i have tried the friction pens, and like you, i feel they are not best 4 most projects.(i do like using them for certain free motion quilting projects.)
i have also used tissue paper whenit is really hard to use the other methods. and if any tissue gets stuck in the thread i GENTLY pull out with tweezers or a thin needle.
i also use a light pencil like you. i would have to say, i use different methods for different styles of embriodery.but i do not like to iron over my embriodery unless completely necessary. again, thanks so much for sharing your skills and wonderful pieces of art.
I am a terrible, lazy person and loathe tracing embroidery designs. If I had to trace all my embroidery work I wouldn’t get much done. Also I like practicing stuff and trying things out. Therefore I came up with this quick and simple method:
A)Print design on paper (using ordinary printer)
B)Dampen fabric with white vinegar.
C)Put printed design on fabric (face down) and rub with back of spoon till design is transferred to fabric.
D)Rinse fabric, let it dry a bit and mount on embroidery frame.
For me, this works (with practice to find the right amount of vinegar to use) on light-coloured cotton, linen and silk. The design can be removed by washing with laundry detergent. (I always wash finished embroidery anyway).
I use it a lot for whitework (particularly for trying out fabric/thread/stitch combinations), but also for needle painting. For the latter, I use overhead sheets for printing. This gives a really well-defined design on the fabric, particularly silk.It does give a bit of a gummy residue that has to be rinsed off, though.
love your site. I have been embroidering for a long time. For the first time I am working with a thick 100% wool fabric for a needle keeper. No one transfer process seems just right – any ideas?
You might try Sulky iron-on transfer pens. They work on felt, but the lines end up rather thick.
Interesting reading your comment regarding frixon pen. I used one to mark a design but didn’t use all of the fabric and didn’t ‘iron off’ for some time. When I did the ink had left a white line of the design . The fabric was a polyester cotton not sure if that had anything to do with that happening but don’t want to take the chance on any precious work.
I am tracing from a holly hobbie coloring book. I’m using transfer pencils that iron on the fabric in dark pink color. Is there any kind of transfer pen that is better than this?
The sublime stitching iron on transfer pens are excellent. They provide a fine, clean, and clear line. I like them a lot!
Hello – I wanted to make a comment about the Frixion Gel pens. If you are considering using them, you might be interested to know that a quick puff from a hair dryer will cause them to disappear. You don’t need to iron. All of Mary’s other cautions still apply of course, but I have found them useful when I want to have a quick line to follow when practicing on a doodle cloth or sampler cloth.
Frixion sells .38 pens. I use them in my paper planner. I find them on ebay.
Reading through the comments and adding my own 2¢, boiling with cream of tartar will also remove rust stains. I know this well.