


Finally – a finish of sorts!
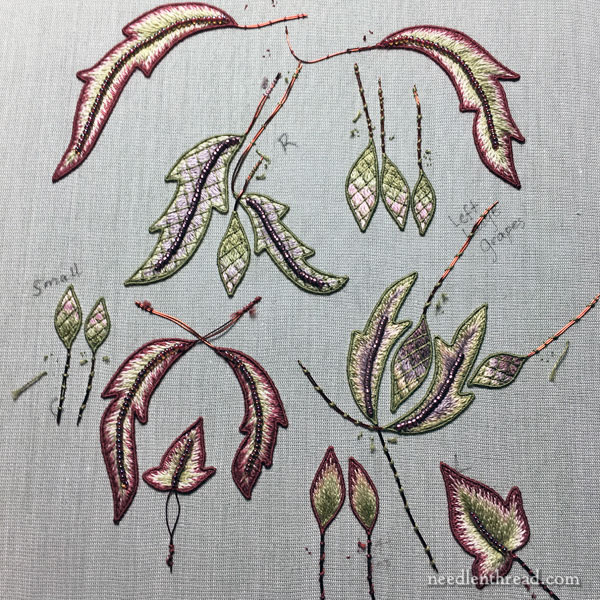
The stumpwork elements for Late Harvest are all stitched up and ready to go! Not that they have anywhere to go yet – I still have to finish the left half of the main part of the project.
But it’s always nice to accomplish a minor goal, isn’t it?
Today, I’ll show you the stumpwork pieces and share a couple handy tips that might help you on your own embroidery projects.
For those of you who are just joining us on Needle ‘n Thread, Late Harvest is an embroidery project from Hazel Blomkamp’s book, Crewel Intentions, which I’ve reviewed here. I’m working it from the kit, which I reviewed here.
The embroidery isn’t “crewel” embroidery, technically, despite the name of the book. Instead, it’s a combination of surface embroidery techniques, including regular surface embroidery with floss, bead embroidery, and stumpwork embroidery, which is a three-dimensional embroidery technique.
After completing the first half of the main design, I decided to devote my stitching time to finishing the stumpwork pieces before venturing on to the second half.
The main reason I decided to get the stumpwork pieces completely finished was because I know myself pretty well. Once the second half of the main design is completely stitched, I’m going to be dying to affix the stumpwork pieces to it. Better to have them done and ready to go!
Before cutting out the stumpwork pieces from the fabric, Hazel suggests outlining them carefully with Fray Check, which is a liquid fray stopper sold widely in sewing stores.
Fray Check is a clear liquid, and it dries clear and a little stiffish. It comes in a tiny little squeeze bottle with a pointed tip to the cap. But controlling the flow on Fray Check or any similarly bottled substance can be difficult. The idea here is to paint the fabric outside the wire with the Fray Check, allowing it to seep only so far as the wired outline. Tricky, around those little pieces of stumpwork!
I didn’t have any of the original Fray Check on hand. Well, I did. But it had died the death. It was solid. Now I know what happens to ten-year-old Fray Check.
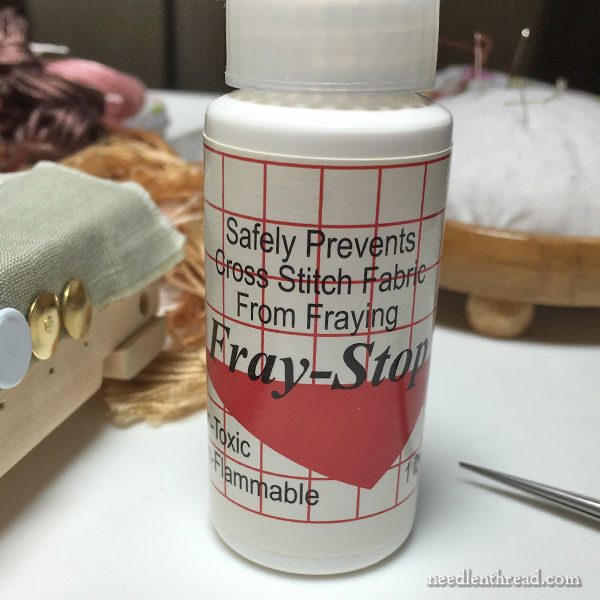
But I did have this Fray Stop on hand, which is the same concept, only it tends to dry softer than Fray Check.
So I decided to use it.
But … how to control the flow? That was my question. I could use a tiny paintbrush. Or…
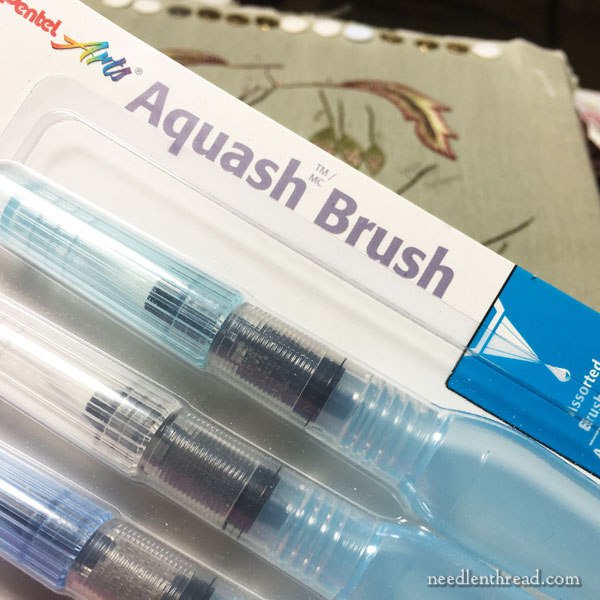
…better yet, how about an Aqua Brush? These are water pens with brush tips, that Pentel sells for working with water color pencils, inks, and dyes. You fill the squeezable pen reservoir with whatever liquid you’re using, and then you use the pen like a fine brush.
I love these! I use them for watercolor pencils primarily, but they’ve come in handy over and over again for other times when I need to get a tiny bit of liquid into a tight spot.
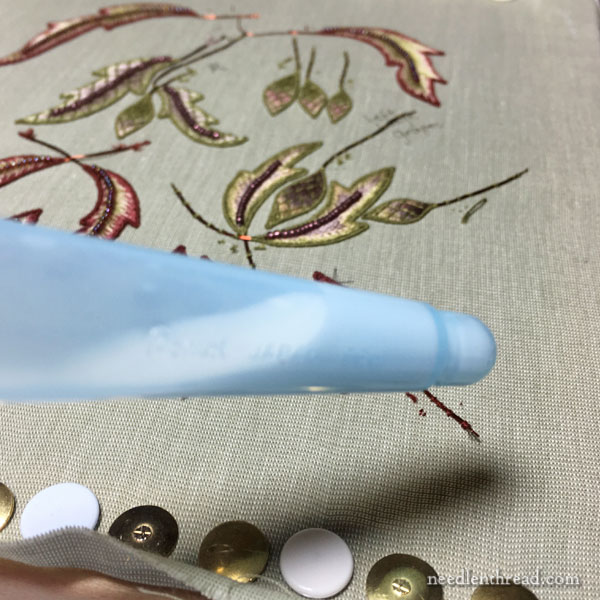
Here’s the pen reservoir filled with the Fray Stop. Notice that it’s white, not clear. That’s ok – it dries clear.
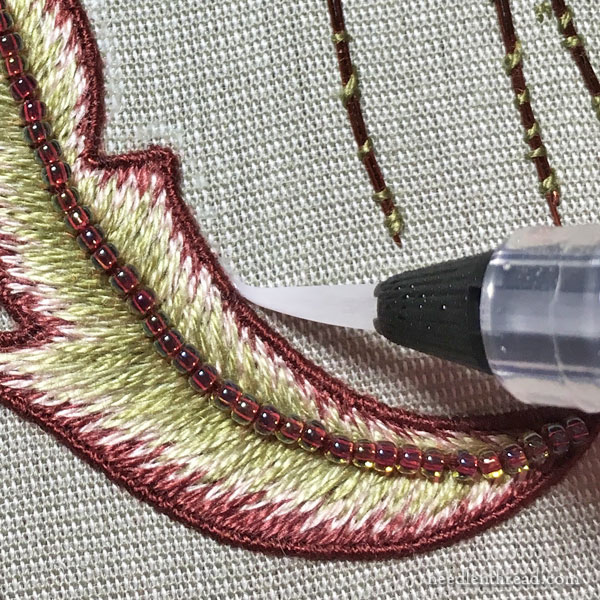
And here’s the fine brush tip making its way around the outside of a stumpwork leaf.
It worked great!
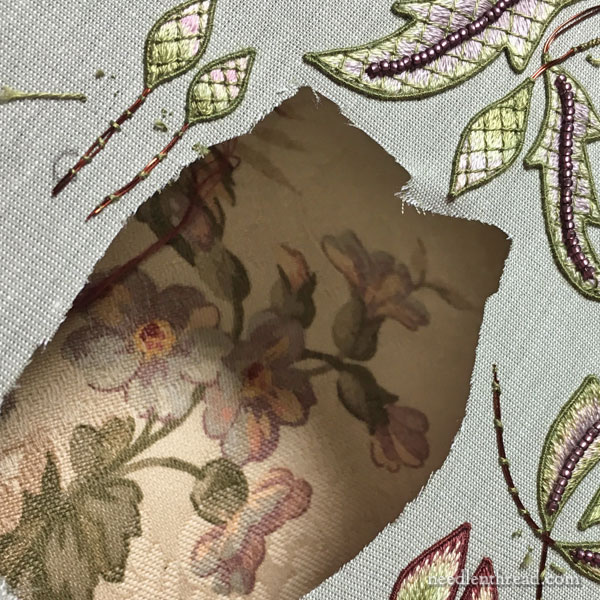
After the Fray Stop dried, you know I had to cut out at least one stumpwork piece. I decided to cut out the chunk of three leaves that I had to redo (I wrote about that kerfuffle here), because the size was wrong.
I’ll leave the rest of the stumpwork pieces together on the fabric until I’m ready to actually put them on the whole embroidery piece. Wouldn’t want to lose any of them!
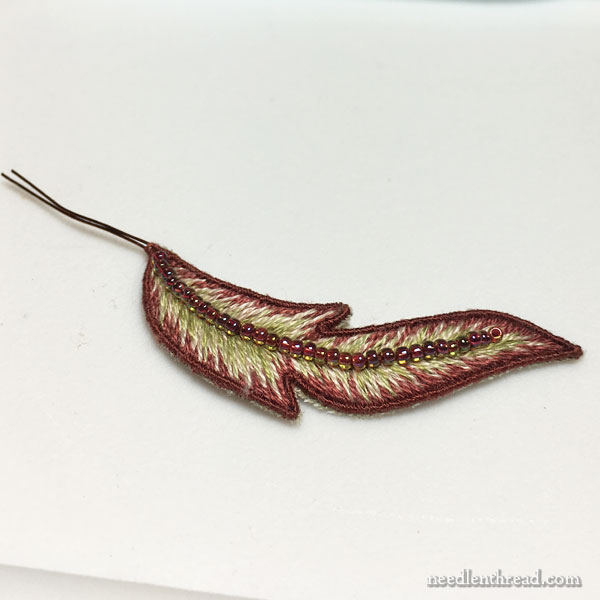
I practiced a bit of cutting on the Mistake Leaves. I think it came out ok, but there’s still room for improvement.
Two points: 1. use Really Sharp Tiny Scissors for this part of the job, and 2. angle under the wire as you cut.
I found it a little tricky on this particular leaf, when snipping in the tiny little angles. But I’m pretty confident the corners will work out ok on the larger version of the leaf.
And now, onto the second half!
More Late Harvest
If you’d like to follow along with Late Harvest from the first stitches until now, you can find all the articles relating to this project in the Late Harvest Project Index, listed chronologically.
Mary, your work is exquisite as always! It is such a wonder piece to be working on!
Patients Is something I lack! I’d be cutting away then regretting it later!
Will be looking forward to seeing the project completed ! Enjoy your week !
I think your work is beautiful, I have been following your Late Harvest project and read your review of Crewel Intentions – I just had to have it. Now to choose which project to do! When you used the Aqua brushes for the Fray Stop did they wash out ok or do you discard them afterwards?
Hi, Pauline – I washed it out right away, and will reuse the pen for water.
Dear Mary
The stumpwork piece that you have cut out looks lovely and I can’t wait to see them on the completed piece. What a great idea to use an aqua brush to paint on the ends of the stumpwork piece, a really useful craft accessory to have in your stash. Thanks for sharing with us your tips and techniques on the completed stumpwork piece and I look forward to further progress on the project.
Regards Anita Simmance
Dear Mary,
Thanks for the tips regarding the stump work leaves. I would like to add something I do. After I have cut out the stump work pieces I take a coloured felt tipped pen or aqua pencil tipped in water, closest to the colour of edge of the piece and gently colour the white edge of the fabric that might still show. It does not matter if the colour is not exactly the same, as it will always look better than the white.
I am pleased to hear that you are managing so well with your health issues. I am still praying and thinking of and trust our Lord will completely heal you .
Lots of love Elza, Cape Town. xxx
Mary…Where did you find this new gadget, Aqua Brush? Oh please tell me it is as simple as an Office Max.
Hi, Sue – I’d try somewhere like hobby lobby or Michaels near the art pencils, pens, and paints. And you can also find them on Amazon, I’m sure.
Mary the pencils look like ordinary colour pencils . I still bought them for the kids when they were at school. You can sharpen them like a pencil. There are two ways to use them. You can do the colouring in first and then go over it with a paint brush or for a more intense colour, wetting the point which I do . Here is a photo of the ones I have. You should find something similar at a stationary shop. xxx
http://g02.a.alicdn.com/kf/HTB1IFdfHVXXXXa9XFXXq6xXFXXXd/Faber-Castell-12-Colors-Water-Soluble-Non-toxic-Water-Color-Pencils-Set-School-Supplies-Student-Stationery.jpg
Yes…Hobby Lobby had them…I got the three pack. It has a fine, medium and broad tip brushes. I am covered…now just to do the stumpwork. 🙂
Mary, that is brilliant. Do you empty and clean the pens between uses? Because these are essentially some sort of liquid plastic, they can degrade some kinds of plastic containers over time, to say nothing of having it dry on the brush part.
I find Fray Block (June Taylor) works well, too, as it is soft when dry, but it is very thin and can be hard to control
Yes, I do empty the pens and wash them thoroughly, so that I can use them again with water.
That’s really fascinating, Mary. One day I will do some stumpwork, but in the meantime I am really enjoying your progress reports on this project.
Thank you Mary for posting about the Pentel Aquabrush! It sounds like an answer to many “liquid application” issues. You didn’t say where you purchased the product, so I wasn’t sure whether to check with an office supply, art supply or craft store. Obviously available online but I didn’t see any local stores listed. Have you used them with inks or dyes to use on threads, lace or fabric? I was wondering if the pens could be used in place of those “fiber crayons”? Thank you also for mentioning Fray Stop–it’s an excellent product! It’s a bit harder to find at a LNS but worth the effort, or online at Yarn Tree.
I’m adding more of these Pentel brushes to my wishlist!
Questions – other than the danger of putting too much on and having it wick up the stitching, why would you NOT want to do this from the back, and have a bit of the fray check on both sides of the wire? Or does enough wick under the wire that not all is getting cut off?
Mary, I love these notes about “Late Harvest,” every single one. It’s not the kind of thing I do, but that doesn’t matter: your expertise and enthusiasm for your work are just marvelous, and the tips you provide are indispensable. Aqua brush! I never would have thought of it. Now I wish I hadn’t given mine away. . . .
Thank you so much for the inspiration and guidance—you totally rock! XO
Well, how smart is that?! I always thought you applied the fray check to the edges AFTER you cut out the shape. This is so much neater!
One question. What does the BACK of your stumpwork look like? I see these beautiful pieces from Inspirations where the back looks almost as good and definitely as fully covered with stitches as the front. How do you accomplish that? Mine always look horribly spotty on the back, which isn’t a problem if only one side will be seen, but that isn’t always the case.
what a great tip! (no pun!) Aqua brush! thank you!
Brilliant idea Mary! And pleased to know the brushes will wash out.
Those Aqua pens really look useful, I’ll look around for them. I tend to use Fray Check quite a bit as it is convenient to store, being in a bottle that stands up. I always keep a glass head pin in the tip to keep the Fray Check liquid. The glass part isn’t important, but they tend to be smaller than the plastic head tips. I’m working a stump work piece by Alison Cole, who tells us that the slightest use of Fray Check will be easily seen by anyone who looks at the finished piece. Will, I can’t tell it’s there after it is applied, so I doubt her advice. The kit that I have has us working clematis petals on purple fabric, so fabric pens aren’t necessary. But I have used fabric pens in other stump work applications with success.
I’m so glad your treatment is going well, I’m sure it is so nice to be near the end of it. Soon you will be healthy and with a full head of hair again!
God bless,
Cynthia
Looking good, Mary, well, excellent really but I wouldn’t want you to suffer from capo grandis* now would I?
I wouldn’t ever have thought of using Fraycheck before cutting out the stumpwork bits, but it makes heaps of sense and as for your utter genius in using the water brush, well, I have run out of words (at last, they say breathing a sigh of relief).
* bastardised Latin for ‘swelled head’.
Seeing these reminds me that I really want to move stumpwork nearer the top of my to-try list. Knowing the little hint about using Fray Check will be good when the time comes.
Just wondering if it would be cleaner to apply the Fray Check to the back side of then stitching. Less chance of bumping stitching?
At a retreat, one stitcher had taken a hardanger class from a national teacher. This teacher claimed that Fray Chek is acid free. My Google search came up empty.
Can you confirm this?
Mary, I just have to tell you how TERRIFIC you are as a teacher. Your website is so easy to navigate that it puts most other websites to shame. Your videos are absolutely perfect: never too long, no annoying chats that have nothing to do with the subject, ALWAYS in focus and close enough so we can see what you’re demonstrating, clear and concise instructions, often with tips on trouble we might encounter, and with your pleasing voice and humor. It may seem that these things are the bare minimum for instruction videos, but you’d be surprised at how few have all these things! It would be churlish to complain considering how generous people are to take the time to make instructive videos about ANYTHING & EVERYTHING on YouTube for free, but few are as professional and perfect as yours.
You have taught me SO much and continue to because I am constantly revisiting your videos for a refresher on this stitch or that. So, I need to say a huge THANK YOU! for all that you give us!
A very loyal, grateful FAN,
Stephanie
Thanks so much, Stephanie! So glad you enjoy and appreciate Needle ‘n Thread! 🙂
Hi Mary
Your tip about using a waterbrush for painting Fray Stop around your pieces is good, but what do you do after you’ve finished? Is your brush useless or can you clean it so it can still be used with water? I guess Fray Stop is not water soluble (or it would wash out of dressmaker-type sewing) so I am curious. Maybe you just accept that the brush is a disposable and throw it out after using it this way.
I just soaked it in hot water and dish soap for a while and it cleaned it right up!