


Today’s installment of Party in Provence focuses on big petals and little flowers. I’m going to show you how I worked the large inner petals on the design and the tall flowers between them.
If you’re just joining in on this project, you’ll find the introduction and materials list for Party in Provence here, and you’ll find the first round of stitching here.
If you’re stitching along and you’re not quite ready to tackle the petals, no problem! You can take your time – the instructions will be here on Needle ‘n Thread when you need them. I’ll be publishing an easy-to-find index for the project next week.
The central section of Provence is the most striking, because of the vibrant blues in the design. Initially, I hadn’t planned on filling the petals with a solid, shaded filling, but I really wanted a good splash of blue in the project, and the petals seemed the most sensible place to accomplish that.
So, here’s how I stitched the petals, with some tips on tackling a few tricky spots!
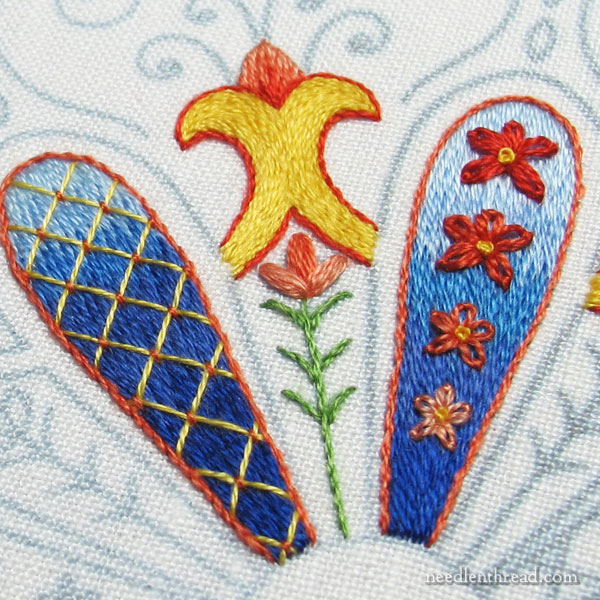
These are the petals we’re going to stitch, in the photo above. I’ll also include the instructions for the small flowers between the petals, so that you can alternate between large petals and little flowers if you want.
Sometimes, I find that alternating between elements on a design like this provides a little more motivation and variety, and helps to keep the project exciting and engaging. So don’t hesitate to switch about between the different elements on the design when you want a break from one or another!
The large central petals on Provence are first filled with long and short stitch, using the whole range of blues from light to dark, starting with light on the outer wider part of the petal and working to dark at the narrow base.
For all the long and short stitch filling, work with one strand of floss (out of the six).
When the filling is finished, the design elements (the lattice stitching on four petals, the small flowers on the other four) are stitched on top of the filled petal, but don’t be alarmed! I’ll tell you how to conquer those elements down below!
In my version, I alternated the amount of the light blue on the petals. On the petals with the flowers on them, there’s more light blue at the top of the petal. In retrospect, this isn’t necessary. I thought it would accentuate the flowers better, but it really makes no difference.

Take a good look at your petal. It is not very long, but you’re going to divide it into five sections horizontally, at least in your head, because there are five shades of blue that you’re going to work in that area.
If you prefer more dark blue on your petals, shorten the areas for the light blue at the top. If you prefer more light blue, shorten the areas for the dark blue at the base. Or you can just keep it really simple and equally divide the petal.
If you want, you can mark the horizontal lines, as shown in the left diagram above.
Then, think about the stitch direction for the long and short stitch. You’re going to be working straight down the long, narrow petal. If you look at the right diagram above, you can see the general direction your stitches should take. The center stitches will be more or less vertical, straight up and down in the middle of the petal.
The stitches to the side of center will just barely slant in towards the center. At the top of the petal, you probably won’t even have that much of a slant in them, if any. The slant doesn’t come too much into play until you start to fill down the shape.
If you want, you can mark stitch direction lines on your petals with a pencil, but with this simple shape, really, just go with the “flow” of the petal. Don’t stress out about stitch direction as you fill – the shape of the petal will almost naturally push you to make your stitches fit into the shape.

When I worked the long and short stitch to fill the petals, I didn’t start with a split stitch outline to stitch over, which is often the procedure when working satin stitch or long and short stitch.
In this case, I didn’t want any lift on the edge of the petals, and, since I’ll have a stem stitch outline around each petal, I wasn’t too concerned with an absolutely smooth outline to the petal itself.
If, however, you’re more comfortable working long and short stitch over a split stitch outline, go for it! It won’t make that much of a difference.
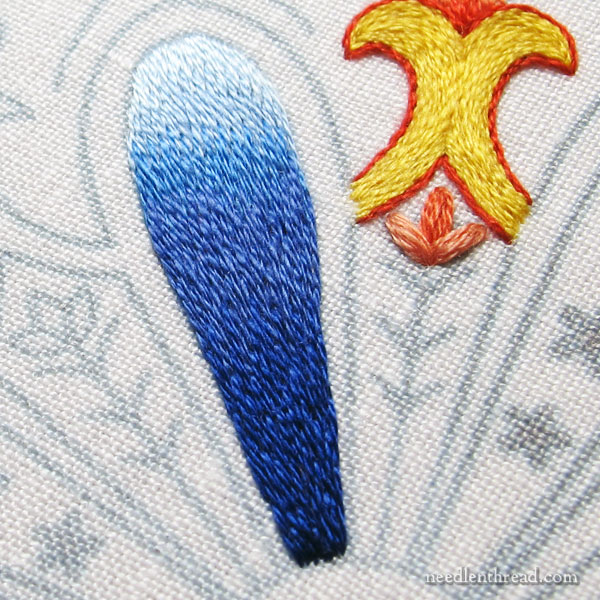
Work the long and short down the petal until it’s covered.
Remember, long and short stitch is very forgiving! Please don’t be intimidated by it!
Some tips to help you along:
1. Make sure you have good lighting, so that you can see that you’re covering the ground fabric completely.
2. Make sure you are coming up from below the previous row and splitting the stitches from behind as you come up into them.
3. Come up deep into the previous row. Don’t just try to split the very ends of the previous rows’ stitches, but rather go deep into each previous row, so that the shades really blend together well and smoothly.
Long & Short Stitch Tutorials
You can find video tutorials for long and short stitch here.
When it comes to filling this particular shape, this tutorial on shading with long and short stitch at an angle may be handy. Just remember that the triangles and petal used in that tutorial is much smaller, so the slant of the filling stitches is much more pronounced. Your filling stitches in the long petals on Provence will not be nearly as pronounced!
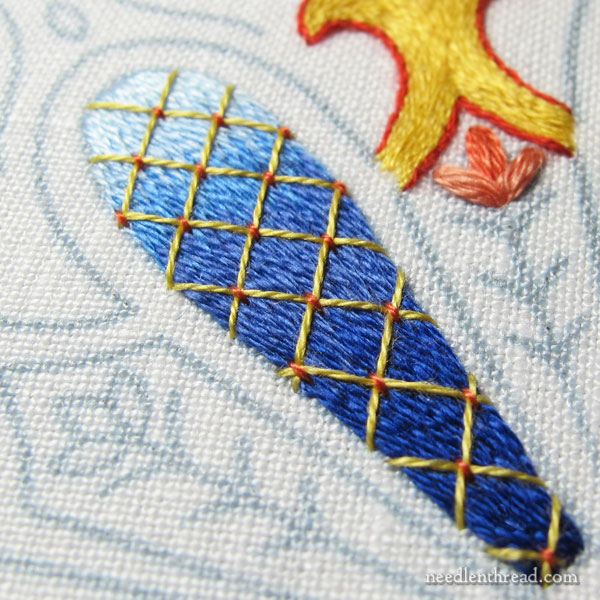
When you finish filling the lattice petals, use one stand of yellow to work long, diagonally straight stitches across each petal, so that they form a diamond pattern (like the one on the design).
Using 350 (dark coral), couch each intersection of the lattice stitches vertically, as shown above.
Lattice Tutorials
Here are some helpful tutorials to see how to work the lattice stitching:
This video on lattice work will show you the basics of working the lattice over a filling (in this case, satin stitch). The video is old, but the technique is correct!
This article on lattice filling may also be helpful. It’s a different approach to a lattice filling, but it may help you to estimate spacing and angles.
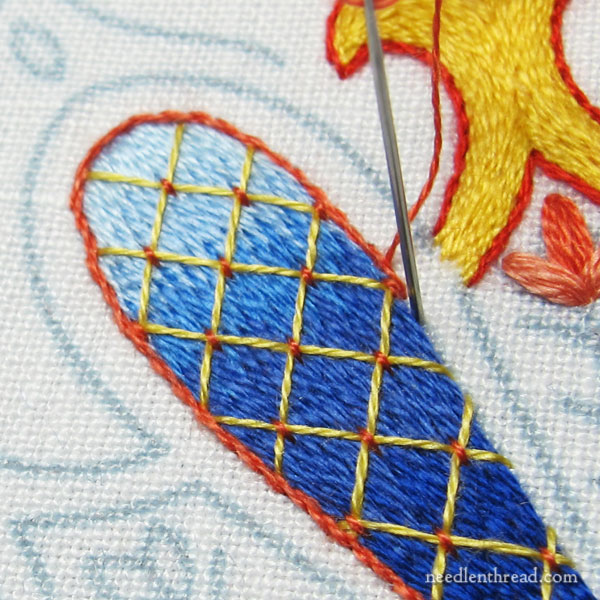
Once the lattice stitching is complete, outline the petal in 351 (medium coral), using one strand of floss, in stem stitch. You can find a video tutorial for stem stitch here.
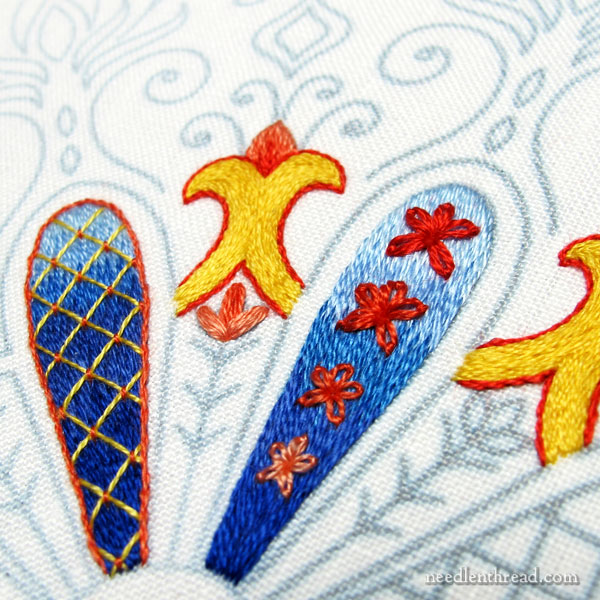
On top of the petals with the flower ornaments, work four five-petal daisy stitch (detached chain stitch) flowers, spaced evenly down the length of the petal. You’ll find a video tutorial for daisy stitch here.
On the first (largest) flower, use two strands of 349 (red); on the second, use two strands of 350; on the third, use one strand of 352; and on the last (smallest), use one strand of 353.
Finally, to finish the large petals, outline them with one strand of 351, using stem stitch, as mentioned above with the lattice petals.
Using one strand of yellow in the needle, work tiny French knots in the middle of each little flower on the long petals. You’ll find a video tutorial for French knots here.
The Small Straight Flowers
For the small flowers between each large petal, start with the center petal on the little flower. Using one strand of 350, work a plump granito, with about 5-7 straight stitches.
Work the two side petals the same way, so that they overlap the center petal, using 352 or 353, depending on how light you want the side petals. I used 352.
You can find a video tutorial for granitos here.
Work the stem and little branches with one strand of green (988) in stem stitch. You can find the video tutorial for stem stitch here.
And that’s it! The large petals and little flowers are finished!
Tips for Spacing
When working over an already filled area so that you can’t see design lines, you might have a difficult time with spacing the design elements that you’re going to stitch.
Sometimes, a little scrap of paper with the spacing marked on the edges can come in handy – like this:
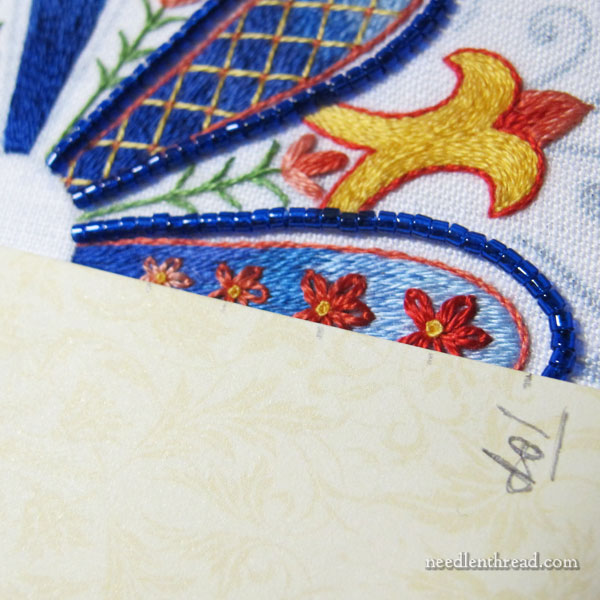
On the scrap of paper in the photo above, I marked where the top of the large petal is, with a little dash marking where the center of each daisy stitch flower should fall.
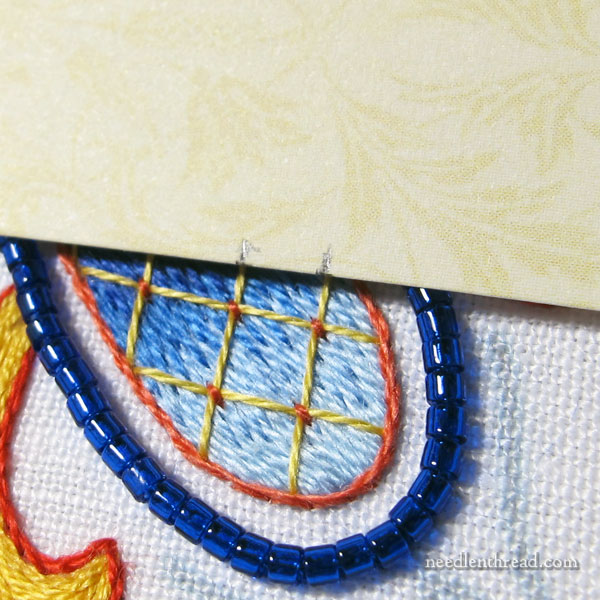
In the photo above, I marked a piece of scrap paper with the width of the space between the lattice lines, and then I used that to help guide me in the correct spacing over the filled in petal.
Questions?
If you have any questions, comments, difficulties, insights, queries – I’m all ears! Join in the conversation below!
Tomorrow, lots of news!
See you then!
Aaaarrrgggghhhh!! Still trying to finish the first week’s stitching!!! Will have to have a blitz on it over the weekend!!!!!
Hi, Jacqui – please don’t pressure yourself! I’m posting the articles every week to ten days, but that doesn’t mean you have to stitch the project that quickly. It’ll be available on the website when you need it. Take your time and enjoy the process!
What a great tip to work out the spacing! I admit, I was wondering how we were going to do that.
I am still working on the first section of stitching. I am trying not to rush and take my time with the stem stitch filling (which I have never done before.) I can’t wait to get to the blue flowers!
Thanks for sharing your methods. I have already learned loads!
Hi, Kathleen! Well, if you get bored with the yellow, don’t hesitate to mix things up. I did a few of the yellow, then a few petals, then back to the yellow, then the little flowers, and mixed things up a bit as I went. It worked up pretty fast and kept me interested the whole time, as I was eager to see the whole effect unfold.
Have you ever used a FriXion pen to transfer a project to your fabric? You buy them at Office Depot or a similar store. They were not originally made for sewing/needlecraft but they are great! I learned about them from an Heirloom sewing class I took. The ink disappears one you iron it! I was terrified to try it especially since my fabric was so expensive, but it worked every time.
Hi, Debbie – I have tested them and used them for embroidery design transfer. If you like the way they work and they work well for you, then that’s great! I wrote an article about them a while ago, explaining why I don’t prefer them: https://needlenthread.wpengine.com/2014/09/embroidery-design-transfer-question-frixion-pens.html Hope that helps!
I’m not stitching Provence, but I’m reading the posts, and I appreciate all the care you’ve taken and the reassurances you offer. No one should be frightened of a “complex” design like this. It’s all one carefully-explained stitch at a time!
Monique
Brilliant explanation on the spacing!
I’m not stitching along on this one because I just can’t fit it in with all the other already-scheduled stitchy things, but I’m rolling around a few ideas in my head for later.
One of those ideas being to incorporate gold/metal threads. Whattaya think?
I have done many types of needlework in the past (cross stitch, Hardanger, drawn thread, needlepoint, wool applique and some crewel) but have not done any fine embroidery. I decided now was the time and have started Party in Provence. One problem I continually have that I have not had with other types of needlework is really perplexing: when I push the needle up from below I have a tendency to split the working thread about 3 inches from the needle. It causes a little bump in the thread where the split occurs and wears the thread quickly. Is there something I am doing wrong or is there a little trick to keep better control of the thread?
Hi, Janet – is that happening on the back – that is, are you catching the working thread on the back, or it somehow happening on the front? I think it’s a matter of moving the working thread out of the way, when you pull your stitch through to the back. Eventually, you’ll become more aware of where that working thread is. You might have to hold it out of the way. I’m trying to picture how it’s happening, but I’m not quite sure where it’s happening. That might make a difference in how you’d manage the thread.
Janet, just so you know you’re not crazy, I had the same problem on the yellow stem stitch filling. I’m not having it with the blue long and short stitch, so I assume it is specific to something in the stem stitch. I will probably play around with it later to see if I can figure out what caused it, but right now I’m trying to get caught up, as I’ve only started with the blue petals and want to kind of keep up on this.
Ah, that is very interesting, Linda! I wonder if it could be that, when you come up for the stem stitch, you’re splitting into the thread, maybe just a little tiny bit, so that the threads interlock. When I work the stem stitch, I usually work from left to right, and I leave a small loop of thread on the front of the fabric, which I hold out of the way with my thumb, while I bring my needle up on the design line, above the loop of thread. That way, there’s no chance I’m catching that working thread. So if you can hold the thread out of the way as you come back up into the fabric, and then pull the thread through and tighten the stitch, it might help.
Mary, I think that is likely. I’ve never used stem stitch as a filling before, and I think my technique must be a bit different when doing that, because I haven’t had the problem when just doing a line of stem stitch.
Hi Mary, I am working the party in Provence. Love it. I am not doing any beading on this project and would like a recommendation for what stitch to do in place of the blue beads around the petals. Thanks. Barb
Hi, Barb – I’d probably go with Palestrina stitch in the brightest of the blues – not necessarily the very dark. You really want those outlines to pop out, so a bright but deep blue would work better than the very darkest blue or the light blues. (That’s assuming you’re using blues…!) You might try the Palestrina stitch with two or three strands of floss – test two strands and then three strands to see which gives you the more pleasing weight of the stitch in relation to the elements around it.
What did you use to transfer the pattern to your fabric? How did you get such crisp even lines on linen?
With this project, I used Sublime Stitching’s fine-tipped iron-on transfer pen, in blue. It’s worth investing in one or two of them to have them on hand for complex designs that work well for iron-ons (where all the design lines will be covered).