


Time to finish up the Strawberries!
We’ve followed this embroidery project featuring five strawberries from concept to completion, step by step, through a series of seven tutorials to finish the design.
If you’re just joining in on the tutorials, you’ll find the complete list of all the articles in this series on this Index Page. You’ll also find other How to Embroider (Blank) tutorials listed there as well.
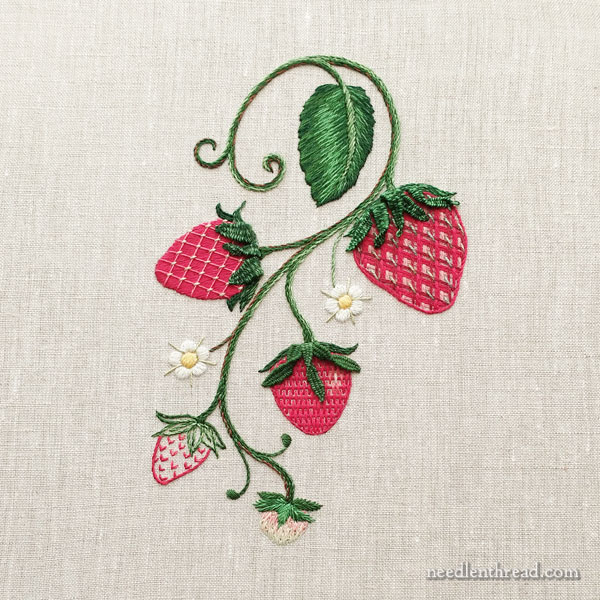
Today, we’re going work the large leaf at the top of this design and all the stems, to finally arrive at this finish:
You can find the embroidery thread color numbers and materials used on this project in this first installment, where you’ll also find the design.
As we work through the tutorial, I’ll refer to the threads by generic color names – light green, medium green, brown, etc. If you want to know exact color numbers, you can refer to the first article.
There are a couple reasons for this. The primary one is that it is not essential to work with the exact colors and threads I use. For these types of projects that are by no means “formal class projects” (they are free tutorials to give you ideas on techniques and choices), you can pull from your own stash to practice with. Using general color terminology makes it easier to follow along in those circumstances.
The order of work in this is a little different, because we ran into some difficulties with the leaf, so I suggested stepping back from the leaf a little while and moving on to the stem, then coming back to the leaf.
To work through the leaf, it will be very helpful if you’re familiar with long and short stitch shading. You don’t have to be an expert – it’s a pretty simple approach to the leaf – but you should understand the principles. If you take the time to read through these articles on long & short stitch shading, and look at the videos, you’ll have a good foundation for moving forward with the leaf.
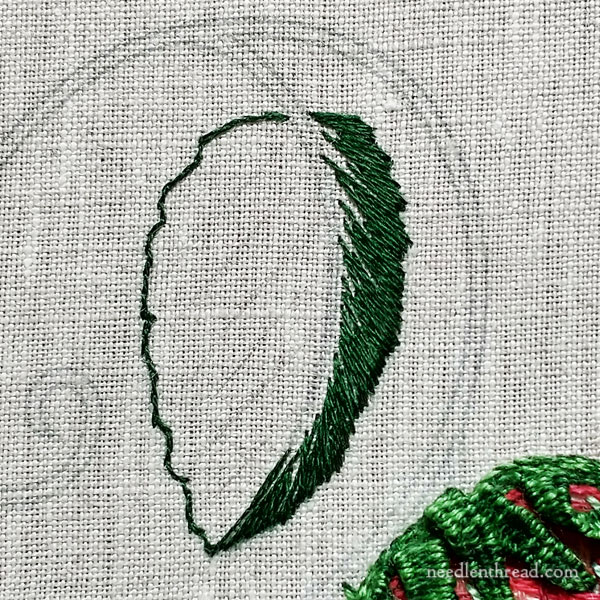
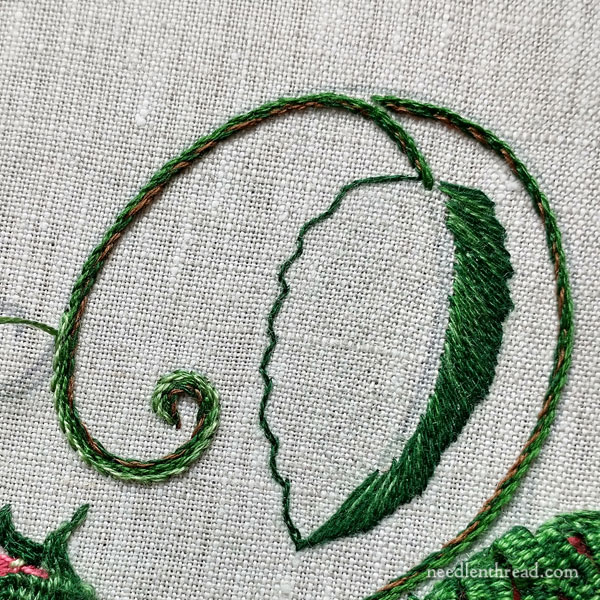
Begin by split stitching an outline all the way around the leaf, using one strand of floss in dark green. Why split stitch instead of backstitch? This article explains it.
But until you’re comfortable with split stitch with a single strand of floss, feel free to opt for a stitch you are comfortable with, like backstitch or split backstitch. It’s pretty essential to outline with something, though, if you want relatively smooth edges with a little lift to them.
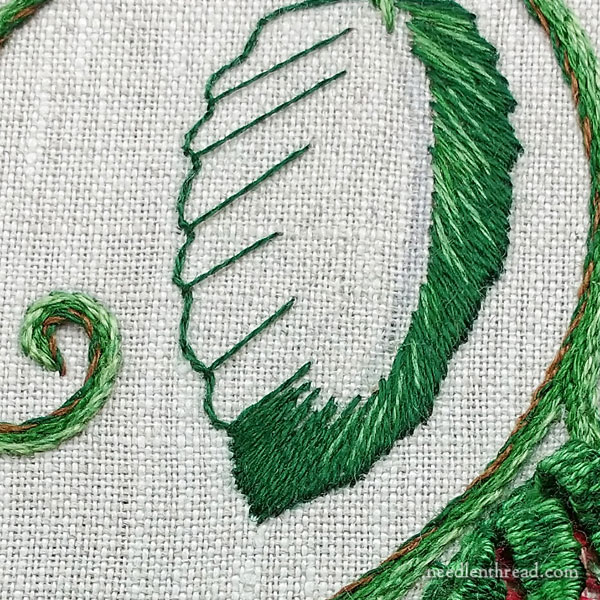
You can also use a pencil to draw directional lines inside the leaf, drawing them slanting towards the growth point at the base of the leaf, as shown in the photo above. (The base of the leaf is at the top of the leaf in this case, because of the leaf’s orientation in the design.)
Work jagged long and short stitches in dark green over the outline, coming up inside the leaf and going down just over your outline. So, at this point, you’re working from the inside of the leaf to the outside.
The reason for stitching from the inside of the leaf out and over the split stitch outline is that you’ll achieve a much cleaner edge on your leaf.
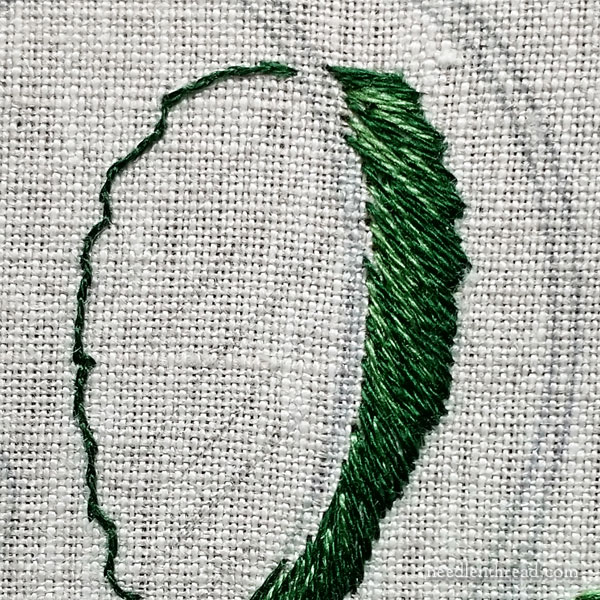
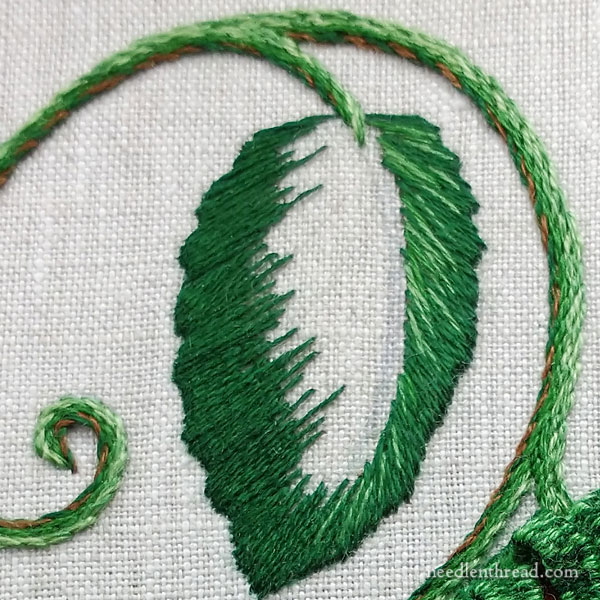
After the first row, the stitches come up underneath the first row’s stitches, splitting them, and working towards the center vein of the leaf. Using one strand of a lighter green and “sketch in” some stitches, splitting into the first row of dark green and ending towards the center vein.
These stitches should go pretty deep into the first row, and they should be somewhat long.
I like to think of long and short stitch as long and longer stitch – otherwise, you often end up with very short stubby stitches that just don’t blend well.
There was a long pause at this point in the workflow on this piece, and when we came back to it, Anna had some frustrating moments with the leaf, resulting in picking out and starting over a couple times.
So I suggested moving on to the stems, and coming back to the leaf later. Often, if you step away from an element that’s causing you frustration and move on to something simpler, by the time you take that break, you’ll be ready to tackle the frustrating spot again.
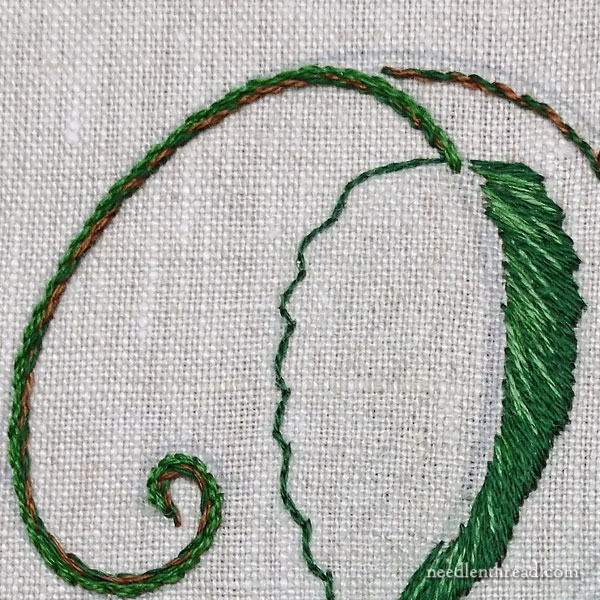
For the stems, work with two strands of floss in the needle, and blend colors. So, brown with dark green, brown with medium, dark and medium green, medium and light green.
Work the stems in lines of stem stitch, worked close together.
Color placement is up to you. The outside of the stems here are worked in either brown and green or green and light green, with the center areas being more consistently medium or medium and dark green.
Just follow the curves, and work about three lines of stem stitch over most of the stem areas. Where there are thinner stems, you might work just one or two lines.
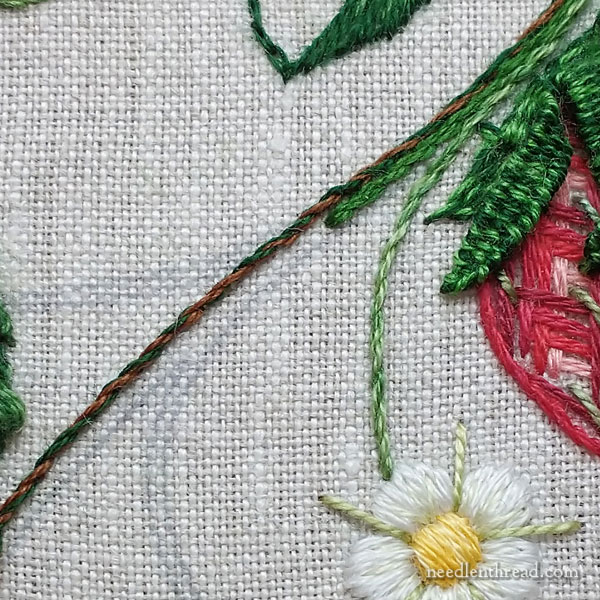
You can see here that this blossom stem just got one little line of stem stitch, in lighter greens.
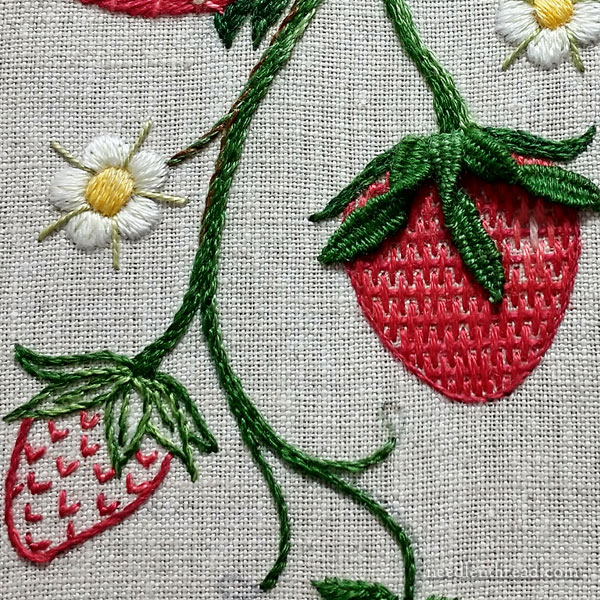
Branch off as smoothly as you can, blending the lines of stem stitch together where they intersect.
The tips on these lower branches above the last berry end up being satin stitched – just about three or four satin stitches over the drawn outlines. It’s such a small space that padding isn’t necessary.
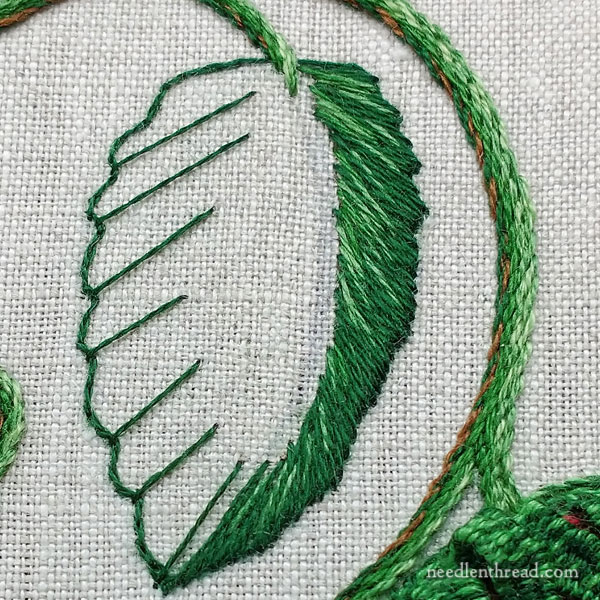
Time to tackle the other half of the leaf!
To break down a leaf like this, I like to work long directional stitches to create intervals. These stitches go from the inside of the leaf to the outside, over the outline. Again, we’re using one strand of dark green at this point.
The stitches, as you can see, are long. They follow the previously marked directional lines on the leaf.
With the intervals marked out, it’s easy to fill between them with long and short stitch, and it makes it seem like the progress is quite fast, because you have small spaces to fill in, rather than one huge space.
Plus, working in small segments like this helps to maintain the stitch direction, which is very important on a leaf.
So just keep on going, filling the small sections with jagged long and longer stitches, working from inside the leaf out over the split stitch outline.
Hey, you know what? If you have a hard time maintaining the angle of your stitches when you come up inside the leaf and work out over the split stitch outline, you can start just outside the split stitch outline and end the stitches inside the leaf. If this works better for you and is easier for you to maintain that stitch angle, go for it! It’s not right or wrong. Do what works best for you!
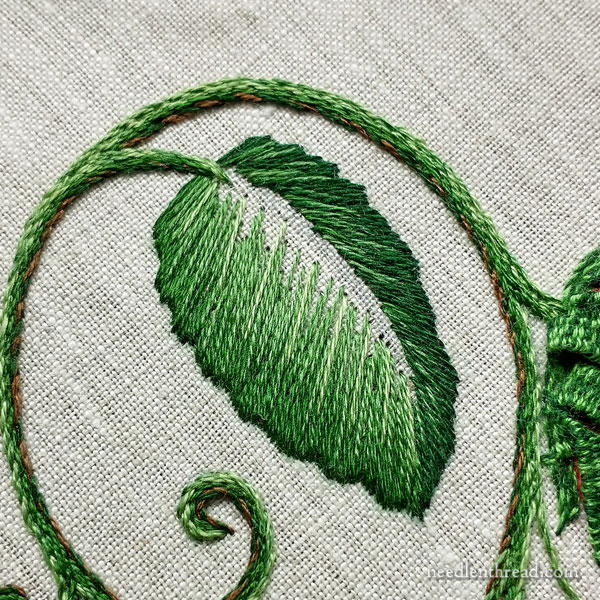
Then grab a strand of medium green, and work long stitches deep into the layer of dark green, coming up underneath the first row of dark green and splitting the stitches, and working towards the stem.
Then, if you want, sketch in a few lighter green stitches along the way as a third layer, spacing them out quite a bit.
Remember to go deep into previous rows. This is how you achieve better blending.
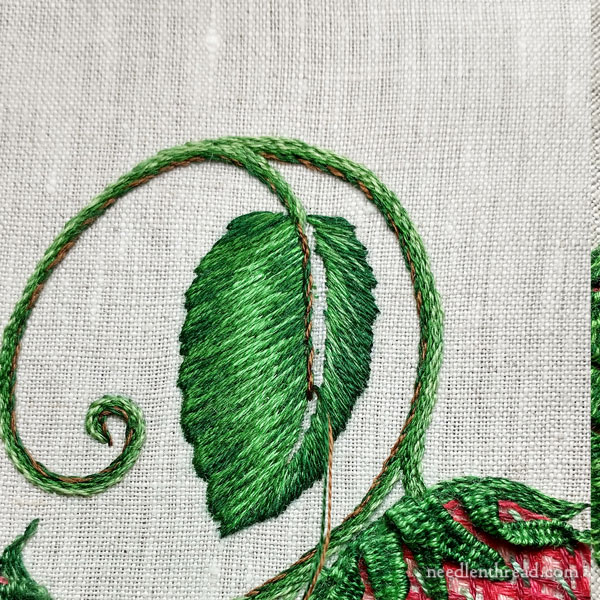
To draw the leaf back into the stem, to give a sense of a curve to the leaf, we went back to the dark green for the final layer closest to the center vein.
Again, go deep!
At this point, the center vein was halfway begun already, but that stitching came out.
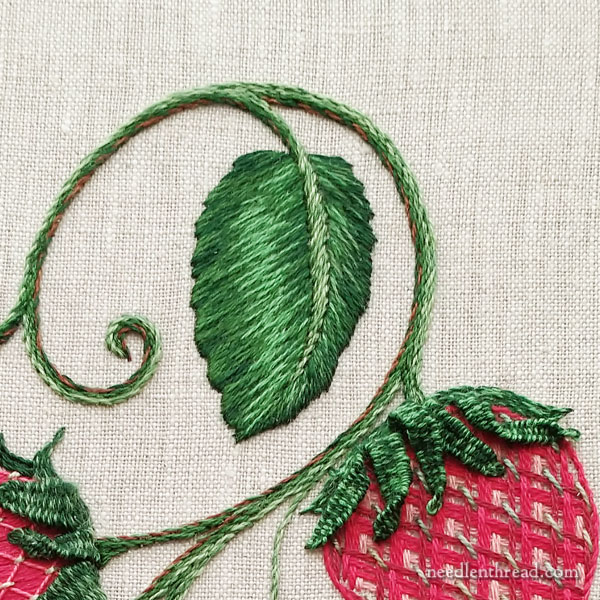
Finally, after struggling with the varied widths on the center vein, we settled on a very slanted stem stitch (it’s almost more of a slanted satin stitch) in one pass, using two lighter greens in the needle at once to fill the vein area. It worked out ok.
And there they are. Finis!
The next design in this series of tutorials on How to Embroider (Blank) will be a delicate daisy spray. We’ll cover more greenery stitching, and for some reason, we ended up with five different approaches (again!) to embroidering the daisies. We’ll get back to the tutorials fairly soon, after a short break for a few other exciting topics.
I hope you’ve enjoyed the strawberries!
What a great “sample” project! A little bit of everything! You do such a great job inspiring and expanding needlework knowledge! thanks.
This is really very pretty. I wish I were motivated to follow your tutorials but currently only seem able to get as far as printing out the designs, reading the instructions and squirrelling ideas away …. I am not sure why. It isn’t as if I’m not bored of bullion knots!
Dear Mary
A great tutorial I have experienced difficulty with the L&S stitch, I find it difficult as well when the design is slanted as the leaf above, you have to really concentrate and it doesn’t always work the first time and as you say if you step away from a project you very often find the solution when you return. Thank you for sharing with us this lovely embroidered strawberries series. I’ve really enjoyed it, and the all the tutorials on the five ways to embroider. The instructions and photos are so clear and easy to follow. Thank you.
Regards Anita Simmance
Mary, as you go from one row to the next with long and short stitch are you actually splitting the threads themselves in the previous row or are you placing your needle in between the threads of the previous row?
Thank-you for a great tutorial!
You might want to check out the long and short stitch lessons and videos that I mentioned above, so that your questions can be answered with a little further exploration. It’ll help clarify many aspects of the technique, since you’re not familiar with it. But, to save you some time, here’s a line out of the tutorial that you’re asking this question about: “the stitches come up underneath the first row’s stitches, splitting them.” 🙂 Hope that helps!
Thank-you very much for the info, Mary. I’ll review the articles again as well.