


Welcome to the second installment of Cotton Quartet!
If you’re just joining us, you’ll find the first installment of this stitch-along project here, with background information and instructions on getting started.
Today, we’ll add a few more rows onto our sampler tool wallet, using some pretty simple stitches. (Hey! Never underestimate the power of simple stitches! You can do a lot with them!)
If you are a member on Patreon, you’ve already received these instructions in the PDF download posted week before last, so you’re ahead of the game. You also have the stitch dictionary at the end of the PDF, so that you have access to the stitch instructions in one place.
I’ll also share a couple tips today that may help you avoid some frustrations. These are points that occurred to me while I was writing today’s blog post, and thankfully, I already had some pictures.
While the lesson today is relatively short, two of the stitched bands take a while to stitch, so you’ll have time to get those finished before next week’s installment.
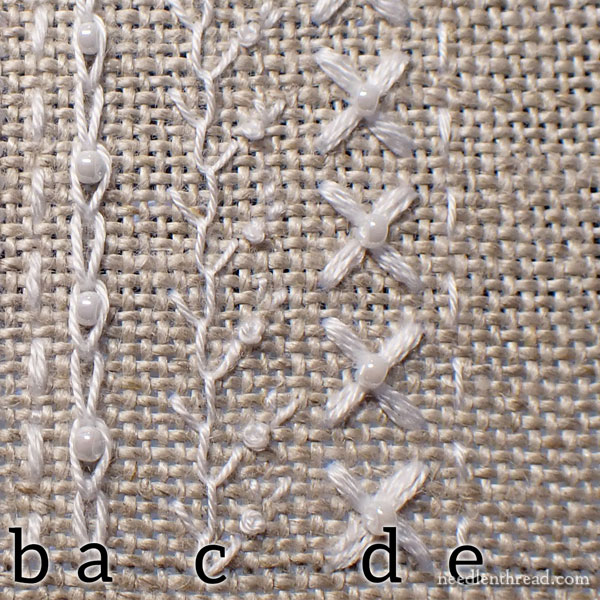
We’ll be stitching Lines C, D, and E on the sampler. You can see them marked in the photo above. I’ll link you to tutorials for the stitches mentioned, where necessary.
You can see that the first band, C, is a composite band. This means it is made up of more than one stitch. There are several composite bands on the sampler, so as we work through it, you’ll gain experience in combining stitches to make up decorative bands.
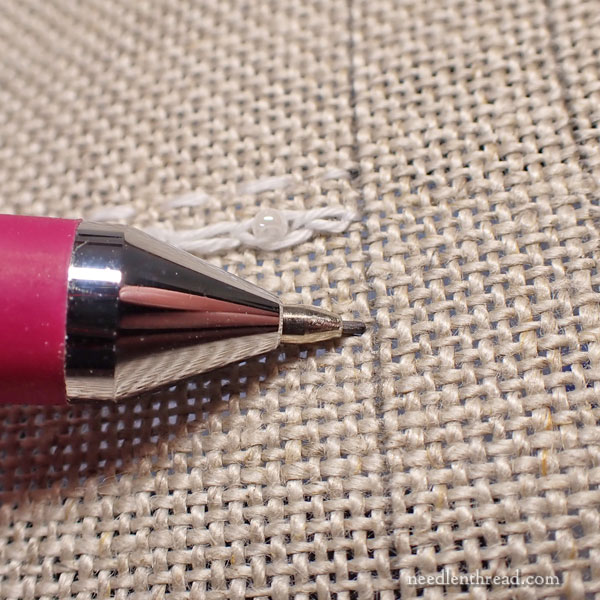
With some of the bands, you may want to mark a line on the fabric to help keep your stitching line straight without too much effort. Sometimes, it’s easier to see a marked line than to follow the weave of the fabric, especially if your stitch covers the whole line you’re trying to follow.
I use a .5 mm lead mechanical pencil for this type of marking. I find a .7 a bit too large.
To easily mark the line, hold your pencil at a low angle to the fabric, and simply pull it slowly and steadily down the fabric, in the “ditch” between two of the fabric threads. This is the easiest way to mark a straight line on this type of linen.
(If substituted fabrics and you’re working on cotton or some other plain weave fabric, with a weave that is not easily seen or felt, you might have to use a ruler.)
For Line C, make sure your fabric is oriented so that the section with the bead loop (I usually refer to it as the “top section”) is at the top, if you are viewing vertically. You need to begin Line C at the top of that section.
First, I drew a line about 7 threads of fabric to the right of the center line (with the bead loop at the top, viewing the piece vertically). This is just a trace more than 1/3″ of an inch from the center beaded chain stitch line (A), if you’re not counting.
Of course, you can measure and place your lines however you want! You do not have to follow exactly what I’m doing with my sampler. You’ll see a little further on how you can go back and fill between lines if you want, so you don’t have to be meticulous about the placement of each sampler line. That said, the lines right next to the edge of the sampler do require consideration, which we will also see further on.
I used coton a broder #25 and the #7 crewel needle.
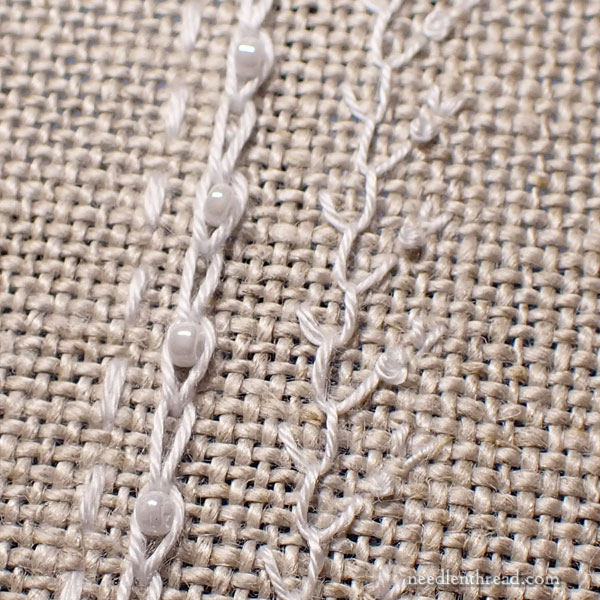
Line C is worked in feather stitch, beginning at the top (beaded loop section) with the “arms” extending about two fabric threads from the right and from the left of center.
The holding stitch is always on the center line.
When the feather stitch line was complete, I returned up the right side of the feather stitch line only, adding a French knot at the tip of each feather stitch “arm” with two tiny straight stitches fanning out beyond the French knot.
These tiny straight stitches are over about one fabric thread, worked at angles to each so that they fan out from the top of the French knot, following the direction that the “arm” of the feature stitch is slanting. You don’t have to follow the weave of the fabric to place these straight stitches. Feel free to split right into the fabric. This is when a crewel needle comes in handy!
If you are not familiar with feather stitch, you can find a video tutorial for feather stitch here.
You can find a video tutorial for French knots here.
Coton a Broder Pull Skeins
Ok, we all know that pull skeins can sometimes be a royal pain in the … neck.
So let’s pause a moment and talk about coton a broder pull skeins.
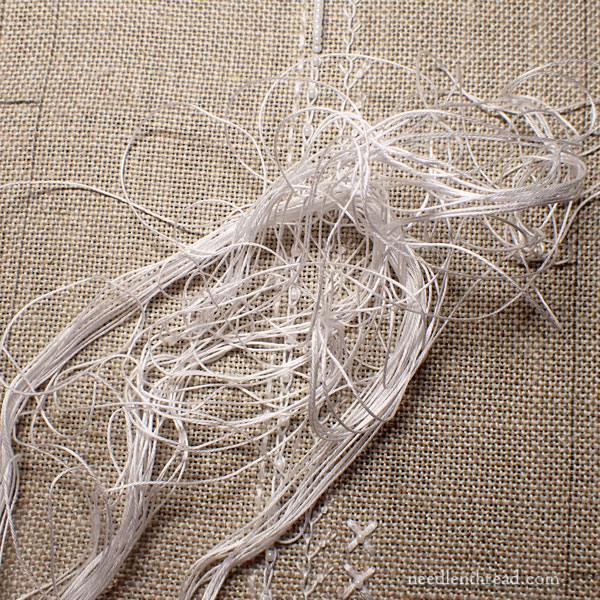
I hate to say it (because I love coton a broder!), but often, the pull skeins of coton a broder are worse than stranded cotton pull skeins.
I have written before about how to handle pull skeins. You’ll find one article here, and you’ll find another article with more specific information here.
The tips in those articles help minimize the frustration that you might feel when working with a pull skein that misbehaves.
However, with coton a broder, I much prefer to break down my pull skein from the beginning.
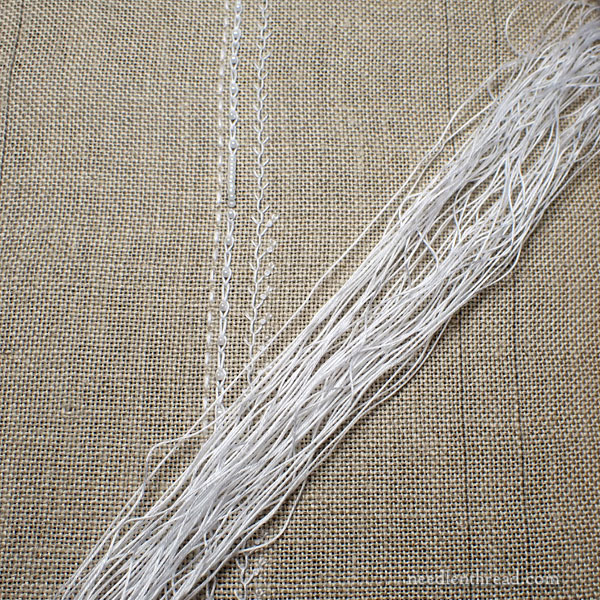
I cut the whole pull skein into serviceable, pre-cut lengths of about 18″, laying them all side by side very neatly as I cut the skein.
There is no magical way to flip the skein and suddenly end up with perfect 18″ lengths. A pull skein is not put up in a twist (like perle cotton) or put up in a loop (like floche). Because it is put up in a specific configuration (kind of like a folded figure-8), the skein won’t come apart easily if you try to pull it all apart in one magnificent move.
So you do have to pull out lengths of 18″ (or whatever your comfortable stitching length is), one length at a time, and cut it.
I find it worthwhile from the beginning. It just saves frustration.
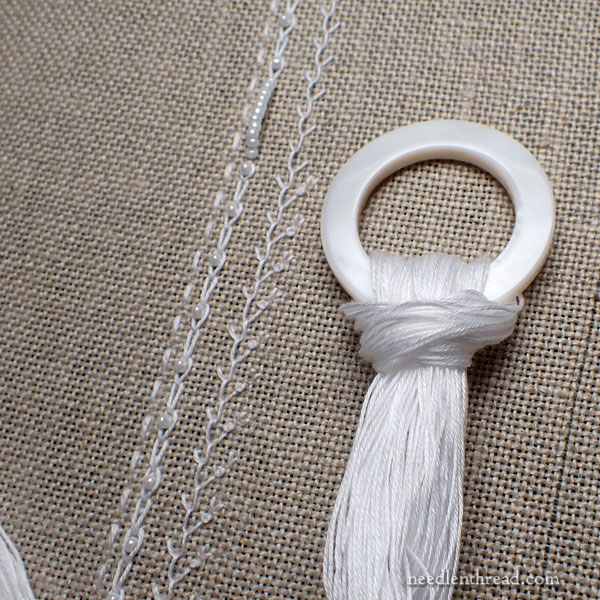
When I’ve got the skein cut, I’ll hitch the bundle of threads onto a thread ring, or onto a small piece of card stock with a larger hole punched in it. Now, I can pull one thread at a time as I need it.
If you’re not sure how to pull one thread out at a time, we talked about it a while ago in this article, which has photos to demonstrate.
If you want to make your own decorative thread cards for holding multiple threads for a project, you’ll find a free printable in this article.
Line D
Now that you’ve got your coton a broder organized, we’re switching to stranded cotton!
For Line D, I used four strands of stranded cotton from the six. You’ll want to “strip” the floss – that is, separate the strands out one at a time and put them back together in a bunch of four. If you don’t know how to do that, you’ll find a tutorial for stripping stranded cotton here.
Why do you want to do this? Because you’ll get better coverage with each stitch.
You may also want to use a laying tool (or a very large tapestry needle, if you don’t have a laying tool) to achieve nice, smooth, untwisted straight stitches in Line D.
Use the tapestry needle for the X’s. Use the smallest crewel needle for the beading.
You can find a video tutorial for using a laying tool here.

Line D is a band made up of large X’s (not cross stitches!), with a bead in the center.
Work Line D upwards. Holding the work vertically, with the bead loop section at the top, start at the base (the lowest section farthest from the bead loop) and work upwards. This way, if the stitch spacing is slightly off at the top, this will be hidden by the closure of the tool wallet.
Do not draw a pencil line for Line D, because it would show between the stitches.
About 7 threads of fabric to the right of the line you drew for the feather stitches (the center of Line C), begin the first X. Work a straight stitch diagonally over three fabric threads, according to the diagram above.
Bring the needle and thread to the front at A, cross diagonally over three threads to go down at B (center), come up at C, cross diagonally over three threads back to B, come up at D, go down at B, come up at E, go down at B.
Move up the band, skipping two threads between each large X.
If you reach the top edge of the fabric and you don’t have enough fabric for a full X, work as much of an X as you can, and do not bead the partial X.
Once the X’s are all finished, switch to beading thread and a small crewel needle, and bead the center of each X, situating the bead so that it sits like a tire on top of the center area, and stitching the bead on as demonstrated in the first installment of Cotton Quartet, which you will find here.
Line E
Line E is a running stitch worked in coton a broder.
Begin Line E two threads of fabric to the right of the edge of Line D.
Work the running stitch over three threads of fabric on the front of the fabric, and skip two threads of fabric between each running stitch.
Looking for More
If you’re looking for previous installments in this project, you’ll find the first installment for Cotton Quartet here.
Next week, I’ll begin an index where all the articles will be listed chronologically, so that you can easily find them.
And we will move on with several more decorative bands on the sampler!
Have a wonderful weekend!
Mary, I noticed that the photo of your completed case has a row of stitches between A and C. Will we go back to add that later, or have you made a design decision to delete it?
Thanks!
We will talk about that in upcoming posts!
Mary, seeing that crazy tangled skein of Coton a Broder in your post made me feel so much better! I’ve been mumbling and muttering about my tangled skein and trying to untangle it all week. I finally smoothed it all into submission last night and can get back to stitching. I’ve sworn I would never work with another skein of it again unless you shared some magic way of taming the skeins without doing exactly what you advised and what I ended up doing: untangling and then cutting serviceable lengths one by one and then looping them all together on a floss holder of some sort with a lark’s head knot. Knowing that I’d always have to do that first and that it’s never going to be simple because of the way the thread is wound into skeins makes me think I’ll stick to the other 3 choices, floche, standard floss and pearl cotton.
I’ve also had more trouble keeping the stitch tensions consistent with the Coton a Broder than I usually have with all the other types of floss. The stitches tend to be loosey-goosey on the back but if I pull tight enough to stop that, it distorts the threads of the linen fabric. Finally, I noticed the thread is fuzzy and tends to pill and split. But, I do like the appearance of the stitches once I get this thread under control. Any further tips you have to offer for working with it will be greatly appreciated!
I’m so glad to have a chance to try this all out on a small project with lots of different stitches and only ONE skein of coton a broder to worry about.
Oh wow! I’m sorry to hear that you have problems stitching with it. It’s one of my favorite embroidery threads, and I’ve never had stitching problems with it. I’ve never seen it pill or separate or fuzz up. I use about a 16” cut. The pull skein problem doesn’t happen every time. It’s an occasional thing, kind of like skeins of floss (also on pull skeins), which occasionally knot up. But as for stitching, I love embroidering with this thread! I wish you could have the same experience. 🙁
I just got my kit for this in the mail today and am super excited to get started! I even subscribed via Patreon to get the easy to reference PDFs. Thank you so much for the super detailed instructions. One request though – Could you show a shot of the whole fabric in the hoop at the end of each post? You probably prepare your posts ahead of time and schedule them, so it might be too late – but I had to ask. A view of the whole fabric would help me make sure the big picture view of all the steps are coming together right and I didn’t get turned around in my stitching. Thank you!
I will try! I didn’t take full shots at every stage, because the result is a lot of fabric, and a few skinny lines that you can’t see clearly because i have to get far enough back to get the whole piece of fabric in. But I’ll try to rectify this and make the orientation clearer. Thanks!
Many thanks for your splendid instructions Mary. I especially like the Patreon version with handy stitch instructions included.
My stashed coton a broder isn’t bright white, so doesn’t stand out like yours does, but subtle is still pretty. I am loving this project!!
I have spent today setting up the cotton quartet needle case. Your instructions were so clear and I thoroughly enjoyed the whole process. I got as far as the beaded loop for the clasp and am just waiting for the cotton a border to start the stitches. Thank you for sharing this with everybody and holding the hand of a beginner.