


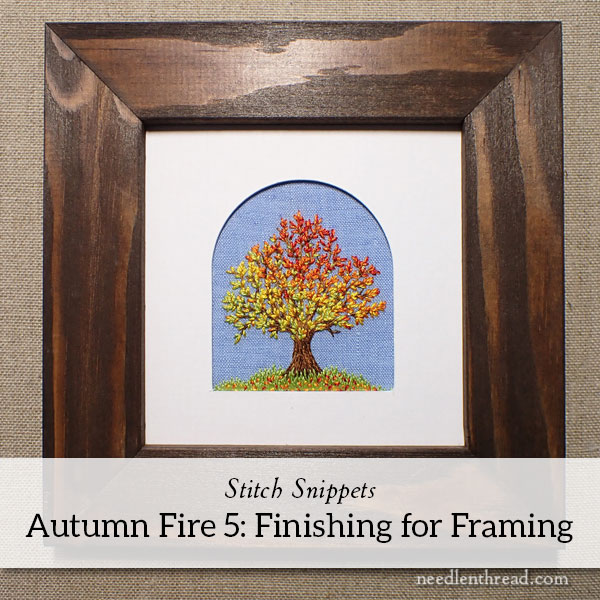
Today, we finish up Autumn Fire! Yay!
Autumn Fire is the third Stitch Snippet project for 2022. You can find all the instructional articles for Autumn Fire listed here in chronological order, so that you can follow along with them at your own pace.
You’ll find all the Stitch Snippet 2022 projects listed under Tips & Techniques in the main menu here on Needle ‘n Thread.
If you’re a member on Patreon, you received today’s installment last Friday, in the final downloadable PDF for Autumn Fire.
We will have a limited number of Autumn Fire kits available hopefully by mid-week next week, so if you are hankering to stitch this project – or you want to stitch it in the future when time allows – keep an eye out next week for those. I’ll announce it here on the blog when they are ready again.
Now, onto the business of the day! We’re going to prepare Autumn Fire for framing.
Gather your materials for this installment:
If you have the kit, you’ll just need some sewing pins. You’ve got everything else: linen lacing thread, arched mat, mounting board.
We’re using a 4″ square mounting board (cut from mat board), a specially-cut arched mat, and 80/3 linen thread for lacing. If you don’t have the linen thread, use a very strong cotton thread (like a top stitching thread, a heavy quilting thread, etc.).
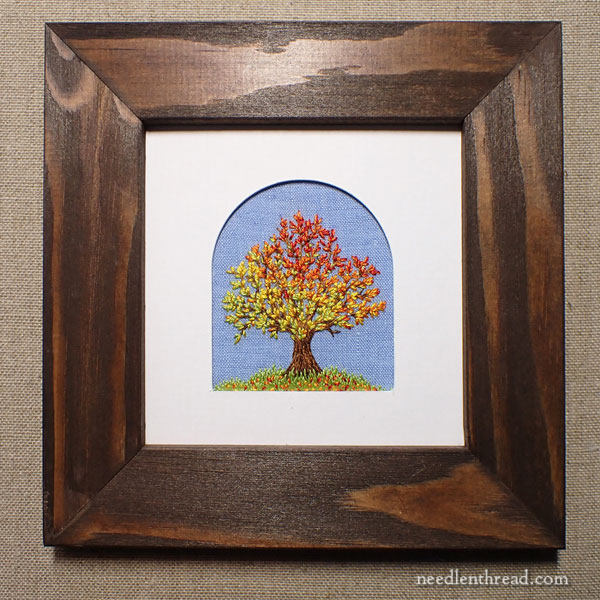
The frame is something you’ll provide. The frame you provide will vary according to your tastes, decor, and so forth.
About Frames
You might be thinking this frame is a bit heavy for such a little project, but in fact, it looks really good on a small wall.
I tried different frames, and I found that the heavier frame and the darker color looked great with the tree and set off the arch mat really well.
This is a simple photo frame with a 4″ square opening. The glass, the mat, the backing board, as well as the back cover of the frame, all fit into the opening. If you’re thrifty and lucky, you can probably find a suitable similar frame at a thrift shop. I’ve seen similar on Amazon, at JoAnn’s, Michael’s, Hobby Lobby, TJMaxx, etc – so it’s not a rare thing to find a suitable 4″ square frame.
Preparing for Framing
When last we met on this project, your final task was to damp stretch and block the embroidery. This is an essential step in preparing embroidery for framing. Don’t skip it!
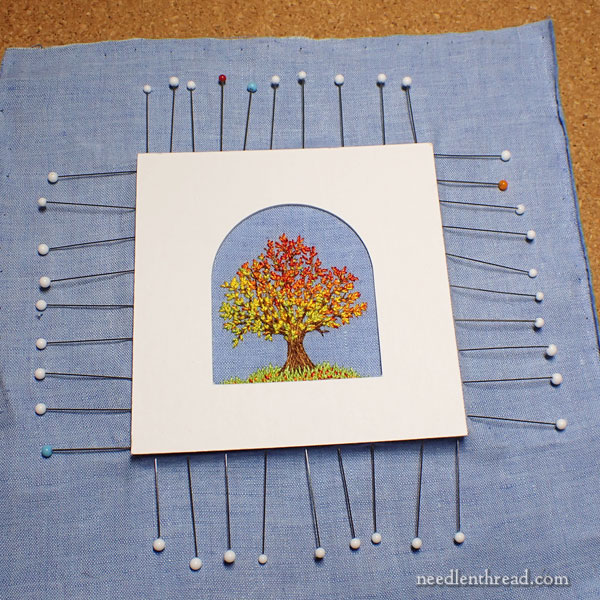
The first step to mounting the embroidery on the fabric is to pin the embroidery in place on the mounting board.
Center the embroidery on the mounting board (that’s the plain 4″ square mat board). Use the arched mat to help you situate the embroidery exactly where you need it to be.
You want the embroidery to be centered in the arch on the top mat, so make sure that, as you work through this process, you occasionally double-check the placement of the embroidery on the mounting board in reference to its place inside the arch on the top mat. This is very important!
To do this, just make a sandwich with the two mats: place the mounting board on your table, place the embroidery on top of it and tentatively center it, place the arch on top of the embroidery, and then fiddle the embroidery until the tree is right where you want it inside the arch.
Then, gently press the fabric down over the edge of the mounting board on one side, without shifting the embroidery. Stick a pin in the center of that edge, pushing the tip gently through the fabric and into the edge of the mounting board.
The mounting board is not very thick, so you’re just sticking the very end of the pins into it. Don’t try to push deep, or you’ll break through the board.
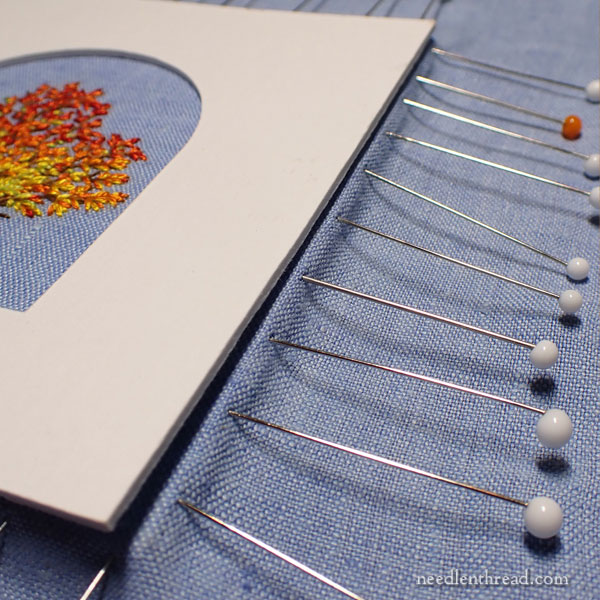
Gently pin out from the center of that edge, to each side.
Then do the opposite side of the embroidery to the one you just pinned (just like you do when you’re damp stretching).
Don’t try to pull the needlework too tight, but do tighten it somewhat over the board.
Make sure you double-check the placement of the embroidery in the arch on the top mat! And then pin that side.
Then do the two remaining opposite sides in the same manner.
Double-check the placement of the embroidery within the arch on the top mat! (I’m probably going to say that a few more times).
Now, flip your pinned piece so that the back of the mounting board is upwards.
Trim off excess fabric (avoiding the pins), so that you have about 1″ – 1.25″ of fabric on all sides. I did this after I pinned because I wanted to make sure that the embroidery was centered well in the arch before trimming, just in case I didn’t transfer exactly in the center of my fabric.
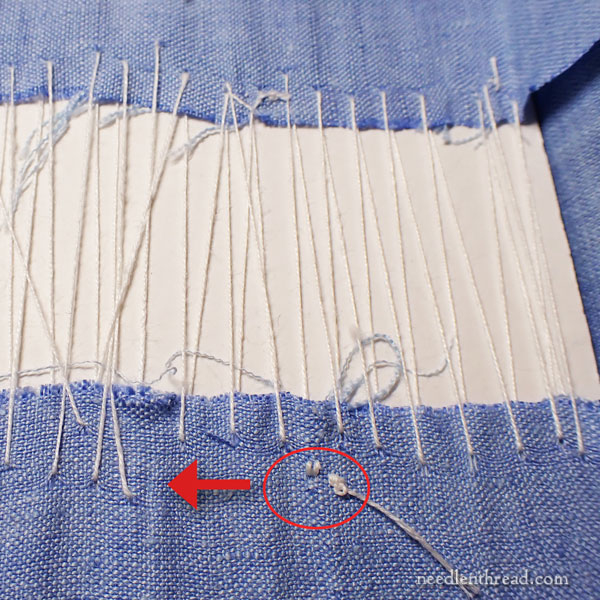
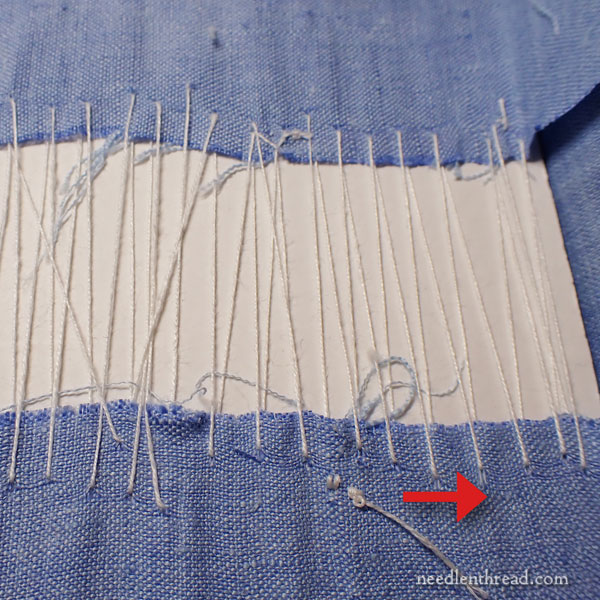
Then, cut about 36″ of lacing thread and thread your needle. Starting in the middle of one side, with a knot, work some tiny holding stitches (circled in the photo above).
Fold the opposite edges of fabric towards the center, so that you have two flaps of fabric folded over the mounting board horizontally. Pass the needle and thread up into the folded opposite edge, straight across from where you started.
Then move back down to the first flap (where you started the thread), and, moving about 1/4″ to the left, bring the needle and thread up into the fabric (or down into it – it doesn’t really matter) and pull through, tightening both flaps of fabric towards the center.
Work back and forth across the opposite sides, pulling the thread every two stitches or so, to make sure that it is taut and that the fabric is taut on the board.
DO NOT REMOVE THE PINS as you go!
You might double-check the front to make sure nothing is shifting, but it really shouldn’t be, because your pins are holding the front fabric in place. Don’t pull so taut that you’re bending the board or anything! You just want to firmly lace the fabric so that it is held securely onto the mounting board.
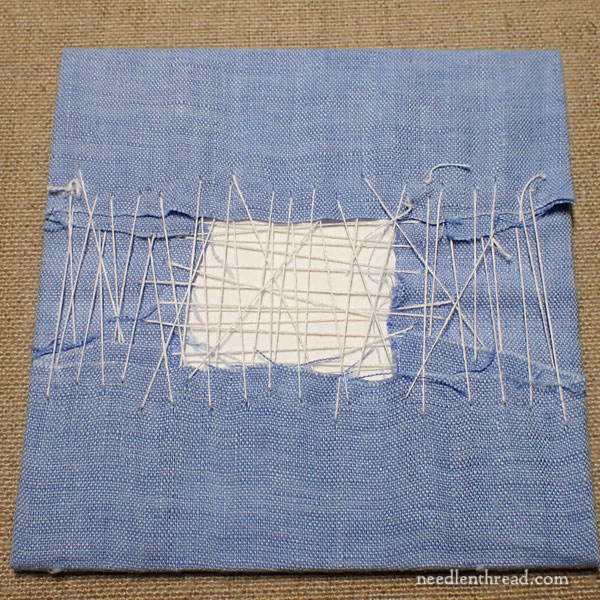
Once you reach one side edge, take long and widely spaced lacing stitches back to the center and then work out to the other edge.
Turn the work over and double-check the placement of your embroidery.
DO NOT REMOVE THE PINS.
If all is well on the front, turn the work and do the other two opposite flaps of fabric in the same way. Avoid lacing into the other lacing threads, just in case you have to take any out. It’s easier if they’re not entwined.

Make sure that you’re working out to each edge and pulling that flap of fabric tight against the board, to give the fabric as small and neat a profile on the board as possible.
There are no mitered corners here. You’re just folding the flaps of fabric down onto the previously laced two sides.
DO NOT REMOVE THE PINS.
Flip your work and double-check the placement of your embroidery in the arched mat.
If all is well, you may now remove the pins.
Hmmmm. Well, it might not be the prettiest lacing job in the world, but it’s perfectly functional! And if I need to take the embroidery off the board for any reason, it’s as easy as snip, snip, snip!
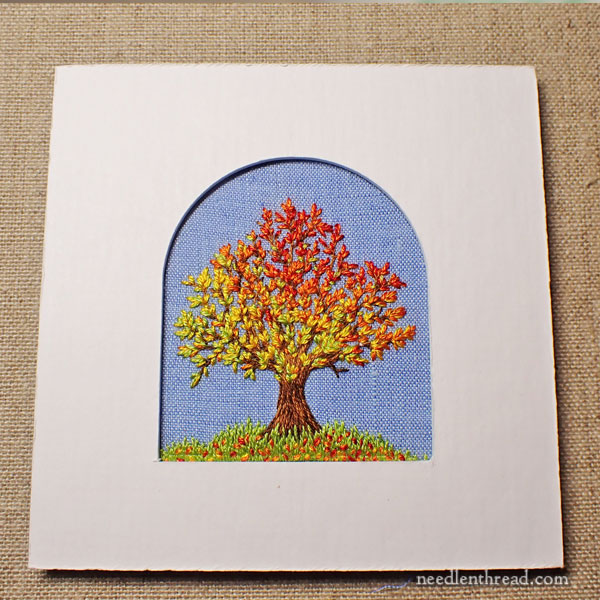
Turn the piece over, place your arched mat on top, and there it is!
The edges of both the top mat and the mounting board should all line up well, and the tree should be centered.
You can see why it’s important to consistently double-check the placement of the tree on the mounting board in relation to the mat. If you don’t do that as you work through each stage, at this point, you’d have to take the lacing out and start over if you need to adjust the placement.
And we wouldn’t want that!
I had to re-lace half of mine, though, so it does happen! If it happens, it’s not that big of a deal! You have plenty of linen thread. Just figure it’s all part of the learning experience, right?
And now your only task if finding a frame!
I hope you enjoyed the project. Stay tuned for the last Stitch Snippet for 2022! We should (if all goes as planned) be launching it the first week of November. I will tell you more, very soon!
I’ve definitely enjoyed this little project, however I was really surprised that the linen lacing thread isn’t stronger. I can break it between my hands. Is that normal? I ended up using a different thread for the lacing.
Hi, Linda, if you’re pulling with your hands with the intention of breaking the thread, then it isn’t too surprising that it would break. The purpose of using linen thread is that it doesn’t tend to stretch as much as other fibers of similar weight, so your fabric will remain nicely taut over time. If you are lacing the fabric with that much pressure that the thread would break, then you are lacing too tightly. Hope that helps!
Thanks, Mary. I just used different linen to lace it with. I’m a weaver so I have other linen around and I’m used to linen being a very strong thread. I was just really surprised that this wasn’t as strong.
Hi, Linda – it’s probably because this thread is made for embroidery. But I use it for lacing fabric onto mounting board for framing all the time, and it’s never failed me. Now, for lacing large embroidery frames (slate frames) with big projects that will be on the slate frame for a while, I use a 3-ply or 4-ply (can’t remember which it is) linen warp yarn, which is definitely a heftier thread than the 80/3 made for embroidery. I also found a linen / cotton blend warp yarn that works great for lacing up slate frames. But these are both a much heavier duty string, and for mounting fabric on board for framing, that type of muscle isn’t really essential.
I’m always looking for suggestions on linen that’s used for the warp in weaving, so if you have a favorite brand that you use, I’d love to hear about it! I came across the cone I have at an estate sale where the owner was a weaver, so I don’t really know much about it. I’d love to have a good source for a reliable brand. Any suggestions?
Do you have a type or brand of mat board that you recommend?
I use a pH neutral, archival mat from local art or framing stores. They’re all pretty much the same, as long as they’re the archival ones. I like Canson for Bristol board and the like, but when it comes to mat board, I usually get whatever brand the store carries.
Really informative and helpful! As a beginner, I found this great.
Thank you