


Well, here we are, December 13, behind schedule, but catching up! It was a recuperative weekend, but I’ll tell you what – the old rusty-not-trusty laptop from home just doesn’t cut it. I knew I should have kept up my North Pole connections!
Today, we’re going to finish up the Christmas Tree Ornament series, and I’ll also announce the give-away winners for this beautiful silk ribbon give-away from Di van Niekerk.
Without further ado – because it’s going to be a long one! – let’s go!
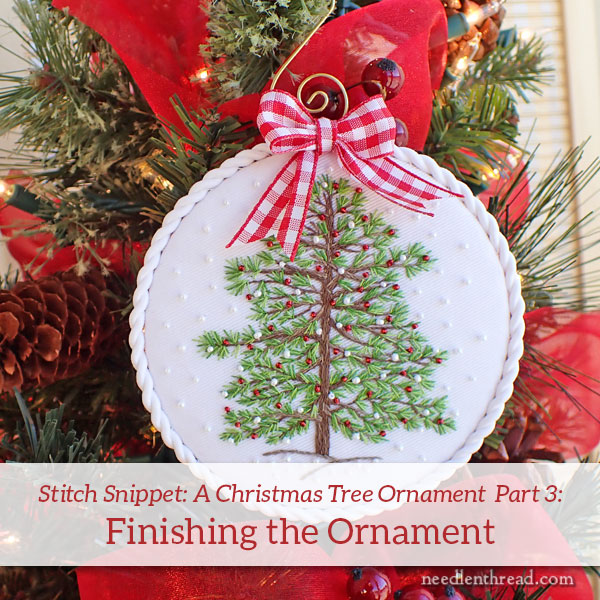
Last time we met on the ornament, we prepared the front of the ornament for assembly. I also showed you how to make a pretty little bow here.
Now, with all your pieces ready to assemble, we’ll put the whole thing together.
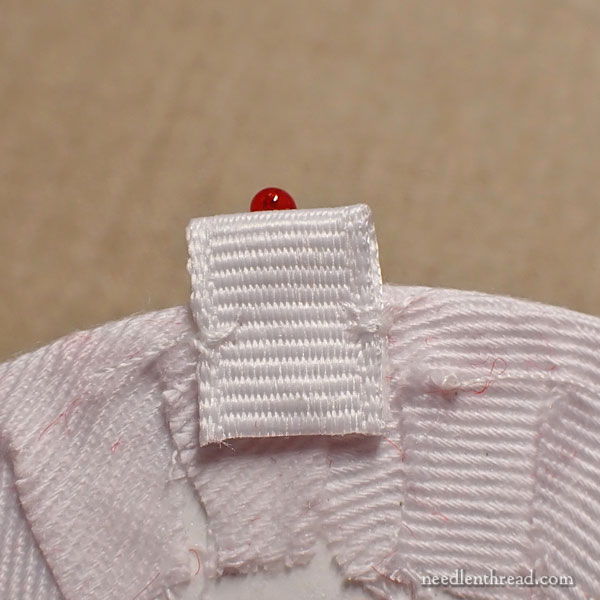
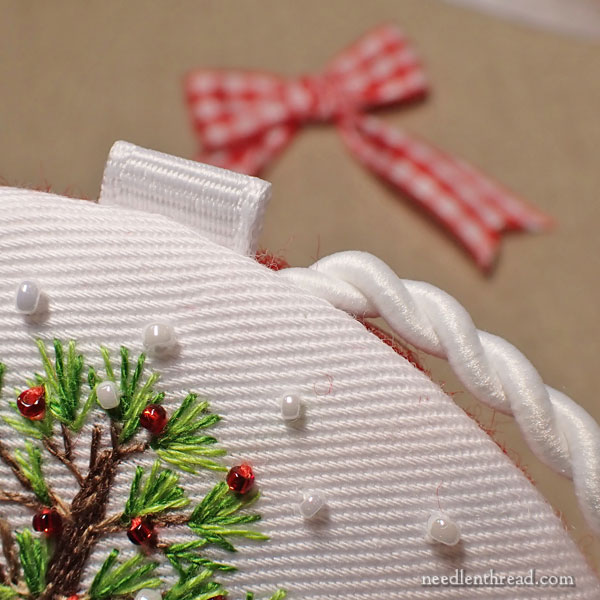
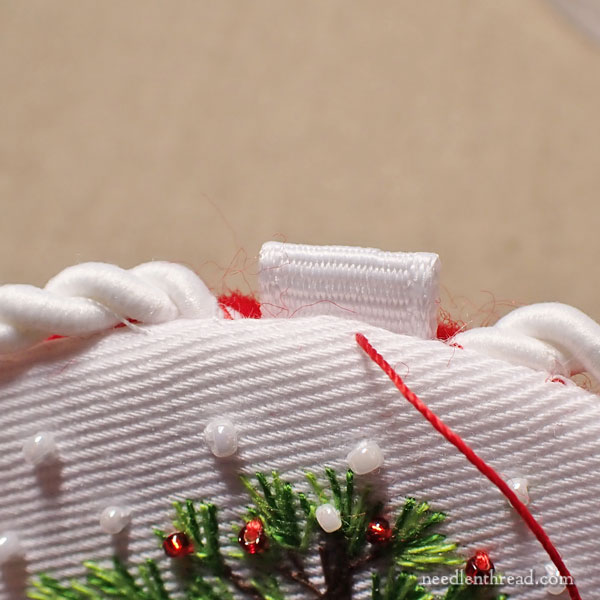
Start by sewing on the hang tag. This is the folded piece of grosgrain ribbon.
Looking at the front of the ornament, insert a pin in the top of the ornament, centered. This will or should be situated above the tip of the tree. This marks the center so you can see it from the back while you’re working.
Center the folded grosgrain ribbon piece on the back of the ornament piece, using the pin as a guide for the center.
Using white sewing thread, tack the two sides of the grosgrain piece to the back of the ornament, with a few small stitches through the edge of the grosgrain and the fabric on the back of the ornament board.
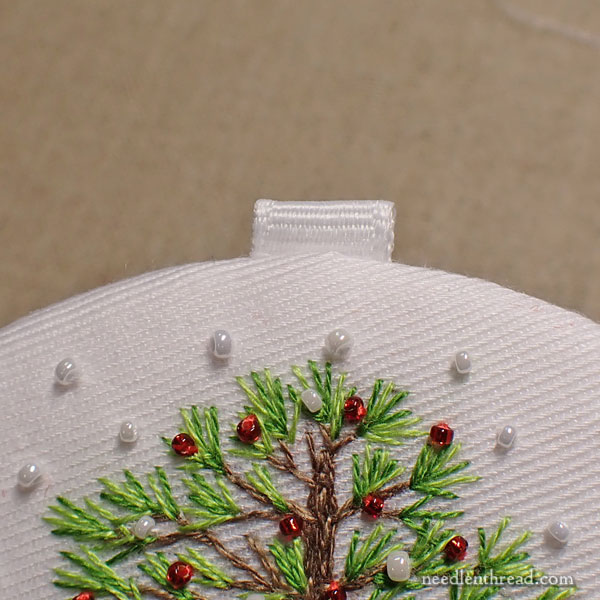
About half the grosgrain piece should extend above the edge of the ornament – it’ll be about 1/4″ showing up above the edge of the ornament.

Switch to red sewing thread.
Sandwich the second round of low-loft batting behind the round of wool felt and situate both up against the back of the ornament. If you need to trim away some batting, do that now. It should not show past the wool felt.
Leave about 1″ on each side of the grosgrain ribbon open on both sides, so begin stitching the wool felt to the back of the ornament about 1″ away from either side of the grosgrain.
In the photo above, the space is not 1″ – I stitched mine much closer, and regretted not having a little more room for the rest of the finishing. So don’t do what I did!
You can use a knot in the red thread. Bring the thread out on the very edge of the ornament, after catching the knot well inside the edge where it won’t be seen.
Pass over the outside edge of the felt, and back into the inside top edge of the white fabric as shown in the photo above.
Scoop up a tiny bit of the white fabric to move forward – about 3/16″ – 1/4″.
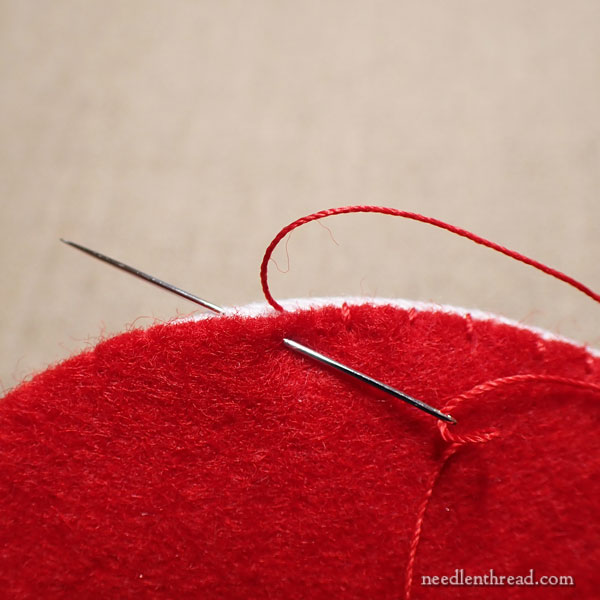
Pass back over the edge of the felt and into it, to make a vertical stitch that runs perpendicular to the edge of the felt. Go into the felt at least 1/8″ from the edge. Whatever length you make these stitches, keep them consistent.
Pass through the felt and into the white, go forward a stitch, and continue working in this method all around the ornament to secure the felt.
When you finish, work a few holding stitches inside the edge of the ornament where they will be covered by the felt.
You can then pass the needle out through the wool felt anywhere, and trim the thread close so that it sinks into the felt.
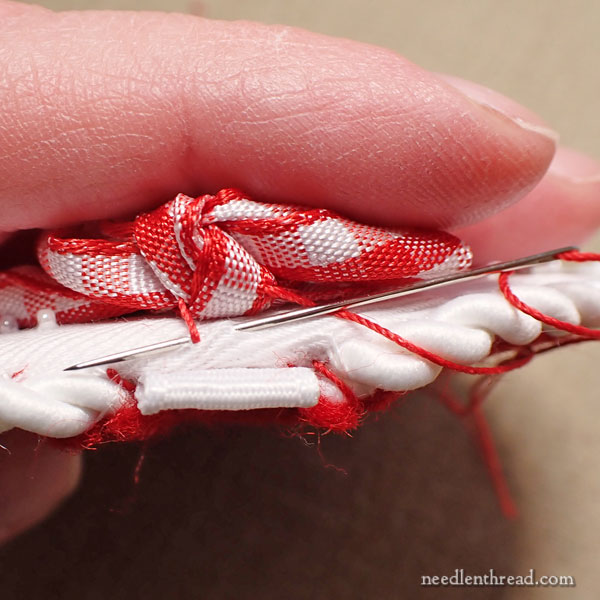
Switch to white sewing thread.
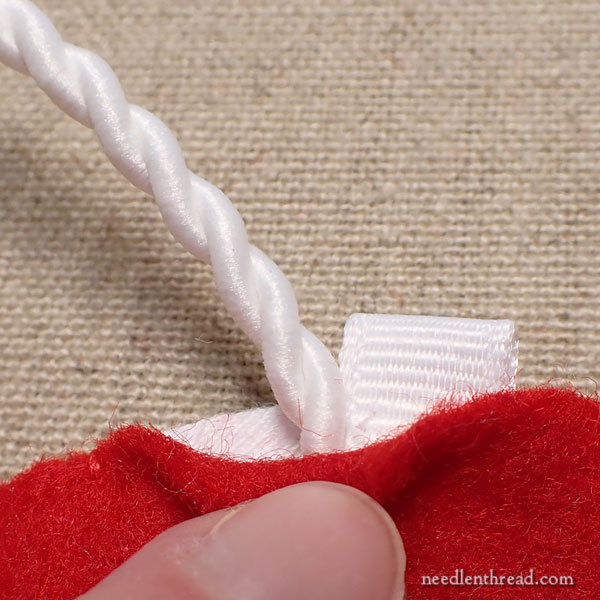
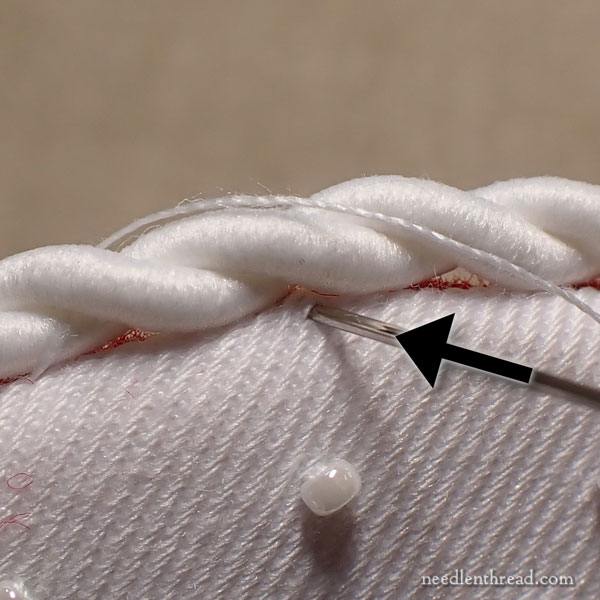
Take your twist. If you can, flatten the end a bit. You can keep a bit of tape around this end, and just try to work the end as flat as possible.
Tuck about 1/2″ into the ornament next to the grosgrain ribbon.
Start your white thread with a knot, in the fabric on the back of the ornament.
It may not always be easy to get through this fabric, because of the glue – just work the needle and thread into a place that will receive it, as best as possible. It sometimes takes a little working.
You want to pass the needle and thread in the fabric behind the twist, so that you can oversew the twist onto the fabric, as shown above.
It’s really important to secure the twist here inside the edge. Whip over the twist a number of times, pulling firmly, and picking up a little bit of background fabric each time.
If you want, you can even pass through the twist a couple times, piercing it with your needle and thread. But be careful! Once you’ve done this, it’s difficult to make any corrections, so you want to make sure that you’re absolutely certain about the placement of the twist and it’s security on the fabric!
When you turn the piece around the twist should be coming out of the ornament right near the grosgrain.
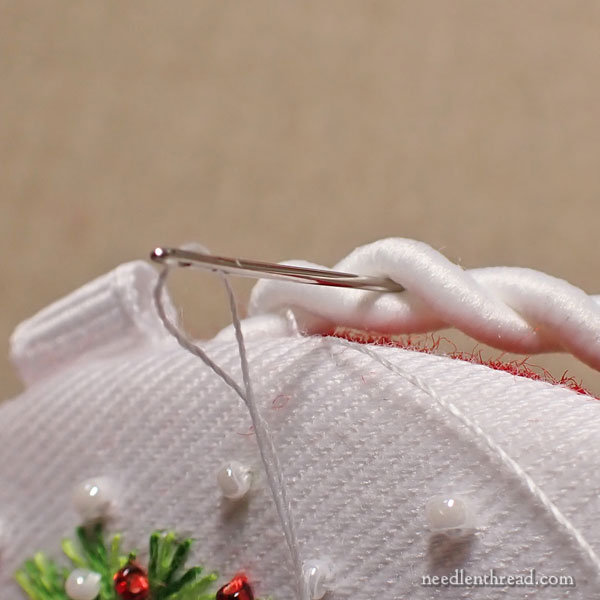
You want this initial part of the twist sewn securely to the edge of the ornament, so bring the needle and thread out at the top edge of the white, and pass through the twist to take a couple securing stitches that will hold the twist in place.
These stitches won’t be visible at the end, because the bow will cover this area of the ornament.
Whenever you pass through the ornament fabric, it should be on the top edge of the white. Avoid passing through the felt!
Once you get the first bit of twist secured to the edge, the rest will be easy.
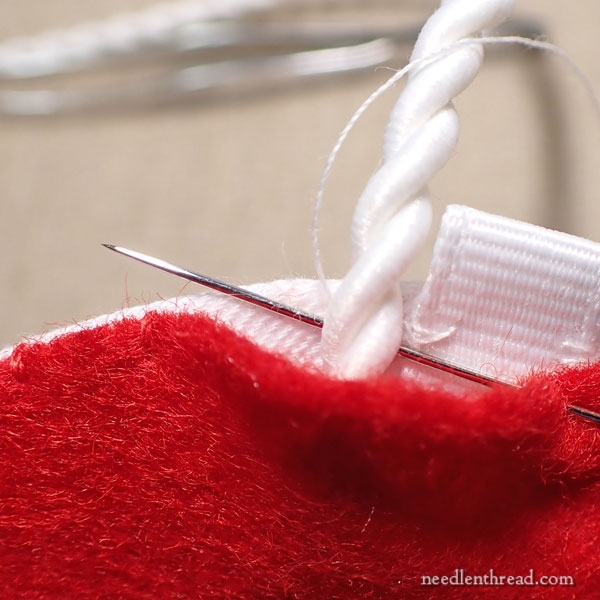
Begin with your needle in the configuration above – you want the thread coming off the back of the top edge, and you’ll be stitching over the twist and into the top edge towards the back with each subsequent stitch around the twist.
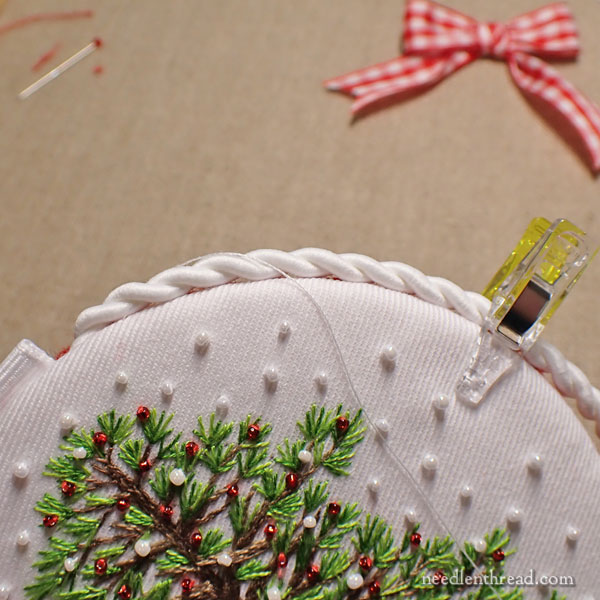
At this point, it will help if you clip your twist onto the ornament edge about a quarter way around the ornament, so that the twist is held securely while you stitch it on.
Pass your needle and thread over the twist and into the front edge of the ornament, emerging on the back edge of the ornament, as shown in the photo above.
You want your white thread to follow the line of the twist, so that it sinks into that line.
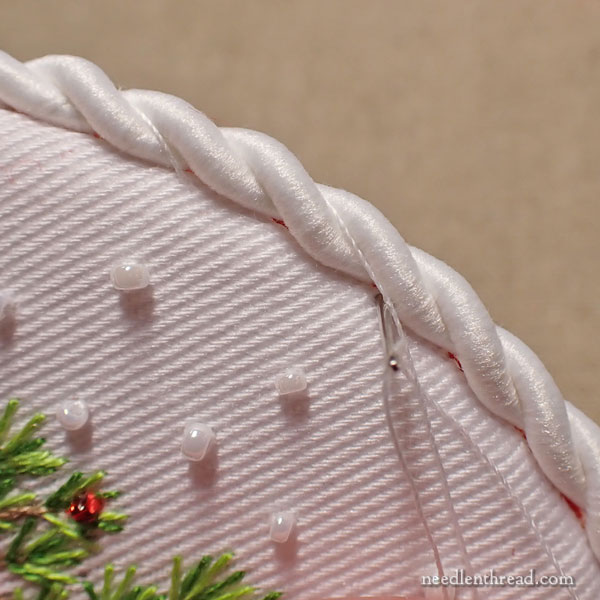
Keep a long-ish angle on the stitches that pass over the twist, so that they fall into the “valley” between the two plies on the twist.
If you gently roll the twist forward a little with your fingers, it will slightly open and the thread will hide itself inside the twist a little bit.
You don’t have to sew over every twist in the thread. Sew over every couple twists, all the way around, moving the clip forward as you get near it.
The thread won’t show. You can see it in these photos mainly because the photos are so close up.
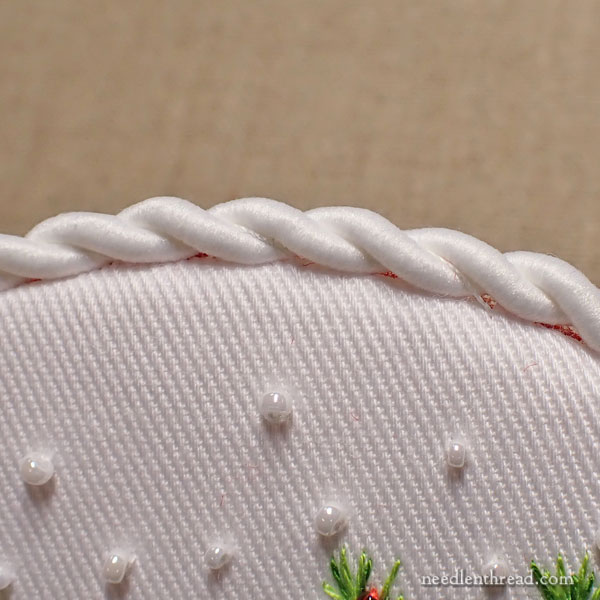
When you get to the other side of the grosgrain, you’ll tuck the end in. If you need to trim it, do so, but keep a piece of tape on the end. Try to work the end so that it is as flat as possible.
Over-sew the cord to the back of the white fabric again, making it as secure as possible. Knot the thread off and cut it.
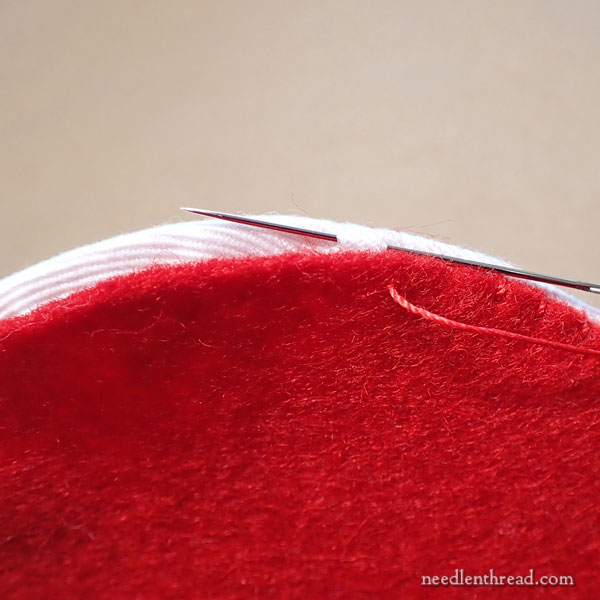
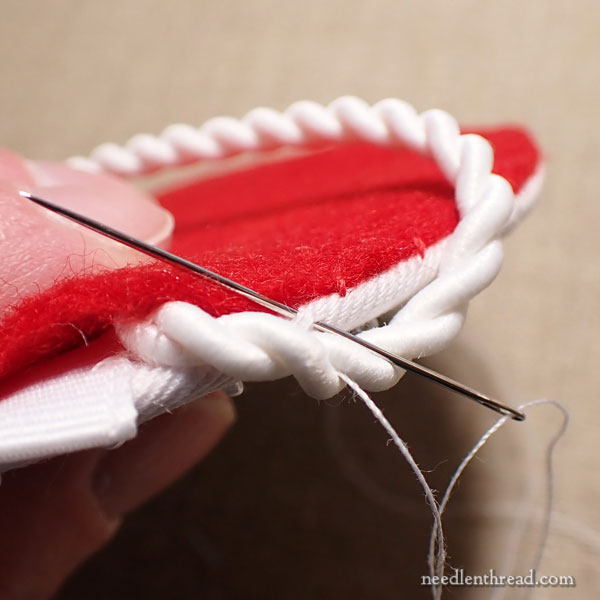
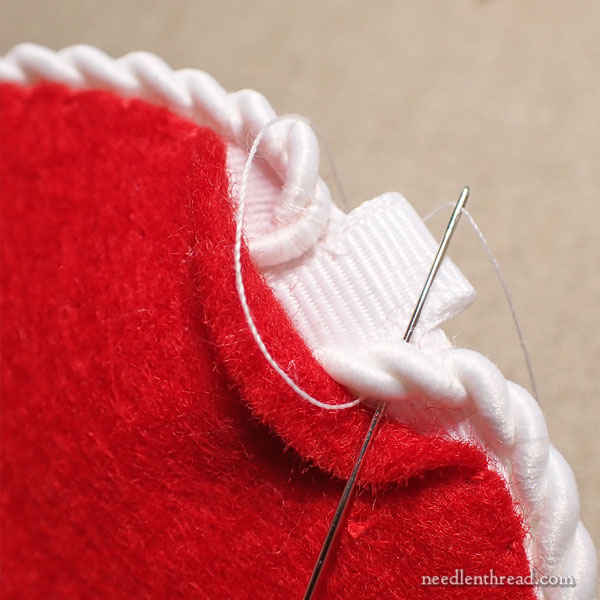
Switch to red sewing thread to finish stitching the felt in place.
When you get to the middle of the grosgrain on the back, pass through to the front of the ornament, right in the center top.
Secure the bow to the front at this point, passing through the back of the knot on the bow a number of times to secure it.
Then pass to the back to finish off the felt closure.
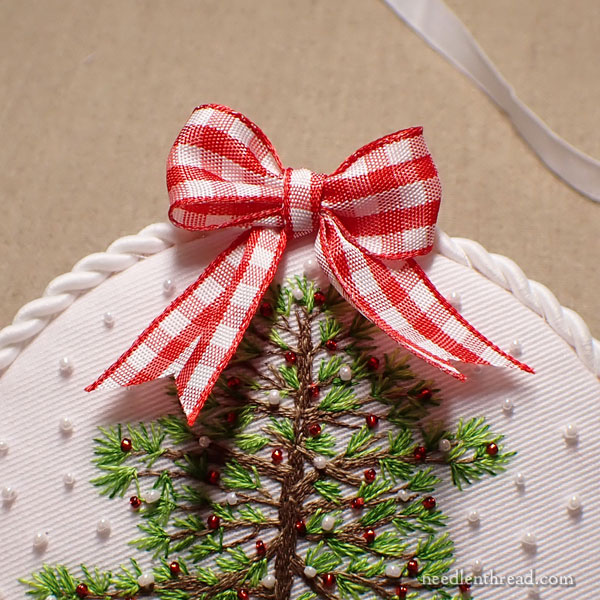
The bow should cover the grosgrain more or less, and it will also cover the edges of the grosgrain where the twist begins.
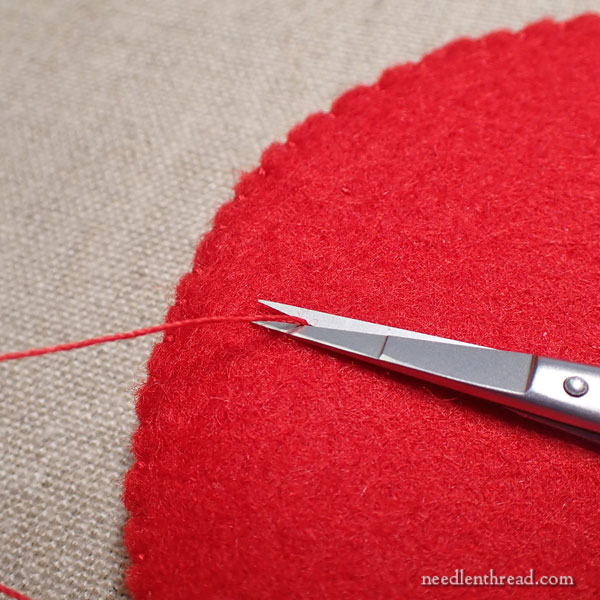
Finish off the red thread on the back by taking tiny tacking stitches inside the edge of the white, hidden by the wool felt, and then snip the red thread.
You are finished!
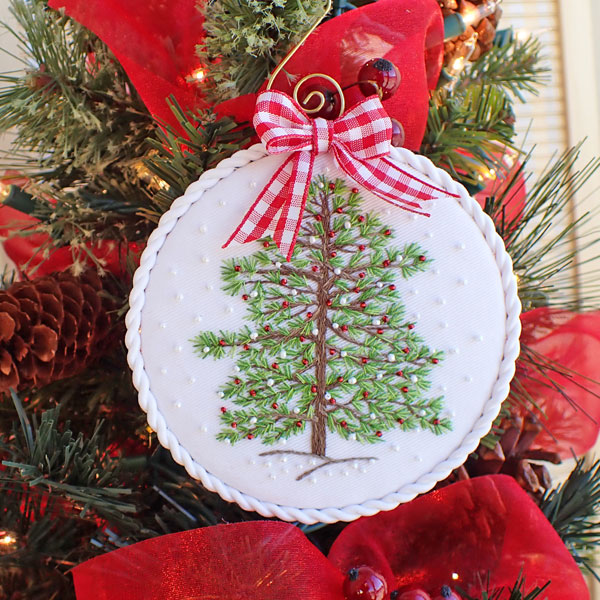
Thread a pretty little hanger through the grosgrain loop, and you’r ornament is ready to display!
I hope you enjoyed this Stitch Snippet! I’ll be putting all of the installments together into one index tomorrow, and you’ll be able to find the index under Tips & Techniques in the main menu here on Needle ‘n Thread.
Silk Ribbon Give-Away Winners!
And here are the winners for the silk ribbon give-away!
For package #1 (three bundles of silk): Wanda Barnett, who answered the question about favorite holiday treats:
How to narrow all the delicious holiday goodies down to just one favorite? There are so many: Christmas cookie cutouts – the soft ones with cream cheese frosting and sprinkles, pumpkin roll, Bacardi rum cake, peanut butter fudge, my Aunt Wilma’s fig-filled cookies. But ok, if I have to choose one, it has to be my white chocolate pecan cheesecake topped with brandied fruit and a dollop of real whipped cream. Now you’ve got me thinking about it, I don’t know how I will be able to wait for Christmas.
And for package 2 (the silk thread bundle and book), Melanie Murphy, who answered:
f I could have only one edible treat during the Christmas season, it would be
ribbon candy! I used to live on the East Coast and ribbon candy was readily
available. When we moved to California, nobody had ribbon candy ! My mom
started a tradition of sending us several boxes of ribbon candy every year at
Christmas. Whenever I enjoy ribbon candy now, I have memories of New England,
my mom, and our first Christmases in a new place.
I’ll be in touch, ladies!
Thanks again to Di van Niekerk for the beautiful give-away. I hope everyone had as much fun as I did, reading all the answers for the give-away. It made me hungry!
Thank you for this – I’ve wanted to trim things using that type of trim but never was sure how to finish it off. ….and….congratulations to the lucky winners!
L’arbre de Noel est fantastique ! Les informations transmises sont excellentes.
Un Vrai Bijoux.
Merci Mary pour votre devouement. Passer d’Heureuses Fetes de fin d’Annee.
Micheline la Quebecoise.
Christmas greetings! I want to THANK YOU, Mary and staff, for the year of Stitch Snippets. Your instructions are excellent and I always learn new cool tricks from you. I am so looking forward to your 2023 Snippets!!