


Worked into the daily schedule here at the studio, I’m packing in as much time as possible on goldwork.
Anna is soldiering on preparing thread packs and kits while I tackle chip work on this goldwork project at the head-reeling pace of … mmmmm …. let’s call it sloth-slow.
Or so it seems to me.
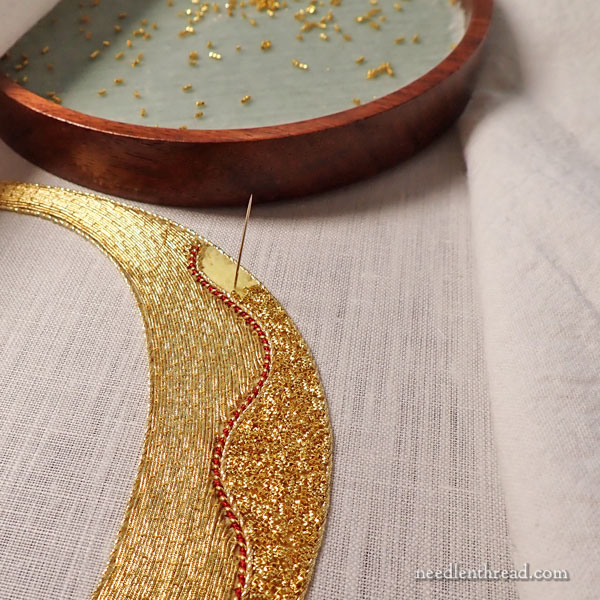
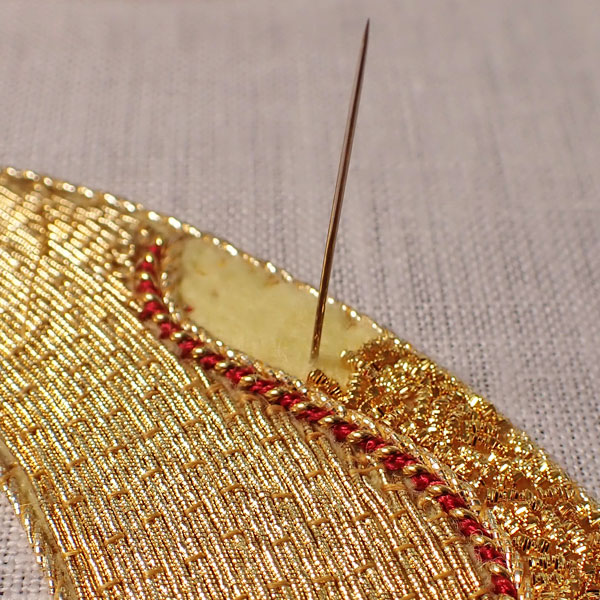
See that little small space of yellow felt, where the needle is sticking out? When I sat down to finish that up, in my mind it was a five-minute job.
In reality, it was more like 35 minutes.
First, I had to cut the chips. I was out of those little specks of gold when I previously stopped stitching at that point. If I had been smart – which is not the most common occurrence around here – I would have cut chips when I stopped at the end of that last work session. That way, when I had a chance to attack the chip work again, I’d be ready to go!
It’s the same concept as pre-threading needles. Or tidying up your work space when you finish a stitching session. It just makes getting started the next time that much faster.
But I didn’t. So I had to cut chips.
Tool Talk
Some of you have written and asked about the little trays I use when working on this project, like the one you can see in the photo above. These are velvet-lined wood trays from Jenny Adin-Christie – she offers these small ones and these large ones.
If I could have one of each size in every color, I would! They’re great for goldwork and for bead embroidery. They have a magnet on the back, so that they sit more securely on your frame. I don’t generally use them with the magnet while I’m working (because I pick up the tray frequently), but when I walk away from my work, before I cover it, I secure the tray with a magnet just in case the frame gets inadvertently bumped or something.
So that’s what those are, in case you’ve been wondering.
I’ve made my own goldwork trays using velvet, adhesive, and small, flat tins. You can read about that here. I found larger tins that are more shallow, too, and have made them out of those. There’s no need to add a magnet. If you want a magnet to secure the tin to your surface, just put one on the back of the fabric and the tin will be quite attracted to it. I like working with the tins because they have lids.
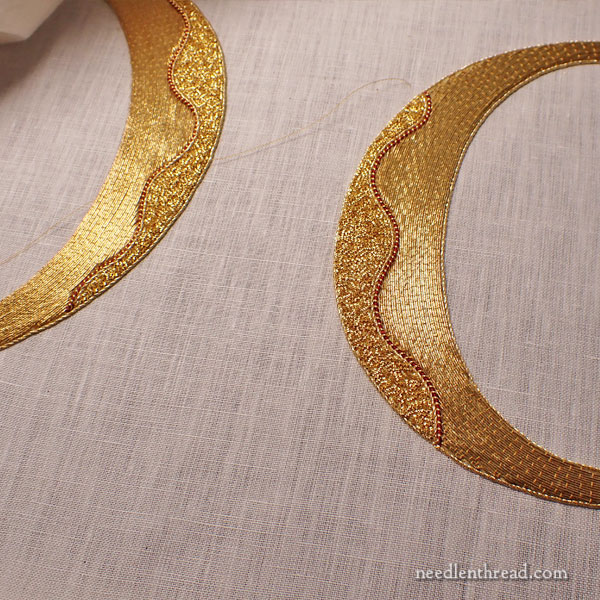
When I settle down to work on this type of chip work, I get ultra focused on the area I’m working in, to the point that it’s all that I see, and I see everything about it. I start to pick up little details of imperfections and flaws in the previous goldwork surrounding the area I’m working.
On any project, as you work on it and manipulate new threads into place and so forth, you start to nudge and move the previous work, so there are many spots where the couched passing thread has been prodded or poked or shoved out of the way.
There are also places where I’ve noticed uncovered felt.
Or threads that could have been this much closer together.
Small gaps and wiggles.
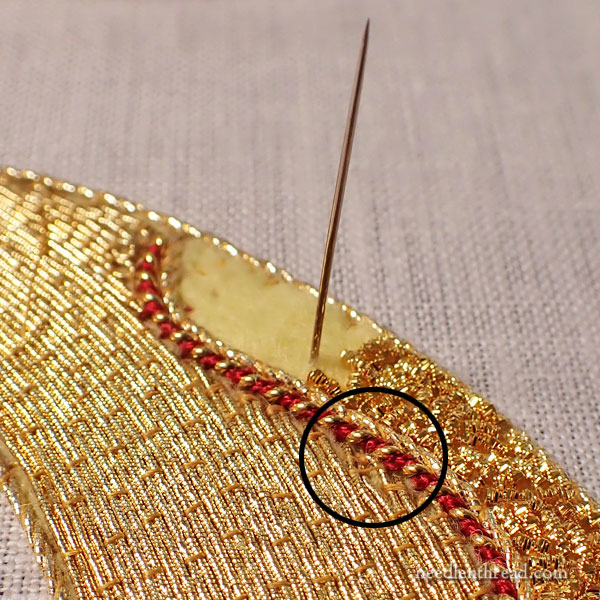
Little areas where the folds in the threads have separated or where they weren’t pulled and secured as closely together as they could have been.
The other day, I found myself getting obsessed with these little areas!
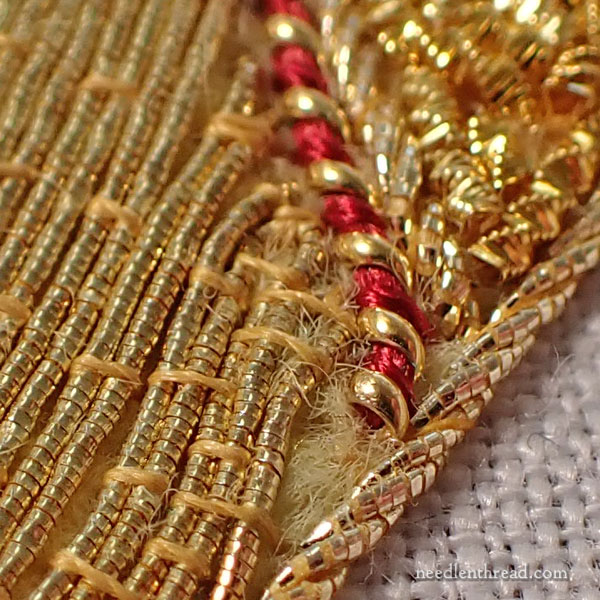
I saw this gap, for example. It yawned before me like a massive, cavernous void.
It bugged me the whole time I was filling in chips. I knew I would never be at peace until that gap was addressed!
I made a mental note to get out the passing thread and fix it as soon as I was finished chipping.
And then I looked away from the work to forage out the passing thread, and I turned back to it, and …
Gosh. Where was that spot, anyway?
It was hard to find! And, stepping back only a foot or two, all those little naked areas and wiggles and gaps just melted away. (This is one of the reasons yellow felt is used behind goldwork, by the way!)
Moral of the story: step back from your embroidery now and then! If you get micro-focused on the itty-bitty details, you might lose sight of the whole picture. Trying to correct the micro-details, you might lose a lot of time in the progress that actually matters.
The whole affair was rather like a Life Analogy, really. Don’t let the tiny imperfections hold you up! They’ll always be there, because nothing – and no one – is ever perfect.
On that note, I’m going to go delve into more chip work. The ultimate deadline for this project is 64 days away.
The Rest of the Story
If you want to read the back story on this project and see what it’s all about, you can find the project index for it here.
This afternoon, if all goes as planned, a shipment of little parts for kits should be arriving! Hurray! So the rest of this week, we’ll be kitting and finishing and writing and photographing, and maybe (you never know) trying out some video – all the while, squeezing in goldwork along the way.
I love a busy week! I hope yours is fabulous!

Mary, your gold work is absolutely stunning! Personally, it would take me years to notice anything that got wiggled out of position! You both are doing an amazing piece of art and can’t wait to see it completed.
🙂 Thanks, Lynn!
I remember being upset over an “error” in a piece I was working on (not uncommon with my eyesight) and intended to rip it out next work session. The next day, not only was the “error” not bad, but looked like inspiration in the overall look of the piece! I guess the funny saying is right, ” If you can’t see the mistake from five feet away as you run past – don’t worry about it!”
I try not to end a sewing session leaving the machine with an empty bobbin.
I remember another project where you were not happy while working on it. However when you walked in the room the next day and saw it from a distance, your worries dissipated.
This is so beautiful.
Thank you for sharing your bits of wisdom and experience with us.