


Sometimes, certain embroidery questions pop up with more frequency in my inbox than others do. Lately, I’ve had a few questions about the bullion knot.
Several readers have expressed some frustration over the stitch, and after a recent exchange with a very determined beginner, I decided to write about it here, in case others are facing similar frustrations.
I’m here to tell you today that you don’t have to use bullion knots! The bullion stitch is a lovely stitch, but if you’re a beginner and the stitch is putting you completely off embroidery, don’t use it! Substitute other stitches, and as your confidence grows, tackle the bullion later (if you want).
This very determined beginner told me quite bluntly, I’m boycotting the bullion stitch forever. I hate it! Can you suggest other stitches I can use on [the name of a project by a specific designer – she also attached a picture] in place of bullion stitches? Sincerely, Bummed by Bullions
Since my first advice in situations like this – to contact the designer – yielded no results, I felt ok about helping her tweak the design.
There are loads of embroidery stitches that you can use in place of the bullion knot. Some are textured. Some are… knot.
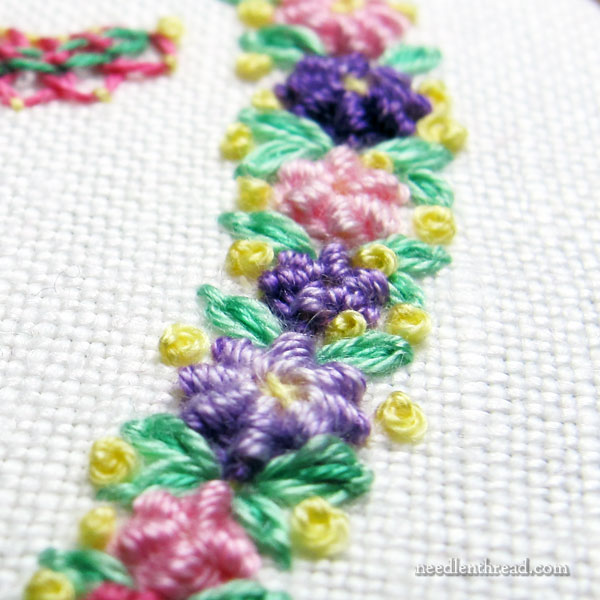
When texture is desired, as far as simple stitches go, my favorite recommendation for beginners is the ribbed stitch – ribbed stitch wheels, if you’re constructing flowers.
This stitch is a two-part stitch. You begin with a foundation of any number of spokes, and then, passing around the circle of spokes, you wrap them using (more or less) a backstitch technique.
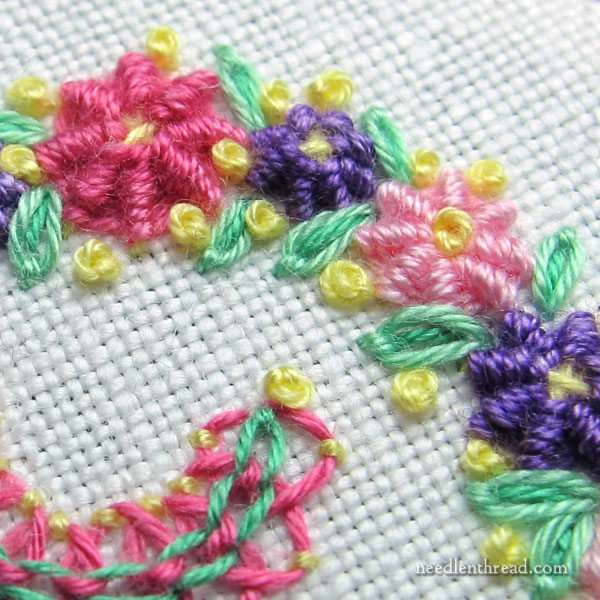
Since Bummed was comfortable with daisy stitch flowers, and since her design focused on a floral cluster that had a more natural look to it, I suggested a mix of daisy stitch flowers, straight stitch flowers, and ribbed stitch flowers, so that all the floral elements didn’t look quite the same. The variation would lend a little more life and a little less “structure” to the bunch of flowers. (A whole bunch of ribbed stitch wheels would look somewhat stilted, but mixed with other stitches, they add texture and are simple to stitch.)
In such cases where you’re clustering a lot elements together, start with the elements that will take your needle the most room to stitch – in this case, the ribbed stitch flowers – and then stitch everything else around those. That way, you’re not snagging other stitches in the process.

Another stitch that works well, but that is slightly more labor intensive than even the bullion is the cast-on stitch. It makes great textured florals!
Even though it is more work than a bullion, some stitchers have greater success with cast on stitch than they do with bullion knots. I think this is because you have more control over the cast-on wraps than you do with the basic wraps of the bullion.
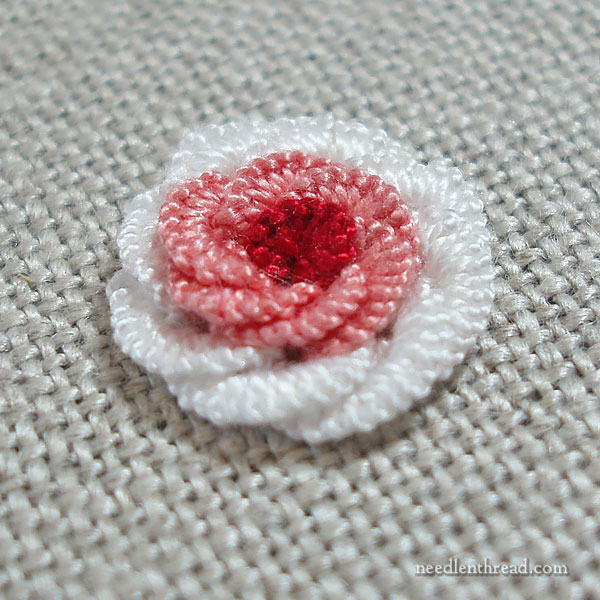
If you want to make roses with the cast-on stitch, you can make beautiful ones!
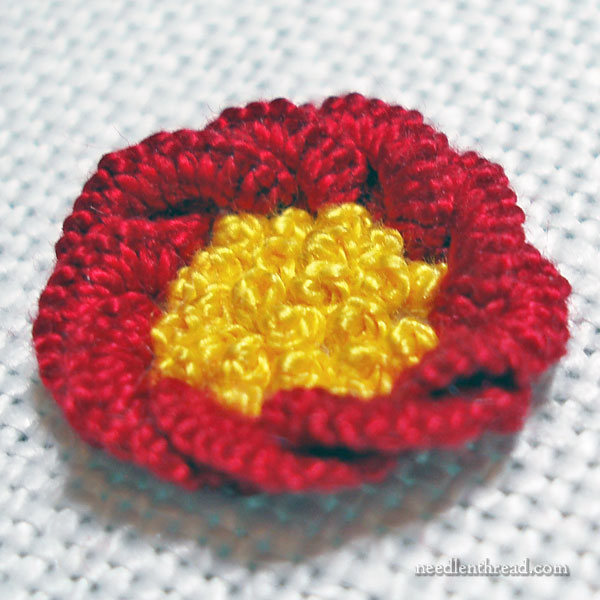
And you can make simpler flowers with overlapping petals, too.
And you can go even simpler, with cast-on loops to make single bud-like, small flowers.
There are lots of options with the cast-on stitch! If you want to learn this stitch, you can find my video for it here. I also offer a Cast-on and Double Cast-On Stitch downloadable tutorial that you can find here, which takes you step-by-step through creating all three of the flowers above with the cast-on stitch. By the time you work through that printable, you’ll be a pro at this stitch!
Other Textured Stitches
The two stitches above lend themselves well to floral elements (and other embroidered elements), but there are loads of other textured stitches available in the embroidery world.
This article offers sixteen stitches to add dimension and texture to embroidery. While they might not all work for floral elements, you can always play around with them to see what they can do. Most are quite simple!
I hope that Bummed by Bullions is well on her way to completing her first ever needlework project. She chose a rather advanced project to jump into embroidery with, but I think she’ll do great because she’s determined – and because she’s willing to seek out other options for the areas that trouble her.
That’s an approach that will guarantee her success!
I, too, loathed bullion knots, especially in wool, until my tutor showed me the error of my ways. I always wanted to keep the loops orderly so I didn’t have a big mess at the end, and so I would tighten up the knot too early. You have to keep it loose and gradually coax all the loops down the main thread. When you’re very close to the fabric, that’s the time to use your needle or a laying tool to arrange all the loops and tighten up the knot. Then you can lay down a nice little caterpillar and go on to the next one!
Yep, great advice!
Bom dia Mary,
Adorei seus comentários! Maravilhosos!!!
Vou testar todos esses pontos texturizados!!!
Obrigada e um abraço do Rio de Janeiro, Brasil
Well, I’m sorry to hear that the aforementioned embroiderer is boycotting the bullion knot. Perhaps if she had tried using rayon threads, she may have had more success. Brazilian dimensional embroidery is my hobby of choice, and it is chock full of bullion knots and cast-ons knots, among so many other stitches. Yes, they take patience, but the resulting effect, especially with the vibrant rayon threads, are oh, so worth it!
I have found over the years that wrapping the thread around in a clockwise direction with a z twist threads and anti clockwise when using s twisted threads maintains their twist resulting a nice looking bullion with less tendency to knot up. Of course using a straw needle or other small eyed needle is essential.
This article is great. I’ve tried the bullion stitch and I couldn’t get to work even s little. I’ve bypassed patterns with it because they had bullion stitches. Thank you so much for giving us so many great substitutes.
I really like the whipped stem stitch (might be called something different) to simulate/replace bullions. I use it whenever a project calls for an exceptionally long, unwieldy bullion. I think Mary used it in the Agnus Dei project (she called it stem stitch filling) for the lamb wool. I have used it for shorter bullions too, though it has a tighter appearance than true bullions and it is difficult to work closely together without using a curved tapestry needle.
Yes! It’s great for “cheater” bullions – although they aren’t really cheating. It’s a different stitch, but it produces similar results and it looks just as good in my opinion! I’ll be talking about that shortly…
Thank you for the great article and your usual witty word play. I enjoy each and every entry you do.
Aw, thanks, Laura! 🙂
Your flowers are so lovely!!
🙂 Thanks, Melita!
I actually feel that way about split stitch. I keep trying, but it never seems to look good.
I am so glad I found your blog again. The first time I read one of your blog posts it was somewhere around 2013 and I had a blog called Sarah Beth’s Cross Stitch. You were stitching that gorgeous hummingbird pair from the adult coloring book The Secret Garden by Johanna Basford. Later on my blog got hacked and I was never able to recover it again which unfortunately I didn’t. I fell in love with the adult coloring books because of that post as well. Thank you. I love needlework and coloring as well.