


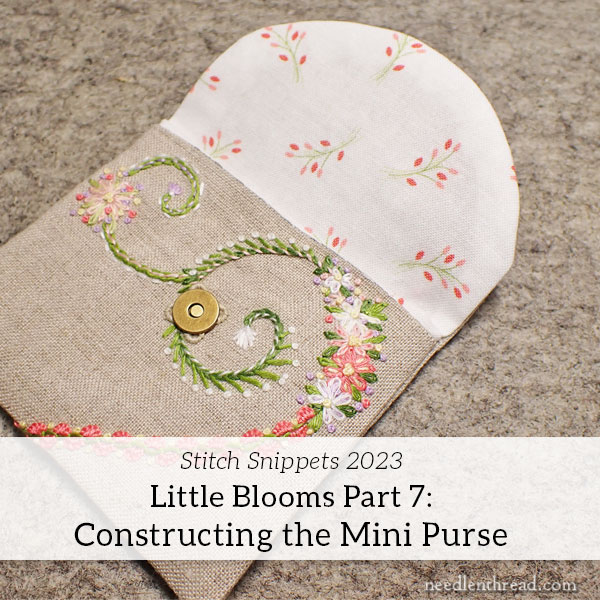
Finally, today, we construct the Little Blooms mini snap purse!
Today’s article is rather lengthy because we need to cover the whole construction process so you can finish it in one work session. I can’t fit the finishing touches into this article, though, so next week, we will cover the final bits – adding the hand embroidered trim on the outside edge of the flap and sewing the other half of the snap in place. (I have an easy method for that!)
If you are a member on Patreon, today you will have the final PDF for the project and it will take you through all the construction as well as the finishing touches.
And – Big News! – if you have been patiently awaiting a materials kit for Little Blooms, at long last, we have some available now!
Let’s get on with the construction!
Gather your construction supplies: the finished embroidery that you’ve basted around and damp stretched and blocked (we covered these steps in the previous installment); scissors for cutting fabric; white sewing thread; natural sewing thread (optional); needle; and a stick of some sort with a blunt end – like a chopstick or something similar – to help with turning.
You’ll also want access to an iron and you’ll need a pressing cloth. (I use a folded flour sack towel to cover the ironing surface and between the item and the iron.)
Remember to read through all the instructions carefully before you begin. You might even want to read through them several times, to make sure you understand the process and so that you know what’s coming up as the next step as you work through this.
You can click on the diagram below for a larger version.
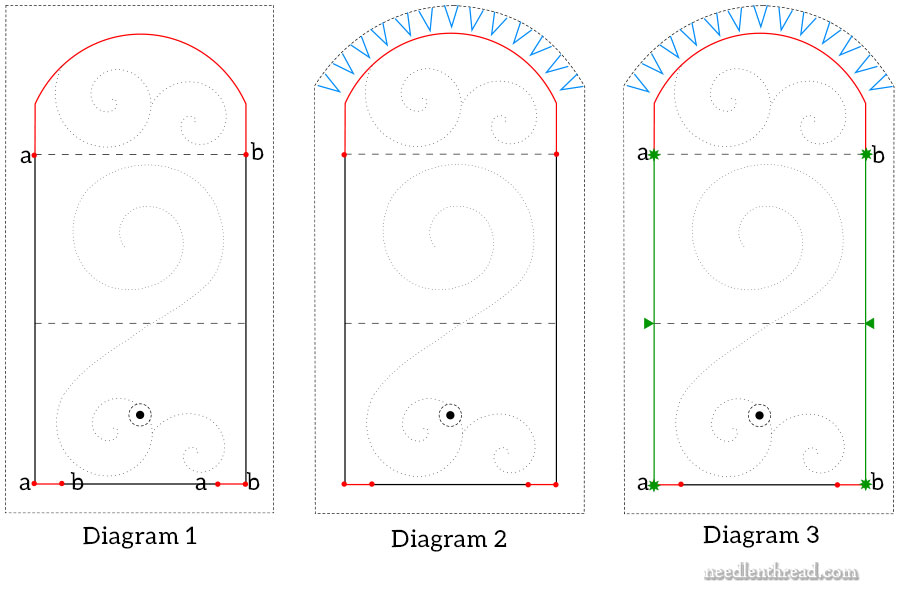
Refer to the diagram above for the following steps. I will also include some step-by-step photos below.
1. Place your lining fabric (that’s the cotton with the little buds on it, if you’re working from the kit) face up on your work surface. Place your embroidered linen face down on the lining fabric, so that they are both long-ways in front of you. Right sides are now together. Make sure that the grain on both fabrics is aligned. Pin the fabrics together. You should be able to see the basted line around the perimeter of the design area on the linen. This is your seam line, and you will use that basted line as your sewing guide.
2. Refer to Diagram 1 and look at the red lines.
Sew the flap, from “a” to “b.” You can sew this by hand using sewing thread and a backstitch.
Start your thread with a knot and three backstitches on top of each other, and then work even, relatively small (1/8″ or slightly smaller) backstitches along the basting line. End at “b” with three backstitches on top of each other and a knot.
You can also sew by machine if you have a machine, following the normal sewing procedures on a machine.
Sew the small lines from “a” to “b” at the bottom of the design. These should be no more than about 3/4″ long. Follow the same sewing procedures.
The gap between “b” and “a” in the middle of that bottom line is your turning gap. Don’t sew it!
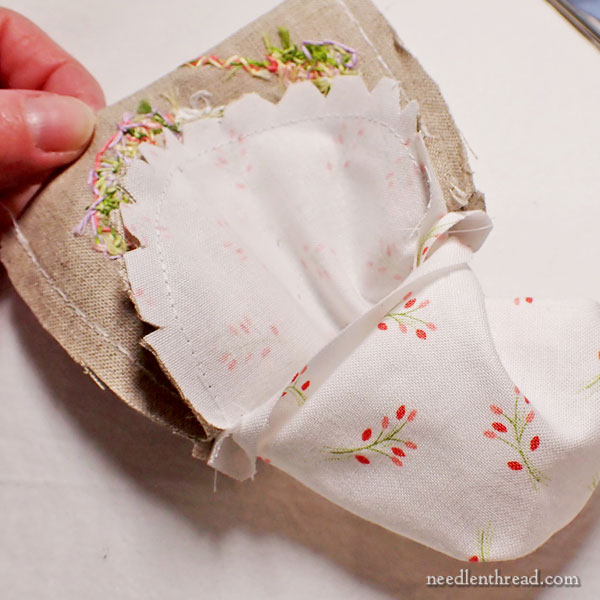
3. Refer to Diagram 2. Cut the excess fabric, following the dashed line that’s about 3/8″ outside the seam line. Cut both the linen and the cotton lining.

Then cut “V” notches along the curved flap area, ending the notch no closer than 1/8″ from the sewn seam line. It’s important to stay away from that sewing line! Obviously the notches don’t have to be exactly beautiful.
4. Refer to Diagram 3. Pull the linen and the cotton lining away from each other in the area marked with green. Fold them both approximately where the arrow is. The stars at “a” and “b” mark the spots where your sewing began. Pinch “a” to “a” and “b” to “b” on both the linen and the lining.
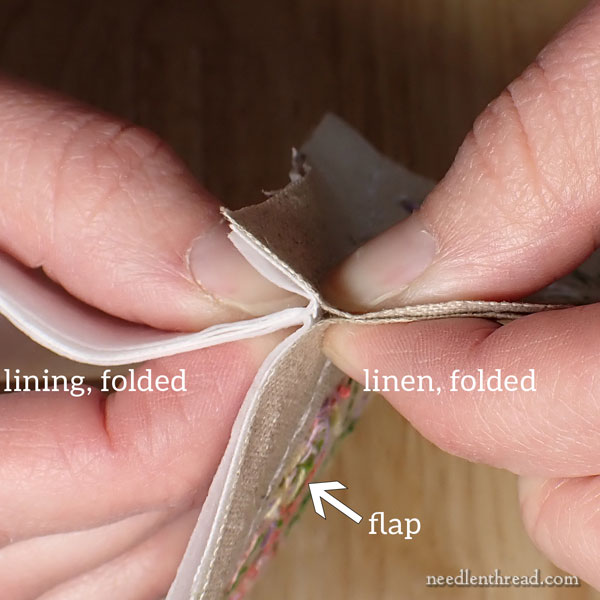
You will end up with what looks like a plus sign in your fabric. Pin “a” to “a” and “b” to “b”, creating a tight intersection there.
You have just formed the linen pocket of the purse on one side of the intersection and the lining pocket of the purse on the other side of the intersection.
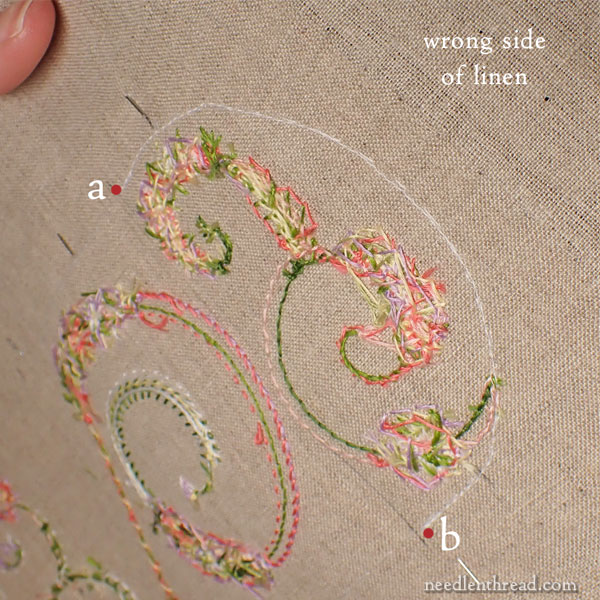
You don’t have a seam guide on the lining side yet. So let’s extend the seam guide onto the lining.
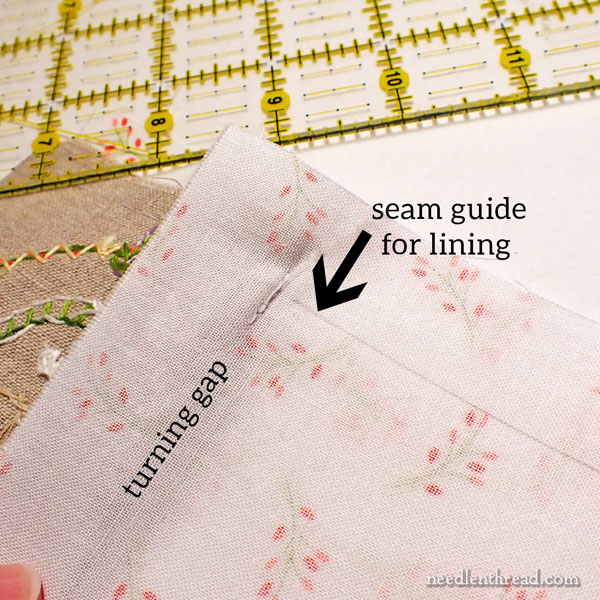
Lay out the piece on the table, so that the folded linen and the folded lining are lying flat. Use a ruler and a pencil to extend the seam lines from the linen side (lining the ruler up with the basting line) to the lining side, drawing seam guides onto the lining with a pencil.
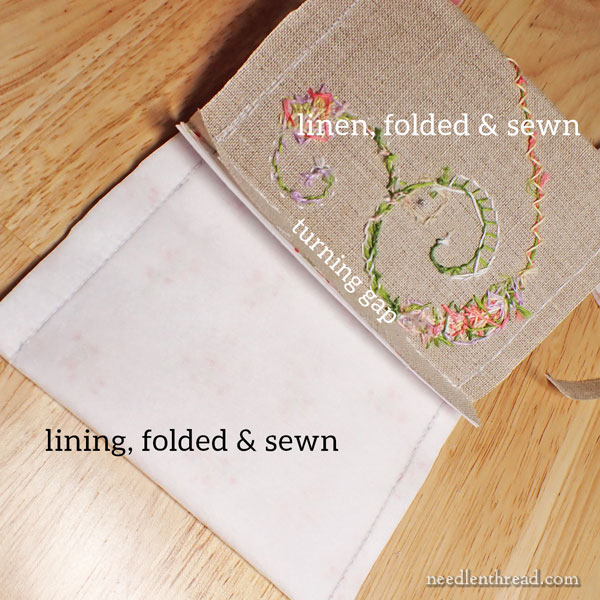
Sew the linen seams from the folded line into the intersection, ending at the point where “a” meets “a” and “b” meets “b” – this is sewing up each side of the pocket.
Now sew up the lining from the fold into the intersection where “a” and “a” meet and “b” and “b” meet.
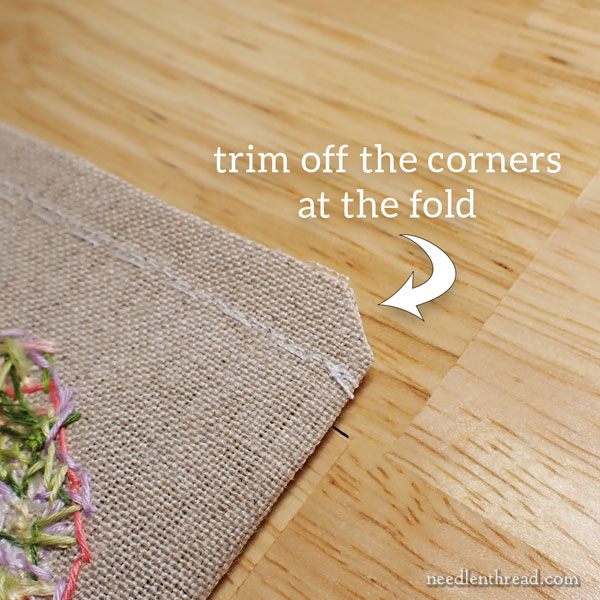
Trim the corners outside the seam, at the folded base of the pockets (on both the linen and the lining). Just cut a diagonal bit off the corners, about 1/8″ away from where the sewn seam is.
Now you’re ready to turn everything through the turning gap.
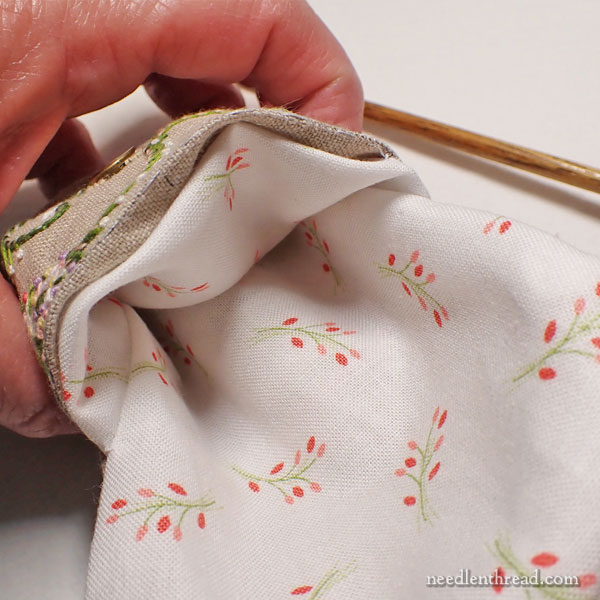
You’ll turn everything inside out! Use the stick to help you push corners all the way out. The flap should turn right sides out – embroidery out, with lining right side out behind the embroidery.
The embroidered pocket should be right side out, and the cotton lining should be right side out, directly opposite the embroidered pocket.
Make sure you’ve used the stick to push out your corners. If they aren’t coming all the way out, use a pin to help pick them out. You want them nice and square.
Everything will be rather messy, thanks to the turning process. Spray the whole thing with a light mist of water, and then iron it between pressing cloths.
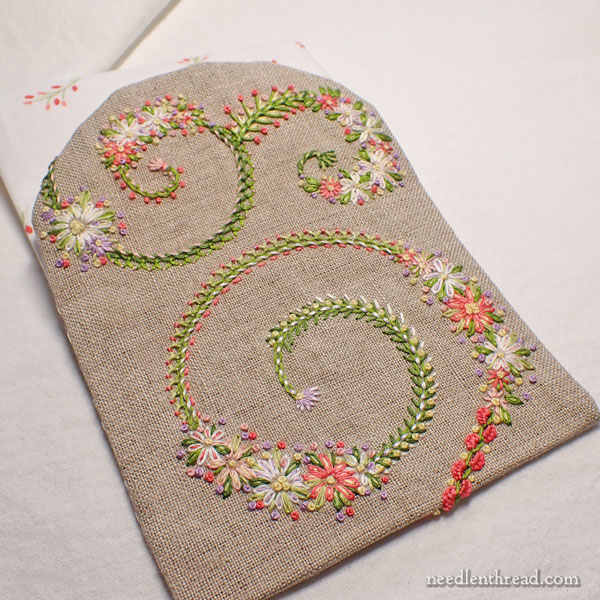
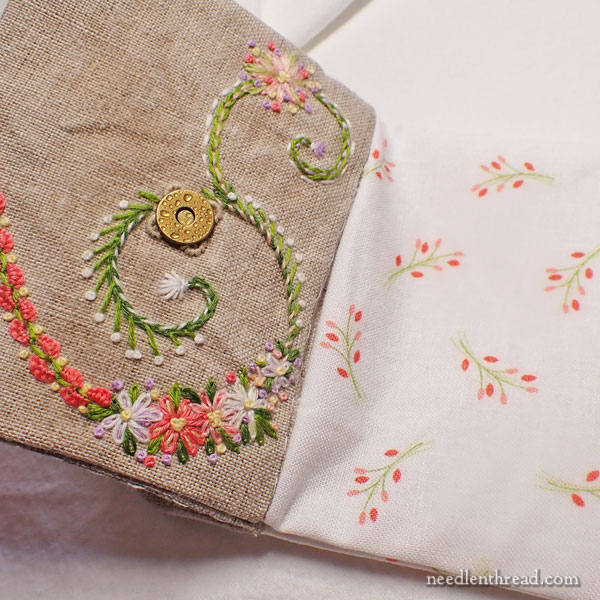
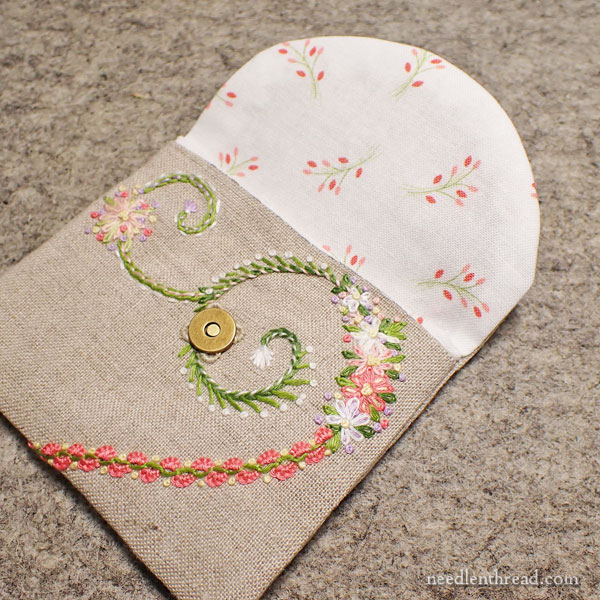
Here’s the ironed piece.
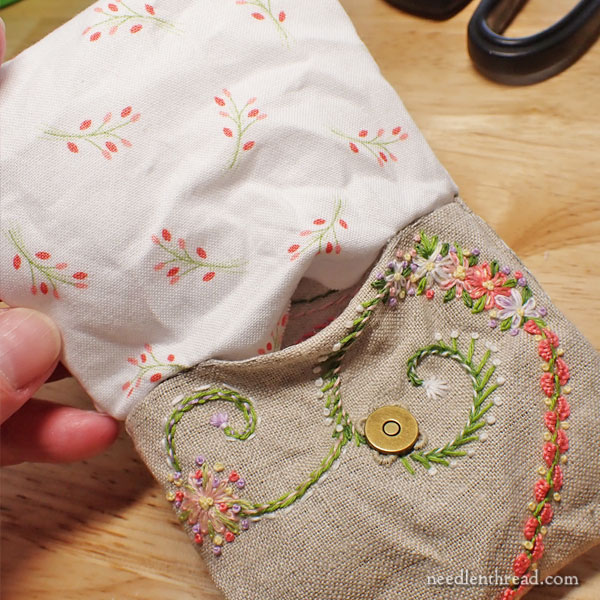
Now push the lining into the linen pocket, and use the stick to situate it.
Finger press the turned fabric at the seam, where the turning gap is on the front of the pocket under the flap.
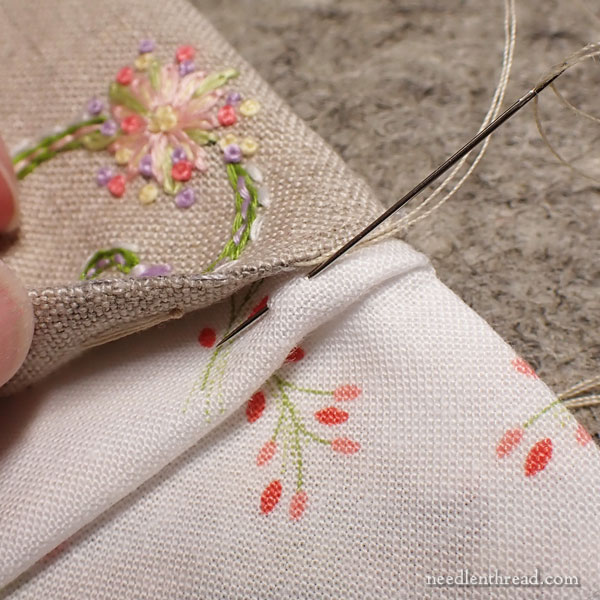
Sew up the turning gap using a blind “ladder” stitch inside the two turned edges that form the seam of the turning gap.
To work this stitch, start with a knot in your sewing thread and start your needle and thread inside the linen seam allowance so it won’t be seen.
Then work a running stitch on the inside edge of the linen turn, picking up a little bit of the linen. When you come out of the edge of the linen, move to the very edge of the lining (inside the edge) and pick up a little lining.

Then move back to the linen and pick up a little linen, etc. You’re basically alternating running stitch from linen to lining, just inside the turned edge. As you pull the thread, the edges will come together and the stitching will be invisible.
And that, my friends, is how you construct the pouch!
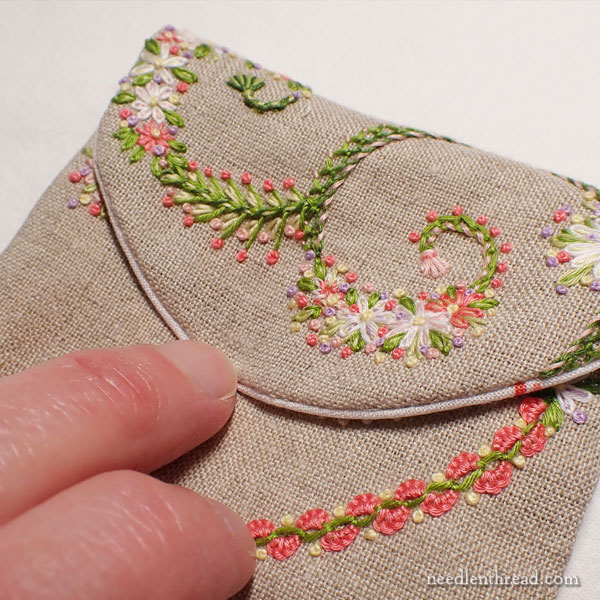
Next week, we’ll add the embroidered trim and the snap.
You can find the previous tutorials in the stitch along for Little Blooms here in the project index.
Members on Patreon will find the PDF available for the entire finishing process, so that you can complete the project this weekend! I still plan to post some more supplementary videos for this project on Patreon, but I’m awaiting some new equipment.
In Other News…
It’s moving weekend! I’m moving back to my house this weekend, hip hip hurray! So that’s been a bit of a frenzy. It will be nice to have a house again, where there was no house for what seemed like an age. And it will be wonderful to get back to normal living arrangements again!
I know there have been a few problems with the email newsletter lately. It’s been including multiple articles in each newsletter. I’ve been working on fixing that, and I hope that it is fixed with today’s email. If it isn’t, don’t worry! I’ll get the problem sorted!
We’ve been restocking all kinds of kits and books lately, for those who have been waiting! I mentioned above that we have Little Blooms back in stock. We’ve also got the 2023 Leafy Tree kit and updated instructional PDF download bundle available now.
And we have all the reticello kits back in stock, along with all of Giuliana Buonpadre’s books from Italy – including Il Reticello, if you have been waiting for those.
I hope you have a great weekend!

Good Luck with your move Mary. I bet your father is happy about moving home too!
Hope you have a great weekend!
Thanks, Susan! Yes, he was relieved to get back home. We managed to get everything moved in and mostly sorted by the end of the day on Saturday, thanks to my nieces, nephews, etc., here in town. By the end of the day on Monday (yesterday), we had to move out again (this time to a local airbnb) while a major plumbing issue is resolved. I hope the problem is resolved quickly – not being settled is really hard on my dad. So we shall see how this week goes! One day at a time…
Mary. There is something going wrong with your emails. Lately the subject line is different than the content. Some emails content is being duplicated and other content is not received. This has been happening for a little while. I have been expecting you to find out and fix it. For example the details of pasting the back of your project. Appeared as a subject but the content hasn’t appeared in the emails.
Hi, Judith – Thanks for your note! Yes, I’m trying to get this fixed. In the meantime, though, what’s happening is this: the newsletter is picking up two-three previous articles, followed by the current (most recent) article that’s in the headline. So if you scroll down in the newsletter, you will come to the current post from the day the newsletter arrived, corresponding to whatever is in the headline (subject line) of that newsletter. I hope to have this resolved today – before tomorrow’s new content – and I have a ticket open for help with the problem, but I’m not sure it will be solved by tomorrow. The holiday weekend slowed things down for getting technical help.
A tip for the turning opening – instead of stopping the stitching at the opening’s ends, turn at a right angle and sew off the edge of the seam allowance. It helps to line up the fabrics where you need to stitch the opening after turning. It also helps reduce the stress a bit on the fabric at those points when turning.
Happy Day for moving back into your house. I know it’s been a pain, but it’s good to have those issues fixed.
That’s a very good tip! Thanks, Gail!
Well, we moved in on Saturday and actually got everything in and much sorting done, thanks to a lot of help from family here in town. And then everything went south and we had a problem with the sewer system, and now we are living in an airbnb until that is fixed. It’s hardest on my dad, of course – he is not very mobile (at 92), and the “uprooting” can be confusing, especially at night.
It’s now May 29. I -did- receive an email whose title is Part 7, but the body is a duplicate of part 6. I am confused.
-Kathy
Hi, Kathy – There is a current glitch in the newsletter, where it is sending out two or three previous articles, finally followed by the most current article. If you scroll to the end of that email, you’ll get to the current article. Hope that helps!
merci,merci .quel bonheur de vous lire!