February 29, 2012
Stitch Play: Chain Stitch Spider Daisy
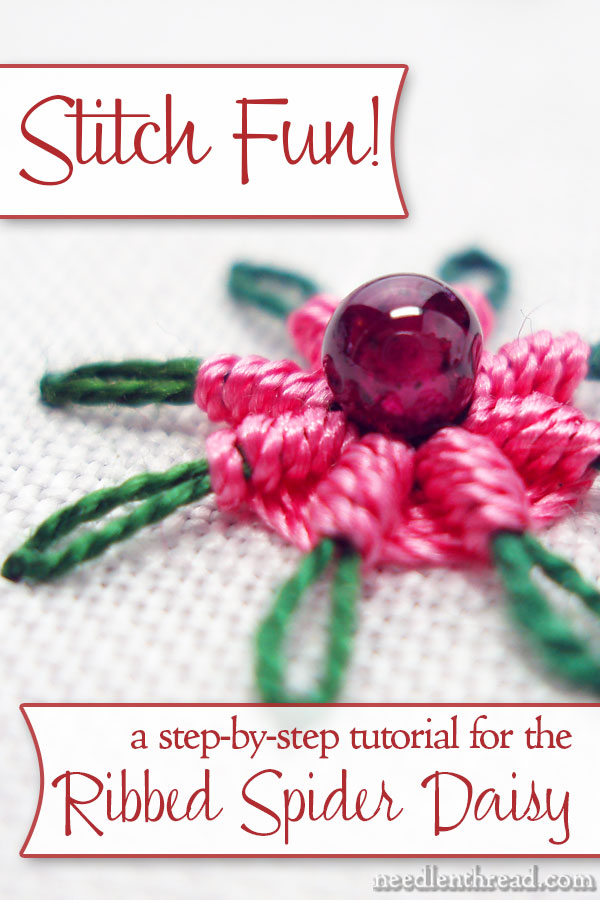
When you combine hand embroidery stitches in different ways, you never know what you’ll come up with! And sometimes, you won’t even know how to name the result.
I’m calling this the Chain Stitch Spider Daisy, or the Ribbed Spider Daisy, for two reasons: It’s a daisy created with the detached chain stitch and the ribbed spider web stitch, and when you look at it from the side, the petals are a bit too reminiscent of spider legs!
If you don’t particularly like spiders, I hope you’ll forgive me for the name.
This is a neat little flower technique, if you want to add simple flowers with a bit of texture and color contrast on them to your embroidery projects. Top it with a bead for extra sparkle and bling!