


As I mentioned in my photo tutorial on using a waste knot, the most common question I receive via e-mail is “how do I begin (or end) my thread withough using a knot?” To answer that question, I’ve worked up several photo tutorials.
I’ll be listing all these photo tutorials here so that they’re easy to locate. I’ll have a permanent link to them under “Tips & Techniques” in the main menu, under Beginner Embroidery, where you find all such posts on embroidery tips and tricks indexed.
I hope you find this list of photo tutorials on beginning and ending threads helpful!
Beginning Threads for Hand Embroidery
- Two-Standed Invisible Start with No Knots
- The Waste Knot
- The Away Waste Knot
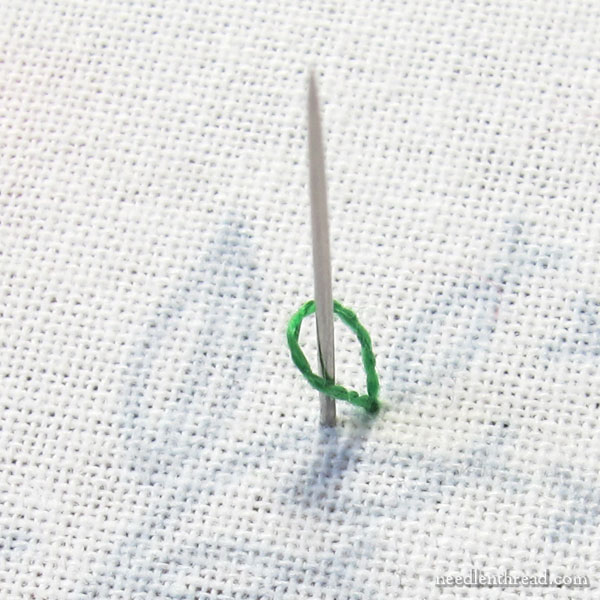
- Anchor Stitches on a Line
Ending Threads for Hand Embroidery without a Knot
- Pulling It Through
- You can also use the same technique found in the Anchor Stitches on a Line tutorial above, to end a thread, as long as you can cover the anchor stitches up with more embroidery.
Hi Mary, thank you for the photo tutorial on waste knots and the beginning and ending threads. Sure makes the work look neater onthe back.
Hi Mary,
Thank you so much! That’s so useful, and something I’ve been curious how to do. (Just wondering, is my computer playing up or is the part on endings still to come? I get links to the first three, Waste Knot, Waste Away Knot and Anchor Stiches on a Line ,but not the others listed.) Anyway, thank you again for your amazing work here!
Best wishes!
I have a question for you, is there a way to start and end the stitch when you are doing French knots? The knot is inside a small circle and I wondered if using that ring around the french knot would be the place to anchor the stitches?
Hi,
Could you please video the Satin Stitch and the Double Stem Stitch for me. I couldn’t find the second one and the first one I just needed the Satin Stitch not the padding.
I have a questinon. Do you outline first and then do the Satin Stitching? Thanks
Hi, Debbie –
The satin stitch without padding is the same as satin stitch with padding – it just isn’t worked over padding. An outlined edge underneath the satin stitch, though, helps keep the edge nice and straight, so I normally at least outline before satin stitching, unless it’s a really tiny element that I’m satin stitching. The “outline” in satin stitch is simply a split stitch worked along the outline of the element you want to satin stitch, and then the satin stitch is worked over the split stitch outline. Sometimes, stitchers will outline their satin stitched area after doing their satin stitching, for decorative effect, but if you’re just trying to work a nice smooth satin stitch with a clean edge, then you wouldn’t outline around the satin stitched area after doing the satin stitch.
Double stem stitch is an interesting question. I have looked this up repeatedly for people, because they get kits or designs that call for “double stem stitch” along a line. I can find no reference to a stitch actually named “double stem stitch,” and nor can any stitchers I know, who I contacted for feedback on the question. So I asked one reader to send me a picture of the design she was stitching, and it looked to me like the “double stem stitch” was simply an outline in stem stitch, stitched twice – so, basically, two rows of stem stitch worked close together outlining the area. I could be wrong about this, but I haven’t found any reference for a specific stitch called “double stem stitch,” so I have a feeling that’s what it is. If you have a picture of the stitch worked, I’d love to see it, just in case it isn’t what I’m assuming it is.
Thanks heaps for your questions!
~MC
Mary, I have to confess. I have not done anything on any of my craft areas of interest for about a year, due to health problems. Now I have to start all over and it looks like I should start with the Tips ESPECIALLY for Beginners. I think that was my problem before, I was trying to figure out how to catch up with everyone but now it looks like you have given me a path to follow with the Tips Especially for Beginners.
I started today copying the Index of that whole 3 page list of topics. (Please don’t remove any of it for a long time, I beg you). Looks like I have a lot of copying to do before I even start work (with Christmas & everything).
Anyway, that is my plan to copy it all and then work my way through the videos and the accompaning list. If that is not the right course to take – please give me a holler. I am determined I am going to learn this. I fell in love with Helen Stevens embroidery and I hope I can learn to do a tiny bit of it the way she does it. It looks so beautiful. Thank you for showing us such a precise road to follow (but, just in case I’m going about it the wrong way – please let me know). Full of doubts as usual – sorry. But I’m still determined!
I found another way to start and I think it’s pretty cool!The loop method. Drawbacks…It only works of you are using an even # of strands. Advantage…nothing to clip at all.
say that you are using 2 strands of DMC floss on your beautiful project… cut a length of floss that double the length that you intend to use. Then separate 1 strand from the rest. Fold this strand in half. Thread BOTH ends through your needle. Push the needle through the fabric back to front without pulling the loop through, in fact if you wanted you could insert a toothpick or something to keep it from pulling through accidentally. Make a tiny straight stitch or your first “called for” stitch (if the thread will go completely through the fabric before starting the next stitch). Now you have a loop on the back a stitch on the front and the needle “freely hanging” from the back. thread the needle through the loop. Continue to make your next stitch as you normally would. Does that make sense?
I just found the link to the “start and finish.” Thank you again!
Marian, Thank you for having this tutorial for the beginning/ending of embroidery. The waste knot is very helpful. Is this method also adaptable when using Perle cotton for blanket stitches around objects? Thank you.
Wonderful blog. It has helped me a lot in terms of embroidery, parabens.
I have great difficulty in finishing perfect in my embroidery. I give a suggestion for a tutorial that show embroidery inside clean.
hugs
Engracia – Brazil
Dear Mary, I accidentally found your website and browsed through the pages. I embroidered simple chain stitches on my work jackets and was pleased with the challenge and the results. I usually cross stitch but after working on my jackets I will attempt embroidery projects for the winter time. Eagerly waiting for Lavender Honey & Other Little Things.
Judy Kocsis
Hi, Judy – Thanks for your note. Your jackets sound like a really good idea!
Lavender Honey & Other Little Things is available in the shop now, if you want to take a look at it. Here’s a direct link: http://shop.needlenthread.com/product/lavender-honey-other-little-things
Glad you’re enjoying embroidery!
Mary
“Withough” should be “without.”
Hi Mary,
I’m brand new to embroidery and just found your website. Thank you for the wonderful tips, techniques, videos that you’ve posted. I can see the love you have for the art, as well how much you enjoy teaching and sharing with others.
I was wondering if you recommend a certain way to start a project. I’ve read many o the FAQ for beginners, but haven’t come across where to actually begin a project. Should I start at the bottom and work up, start from the top and work down, the periphery versus the center and work out?
Thanks for your help,
Toni
Hi, I have done some embroidery before and have weaved the ends of threads into previous stitches. Now I am trying to do a cross stitch pre-stamped pre-quilted baby crib blanket. I started out tying knots in the back and then realized there are going to be very many knots and they won’t be comfortable on the baby. I started looking for other ways to start and finish the ends and found your web site. My question is what would you suggest is the best way to do a blanket like this? I can do the stitches without having them go all the way through to the back, but I have those start and finish knots in the back. Could I do something like the “waste knot” starting on the front of the quilt and weave the ends under the cross stitches? I would have to do this on the front instead of the back, so I don’t know if the ends would show through the cross stitches. If you think this would work, how long would you suggest weaving the ends so that they stay when the blanket is washed? Thank you very much for any help you can give!
iwould like to know how to embroder pre-quilted baby cover without stitches showing on back. can not find any instructions anywhere. thanks thanks kay
Hi, Kay – that’s a difficult proposition! You might try just “sewing” the stitches rather than stabbing them (so, just scoop up the top layer of fabric and not the bottom layer, and work just through the one layer – don’t stab your needle all the way through to the back.) They do make curved embroidery needles that might assist you in this, too.
Mary,
I thought I had read or saw on your blog about how to create and end and isolated cross stictch without trailing threads all over the back. However, I can’t find it on your site. Can you help me?
Sally
Hi, Sally – it was about isolated French knots, in two parts. Part one is here: https://needlenthread.wpengine.com/2012/06/isolated-french-knots-part-1.html Part 2 is here: https://needlenthread.wpengine.com/2012/06/isolated-french-knots-part-2.html
In wandering through some of your articles, I found one on how to do the reverse chain stitch, which has another way to start a thread — is that as good as the three you listed here? It seems to me to be the easiest yet. (And why isn’t reverse chain stitch listed ‘up front’ with the other stitches? I had to use the search to find it again.)
So many questions — Hope you don’t mind, I’m just a curious person.
I’ve been away from stitching for almost 2 years (neck problems) and am having to relearn/be reminded how to do most everything — and your tutoring articles and videos are really the best! Thank you!
Hi, Holly – I use reverse chain and chain interchangeably, depending on what I’m embroidering. If, for example, I want the chain stitch to go in the same direction on two sides of, say, a leaf, I would stitch towards the tip of the leaf with regular chain stitch. Then, if I still have thread left, I’ll come down the other side of the leaf with reverse chain stitch.
There is a slight difference in the finished look of the two stitches. With regular chain stitch, the “links” tend to be a bit plumper, while with reverse chain stitch, they tend to be a bit straighter – they pull thinner, due to the tension on the stitch.
Whether or not one is easier than the other really depends on the stitcher’s preference. I find it easier to teach regular chain stitch, because generally, beginners will keep a more consistent and attractive tension with regular chain than reverse chain. Plus, if beginner’s are learning a collection of stitches (daisy stitch among them), it’s very easy to go from chain stitch to daisy stitch or visa-versa.
Mary,
First of all I want to thank you for your wonderful Newsletters over the years, your awesome YouTube channel of Stitch Tutorials, your wonderful Website with all of the information you offer to your Embroidery family for free & your beautiful Patterns that you offer us, some even FREE, but most of all I love ❤️ ❣️ your PHOTOS & TUTORIALS OF YOUR GORGEOUS HAND EMBROIDERY, GOLDWORK & ALL THE OTHER KINDS OF NEEDLEWORK YOU DO.
I have not only expanded my knowledge of Needlework Techniques & Terminology but I have also learned how to do more than just Surface Embroidery & CrossStitch through your awesome Website & YouTube Tutorials! I cannot thank you enough for all that you did, do & continue to do for us and for so many more people & Churches. You are an amazing women Ms. Mary Corbet!
🙂 Thanks, Carrie! That’s very kind of you!
I only want to say that I appreciate all the work you put into sharing your techniques with me. Since I wasn’t truly taught to cross-stitch, I’m having to put aside old habits (bad habits) and learn the proper way of this amazing craft. Your blogs are easy to understand and follow. Thank you. Oh… And your projects are absolutely gorgeous!!!
Exactly what I needed. I should know by now to simply go to your website instead of doing a general search. Thank you, Mary Corbett. Your knowledge is as a treasure of golden threads and rare hand made needles of the finest kind.
Aw, thanks, April!
Can I use knots when starting my embroidery project on kitchen dish towel to prevents unraveling when washing in the washing machine as well as ending in knots too? If not, how do I keep the threads secure to prevents unraveling?
Of course you can. If you are more comfortable stitching with knots – if it’s easier and you feel like they’ll be more secure for you, especially in the laundry – then go for it!
If you don’t want to use knots, you can begin and end threads with small tacking stitches and a waste knot on the top of the fabric, on a spot nearby that will be stitched over, and then cut the knot off. Use at least three tiny tacking stitches near each other, and then stitch up to where the knot is and cut if off.
is “single strands of crewel yarn…” the same as separating 6ply embroidery thread into 2ply for working a design?
my crewel yarn (paternayan 100% virgin wool) is 2ply.
wondering if I separate these to make “a single strand”? or if one 2 ply thread of this wool is considered a single thread. thanks for your help.
No, you don’t! Crewel yarn is normally a two-ply thread (that’s the single strand, both plies twisted together). Sometimes, crewel yarn comes in a bunch off the skein – like 4 strands, or 2 strands. Each of those strands is made up of two plies, twisted together. It depends on the brand, though.