


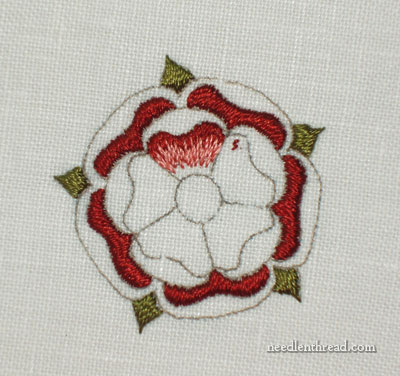
Continuing with the silk and goldwork embroidered Tudor-style rose, here’s the next step in the stitching process: the inner petals worked in three colors of silk, in long & short stitch.
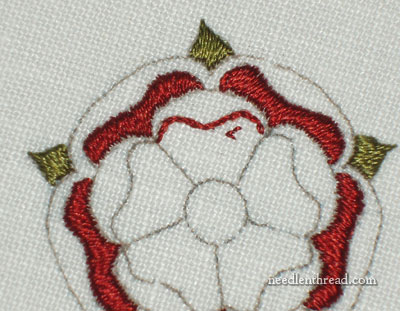
By this point, the leaves and the color on the outside petals of the rose have been embroidered in satin stitch. The next step is to split stitch the top edge of the colored area of the inside petals, as shown in the photo above.
Don’t do one petal at a time! When I took these photos, I was demonstrating on one petal, but you’ll want to do all the petals at once. Split stitch that top line all the way around the “circle” of the flower.
You want your split stitch line just inside the design line, towards the middle of the flower, because you’re going to take your first row of stitching over the split stitch line, just on the design line.
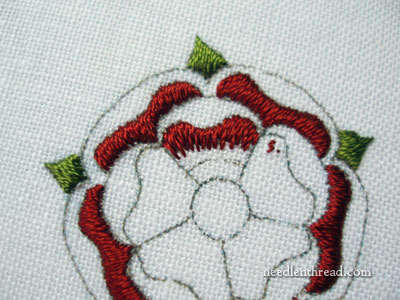
Work the long and short stitch over the split stitch line. If you’ve not done this before, I suggest looking at my instructions on long and short stitch shading at an angle. Apply those concepts to stitching the petals.
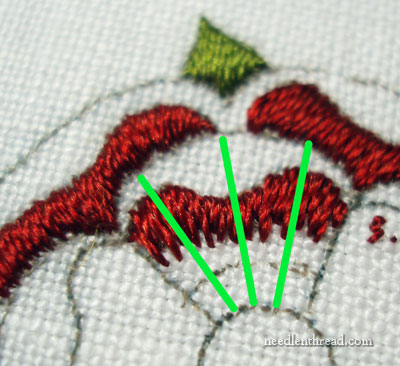
You’ll want to angle your stitches as shown above, starting in the middle and then working out to one side, then going back to the middle and working out to the other side.
Notice that I’ve drawn two curved lines inside the petal, to show approximately where the color changes are. You don’t have to do this at all, but it does help a bit, if you’ve not done a lot of this type of work.
Again, instead of working one petal at a time, do all of them as you go. (I’ll show that below.) If you draw your inside circles that mark the color changes, go ahead and draw the circles for all the petals at the same time.
Notice that I’m stitching in “guide lines” to set the angle of my stitches. After you’ve stitched your middle stitch, go over to one side and put in a stitch, angling it to the center of the flower. Pulling your working thread in the direction you want your stitch to go helps you see where to take your needle down to achieve that angle. Then you’ll just fill in between the guide stitches.
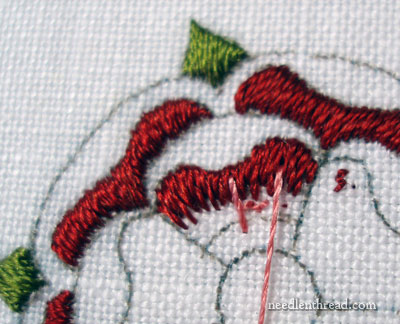
Make sure, when stitching each subsequent row of color, that you go deep into the previous row. You’re bringing your needle up into this previous row, splitting the stitches. See how close the first center stitch is to the top of the red? Go deep and make your stitches fairly long! Don’t be shy about that. Long & short stitch looks better when the stitches are longer than it does when the stitches are too short.
Fill in the pink, working from the center to one side, between your “guide” stitches, and then go back to the middle, and fill to the other side, using guide stitches again and filling in between them.
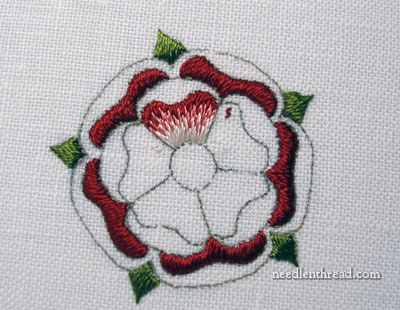
The white is worked the same way, but it ends on the center circle line. Because the shape gets narrower and narrower as you work towards the center, you’ll have fewer stitches in each row. The pink row will have fewer stitches than the red row, and the white row will have fewer stitches than the pink row.
In the photo above, you can see that the right side of the petal doesn’t look quite as full as the left side, and the shorter stitches on the right side are shorter than the stitches on the left side. Try to be a little more consistent than I was with the first petal! This evened out, once I got the other petals in.

Here, I’m moving on to the second petal and stitching in those “guide” stitches to set my stitching angle. You can see that I’ve continued the inside circles all around the inside of the petals. When you start filling with the topmost color in long and short stitch, you’ll fill the top of one petal with that color, then move to the next petal and fill that color in, then the next petal – working all the way around the flower.
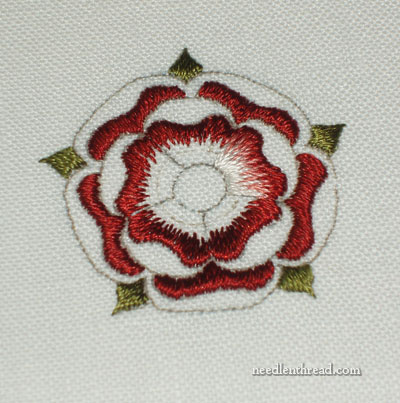
So you can see here that I’ve now filled the top layer of red in all around the flower.
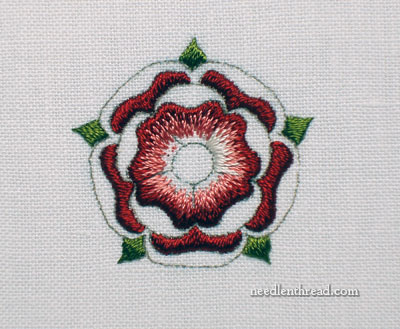
And now the pink’s in, all around the flower.
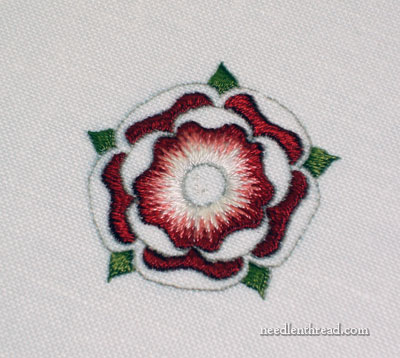
And finally, the white is in, all the way around the flower. (It’s actually “creme”, but it looks white…)
So that’s the method for the long and short stitch filling for the center of the rose.
You may wish to take a look at the first couple long & short stitch lessons in my long & short stitch tutorials. There’s one on basic long and short stitch (with videos), and then one on shading at an angle – both of these will come in handy if you’ve not done a lot of long & short stitch shading.
Next time we visit this tutorial series, we’ll be adding some gold. Oooooh. I love gold.
Previous posts in the development of this project:
Tudor-Style Rose Hand Embroidery Pattern
Part 1: Satin Stitching the Leaves and Outside Petals
If you’d like to see this entire project worked step-by-step, feel free to visit the complete list of tutorials in the Goldwork & Silk Tudor-Style Rose instructional series.
Enjoy your weekend!
In all admiration I don’t see how those stitches could be called “long”…
LOL. I suppose “long” is relative. They’re longer than the shorter ones, anyway….!
Mary, this is BEAUTIFUL! I have to try this soon. Spectacular results.
Hi Mary! Just love your instruction videos and well really everything on your website.
I have a question regarding the split stitch on the flower. Is it important to use the split stitch and not say the stem stitch and if so why? I am trying to do the shading technique, and just wanted to know out of curiosity. Thanks!
Hi,
The stem stitch won’t provide the same smooth edge that the split will provide. Stem stitch has bumps to it, and since you’re stitching over the line of stitching, you want the line to be as smooth as possible.
Hope that helps!
MC