


Yesterday, I posted a how-to video for the cast-on stitch, and today, as part of the Stitch Play series, I’d like to follow up with a tutorial for making a very simple cast-on stitch flower. It’s the same flower I showed you in yesterday’s post – and we’ll go through it step-by-step, so you can get an idea of how to play around with the cast-on stitch.
Incidentally, you can substitute the bullion knot for the cast-on stitch and create a similar flower with a slightly different look, so feel free to play with both stitches. (I updated the video for the bullion knot this week – it’s much better than the old one!)
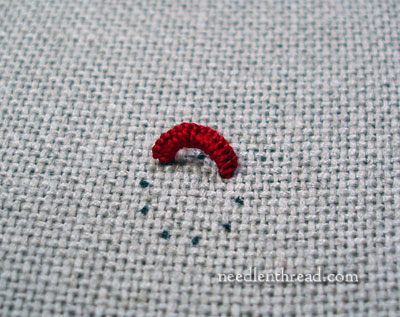
This is the flower we’ll create:
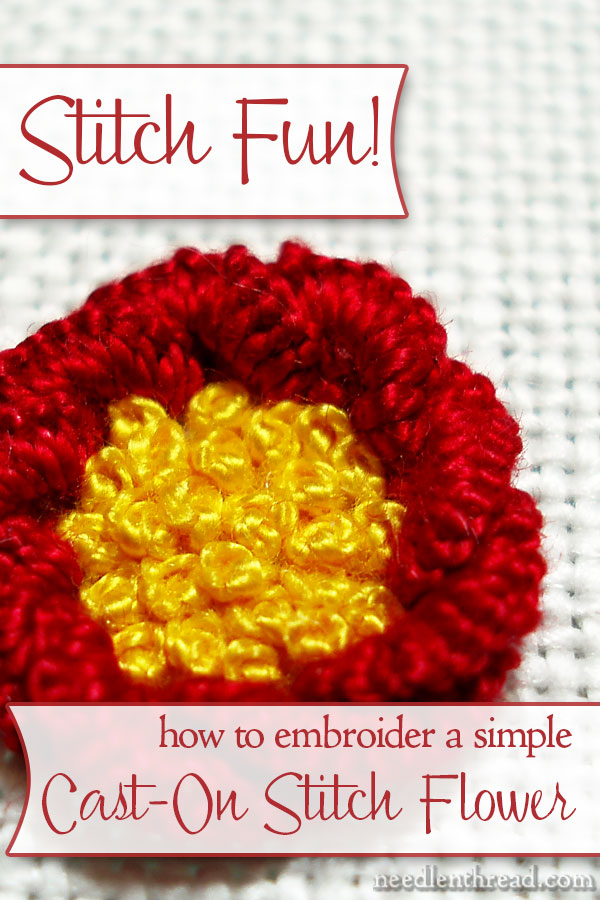
Once you get the cast-on stitch down, there’s really nothing difficult about making this flower. The only “trick” is on the very last stitch. So grab a milliner needle (I’m using a #5), some #8 perle cotton (or whatever thread you want to use), and a piece of fabric, and let’s work it out together!
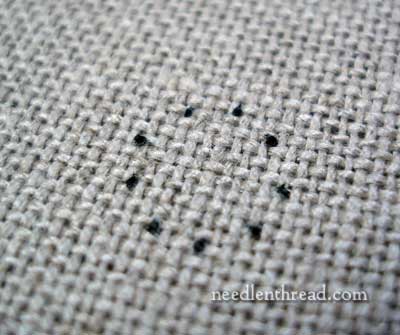
If you’re not comfortable stitching around a circle and getting the spacing of your stitches right, feel free to mark out the spacing for your circle. My circle in the photo above is about 3/8″ in diameter, so it’s not very large. I’ve got 9 evenly spaced dots on the fabric – you can use any number, odd or even, depending on the number of petals you want. Nine dots will give you nine petals.
If you need a little help spacing your dots around a circle, you can check out this previous Stitch Play post on an easy way to achieve accurate spacing around a circle. It is true that, in some cases, petals that are too evenly spaced might seem a bit rigid or unnatural, there are definitely many instances in surface embroidery where you will want and appreciate even spacing, and this happens to be one of them. With this type of embroidered flower, even spaces are really essential.
If you don’t know how to work the cast on stitch yet, do take some time to look at the cast-on stitch video. Today’s tutorial is not going to walk you through the stitch, but rather through creating the flower with the stitch, so you may wish to familiarize yourself with the stitch first.
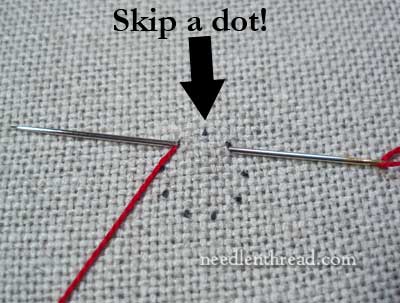
Position your needle in the fabric to begin the stitch, making sure that your starting and ending points are each on a dot, and that there is one dot in between the starting and ending points of the stitch. So, each time you create a petal in the flower, you’re going to put your needle into position on two dots, skipping one dot each time.
When you cast the stitches on the needle, you’ll want to cast on enough stitches to cover about double the space between the two dots. In this sample, I’ve cast 18 stitches onto the needle.
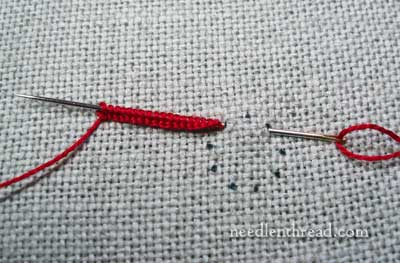
When you pull the thread through to the back, the excess number of cast-on stitches will cause the stitch to arch. The stitch will sit up on the fabric, looking every bit like a near-cousin to the Slinky.
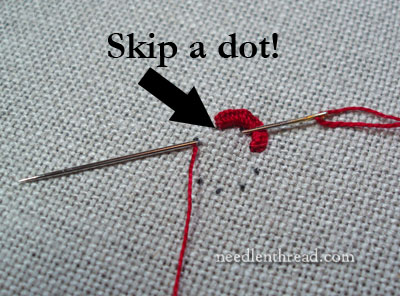
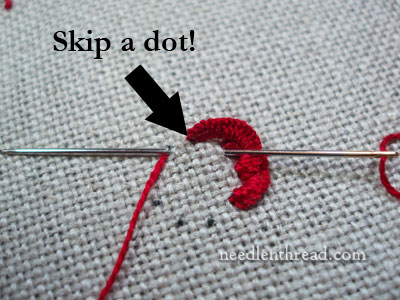
Now you’re just going to move counter-clockwise around the dots on your fabric, always skipping a dot. The dot you are skipping will actually have one end of a cast-on stitch covering it already.
Remember: each petal starts and ends on a dot, and there is one dot in between the starting and ending point. The eye-end of your needle will end up resting on the previous stitch, as you can see in the photo above.
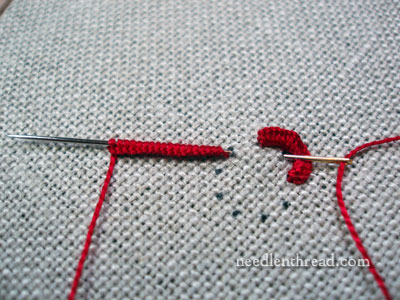
For each stitch around the flower, assuming that you have spaced your dots evenly, you will cast the same number of stitches onto the needle. So, in the photo above with the second stitch, there are 18 stitches cast onto the needle.
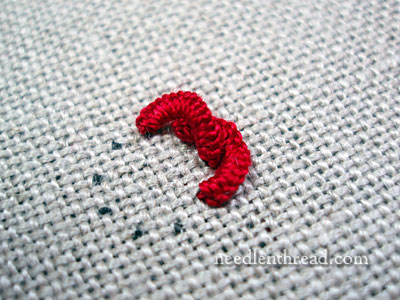
When you pull your second stitch through, the two stitches will overlap each other and kind of hug each other. They’re cute, aren’t they?
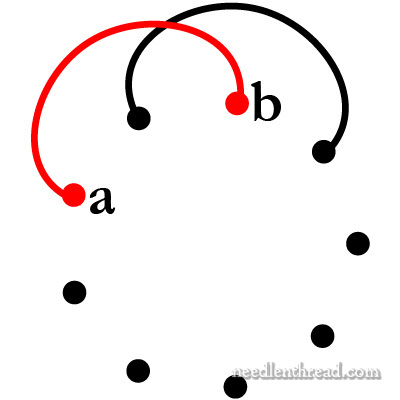
Diagrammed, this is what the petal situation would look like at this point. The black loop indicates the first petal already created. For the second petal, the thread came to the front at a, the needle went down at b, scooped up the fabric to emerge again at a again, then the stitches were cast onto the needle, the needle was pulled through them, resulting in the red loop in the diagram.
Set up for your third stitch, remembering to skip a dot!
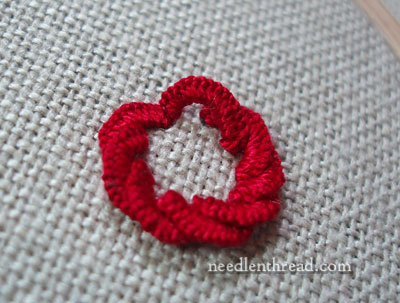
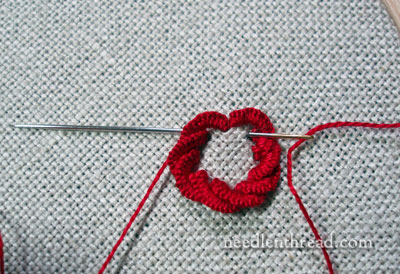
Continue all the way around your circle of dots, until you finish the next-to-the-last stitch. At this point, the end of the next-to-the-last stitch should be touching the beginning of the first stitch you made. But – as you can see – something is still missing, and that’s the last stitch, which is the tricky part here.
If you look at the picture above, and consider where the last stitch will go, this is what you should conclude: to look correct, the Left End of the last stitch (which hasn’t been worked yet) needs to be on the outside of the ring of petals, wrapping behind the first stitch you made. The right end of the last stitch needs to be on the inside of the ring of petals.
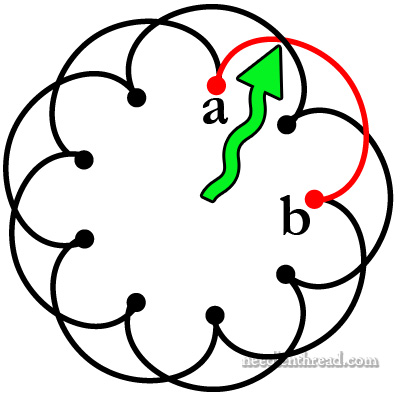
Diagrammed, this is what the petal situation should look like. Notice where the green arrow points – the red petal (the last petal) wraps behind the first petal.
To achieve this, bring the needle up at a, which is now behind the first petal, take it down at b, which is still on the inside of the ring, scoop up enough fabric to re-emerge at a (behind the petal, on the outside of the ring), and then cast the stitches onto the needle.
Let’s do it!
I brought the needle up behind the first petal on the outside of the ring, pulled the thread through, and then went down on the inside of the ring (point b in the diagram above), and re-emerged behind the first petal, on the outside of the wring again.
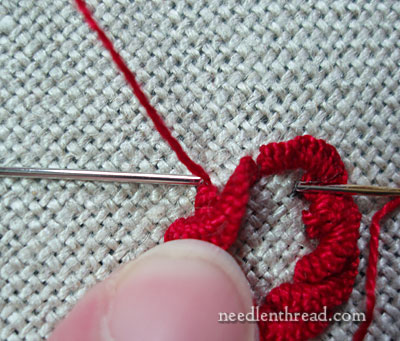
If you bend that first petal in the ring, you’ll see that the needle is coming out right behind it, behind the first petal you made.
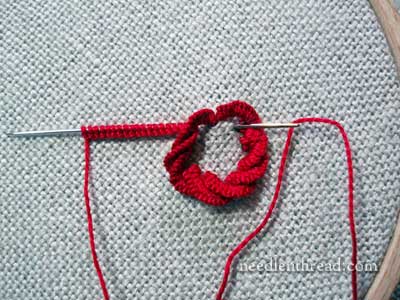
Cast on your stitches, all 18 of them, just like the other petals…
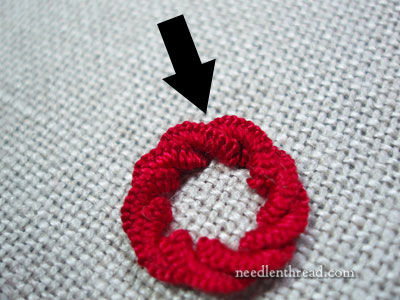
…and finish off the stitch by pulling through as you normally would. You won’t be able to tell where the final stitch and the first stitch are, but the arrow in the photo above points them out.

Now you can fill in the center with French knots (or whatever stitch you wish), and there’s your flower!
Once you can create this simple one here, you’ll be able to apply the concept to all kinds of dimensional flowers made with the cast-on stitch and other similar stitches. Coming up, we’ll look at a different cast-on stitch flower, so that you can add a little variety to your bouquet!
Hope you have fun playing with the cast-on stitch!
You can find a Stitch Play Printable for cast-on stitch and double cast-on stitch, including more photo instructions for this flower and three other beautiful dimensional flowers, available in my shop!
Stitch Play is a series of articles on Needle ‘n Thread that features photo tutorials for creative ways of using embroidery stitches. If you’d like to read more of the Stitch Play articles, you can find them all lined up here in the index. You can also find the Stitch Play index of articles on the Tips & Techniques page, listed in the main menu at the top of the website. You’ll find all kinds of helpful tutorials and how-to articles listed on that page, if you’re looking for any particular information, or if you just want to browse.
Mary, thank you so much for the step by step instructions. I have been a cross stitcher for decades and also enjoy counted work.
I have always been intimidated by embroidery, but your blog is so informative and instructional that I am gearing up to make a stitch sampler to try all these beautiful examples you are showing.
What type of fabric are you stitching on.
Carmen
Hi, Carmen – in this tutorial, I’m using Strathaven linen, in natural. I pretty much always use linen for stitch demos. Hope that helps! -MC
Mary, I very much enjoyed this demonstration and am anxious to give it a try. Thank you for all the hard work you put into your daily write-ups.
Cynthia
Well, that answers my questions perfectly. First of all, the diameter of the circle is so small that the width/thickness of the row of cast on stitches just looks chubby. And the way they overlap so well covers any gaps. Now I have to wonder how anyone can do these using slippery thread like rayon (EdMar for example). Practice, practice.
Thank you again for the non-video tutorials!
Oh, thanks Mary! That tutorial wouldn’t be complete without your teaching us how to make this adorable flower. thank you!!
MERCI pour ce point délicat et cette jolie fleur.
Thank you for both presentations of this lovely little flower! Since I just love forget-me-nots, I’m wondering if you can adjust the number of “dots” to make fewer petals? (I could play with it, but I’d rather ask the expert–that’s you!)
You’ve become a “go to” source when I want to find a new or best method for a particular stitch. THANK YOU for your willingness to share your wonderful gift!
Hi, Delcia – I’m glad you like the tutorial! Yes, of course you can adjust the number of dots. Five dots will yield five petals… Etc.
-MC
Dear Mary
At 68, I am a newcomer to embroidery, but your website has me eagerly awaiting your next email. I am now progressing to try the cast on stitch flower. Your instructions are so clear: they give me the confidence to try things that I would have thought were beyond me.
Thank you so much.
Lois
So glad to hear it, Lois!
Merci beaucoup pour vos explications et vos vidéos. Elles m’aident bien pour comprendre des points que j’ai toujours eu du mal à faire
Encore merci beaucoup
Hi Mary, I am pretty new to embroidery and working on a voided monogram. Thank you SO much for these great tutorials! I am trying to learn this cast on stitch flower, but having a huge issue with the petals getting twisted. How do you avoid the thread twisting as you are casting on?
It helps to let go of the thread and let it untwist a bit. As you cast on, it can become twisted, depending on how you roll it in your fingers. So just let go between cast-ons, and smooth the thread out.